


linux安装mysql8.0
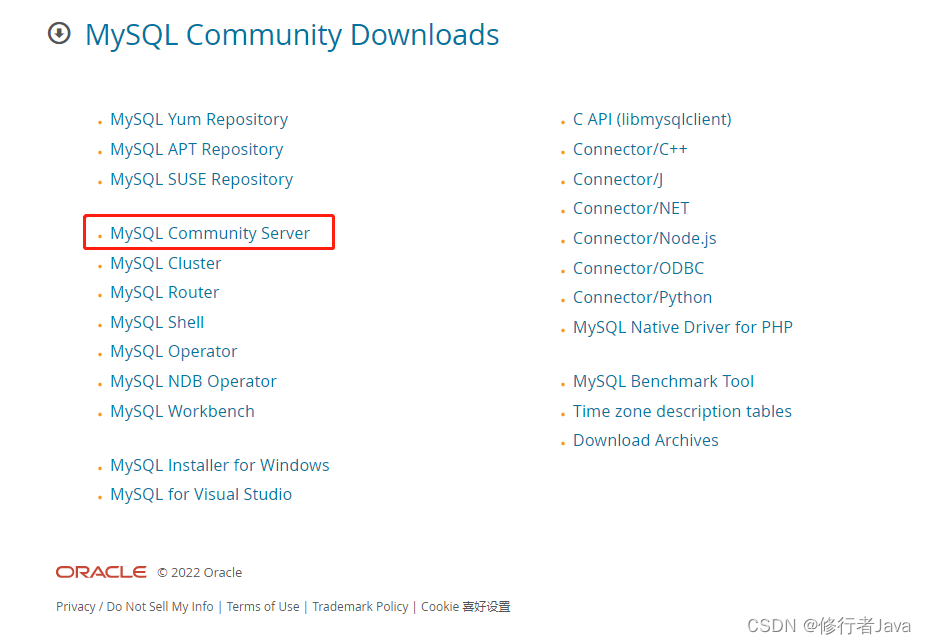
1、官网下载安装包
https://dev.mysql.com/downloads/
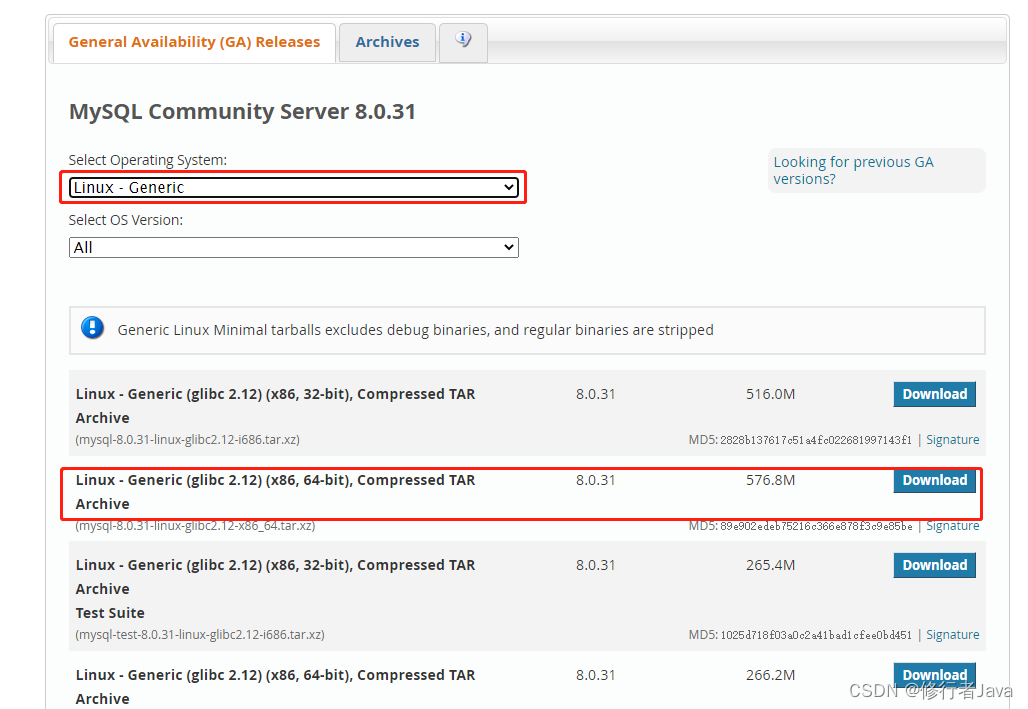
2、下载你需要的版本
3、连接linux,将下载好的安装包传输到任意文件夹下(一般在/usr/local下),解压
tar xvf mysql-8.0.31-linux-glibc2.12-x86_64.tar.xz
4、重命名解压出来的文件夹为mysql,移动到/usr/local下
mv ./mysql-8.0.31-linux-glibc2.12-x86_64 /usr/local/mysql
5、/usr/local/mysql文件夹下创建data文件夹
cd  /usr/local/mysql
mkdir data
6、创建用户组以及用户和密码(如果提示已存在说明之前有创建过了)
groupadd mysql
useradd -g mysql mysql
7、授权刚刚新建的用户
chown -R mysql.mysql /usr/local/mysql
chmod 750 /usr/local/mysql/data -R
8、配置环境,编辑/etc/profile文件,加入环境变量
vim /etc/profile
i键编辑,移动上下左右箭头,最后一行加入环境变量,Esc退出编辑,:wq保存退出
export PATH=$PATH:/usr/local/mysql/bin:/usr/local/mysql/lib
执行命令,使配置文件生效
source /etc/profile
9、编辑配置文件my.cnf
vim /etc/my.cnf
清空文件,将下面内容复制进去,保存退出
[mysqld]
# port=3306
# server-id=3306
user=root
general_log = 1
general_log_file= /var/log/mysql/mysql.log
basedir=/usr/local/mysql
datadir=/usr/local/mysql/data
log-bin=/usr/local/mysql/data/mysql-bin
innodb_data_home_dir=/usr/local/mysql/data
innodb_log_group_home_dir=/usr/local/mysql/data/
character-set-server=utf8mb4
# lower_case_table_names=1
autocommit=1
default_authentication_plugin=mysql_native_password
symbolic-links=0
bind-address = 0.0.0.0
max_connections=2000
sql_mode=STRICT_TRANS_TABLES,NO_ZERO_IN_DATE,NO_ZERO_DATE,ERROR_FOR_DIVISION_BY_ZERO,NO_ENGINE_SUBSTITUTION
# Disabling symbolic-links is recommended to prevent assorted security risks
# Settings user and group are ignored when systemd is used.
# If you need to run mysqld under a different user or group,
# customize your systemd unit file for mariadb according to the
# instructions in http://fedoraproject.org/wiki/Systemd

[mysqld_safe]
log-error=/usr/local/mysql/data/mysql.log
pid-file=/usr/local/mysql/data/mysql.pid

#
# include all files from the config directory
10、执行下面命令,授权
chown 777 /etc/my.cnf
chmod +x /etc/init.d/mysql
chmod +x /etc/init.d/mysqld
11、启动mysql
service mysql start
12、设置开机自启,将mysql.server 文件复制到 /etc/rc.d/init.d/ 目录下
cp /usr/local/mysql/support-files/mysql.server /etc/rc.d/init.d/mysql
13、赋予权限,添加服务
chmod +x /etc/init.d/mysql
chkconfig --add mysql
14、查看服务列表
chkconfig --list
15、看到3、4、5状态为开或者为 on 则表示成功,如果未开启,执行命令
chkconfig --level 345 mysqld on
16、重启计算机:reboot,再次查看服务列表
17、修改密码,先初始化,保存初始化的密码,如果初始密码忘记了就删掉/usr/local/mysql下的data文件夹重新初始化
./mysqld --initialize
18、登录mysql,修改密码
mysql -uroot -p
19、修改密码为root(个人自定义),刷新权限
ALTER USER 'root'@'localhost' IDENTIFIED WITH mysql_native_password BY 'root';
flush privileges;
20、添加用户,查看用户
create user 'admin'@'%' identified by '123456';
select user from mysql.user;
20、用户授权
# grant 权限名 on 数据库名.表名 to '用户名'@'主机名';
grant select on mysql.user to 'admin'@'%';
21、撤销用户权限
revoke select on mysql.user from 'admin'@'%';
22…


 1万+
1万+


 被折叠的 条评论
为什么被折叠?
被折叠的 条评论
为什么被折叠?
 到【灌水乐园】发言


