


directives
自定义指令
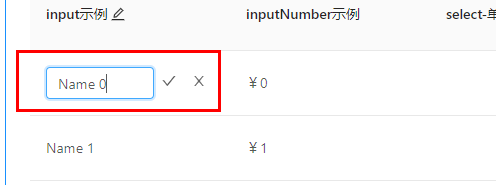
原先业务,实现 table表格组件,每一行单元格编辑,需要勾选。

 <ta-table :columns="columns" :data-source="data" :scroll="{ x: 3100 }">
      <span slot="nameTitle">input示例 <ta-icon type="edit" /></span>
      <ta-table-edit slot="name" slot-scope="text, record" :edit-style="editStyle" type="input" :before-change="fnBeforeChange" />
      <ta-table-edit slot="age" slot-scope="text, record" :edit-style="editStyle" :as-amount="true" type="inputNumber" @change="changeData" />
      <ta-table-edit slot="sex" slot-scope="text, record" :edit-style="editStyle" type="select" :option="CollectionData('SEX')" @change="changeData" />
      <ta-table-edit slot="hobby" slot-scope="text, record" :edit-style="editStyle" type="select" :multiple="true" :option="hobbyList" @change="changeData" />
      <ta-table-edit slot="date" slot-scope="text, record" :edit-style="editStyle" type="datePicker" @change="changeData" />
......

 const columns = [
    { dataIndex: 'name', width: 200, slots: { title: 'nameTitle', }, scopedSlots: { customRender: 'name', }, overflowTooltip: true, },
    { title: 'inputNumber示例', dataIndex: 'age', width: 200, scopedSlots: { customRender: 'age', }, },
    { title: 'select-单选示例', dataIndex: 'sex', width: 200, scopedSlots: { customRender: 'sex', }, },
......
使用插槽直接显示输入框;创建回车跳转指令
      <ta-table :columns="tableColumns" :dataSource="drugList" :scroll="{  }"
                :showOverflowTooltip="true" size="small">
        <template slot="cnt" slot-scope="text,record,index">
          <ta-input :ref="'cnt_'+index" v-next-select="'price_'+index" v-model="record.cnt"></ta-input>
        </template>
        <template slot="retailPrice" slot-scope="text,record,index">
          <ta-input :ref="'price_'+index" v-model="record.retailPrice"
                    @keydown.enter="showCodeBox(record,index)"></ta-input>
        </template>
        <template slot="sum" slot-scope="text,record,index">
          <span>{{ (record.retailPrice * record.cnt).toFixed(2) }}</span>
        </template>
        <template slot="operation" slot-scope="text,record,index">
          <span class="delete" @click="deleteDrug(index)">删除</span>
        </template>
      </ta-table>
// 临时回车跳转指令
  directives: {
    nextSelect: {
      bind: function (el, { value }, vnode) {
        el.onkeydown = function (ev) {
          if (ev.keyCode === 13) {
            let nextInput = vnode.context.$refs[value];
            if (nextInput && typeof nextInput.focus === "function") {
              nextInput.focus();
              nextInput.select();
            } else {
              vnode.context.$refs.searchPanel.focus();
            }
          }
        };

      }
    }
  },

  {
    title: "数量",
    dataIndex: "cnt",
    scopedSlots: { customRender: "cnt" },
    width: 100
  }, {
    title: "单价",
    dataIndex: "retailPrice",
    scopedSlots: { customRender: "retailPrice" },
    width: 100
  },
Vue使用NProgress
import router from './router'
import store from './store'
import { Message } from 'element-ui'
import NProgress from 'nprogress'
import 'nprogress/nprogress.css'
import { getToken } from '@/utils/auth'

NProgress.configure({ showSpinner: false })

const whiteList = ['/login', '/auth-redirect', '/bind', '/register']

router.beforeEach((to, from, next) => {
  NProgress.start()
  if (getToken()) {
    /* has token*/
    if (to.path === '/login') {
      next({ path: '/' })
      NProgress.done()
    } else {
      if (store.getters.roles.length === 0) {
        // 判断当前用户是否已拉取完user_info信息
        store.dispatch('GetUserInfo').then(res => {
          // 拉取user_info
          const roles = res.data.roles
          store.dispatch('GenerateRoutes', { roles }).then(accessRoutes => {
            // 根据roles权限生成可访问的路由表
            router.addRoutes(accessRoutes) // 动态添加可访问路由表
            next({ ...to, replace: true }) // hack方法 确保addRoutes已完成
          })
        })
          .catch(err => {
            store.dispatch('FedLogOut').then(() => {
              Message.error(err)
              next({ path: '/' })
            })
          })
      } else {
        next()
        // 没有动态改变权限的需求可直接next() 删除下方权限判断 ↓
        // if (hasPermission(store.getters.roles, to.meta.roles)) {
        //   next()
        // } else {
        //   next({ path: '/401', replace: true, query: { noGoBack: true }})
        // }
        // 可删 ↑
      }
    }
  } else {
    // 没有token
    if (whiteList.indexOf(to.path) !== -1) {
      // 在免登录白名单,直接进入
      next()
    } else {
      next(`/login?redirect=${to.path}`) // 否则全部重定向到登录页
      NProgress.done()
    }
  }
})
router.afterEach(() => {
  NProgress.done()
})
Vue 也允许注册自定义指令。
代码复用和抽象的主要形式是组件。然而,有的情况下,你仍然需要对普通 DOM 元素进行底层操作,这时候就会用到自定义指令。
举例:
聚焦输入框;当页面加载时,该元素将获得焦点 (注意:autofocus 在移动版 Safari 上不工作)。
事实上,只要你在打开这个页面后还没点击过任何内容,这个输入框就应当还是处于聚焦状态。现在让我们用指令来实现这个功能:
// 注册一个全局自定义指令 `v-focus`
Vue.directive('focus', {
  // 当被绑定的元素插入到 DOM 中时……
  inserted: function (el) {
    // 聚焦元素
    el.focus()
  }
})
如果想注册局部指令,组件中也接受一个 directives 的选项:
directives: {
  focus: {
    // 指令的定义
    inserted: function (el) {
      el.focus()
    }
  }
}
指令定义钩子函数
一个指令定义对象可以提供如下几个钩子函数 (均为可选):
bind:只调用一次,指令第一次绑定到元素时调用。在这里可以进行一次性的初始化设置。
inserted:被绑定元素插入父节点时调用 (仅保证父节点存在,但不一定已被插入文档中)。
update:所在组件的 VNode 更新时调用,但是可能发生在其子 VNode 更新之前。指令的值可能发生了改变,也可能没有。但是你可以通过比较更新前后的值来忽略不必要的模板更新 (详细的钩子函数参数见下)。
componentUpdated:指令所在组件的 VNode 及其子 VNode 全部更新后调用。
unbind:只调用一次,指令与元素解绑时调用。


 5084
5084


 被折叠的 条评论
为什么被折叠?
被折叠的 条评论
为什么被折叠?
 到【灌水乐园】发言


