


netcore3.1知识小结
前言
本文是对最近使用netcore遇到的知识点小结,以备后用。
依赖注入DI
注意需要在startup.cs中引入Microsoft.Extensions.DependencyInjection
构造函数注入
构造函数注入是默认的注册方式,在core中相对比较简单,本文不做详细介绍
1.对于注入的对象需要有一个接口,首先需要在startup.cs中的ConfigureServices中中注册服务
注册服务有三种类型:
Transient(瞬时)每次访问都会生成一个新的对象,这个生命周期最适合轻量级,无状态的服务。
Scoped(作用域)在同作用域,服务每个请求只创建一次。
Singleton(单例)全局只创建一次,在第一次被请求时创建。
 			services.AddMemoryCache();
            services.AddTransient<ITokenTool,TokenToolImp>();//添加工具接口类
            services.Scoped<AuthorizeFilterAttribute>();//添加权限验证单例
            services.AddSingleton<ICache,MemoryCacheImp>();//添加缓存接口类
2.在构造器中注入
	private readonly ITokenTool _tokenTool;
    public WeatherForecastController(ITokenTool tool)
            {
                _tokenTool = tool;
            }
3.在Action中注入加上[FromServices]标记就可以了
public ResponseModel<string> Login(string name,string pwd,[FromServices]ITokenTool tool,[FromServices]ICache cache)
拦截器中注入TypeFilter和ServiceFilter
对于在拦截器中注入,因为其需要无参构造启动,所以方式有点不一样,其他方式:TypeFilter和ServiceFilter
- ServiceFilter
如上,先实现拦截器后,在构造器中注入,然后在标记的时候我们需要改成下面的方式
 [ServiceFilter(typeof(MyFilter))]
 public IActionResult Index(){ return View();}
- TypeFilter
和上面的方式差不多,它和ServiceFilter的区别是它不从DI容器中创建实例,所以不需要在ConfigureServices中进行注册就能使用。
并且TypeFilter的生命周期是瞬时的我们无法控制,而ServiceFilter我们可以在注册时自己调整
 [TypeFilter(typeof(MyFilter))]
 public IActionResult Index(){ return View();}
3.全局的拦截器注入可以看下面
其他方式注入
不推荐,此处不讲,如有需要了解的朋友,可以查看下面这篇博客:
替换ioc容器,使用Autofac通过构造函数和属性注入两种方式讲解
全局拦截器
此次我使用了两种全局拦截器,actionFilter和中间件形式:
中间件全局异常拦截器
-
创建GlobalExceptionMiddleware类 。
 >此类必须有一个RequestDelegate字段,并且在构造中注入;
 >必须有一个invoke()方法
public class GlobalExceptionMiddleware
    {
        private readonly RequestDelegate next;
        public GlobalExceptionMiddleware(RequestDelegate next)
        {
            this.next = next;
        }
        public async Task Invoke(HttpContext context)
        {
            try
            {
                await next(context);
            }
            catch (Exception ex)
            {
                await HandlerExceptionAsync(context, ex);
            }
        }

        private Task HandlerExceptionAsync(HttpContext context, Exception ex)
        {
            var code = HttpStatusCode.OK;
            var result = JsonConvert.SerializeObject(new ResponseModel{Message=ex.Message,Description=HttpStatusCode.Unauthorized.ToString()});
            context.Response.ContentType = "application/json";
            context.Response.StatusCode = (int)code;
            return context.Response.WriteAsync(result);
        }
    }
- 然后在Startup.cs中的configure方法中注册
app.UseMiddleware(typeof(GlobalExceptionMiddleware));
action权限过滤全局拦截器
此方法相对简单,此处主要讲全局实现
3. 继承ActionFilterAttribute类
4. 在startup.cs中的ConfigureServices方法中注册filter,如下;
这种方式有个问题,他在创建实例的时候会走默认的无参构造函数,如果我们有在拦截器中注入其他对象,则会报异常
services.AddControllers(option=>
{
      option.Filters.Add<AuthorizeFilterAttribute>();
  });
- 使用服务的方式注册拦截器,实现拦截器中注入;
是不是很简单!!!
services.AddControllers(option=>
{
      option.Filters.AddService<AuthorizeFilterAttribute>();
  });
拦截器中获取属性
    var action=context.ActionDescriptor as ControllerActionDescriptor;
    var list=action.MethodInfo.GetCustomAttributesData().Where(t=>t.AttributeType==typeof(NoAuthorizeAttribute)).ToList()
自定义user类赋值给context.HttpContext.User
- **先实现UserPrincipal **
  public class TokenModel
    {
        public int UserId{set;get;}
        public int EntId{set;get;}
        public DateTime ExpirationTime{set;get;}
        public string Ip{set;get;}
    }
    public class UserPrincipal :ClaimsPrincipal
    {
        public TokenModel User{set;get;}
        public UserPrincipal(TokenModel obj){
            User=obj;
        }
    }
- **在拦截器中赋值 **
context.HttpContext.User=new UserPrincipal(user);
- **在action中使用 **
			var up=this.User as UserPrincipal;
            return up.User.EntId;
结合swagger
- 首先需要引入相关包:在终端控制台输入命令:
dotnet add YourProjectName.csproj package Swashbuckle.AspNetCore
- 在startup.cs ConfigureServices中添加如下服务:
services.AddSwaggerGen(c=>
{
c.SwaggerDoc("v1",new OpenApiInfo{Title="MyApi",Version="v1"});
var xmlFile = $"{Assembly.GetExecutingAssembly().GetName().Name}.xml";
var xmlPath = Path.Combine(AppContext.BaseDirectory, xmlFile);
c.IncludeXmlComments(xmlPath);
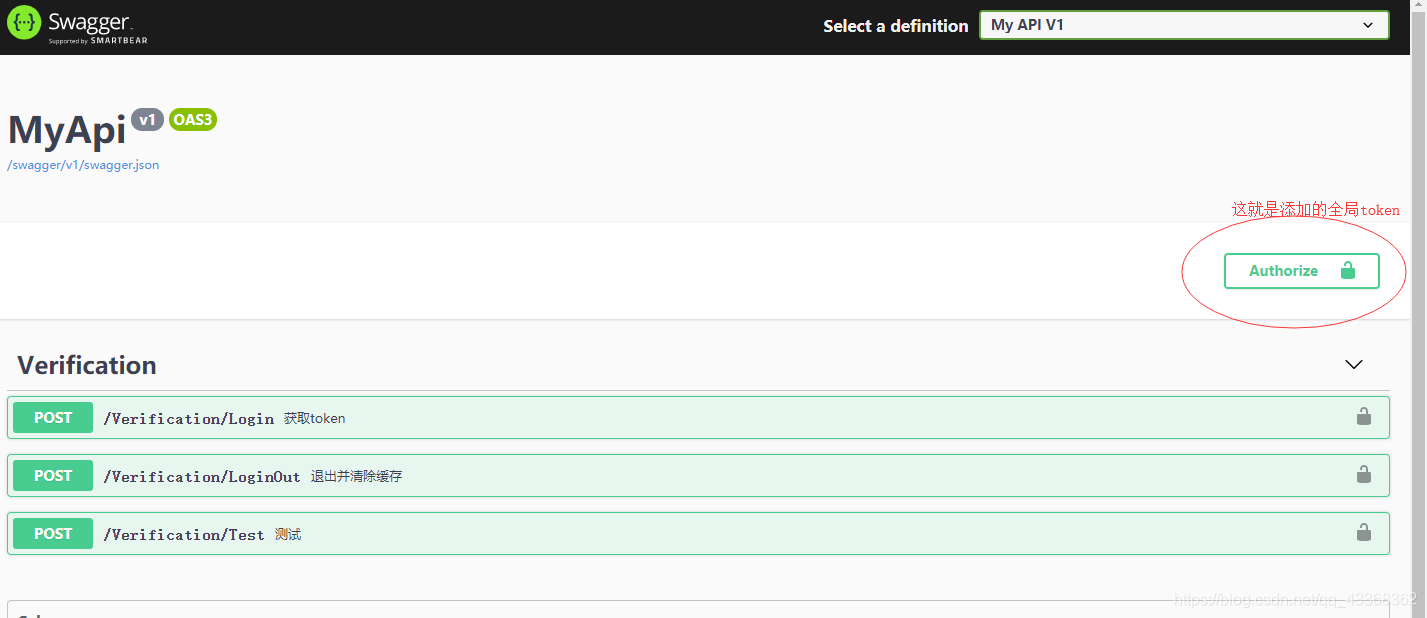
//这里是为webapi项目添加一个全局的token,方便测试
c.AddSecurityDefinition("Bearer", new OpenApiSecurityScheme
{
Description = "请放入token,已方便api测试.",
Name = "Authorization",
In = ParameterLocation.Header,
Scheme = "bearer",
Type = SecuritySchemeType.Http,
BearerFormat = "JWT"
});
c.AddSecurityRequirement(new OpenApiSecurityRequirement
{
{
new OpenApiSecurityScheme
{
Reference = new OpenApiReference { Type = ReferenceType.SecurityScheme, Id = "Bearer" }
},
new List<string>()
}
});
});
- 在startup.cs Configure中添加如下:
 app.UseSwaggerUI(c=>
            {
                c.SwaggerEndpoint("/swagger/v1/swagger.json","My API V1");
            });
- 启动项目,打开网址:https://localhost:5001/swagger
使用缓存
在netcore中已经集成了缓存我们可以直接使用
在ConfigureServices中启用services.AddMemoryCache();然后就可以注入使用了。当然最好我们封装一个接口自己实现一下
 public interface ICache
    {
        bool SetCache<T>(string key,T value,DateTime? expireTime=null);
        bool RemoveCache(string key);
        T GetCache<T>(string key);
    }
 public class MemoryCacheImp : ICache
    {
        private readonly IMemoryCache _cache;
        public MemoryCacheImp(IMemoryCache cache)
        {
            _cache=cache;
        }
       public T GetCache<T>(string key)
        {
            return _cache.Get<T>(key);
        }

        public bool RemoveCache(string key)
        {
            _cache.Remove(key);
            return true;
        }

        public bool SetCache<T>(string key, T value, DateTime? expireTime = null)
        {
            try
            {
                if(expireTime==null)
                {
                    return _cache.Set<T>(key,value)!=null;
                }else
                {
                    return _cache.Set<T>(key,value,expireTime.Value- DateTime.Now)!=null;
                }
            }catch
            {
                return false;
            }

        }
    }
获取配置文件
- 通过注入_configuration方式:
   public myclass(IConfiguration configuration)
           {
                _configuration = configuration;
           }
          public void fn()
          {
           var data=_configuration["test"];
             var data2=_configuration["Logging:LogLevel:Default"];
             }
- Json文件的弱类型方式读取:
private static void Main(string[] args)
{
    IConfiguration configuration = new ConfigurationBuilder()
        .SetBasePath(Environment.CurrentDirectory)
        .AddJsonFile("AppSettings.json",true,true)
        .AddInMemoryCollection()
        .Build();
    var str1 = configuration["DataBase:SqlServer:ConnectionString"];
    var str2 = configuration["endArray:0:endId"];
    Console.WriteLine($"{str1}+---{str2}");
}
- Json文件的强类型获取方式:
private static void Main(string[] args)
{
    IConfiguration configuration = new ConfigurationBuilder()
        .SetBasePath(Environment.CurrentDirectory)
        .AddJsonFile("AppSettings.json",true,true)
        .AddInMemoryCollection()
        .Build();

    //GetValue获取方式
    int val = configuration.GetValue<int>("endArray:0:endId");
    Console.WriteLine(val);
}
启动端口配置
- Program中用userurls配置
public static IHostBuilder CreateHostBuilder(string[] args) =>
            Host.CreateDefaultBuilder(args)
                .ConfigureWebHostDefaults(webBuilder =>
                {
                    webBuilder.UseUrls("https://*:5001").UseStartup<Startup>();

                });
- Program中用UseConfiguration(config)配置.
此方式没做测试
        public static IHostBuilder CreateHostBuilder(string[] args) =>
            Host.CreateDefaultBuilder(args)
                .ConfigureWebHostDefaults(webBuilder =>
                {
                     var config = new ConfigurationBuilder()
					        .SetBasePath(Directory.GetCurrentDirectory())
					        .AddJsonFile("hosting.json", optional: true)
					        .Build();
        webBuilder.UseConfiguration(config);

                });
- 使用dotnet 命令启动时配置(推荐).
dotnet MyProject.dll --urls="https://localhost:7001;http://localhost:7000" --environment=Development

默认端口为5000(https为5001)

默认环境为Production


 2224
2224


 被折叠的 条评论
为什么被折叠?
被折叠的 条评论
为什么被折叠?
 到【灌水乐园】发言


