


Spring Cloud Gateway
网关基本概念
1、API 网关介绍
API 网关出现的原因是微服务架构的出现,不同的微服务一般会有不同的网络地址,而外部客户端可能需要调用多个服务的接口才能完成一个业务需求,如果让客户端直接与各个微服务通信,会有以下的问题:
(1)客户端会多次请求不同的微服务,增加了客户端的复杂性。
(2)存在跨域请求,在一定场景下处理相对复杂。
(3)认证复杂,每个服务都需要独立认证。
(4)难以重构,随着项目的迭代,可能需要重新划分微服务。例如,可能将多个服务合并成一个或者将一个服务拆分成多个。如果客户端直接与微服务通信,那么重构将会很难实施。
(5)某些微服务可能使用了防火墙 / 浏览器不友好的协议,直接访问会有一定的困难。
以上这些问题可以借助 API 网关解决。API 网关是介于客户端和服务器端之间的中间层,所有的外部请求都会先经过 API 网关这一层。也就是说,API 的实现方面更多的考虑业务逻辑,而安全、性能、监控可以交由 API 网关来做,这样既提高业务灵活性又不缺安全性
Gateway 基本介绍
Spring cloud gateway是 spring 官方基于 Spring 5.0、Spring Boot2.0 和 Project Reactor 等技术开发的网关,Spring Cloud Gateway 旨在为微服务架构提供简单、有效和统一的 API 路由管理方式,Spring Cloud Gateway 作为 Spring Cloud 生态系统中的网关,目标是替代 Netflix Zuul,其 不仅提供统一的路由方式,并且还基于 Filer 链的方式提供了网关基本的功能,例如:安全、监控/埋点、限流等。

核心概念
网关提供 API 全托管服务,丰富的 API 管理功能,辅助企业管理大规模的 API,以降低管理成本和安全风险,包括协议适配、协议转发、安全策略、防刷、流量、监控日志等功能。一般来说网关对外暴露的 URL 或者接口信息,我们统称为路由信息。 如果研发过网关中间件或者使用过 Zuul 的人,会知道网关的核心是 Filter 以及 Filter Chain(Filter 责任链)。Sprig Cloud Gateway 也具有路由和 Filter 的概念。下面介绍一下 Spring Cloud Gateway 中几个重要的概念。
(1)路由。路由是网关最基础的部分,路由信息有一个 ID、一个目的 URL、一组断言和一组 Filter 组成。如果断言路由为真,则说明请求的 URL 和配置匹配
(2)断言。Java8 中的断言函数。Spring Cloud Gateway 中的断言函数输入类型是 Spring5.0 框架中的 ServerWebExchange。Spring Cloud Gateway 中的断言函数允许开发者去定义匹配来自于 http request 中的任何信息,比如请求头和参数等。
(3)过滤器。一个标准的 Spring webFilter。Spring cloud gateway 中的 filter 分为两种类型的 Filter,分别是 Gateway Filter 和 Global Filter。过滤器 Filter 将会对请求和响应进行修改处理

如上图所示,Spring cloud Gateway 发出请求。然后再由 Gateway Handler Mapping 中找到与请求相匹配的路由,将其发送到 Gateway web handler。Handler 再通过指定的过滤器链将请求发送到我们实际的服务执行业务逻辑,然后返回。
Demo 示例
1、先创建 api-gateway 模块(网关服务)
2、在 pom 文件中引入依赖
<!--gson-->
<dependency>
    <groupId>com.google.code.gson</groupId>
    <artifactId>gson</artifactId>
</dependency>

<!-- Gateway网关 -->
<dependency>
    <groupId>org.springframework.cloud</groupId>
    <artifactId>spring-cloud-starter-gateway</artifactId>
</dependency>

<!-- 服务注册 -->
<dependency>
    <groupId>org.springframework.cloud</groupId>
    <artifactId>spring-cloud-starter-alibaba-nacos-discovery</artifactId>
</dependency>

<!--服务调用-->
<dependency>
    <groupId>org.springframework.cloud</groupId>
    <artifactId>spring-cloud-starter-openfeign</artifactId>
</dependency>
3、编写 application.properties 配置文件
# 服务端口
server.port=8181
# 服务名
spring.application.name=service-gateway
# nacos服务地址
spring.cloud.nacos.discovery.server-addr=127.0.0.1:8848

#使用服务发现路由
spring.cloud.gateway.discovery.locator.enabled=true

#设置路由id
spring.cloud.gateway.routes[0].id=service-acl
#设置路由的uri   lb://nacos注册服务名称
spring.cloud.gateway.routes[0].uri=lb://service-acl
#设置路由断言,代理servicerId为auth-service的/auth/路径   必须需要大小写,不像nginx正则匹配一样。
spring.cloud.gateway.routes[0].predicates= Path=/*/acl/**

#配置service-edu服务
spring.cloud.gateway.routes[1].id=service-edu
spring.cloud.gateway.routes[1].uri=lb://service-edu
spring.cloud.gateway.routes[1].predicates= Path=/eduService/**

#配置service-msm服务
spring.cloud.gateway.routes[2].id=service-msm
spring.cloud.gateway.routes[2].uri=lb://service-msm
spring.cloud.gateway.routes[2].predicates= Path=/eduMsm/**
...
4、编写启动类
@SpringBootApplication
public class ApiGatewayApplication {

  public static void main(String[] args) {
    SpringApplication.run(ApiGatewayApplication.class, args);
  }
}
5、配置解决跨域
@Configuration
public class CorsConfig {
  @Bean
  public CorsWebFilter corsFilter() {
    CorsConfiguration config = new CorsConfiguration();
    config.addAllowedMethod("*");
    config.addAllowedOrigin("*");
    config.addAllowedHeader("*");
    UrlBasedCorsConfigurationSource source = new UrlBasedCorsConfigurationSource(new PathPatternParser());
    source.registerCorsConfiguration("/**", config);
    return new CorsWebFilter(source);
  }
}
6、全局Filter,统一处理会员登录与外部不允许访问的服务
/**
 * <p>
 * 全局Filter,统一处理会员登录与外部不允许访问的服务
 * </p>
 * @author Blue
 */
@Component
public class AuthGlobalFilter implements GlobalFilter, Ordered {

    private AntPathMatcher antPathMatcher = new AntPathMatcher();

    @Override
    public Mono<Void> filter(ServerWebExchange exchange, GatewayFilterChain chain) {
        ServerHttpRequest request = exchange.getRequest();
        String path = request.getURI().getPath();
        //api接口,校验用户必须登录
        if (antPathMatcher.match("/api/**/auth/**", path)) {
            List<String> tokenList = request.getHeaders().get("token");
            ServerHttpResponse response = exchange.getResponse();
            return out(response);
        }
        //内部服务接口,不允许外部访问
        if (antPathMatcher.match("/**/inner/**", path)) {
            ServerHttpResponse response = exchange.getResponse();
            return out(response);
        }
        return chain.filter(exchange);
    }

    @Override
    public int getOrder() {
        return 0;
    }

    private Mono<Void> out(ServerHttpResponse response) {
        JsonObject message = new JsonObject();
        message.addProperty("success", false);
        message.addProperty("code", 28004);
        message.addProperty("data", "鉴权失败");
        byte[] bits = message.toString().getBytes(StandardCharsets.UTF_8);
        DataBuffer buffer = response.bufferFactory().wrap(bits);
        //response.setStatusCode(HttpStatus.UNAUTHORIZED);
        //指定编码,否则在浏览器中会中文乱码
        response.getHeaders().add("Content-Type", "application/json;charset=UTF-8");
        return response.writeWith(Mono.just(buffer));
    }
}
7、自定义异常处理
服务网关调用服务时可能会有一些异常或服务不可用,它返回错误信息不友好,需要我们覆盖处理
/**
 * 异常处理配置类, 覆盖默认的异常处理
 *
 * @author Blue
 */

@ConditionalOnWebApplication(type = ConditionalOnWebApplication.Type.REACTIVE)
@ConditionalOnClass(WebFluxConfigurer.class)
@AutoConfigureBefore(WebFluxAutoConfiguration.class)
@EnableConfigurationProperties({ServerProperties.class, ResourceProperties.class})
public class ErrorHandlerConfig {

    private ServerProperties serverProperties;

    private ApplicationContext applicationContext;

    private ResourceProperties resourceProperties;

    private List<ViewResolver> viewResolvers;

    private ServerCodecConfigurer serverCodecConfigurer;

    public ErrorHandlerConfig(ServerProperties serverProperties,
                              ResourceProperties resourceProperties,
                              ObjectProvider<List<ViewResolver>> viewResolversProvider,
                              ServerCodecConfigurer serverCodecConfigurer,
                              ApplicationContext applicationContext) {
        this.serverProperties = serverProperties;
        this.applicationContext = applicationContext;
        this.resourceProperties = resourceProperties;
        this.viewResolvers = viewResolversProvider.getIfAvailable(Collections::emptyList);
        this.serverCodecConfigurer = serverCodecConfigurer;
    }

    @Bean
    @Order(Ordered.HIGHEST_PRECEDENCE)
    public ErrorWebExceptionHandler errorWebExceptionHandler(ErrorAttributes errorAttributes) {
        JsonExceptionHandler exceptionHandler = new JsonExceptionHandler(
                errorAttributes,
                this.resourceProperties,
                this.serverProperties.getError(),
                this.applicationContext);
        exceptionHandler.setViewResolvers(this.viewResolvers);
        exceptionHandler.setMessageWriters(this.serverCodecConfigurer.getWriters());
        exceptionHandler.setMessageReaders(this.serverCodecConfigurer.getReaders());
        return exceptionHandler;
    }
}
/**
 * 自定义异常处理
 * <p>异常时用JSON代替HTML异常信息<p>
 *
 * @author Blue
 */
public class JsonExceptionHandler extends DefaultErrorWebExceptionHandler {

    public JsonExceptionHandler(ErrorAttributes errorAttributes, ResourceProperties resourceProperties,
                                ErrorProperties errorProperties, ApplicationContext applicationContext) {
        super(errorAttributes, resourceProperties, errorProperties, applicationContext);
    }

    /**
     * 获取异常属性
     */
    @Override
    protected Map<String, Object> getErrorAttributes(ServerRequest request, boolean includeStackTrace) {
        Map<String, Object> map = new HashMap<>();
        map.put("success", false);
        map.put("code", 20005);
        map.put("message", "网关失败");
        map.put("data", null);
        return map;
    }

    /**
     * 指定响应处理方法为JSON处理的方法
     *
     * @param errorAttributes
     */
    @Override
    protected RouterFunction<ServerResponse> getRoutingFunction(ErrorAttributes errorAttributes) {
        return RouterFunctions.route(RequestPredicates.all(), this::renderErrorResponse);
    }

    /**
     * 根据code获取对应的HttpStatus
     *
     * @param errorAttributes
     */
    @Override
    protected int getHttpStatus(Map<String, Object> errorAttributes) {
        return 200;
    }
}
定时任务
import cn.blue.staservice.service.StatisticsDailyService;
import cn.blue.staservice.utils.DateUtil;
import org.springframework.scheduling.annotation.Scheduled;
import org.springframework.stereotype.Component;

import javax.annotation.Resource;
import java.util.Date;

/**
 * @author Blue
 * 定时任务
 */
@Component
public class ScheduledTask {

    @Resource
    private StatisticsDailyService staService;

    /**
     * 0/5 * * * * ?表示每隔5分钟执行一次这个方法
     * Cron 表达式
     *
     */
    @Scheduled(cron = "0/* 5 * * * ?")
    public void task1() {
        System.out.println("**************定时任务ScheduledTask执行了..");
    }

    /**
     * 在每天凌晨1点,把前一天数据进行数据查询添加
     */
    @Scheduled(cron = "0 0 1 * * ?")
    public void task2() {
        staService.registerCount(DateUtil.formatDate(DateUtil.addDays(new Date(), -1)));
    }
}
异步任务
@RestController
@RequestMapping("/")
public class AsyncController {
    @Autowired
    AsyncService asyncService;

    @GetMapping
    public void asyncDemo() {
        asyncService.asyncDemo();
    }
}
@Service
public class AsyncService {

    @Async // 使用异步任务,记得在启动类使用 @EnableAsync 开启异步任务注解。
    public void asyncDemo() {
        try {
            // 按理是需要等三秒的
            Thread.sleep(3000);
        } catch (InterruptedException e) {
            e.printStackTrace();
        }
        System.out.println("处理数据中...");
    }
}
Redis
Redis介绍
Redis是当前比较热门的NOSQL系统之一,它是一个开源的使用ANSI c语言编写的key-value存储系统(区别于MySQL的二维表格的形式存储。)。和Memcache类似,但很大程度补偿了Memcache的不足。和Memcache一样,Redis数据都是缓存在计算机内存中,不同的是,Memcache只能将数据缓存到内存中,无法自动定期写入硬盘,这就表示,一断电或重启,内存清空,数据丢失。所以Memcache的应用场景适用于缓存无需持久化的数据。而Redis不同的是它会周期性的把更新的数据写入磁盘或者把修改操作写入追加的记录文件,实现数据的持久化。
Redis的特点:
1,Redis读取的速度是110000次/s,写的速度是81000次/s;
2,原子 。Redis的所有操作都是原子性的,同时Redis还支持对几个操作全并后的原子性执行。
3,支持多种数据结构:string(字符串);list(列表);hash(哈希),set(集合);zset(有序集合)
4,持久化,集群部署
5,支持过期时间,支持事务,消息订阅
项目集成Redis
1、在common模块添加依赖
由于redis缓存是公共应用,所以我们把依赖与配置添加到了common模块下面,在common模块pom.xml下添加以下依赖
<!-- redis -->
<dependency>
    <groupId>org.springframework.boot</groupId>
    <artifactId>spring-boot-starter-data-redis</artifactId>
    <version>2.2.1.RELEASE</version>
</dependency>
<!-- spring2.X集成redis所需common-pool2-->
<dependency>
    <groupId>org.apache.commons</groupId>
    <artifactId>commons-pool2</artifactId>
    <version>2.6.0</version>
</dependency>
2、添加redis配置类
RedisConfig.java
import com.fasterxml.jackson.annotation.JsonAutoDetect;
import com.fasterxml.jackson.annotation.PropertyAccessor;
import com.fasterxml.jackson.databind.ObjectMapper;
import org.springframework.cache.CacheManager;
import org.springframework.cache.annotation.CachingConfigurerSupport;
import org.springframework.cache.annotation.EnableCaching;
import org.springframework.context.annotation.Bean;
import org.springframework.context.annotation.Configuration;
import org.springframework.data.redis.cache.RedisCacheConfiguration;
import org.springframework.data.redis.cache.RedisCacheManager;
import org.springframework.data.redis.connection.RedisConnectionFactory;
import org.springframework.data.redis.core.RedisTemplate;
import org.springframework.data.redis.serializer.Jackson2JsonRedisSerializer;
import org.springframework.data.redis.serializer.RedisSerializationContext;
import org.springframework.data.redis.serializer.RedisSerializer;
import org.springframework.data.redis.serializer.StringRedisSerializer;

import java.time.Duration;

@EnableCaching //开启缓存
@Configuration  //配置类
public class RedisConfig extends CachingConfigurerSupport {

    @Bean
    public RedisTemplate<String, Object> redisTemplate(RedisConnectionFactory factory) {
        RedisTemplate<String, Object> template = new RedisTemplate<>();
        StringRedisSerializer redisSerializer = new StringRedisSerializer();
        Jackson2JsonRedisSerializer jackson2JsonRedisSerializer = new Jackson2JsonRedisSerializer(Object.class);
        ObjectMapper om = new ObjectMapper();
        om.setVisibility(PropertyAccessor.ALL, JsonAutoDetect.Visibility.ANY);
        om.enableDefaultTyping(ObjectMapper.DefaultTyping.NON_FINAL);
        jackson2JsonRedisSerializer.setObjectMapper(om);
        template.setConnectionFactory(factory);
        //key序列化方式
        template.setKeySerializer(redisSerializer);
        //value序列化
        template.setValueSerializer(jackson2JsonRedisSerializer);
        //value hashmap序列化
        template.setHashValueSerializer(jackson2JsonRedisSerializer);

//        // 取值多双引号问题: value序列化用的是jackson2JsonRedisSerializer,改成StringRedisSerializer就行。
//        //key序列化方式
//        template.setKeySerializer(redisSerializer);
//        //value序列化
//        template.setValueSerializer(redisSerializer);
//        //value hashmap序列化
//        template.setHashValueSerializer(redisSerializer);
//        template.setHashValueSerializer(redisSerializer);
//        template.afterPropertiesSet();
        return template;
    }

    @Bean
    public CacheManager cacheManager(RedisConnectionFactory factory) {
        RedisSerializer<String> redisSerializer = new StringRedisSerializer();
        Jackson2JsonRedisSerializer jackson2JsonRedisSerializer = new Jackson2JsonRedisSerializer(Object.class);
        //解决查询缓存转换异常的问题
        ObjectMapper om = new ObjectMapper();
        om.setVisibility(PropertyAccessor.ALL, JsonAutoDetect.Visibility.ANY);
        om.enableDefaultTyping(ObjectMapper.DefaultTyping.NON_FINAL);
        jackson2JsonRedisSerializer.setObjectMapper(om);
        // 配置序列化(解决乱码的问题),过期时间600秒
        RedisCacheConfiguration config = RedisCacheConfiguration.defaultCacheConfig()
                .entryTtl(Duration.ofSeconds(600))
                .serializeKeysWith(RedisSerializationContext.SerializationPair.fromSerializer(redisSerializer))
                .serializeValuesWith(RedisSerializationContext.SerializationPair.fromSerializer(jackson2JsonRedisSerializer))
                .disableCachingNullValues();
        RedisCacheManager cacheManager = RedisCacheManager.builder(factory)
                .cacheDefaults(config)
                .build();
        return cacheManager;
    }
}
3、在接口中添加redis缓存
3.1、Spring Boot缓存注解
(1)缓存@Cacheable
根据方法对其返回结果进行缓存,下次请求时,如果缓存存在,则直接读取缓存数据返回;如果缓存不存在,则执行方法,并把返回的结果存入缓存中。一般用在 查询方法上。
查看源码,属性值如下:
| 属性/方法名 | 解释 |
|---|---|
| value | 缓存名,必填,它指定了你的缓存存放在哪块命名空间 |
| cacheNames | 与 value 差不多,二选一即可 |
| key | 可选属性,可以使用 SpEL 标签自定义缓存的key |
(2)缓存@CachePut
使用该注解标志的方法,每次都会执行,并将结果存入指定的缓存中。其他方法可以直接从响应的缓存中读取缓存数据,而不需要再去查询数据库。一般用在 新增方法上。
查看源码,属性值如下:
| 属性/方法名 | 解释 |
|---|---|
| value | 缓存名,必填,它指定了你的缓存存放在哪块命名空间 |
| cacheNames | 与 value 差不多,二选一即可 |
| key | 可选属性,可以使用 SpEL 标签自定义缓存的key |
(3)缓存@CacheEvict
使用该注解标志的方法,会 清空指定的缓存。一般用在 更新或者删除方法上
查看源码,属性值如下:
| 属性/方法名 | 解释 |
|---|---|
| value | 缓存名,必填,它指定了你的缓存存放在哪块命名空间 |
| cacheNames | 与 value 差不多,二选一即可 |
| key | 可选属性,可以使用 SpEL 标签自定义缓存的key |
| allEntries | 是否清空所有缓存,默认为 false。如果指定为 true,则方法调用后将立即清空所有的缓存 |
| beforeInvocation | 是否在方法执行前就清空,默认为 false。如果指定为 true,则在方法执行前就会清空缓存 |
3.2、成功启动redis,连接redis服务可能遇到的问题
(1)关闭liunx防火墙
(2)找到redis配置文件, 注释一行配置
(3)如果出现下面错误提示

修改 protected-mode yes 改为 protected-mode no
3.3、配置文件添加redis配置
spring:
  redis:
    host: 127.0.0.1
    port: 6379
    database:  0
    timeout: 1800000
    lettuce:
      pool:
        max-wait: -1
        max-active: 20
        min-idle: 0
        #最大阻塞等待时间(负数表示没限制)
        max-idle: 5
3.4、代码示例,添加redis缓存注解
/**
 *
 * @author Blue
 * @since 2020-07-30
 */
@Service
public class CrmBannerServiceImpl extends ServiceImpl<CrmBannerMapper, CrmBanner> implements CrmBannerService {

    /**
     * 查询所有banner
     */
    @Cacheable(value = "banner",key = "'selectIndexList'")
    @Override
    public List<CrmBanner> selectAllBanner() {

        //根据id进行降序排列,显示排列之后前两条记录
        QueryWrapper<CrmBanner> wrapper = new QueryWrapper<>();
        wrapper.orderByDesc("id");
        //last方法,拼接sql语句
        wrapper.last("limit 2");
        return baseMapper.selectList(wrapper);
    }

    /**
     * 新增banner
     */
    @CacheEvict(value = "banner", allEntries=true)
    @Override
    public void saveBanner(CrmBanner banner) {
        baseMapper.insert(banner);
    }
}
3.5、在redis中查看key值
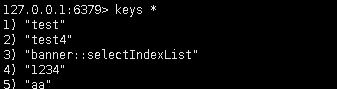
3.6、通过源码查看到key生成的规则

读取yml / properties配置文件中的值
application.properties文件配置
aliyun.oss.file.endpoint=oss-cn-shanghai.aliyuncs.com
aliyun.oss.file.keyid=yourkeyid
aliyun.oss.file.keysecret=yourkeysecret
aliyun.oss.file.bucketname=yourbucketname
@Component
@Component
public class ConstantPropertiesUtils implements InitializingBean {

    /**
     * 读取配置文件内容
     */
    @Value("${aliyun.oss.file.endpoint}")
    private String endpoint;

    @Value("${aliyun.oss.file.keyid}")
    private String keyId;

    @Value("${aliyun.oss.file.keysecret}")
    private String keySecret;

    @Value("${aliyun.oss.file.bucketname}")
    private String bucketName;

    //定义公开静态常量
    public static String END_POIND;
    public static String ACCESS_KEY_ID;
    public static String ACCESS_KEY_SECRET;
    public static String BUCKET_NAME;

    @Override
    public void afterPropertiesSet() throws Exception {
        END_POIND = endpoint;
        ACCESS_KEY_ID = keyId;
        ACCESS_KEY_SECRET = keySecret;
        BUCKET_NAME = bucketName;
    }
}
JWT令牌(JSON Web Token)
JWT介绍
1、JWT 的三个部分依次如下
- Header(头部)
- Payload(负载)
- Signature(签名)
写成一行,就是下面的样子。Header.Payload.Signature,这也正是jwt生成后的格式。
1.1、Header
Header 部分是一个 JSON 对象,描述 JWT 的元数据,通常是下面的样子。
{
  // 签名的算法(algorithm),默认是 HMAC SHA256(写成 HS256)
  "alg": "HS256",
  // typ属性表示这个令牌(token)的类型(type)
  "typ": "JWT"
}
Payload 部分也是一个 JSON 对象,用来 存放实际需要传递的数据。JWT 规定了7个官方字段,供选用。
- iss (issuer):签发人
- exp (expiration time):过期时间
- sub (subject):主题
- aud (audience):受众
- nbf (Not Before):生效时间
- iat (Issued At):签发时间
- jti (JWT ID):编号
注意,JWT 默认是不加密的,任何人都可以读到,这个 JSON 对象也要使用 Base64URL 算法转成字符串
1.3、Signature
Signature 部分是 对前两部分的签名,防止数据篡改。
指定一个密钥(secret)。这个密钥只有服务器才知道,不能泄露给用户。然后,使用 Header 里面指定的签名算法(默认是 HMAC SHA256),按照下面的公式产生签名。
HMACSHA256(
  base64UrlEncode(header) + "." +
  base64UrlEncode(payload)+ '.' +
  secret)

 // eg:
 eyJhbGciOiJIUzI1NiIsInR5cCI6IkpXVCJ9.
 eyJsb2dnZWRJbkFzIjoiYWRtaW4iLCJpYXQiOjE0MjI3Nzk2Mzh9.
 gzSraSYS8EXBxLN_oWnFSRgCzcmJmMjLiuyu5CSpyHI
算出签名以后,把 Header、Payload、Signature 三个部分拼成一个字符串,每个部分之间用"点"(.)分隔,就可以返回给用户。
1.4、Base64URL
JWT 作为一个令牌(token),有些场合可能会放到 URL(比如 api.example.com/?token=xxx)。Base64 有三个字符 +、/ 、 =,在 URL 里面有特殊含义,所以要被替换掉:=被省略、+替换成-,/替换成_ 。这就是 Base64URL 算法。
JWT使用
1、添加jwt工具依赖
<!-- JWT -->
<dependency>
    <groupId>io.jsonwebtoken</groupId>
    <artifactId>jjwt</artifactId>
    <version>0.7.0</version>
</dependency>
2、创建JWT工具类
import io.jsonwebtoken.Claims;
import io.jsonwebtoken.Jws;
import io.jsonwebtoken.Jwts;
import io.jsonwebtoken.SignatureAlgorithm;
import org.springframework.util.StringUtils;

import javax.servlet.http.HttpServletRequest;
import java.util.Date;

/**
 * @author Blue
 */
public class JwtUtils {

    public static final long EXPIRE = 1000 * 60 * 60 * 24;
    public static final String APP_SECRET = "ukc8BDbRigUDaY6pZFfWus2jZWLPHO";

    public static String getJwtToken(String id, String nickname){

        String JwtToken = Jwts.builder()
                .setHeaderParam("typ", "JWT")
                .setHeaderParam("alg", "HS256")
                .setSubject("JWT生成的名称")
                .setIssuedAt(new Date())
                .setExpiration(new Date(System.currentTimeMillis() + EXPIRE))
                .claim("id", id)
                .claim("nickname", nickname)
                .signWith(SignatureAlgorithm.HS256, APP_SECRET)
                .compact();

        return JwtToken;
    }

    /**
     * 判断token是否存在与有效
     * @param jwtToken
     * @return
     */
    public static boolean checkToken(String jwtToken) {
        if(StringUtils.isEmpty(jwtToken)) return false;
        try {
            Jwts.parser().setSigningKey(APP_SECRET).parseClaimsJws(jwtToken);
        } catch (Exception e) {
            e.printStackTrace();
            return false;
        }
        return true;
    }

    /**
     * 通过request判断token是否存在与有效
     * @param request
     * @return
     */
    public static boolean checkToken(HttpServletRequest request) {
        try {
            String jwtToken = request.getHeader("token");
            if(StringUtils.isEmpty(jwtToken)) return false;
            Jwts.parser().setSigningKey(APP_SECRET).parseClaimsJws(jwtToken);
        } catch (Exception e) {
            e.printStackTrace();
            return false;
        }
        return true;
    }

    /**
     * 根据token获取会员id
     * @param request
     * @return
     */
    public static String getMemberIdByJwtToken(HttpServletRequest request) {
        String jwtToken = request.getHeader("token");
        if(StringUtils.isEmpty(jwtToken)) return "";
        Jws<Claims> claimsJws = Jwts.parser().setSigningKey(APP_SECRET).parseClaimsJws(jwtToken);
        Claims claims = claimsJws.getBody();
        return (String)claims.get("id");
    }
}
3、将生成的JWT令牌传给前端
// 会在请求头的
return JwtUtils.getJwtToken(mobileMember.getId(), mobileMember.getNickname());
4、前端登录后获取JWT传来的token
// npm install js-cookie --save 引入
import cookie from 'js-cookie'

// 将token set到cookie中
cookie.set('token名称', res.data.token, {domain: 'localhost'})

// 从cookie中获取token
const token = cookie.get('token名称');
if (token ) { // 判断是否存在token,如果存在的话,则每个http header都加上token
    config.headers['token'] = token;  //请求头加上token
}
5、前端跨域请求
可以将JWT令牌直接 置于url中,后端获取,或者后端从 HttpServletRequest中拿(这个先要 set到cookie中)。


 121
121


 被折叠的 条评论
为什么被折叠?
被折叠的 条评论
为什么被折叠?
 到【灌水乐园】发言


