


安装mysql
1、检查的前系统是否安装mysql数据库
rpm -qa | grep mysql
#centos7自带mariadb,与mysql冲突
rpm -qa | grep mariadb

2、卸载已安装冲突软件
rpm -e --nodeps mariadb-libs-5.5.68-1.el7.x86_64
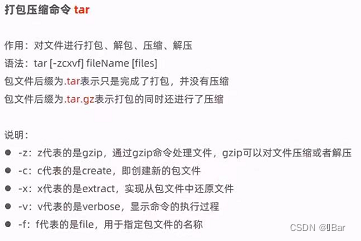
3、将下载好的mysql安装包上传到linux并解压
下载的.tar.gz包使用tar -zxvf,下载的.tar包使用tar -xvf
tar -xvf mysql-5.7.23-1.el6.x86_64.rpm-bundle.tar
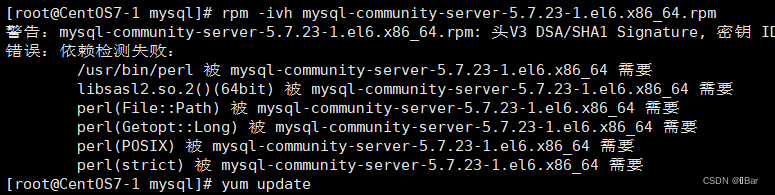
4、按照顺序安装rpm软件包
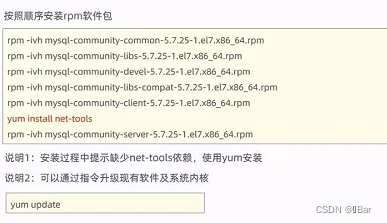
安装时报错使用yum update升级现有软件及系统内核
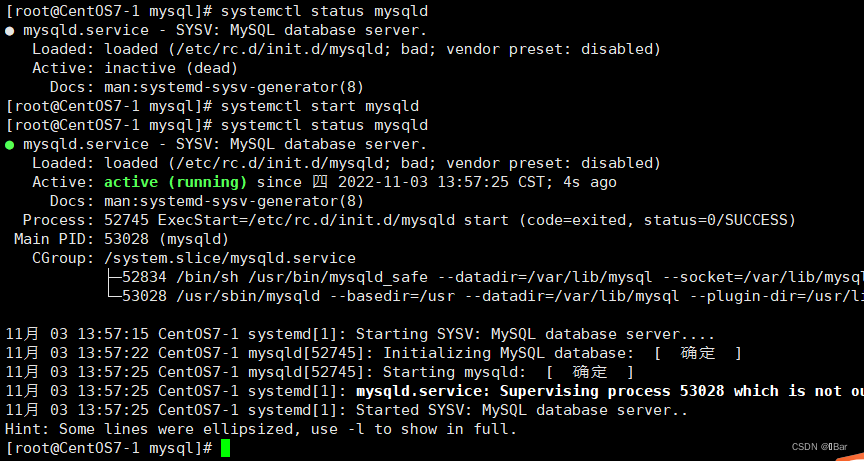
5、启动mysql
 #查看mysql服务状态
systemctl status mysqld
 #启动mysql服务
systemctl start mysqld
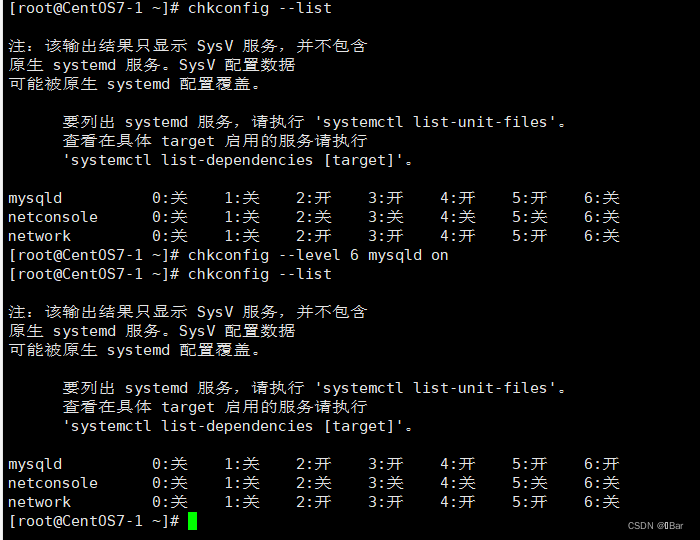
6、设置开机时启动mysql服务
#开机启动mysql服务
systemctl enable mysqld
 #查看已经启动服务
 netstat -tunlp
 netstat -tunlp | grep mysql
#查看mysql进程
ps -ef | grep mysql
7、登录mysql数据库
#查看临时密码
cat /var/log/mysqld.log | grep password

mysql -uroot -p
#修改密码
set global validate_password_length=4;   设置密码长度的最低位数
set global validate_password_policy=LOW;  设置密码安全等级低
set password = password(‘root’);
#开启访问权限
grant all on *.* to 'root'@'%' identified by 'root';
flush privileges;
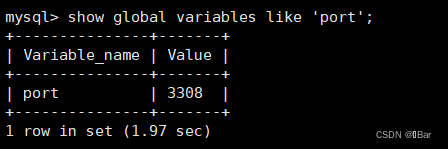
8、修改mysql端口后启动报错
修改端口参考:https://blog.csdn.net/b551500/article/details/79677655?utm_source=copy
修改后重启报错:

解决参考:https://blog.csdn.net/Shockang/article/details/118061120
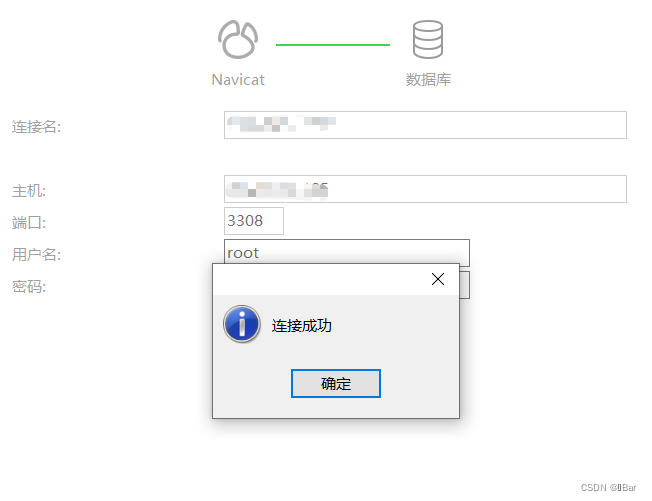
9、修改成功后开放端口后使用Navicat连接成功


 1528
1528


 被折叠的 条评论
为什么被折叠?
被折叠的 条评论
为什么被折叠?
 到【灌水乐园】发言


