


0 前言
(本文来自CSDN 作者/sun,禁止转载,原文链接Ubuntu安装conpot蜜罐系列——(2)安装mysql_conpot日志文件-CSDN博客)
本系列教程实现环境如下:
Ubuntu 18.04/20.04 + conpot0.6 + python3.6
(尝试在Ubuntu 22.04上安装暂时没有成功)
实现目标如下:
安装conpot + 日志存入mysql + 数据库GUI + Nmap对蜜罐进行指纹扫描 + 修改蜜罐指纹
1 安装mysql
(1)先安装mysql-server
sudo apt-get install mysql-server(2)然后开启mysql
service mysql start(3)设置下mysql,对于设置细节,参考 Ubuntu20.04安装MySQL及配置MySQL workbench_mysql workbench ubuntu-CSDN博客
sudo mysql_secure_installation(4)进入mysql数据库,用root用户启动mysql,输入密码按回车就行,此时进入mysql状态下
sudo mysql -u root -p2 创建数据库
(在mysql命令状态下执行)
(1)创建名叫conpot的数据库
CREATE DATABASE conpot;(2)创建一个名为user,密码为root的用户
create user 'user'@'%' identified by 'root';(3)用户user没有权限,给user权限
grant all privileges on conpot.* to 'user'@'%' with grant option;(4)ctrl+z退出命令状态,再进入到user用户下的mysql
sudo mysql -u user -p(5)输入密码为root,创建conpot数据库
create database conpot;(6)看看成功了没
show databases; 3 创建数据表
虽然下面提供的mysql_log.py有创建数据表的功能,但是执行不成功,这里手动执行
先执行,切换到conpot数据库
use conpot;执行下面代码,在conpot数据库下创建名为events的表
"""CREATE TABLE IF NOT EXISTS `events` (
                        `id` bigint(20) NOT NULL AUTO_INCREMENT,
                        `sensorid` text NOT NULL,
                        `session` text NOT NULL,
                        `timestamp` timestamp NOT NULL DEFAULT CURRENT_TIMESTAMP,
                        `remote` text NOT NULL,
                        `protocol` text NOT NULL,
                        `request` text NOT NULL,
                        `response` text NOT NULL,
                        PRIMARY KEY (`id`)
                        ) ENGINE=InnoDB DEFAULT CHARSET=latin1;
                       """)
4 将conpot日志输出到mysql中
以下将对conpot文件进行修改,Ubuntu安装conpot(1)仅仅是conpot原始版本,对于下面的修改,读者可以用两种方式操作:
- 先跟着这一节修改conpot本地文件再安装
- 安装好conpot后进入conpot环境下修改,路径参考如下
(/home/syr/桌面/conpot/conpot-env/lib/python3.6/site-packages/conpot)
(1)创建mysql_log.py
相对路径为(conpot/core/loggers/mysql_log.py),如果安装好了conpot,请在python虚拟环境下找路径。
这是我在conpot 0.5中找到的文件,改了改拿过来。
# Copyright (C) 2014  Daniel creo Haslinger <creo-conpot@blackmesa.at>
#
# This program is free software; you can redistribute it and/or
# modify it under the terms of the GNU General Public License
# as published by the Free Software Foundation; either version 2
# of the License, or (at your option) any later version.
#
# This program is distributed in the hope that it will be useful,
# but WITHOUT ANY WARRANTY; without even the implied warranty of
# MERCHANTABILITY or FITNESS FOR A PARTICULAR PURPOSE.  See the
# GNU General Public License for more details.
#
# You should have received a copy of the GNU General Public License
# along with this program; if not, write to the Free Software
# Foundation, Inc.,
# 51 Franklin Street, Fifth Floor, Boston, MA  02110-1301, USA.


import MySQLdb
import gevent
import logging

from warnings import filterwarnings
filterwarnings('ignore', category=MySQLdb.Warning)

logger = logging.getLogger(__name__)


class MySQLlogger(object):

    def __init__(self, host, port, db, username, passphrase, logdevice, logsocket, sensorid):
        self.host = host
        self.port = port
        self.db = db
        self.username = username
        self.passphrase = passphrase
        self.logdevice = logdevice
        self.logsocket = logsocket
        self.sensorid = sensorid
        #add a method
        self.conn = MySQLdb.connect(host=self.host,
                                    port=self.port,
                                    user=self.username,
                                    passwd=self.passphrase,
                                    db=self.db)

        self._connect()

    def _connect(self):
        try:
            if str(self.logsocket).lower() == 'tcp':
                self.conn = MySQLdb.connect(host=self.host,
                                            port=self.port,
                                            user=self.username,
                                            passwd=self.passphrase,
                                            db=self.db)
                self._create_db()
            elif str(self.logsocket).lower() == 'dev':
                self.conn = MySQLdb.connect(unix_socket=self.logdevice,
                                            user=self.username,
                                            passwd=self.passphrase,
                                            db=self.db)
                self._create_db()
        except (AttributeError, MySQLdb.OperationalError):
            logger.error('Could not create a stable database connection for logging. Check database and credentials.')

    def _create_db(self):
        cursor = self.conn.cursor()
        cursor.execute("""CREATE TABLE IF NOT EXISTS `events` (
                        `id` bigint(20) NOT NULL AUTO_INCREMENT,
                        `sensorid` text NOT NULL,
                        `session` text NOT NULL,
                        `timestamp` timestamp NOT NULL DEFAULT CURRENT_TIMESTAMP,
                        `remote` text NOT NULL,
                        `protocol` text NOT NULL,
                        `request` text NOT NULL,
                        `response` text NOT NULL,
                        PRIMARY KEY (`id`)
                        ) ENGINE=InnoDB DEFAULT CHARSET=latin1;
                       """)

    def log(self, event, retry=1):
        cursor = self.conn.cursor()

        try:
            if( event["data_type"] == "http" ):
                cursor.execute("""INSERT INTO
                                    events (sensorid, session, remote, protocol, request, response)
                                  VALUES
                                    (%s, %s, %s, %s, %s, %s)""", (str(self.sensorid),
                                                                  str(event["id"]),
                                                                  str(event["remote"]),
                                                                  event["data_type"],
                                                                  event["data"].get('request'),
                                                                  event["data"].get('response')))
            else:
                cursor.execute("""INSERT INTO
                                    events (sensorid, session, remote, protocol, request, response)
                                  VALUES
                                    (%s, %s, %s, %s, %s, %s)""", (str(self.sensorid),
                                                                  str(event["id"]),
                                                                  str(event["remote"]),
                                                                  event["data_type"],
                                                                  "null",
                                                                  "null"))
            self.conn.commit()
        except (AttributeError, MySQLdb.OperationalError):
            self._connect()

            if retry == 0:
                logger.error('Logging failed. Database connection not available.')
                return False
            else:
                logger.debug('Logging failed: Database connection lost. Retrying (%s tries left)...', retry)
                retry -= 1
                gevent.sleep(float(0.5))
                return self.log(event, retry)

        return cursor.lastrowid

    def log_session(self, session):
        pass

    def select_data(self):
        cursor = self.conn.cursor()
        cursor.execute("SELECT * FROM events")
        print (cursor.fetchall())

    def select_session_data(self, sessionid):
        cursor = self.conn.cursor()
        cursor.execute("SELECT * FROM events WHERE session = %s", [str(sessionid)])
        return cursor.fetchall()

    def truncate_table(self, table):
        cursor = self.conn.cursor()
        try:
            affected = cursor.execute("TRUNCATE TABLE %s", [str(table)])
            self.conn.commit()
        except (AttributeError, MySQLdb.IntegrityError, MySQLdb.OperationalError):
            return False

return affected(2)在上一步的py文件中,我们引入了一个库叫MySQLdb,python3中已经不支持这个库了,所以需要手动安装。(可能是因为conpot 0.6升级后支持python3,所以舍弃了日志的mysql输出方法)mysqlclient下载链接如下:
https://pypi.org/project/mysqlclient/2.0.0/#files
下载后,在conpot-env环境下执行命令(注意mysqlclient所在的目录是否在命令目录下)
pip install mysqlclient-2.0.0.tar.gz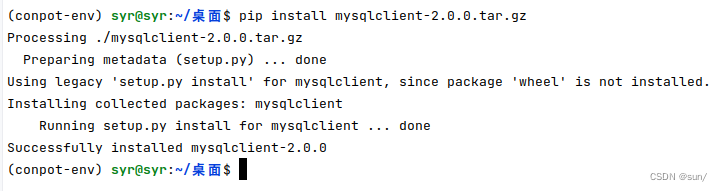
(3)修改配置文件testing.cfg,参考路径如下
/home/syr/桌面/conpot/conpot-env/lib/python3.6/site-packages/conpot/testing.cfg
将以下内容加入到testing.cfg中
[mysql]
enabled = True
device = /tmp/mysql.sock
host = localhost
port = 3306
db = conpot
username = 自己设置的用户名
passphrase = 自己设置的密码
socket = tcp        ; tcp (sends to host:port), dev (sends to mysql device/socket file)
用户名之前是设置user,密码root
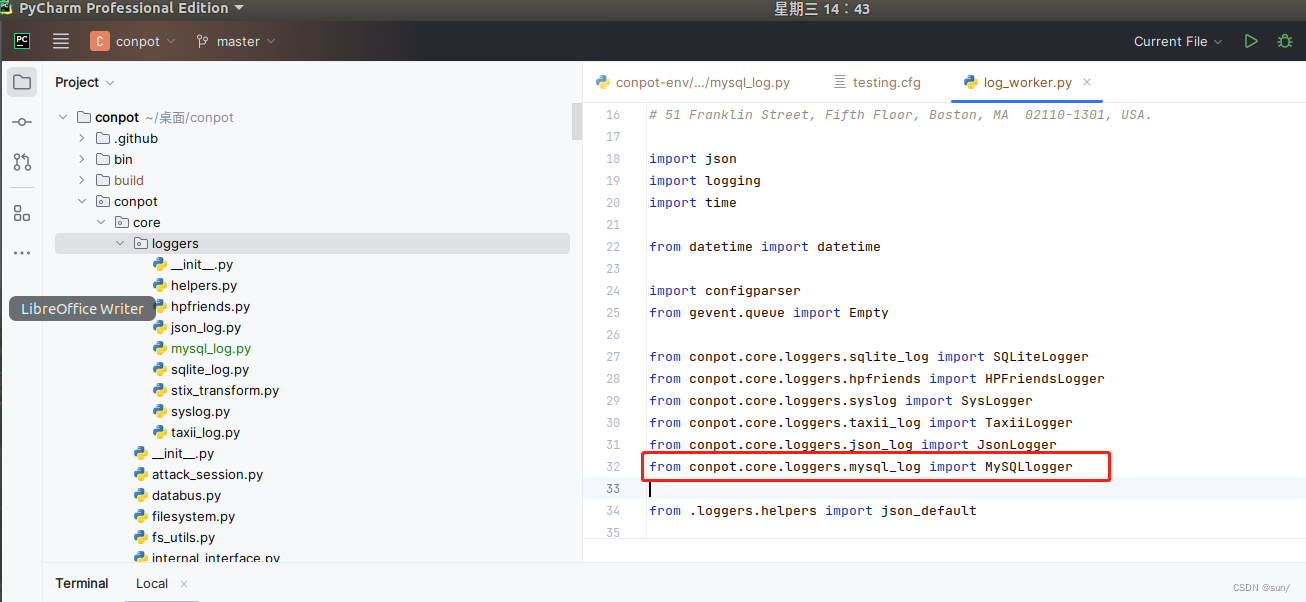
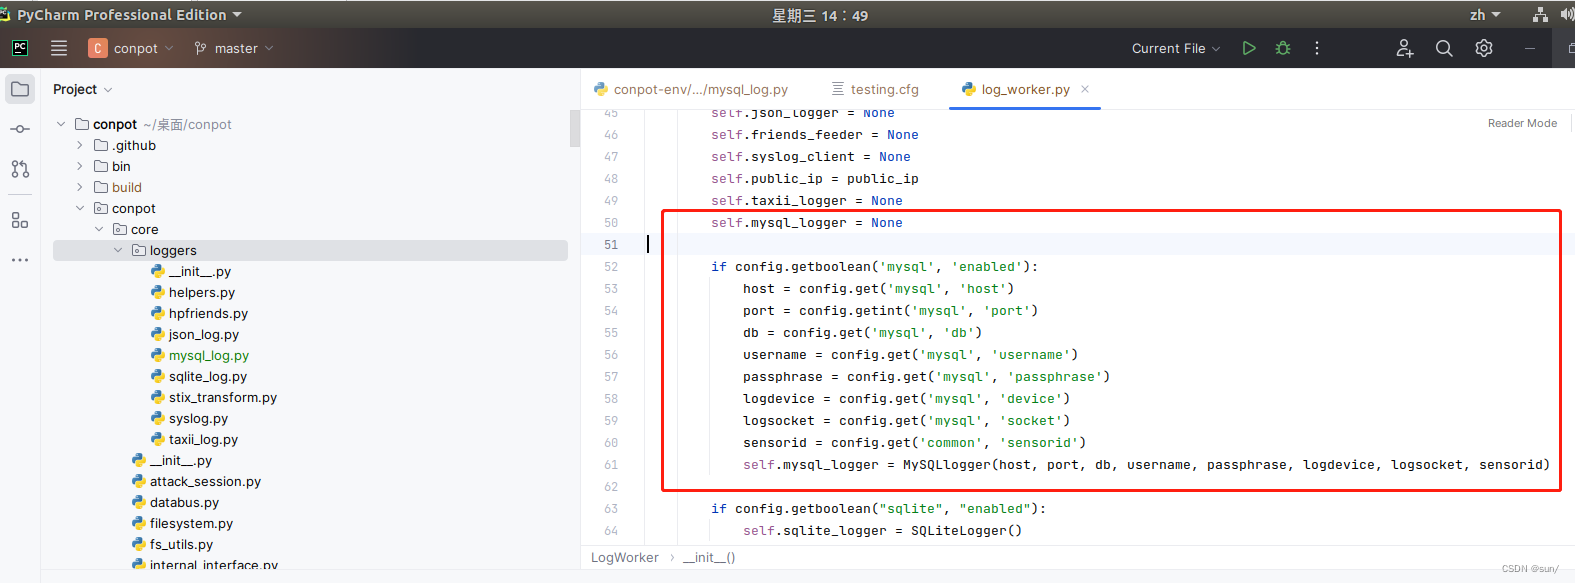
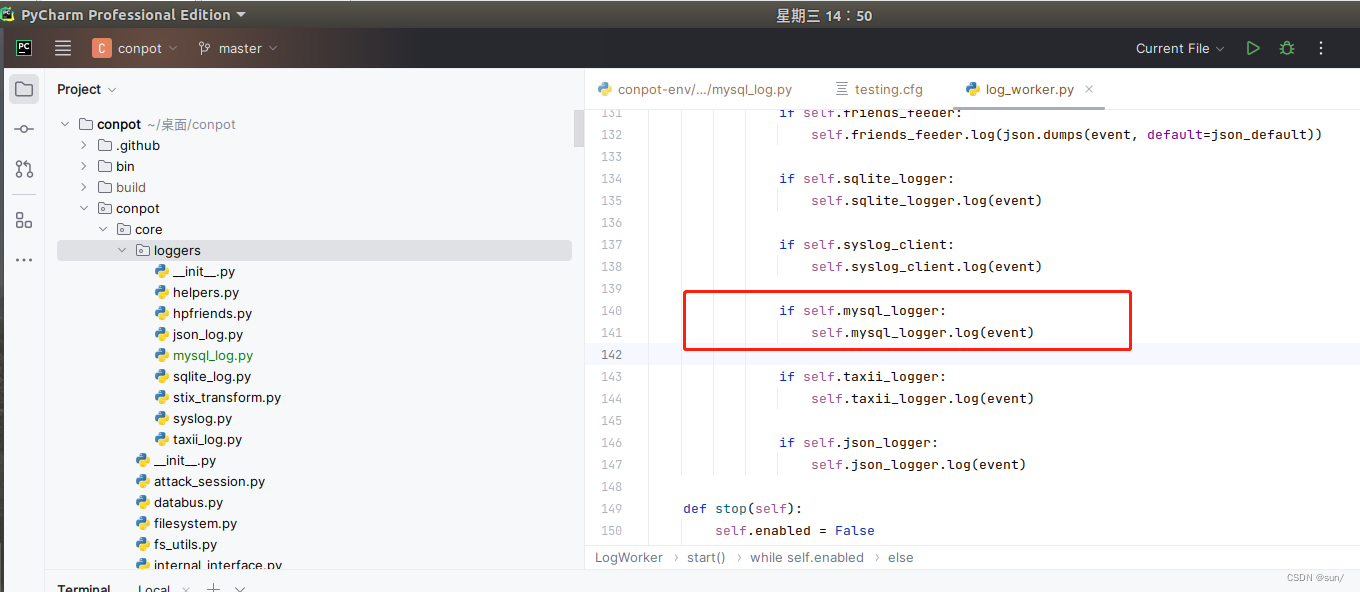
(4)修改log_worker.py文件,共三处问题,路径如下
/home/syr/桌面/conpot/conpot-env/lib/python3.6/site-packages/conpot/core/log_worker.py
参考下面的三张图,添加代码
(5)启动conpot日志写入mysql
conpot -f -t default -c testing.cfg打开本地浏览器,输入127.0.0.8800/index.html
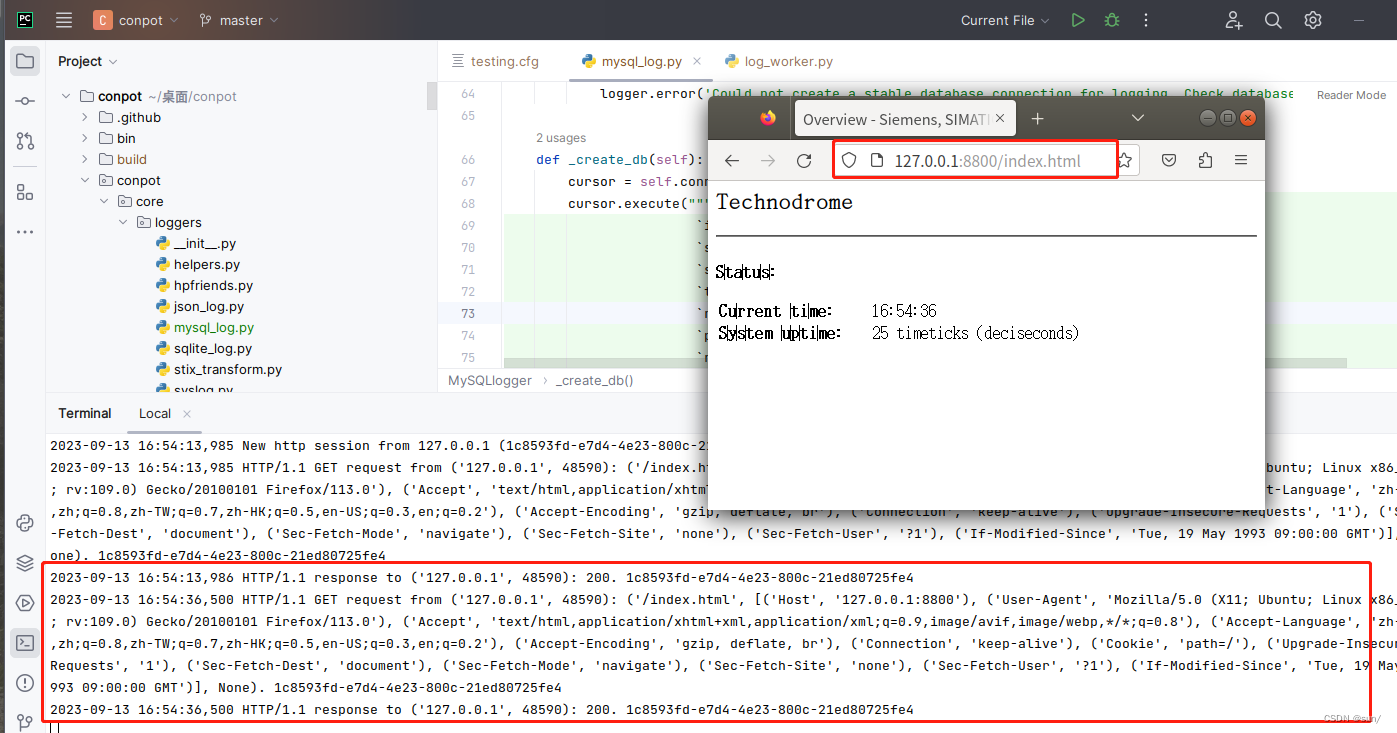
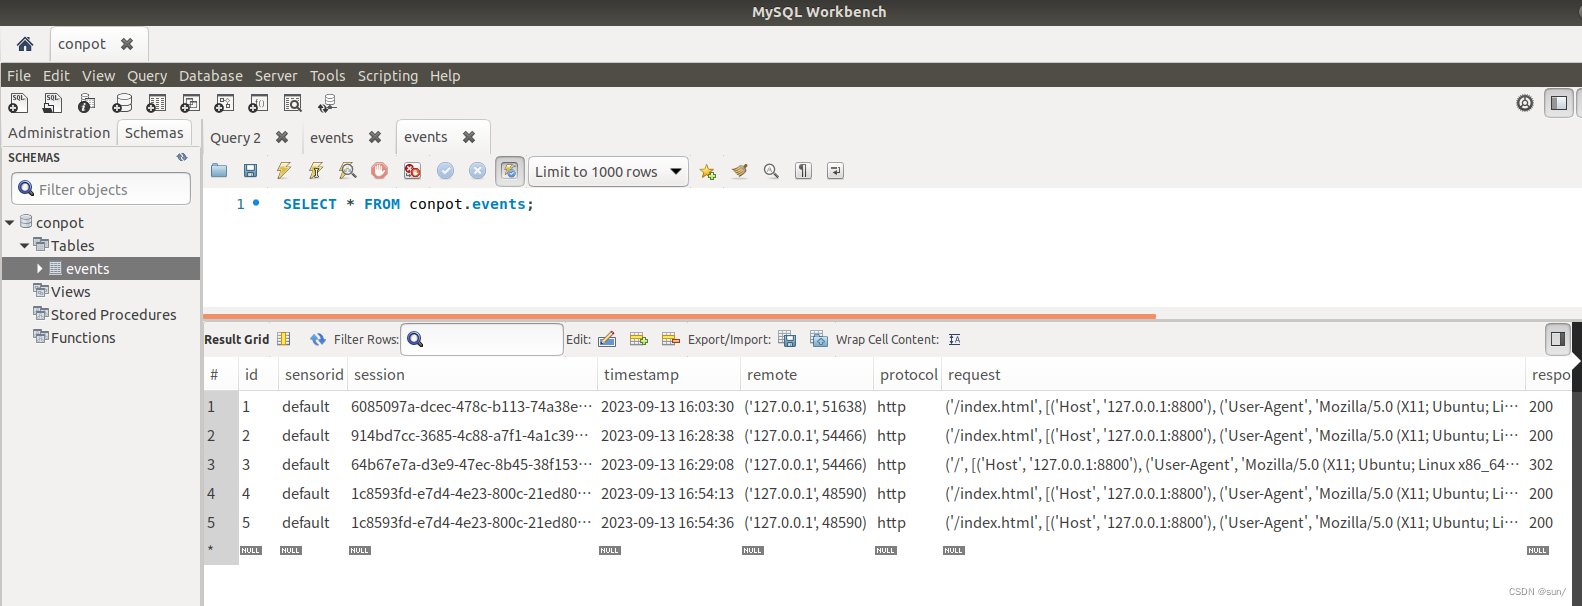
可以在数据库中查看
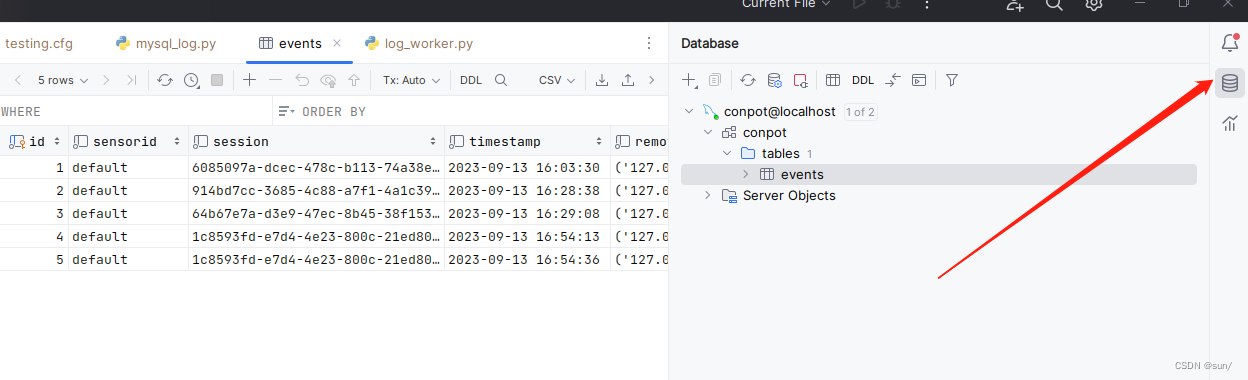
(6)pycharm pro自带数据库GUI
以上是我在pycharm中执行和查看,可以自行在Ubuntu商店安装pycharm


 306
306


 被折叠的 条评论
为什么被折叠?
被折叠的 条评论
为什么被折叠?
 到【灌水乐园】发言


