


准备工作
创建maven项目

添加依赖
在pom.xml文件中加入
<?xml version="1.0" encoding="UTF-8"?>
<project xmlns="http://maven.apache.org/POM/4.0.0"
         xmlns:xsi="http://www.w3.org/2001/XMLSchema-instance"
         xsi:schemaLocation="http://maven.apache.org/POM/4.0.0 http://maven.apache.org/xsd/maven-4.0.0.xsd">
    <modelVersion>4.0.0</modelVersion>

    <groupId>com.learn.test</groupId>
    <artifactId>HBase</artifactId>
    <version>1.0-SNAPSHOT</version>

    <properties>
        <maven.compiler.source>8</maven.compiler.source>
        <maven.compiler.target>8</maven.compiler.target>
    </properties>
    <dependencies>
        <dependency>
            <groupId>org.apache.hbase</groupId>
            <artifactId>hbase-client</artifactId>
            <version>2.4.1</version>
        </dependency>
        <dependency>
            <groupId>junit</groupId>
            <artifactId>junit</artifactId>
            <version>4.12</version>
            <scope>test</scope>
        </dependency>
        <dependency>
            <groupId>org.testng</groupId>
            <artifactId>testng</artifactId>
            <version>6.14.2</version>
            <scope>test</scope>
        </dependency>
        <dependency>
            <groupId>commons-io</groupId>
            <artifactId>commons-io</artifactId>
            <version>2.6</version>
        </dependency>
    </dependencies>

    <build>
        <plugins>
            <plugin>
                <groupId>org.apache.maven.plugins</groupId>
                <artifactId>maven-compiler-plugin</artifactId>
                <version>3.1</version>
                <configuration>
                    <target>1.8</target>
                    <source>1.8</source>
                </configuration>
            </plugin>
        </plugins>
    </build>
</project>
等待它安装
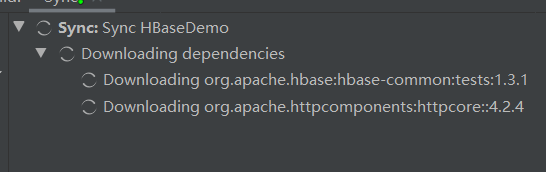
完成状态

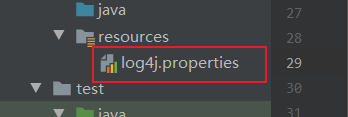
在resource下创建log文件,便于查看错误
log4j.rootLogger=INFO, stdout
log4j.appender.stdout=org.apache.log4j.ConsoleAppender
log4j.appender.stdout.layout=org.apache.log4j.PatternLayout
log4j.appender.stdout.layout.ConversionPattern=%d %p [%c] - %m%n
log4j.appender.logfile=org.apache.log4j.FileAppender
log4j.appender.logfile.File=target/spring.log
log4j.appender.logfile.layout=org.apache.log4j.PatternLayout
log4j.appender.logfile.layout.ConversionPattern=%d %p [%c] - %m%n
API操作
所需要的包
import org.apache.hadoop.conf.Configuration;
import org.apache.hadoop.hbase.Cell;
import org.apache.hadoop.hbase.HBaseConfiguration;
import org.apache.hadoop.hbase.TableName;
import org.apache.hadoop.hbase.client.*;
import org.apache.hadoop.hbase.util.Bytes;
import org.testng.annotations.AfterTest;
import org.testng.annotations.BeforeTest;
import org.testng.annotations.Test;

import java.io.IOException;
import java.util.List;
创建HBase连接
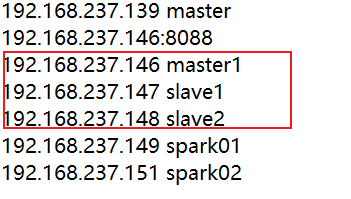
我所用的Hadoop集群是HA集群,主节点不一定是active状态,所以IP地址得相应的改动
  @BeforeTest
    public void beforeTest() throws IOException {
//        1.创建hbase配置
        Configuration configuration = HBaseConfiguration.create();
        configuration.set("hbase.zookeeper.quorum", "192.168.237.146");
        configuration.set("hbase.zookeeper.property.clientPort", "2181");
//        2.创建hbase的连接
        connection = ConnectionFactory.createConnection(configuration);
//        3.创建admin的连接
        admin = connection.getAdmin();
    }
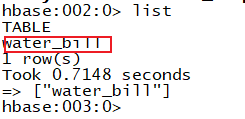
创建HBase表
在创建表之前都得先判断该表是否存在
 @Test
    public void createTableTest() throws IOException {
//        1.判断表是否存在
        TableName tableName = TableName.valueOf("water_bill");
        if (admin.tableExists(tableName)) {
            return;
        }
//        2.构建表描述构建器(构建器设计模式)
        TableDescriptorBuilder tableDescriptorBuilder = TableDescriptorBuilder.newBuilder(tableName);
//        3.构建列族描述构建器
        ColumnFamilyDescriptorBuilder columnFamilyDescriptorBuilder = ColumnFamilyDescriptorBuilder.newBuilder(Bytes.toBytes("info"));
//        4.构建表构建器和列族描述构建器建立联系
        ColumnFamilyDescriptor columnFamilyDescriptor = columnFamilyDescriptorBuilder.build();
        tableDescriptorBuilder.setColumnFamily(columnFamilyDescriptor);
//        5.创建表
        TableDescriptor tableDescriptor = tableDescriptorBuilder.build();
        admin.createTable(tableDescriptor);
    }

删除表
 @Test
    public void deleteTableTest() throws IOException {
//        1.确认表是否存在
        TableName tableName = TableName.valueOf("water_bill");
        if (admin.tableExists(tableName)) {
//            禁用表
            admin.disableTable(tableName);
//            删除表
            admin.deleteTable(tableName);
        }
    }


向表中插入数据
    @Test
    public void putTableTest() throws IOException {
//        1.使用hbase连接获取表
        TableName tableName = TableName.valueOf("water_bill");
        Table table = connection.getTable(tableName);
//        2.构建rowkey,列簇名,列名
//        3.构建put对象
        Put put = new Put(Bytes.toBytes("4944191"));
//        4.添加姓名列
        put.addColumn(Bytes.toBytes("info"), Bytes.toBytes("name"), Bytes.toBytes("张三"));
//        5.使用表执行put操作
        table.put(put);
//        6.关闭表对象
        table.close();
    }

查看数据
    @Test
    public void getableTest() throws IOException {
//        1、使用hbase连接获取表
        TableName tableName = TableName.valueOf("water_bill");
        Table table = connection.getTable(tableName);
//        2、构建rowkey、列簇名、列名
//        3、构建get对象
        Get get = new Get(Bytes.toBytes("4944191"));
//        4、执行get请求,获取result对象
        Result result = table.get(get);
//        5、获取所有的单元格
        List<Cell> cellList = result.listCells();
        for (Cell cell : cellList) {
//          获取单元格的列簇名
            String cf = Bytes.toString(cell.getFamilyArray(), cell.getFamilyOffset(), cell.getFamilyLength());
//          获取单元格的列名
            String cn = Bytes.toString(cell.getQualifierArray(), cell.getQualifierOffset(), cell.getQualifierLength());
//          获取单元格的值
            String value = Bytes.toString(cell.getValueArray(), cell.getValueOffset(), cell.getValueLength());
            System.out.println(cf + ":" + cn + "->" + value);
        }
//        6、关闭表对象
        table.close();
    }


过滤器操作
数据得自己创建,用之前的插入命令多操作几次就行
    @Test
    public void scanFilterTest() throws IOException {
//        1.判断表是否存在
        Table table = connection.getTable(tableName);
//        2.构建scanFilter对象
        Scan scan = new Scan();
//        3.构建过滤器,需要构建两个日期范围的过滤器
//        开始日期
        SingleColumnValueFilter startFilter = new SingleColumnValueFilter(
                Bytes.toBytes("info"),//列族
                Bytes.toBytes("record_date"),//列名
                CompareOperator.GREATER_OR_EQUAL,//比较器
                new BinaryComparator(Bytes.toBytes("2020-06-01"))//比较表达式
        );
//          结束日期过滤器
        SingleColumnValueFilter endFilter = new SingleColumnValueFilter(
                Bytes.toBytes("info"),//列族
                Bytes.toBytes("record_date"),//列名
                CompareOperator.LESS_OR_EQUAL,//比较器
                new BinaryComparator(Bytes.toBytes("2020-06-31"))//比较表达式
        );
//        4.构建过滤器列表
        FilterList filterList = new FilterList(
                FilterList.Operator.MUST_PASS_ALL,//and操作
                startFilter,
                endFilter
        );

//        5.设置scan扫描器的过滤器
        scan.setFilter(filterList);
//        6.通过表的执行结果
        ResultScanner resultScanner = table.getScanner(scan);
//        7.通过执行结果获取迭代器
        Iterator<Result> resultIterator = resultScanner.iterator();
//        8.迭代打印result
        while (resultIterator.hasNext()){
            Result result = resultIterator.next();//获取result
            byte[] rowkey = result.getRow();
            System.out.println("rowkey->" +Bytes.toString(rowkey));
//        5、获取所有的单元格
            List<Cell> cellList = result.listCells();
            for (Cell cell : cellList) {
//          获取单元格的列簇名
                String cf = Bytes.toString(cell.getFamilyArray(), cell.getFamilyOffset(), cell.getFamilyLength());
//          获取单元格的列名
                String cn = Bytes.toString(cell.getQualifierArray(), cell.getQualifierOffset(), cell.getQualifierLength());
//          获取单元格的值
                String value = Bytes.toString(cell.getValueArray(), cell.getValueOffset(), cell.getValueLength());
                System.out.println(cf + ":" + cn + "->" + value);
            }
            System.out.println("===============================================");
        }
//        9.关闭
        resultScanner.close();
        table.close();
    }
查询六月的数据

全部代码
package cn.lenar.hbase;

import org.apache.hadoop.conf.Configuration;
import org.apache.hadoop.hbase.Cell;
import org.apache.hadoop.hbase.HBaseConfiguration;
import org.apache.hadoop.hbase.TableName;
import org.apache.hadoop.hbase.client.*;
import org.apache.hadoop.hbase.util.Bytes;
import org.testng.annotations.AfterTest;
import org.testng.annotations.BeforeTest;
import org.testng.annotations.Test;

import java.io.IOException;
import java.util.List;

/**
 * @author 公羽
 * @time : 2021/4/11 15:02
 * @File : HBase_test.java
 */
public class HBase_test {
    private Connection connection;
    private Admin admin;

    @BeforeTest
    public void beforeTest() throws IOException {
//        1.创建hbase配置
        Configuration configuration = HBaseConfiguration.create();
        configuration.set("hbase.zookeeper.quorum", "192.168.237.146");
        configuration.set("hbase.zookeeper.property.clientPort", "2181");

//        2.创建hbase的连接
        connection = ConnectionFactory.createConnection(configuration);
//        3.创建admin的连接
        admin = connection.getAdmin();
    }

    //        测试创建表
    @Test
    public void createTableTest() throws IOException {
//        1.判断表是否存在
        TableName tableName = TableName.valueOf("water_bill");
        if (admin.tableExists(tableName)) {
            return;
        }
//        2.构建表描述构建器(构建器设计模式)
        TableDescriptorBuilder tableDescriptorBuilder = TableDescriptorBuilder.newBuilder(tableName);
//        3.构建列族描述构建器
        ColumnFamilyDescriptorBuilder columnFamilyDescriptorBuilder = ColumnFamilyDescriptorBuilder.newBuilder(Bytes.toBytes("info"));
//        4.构建表构建器和列族描述构建器建立联系
        ColumnFamilyDescriptor columnFamilyDescriptor = columnFamilyDescriptorBuilder.build();
        tableDescriptorBuilder.setColumnFamily(columnFamilyDescriptor);
//        5.创建表
        TableDescriptor tableDescriptor = tableDescriptorBuilder.build();
        admin.createTable(tableDescriptor);
    }

    //       测试删除表
    @Test
    public void deleteTableTest() throws IOException {
//        1.确认表是否存在
        TableName tableName = TableName.valueOf("water_bill");
        if (admin.tableExists(tableName)) {
//            禁用表
            admin.disableTable(tableName);
//            删除表
            admin.deleteTable(tableName);
        }
    }

    //    测试插入数据
    @Test
    public void putTableTest() throws IOException {
//        1.使用hbase连接获取表
        TableName tableName = TableName.valueOf("water_bill");
        Table table = connection.getTable(tableName);
//        2.构建rowkey,列簇名,列名
//        3.构建put对象
        Put put = new Put(Bytes.toBytes("4944191"));
//        4.添加姓名列
        put.addColumn(Bytes.toBytes("info"), Bytes.toBytes("name"), Bytes.toBytes("张三"));
//        5.使用表执行put操作
        table.put(put);
//        6.关闭表对象
        table.close();
    }

    //测试查看数据
    @Test
    public void getableTest() throws IOException {
//        1、使用hbase连接获取表
        TableName tableName = TableName.valueOf("water_bill");
        Table table = connection.getTable(tableName);
//        2、构建rowkey、列簇名、列名
//        3、构建get对象
        Get get = new Get(Bytes.toBytes("4944191"));
//        4、执行get请求,获取result对象
        Result result = table.get(get);
//        5、获取所有的单元格
        List<Cell> cellList = result.listCells();
        for (Cell cell : cellList) {
//          获取单元格的列簇名
            String cf = Bytes.toString(cell.getFamilyArray(), cell.getFamilyOffset(), cell.getFamilyLength());
//          获取单元格的列名
            String cn = Bytes.toString(cell.getQualifierArray(), cell.getQualifierOffset(), cell.getQualifierLength());
//          获取单元格的值
            String value = Bytes.toString(cell.getValueArray(), cell.getValueOffset(), cell.getValueLength());
            System.out.println(cf + ":" + cn + "->" + value);
        }
//        6、关闭表对象
        table.close();
    }
    @Test
    public void scanFilterTest() throws IOException {
//        1.判断表是否存在
        Table table = connection.getTable(tableName);
//        2.构建scanFilter对象
        Scan scan = new Scan();
//        3.构建过滤器,需要构建两个日期范围的过滤器
//        开始日期
        SingleColumnValueFilter startFilter = new SingleColumnValueFilter(
                Bytes.toBytes("info"),//列族
                Bytes.toBytes("record_date"),//列名
                CompareOperator.GREATER_OR_EQUAL,//比较器
                new BinaryComparator(Bytes.toBytes("2020-06-01"))//比较表达式
        );
//          结束日期过滤器
        SingleColumnValueFilter endFilter = new SingleColumnValueFilter(
                Bytes.toBytes("info"),//列族
                Bytes.toBytes("record_date"),//列名
                CompareOperator.LESS_OR_EQUAL,//比较器
                new BinaryComparator(Bytes.toBytes("2020-06-31"))//比较表达式
        );
//        4.构建过滤器列表
        FilterList filterList = new FilterList(
                FilterList.Operator.MUST_PASS_ALL,//and操作
                startFilter,
                endFilter
        );

//        5.设置scan扫描器的过滤器
        scan.setFilter(filterList);
//        6.通过表的执行结果
        ResultScanner resultScanner = table.getScanner(scan);
//        7.通过执行结果获取迭代器
        Iterator<Result> resultIterator = resultScanner.iterator();
//        8.迭代打印result
        while (resultIterator.hasNext()){
            Result result = resultIterator.next();//获取result
            byte[] rowkey = result.getRow();
            System.out.println("rowkey->" +Bytes.toString(rowkey));
//        5、获取所有的单元格
            List<Cell> cellList = result.listCells();
            for (Cell cell : cellList) {
//          获取单元格的列簇名
                String cf = Bytes.toString(cell.getFamilyArray(), cell.getFamilyOffset(), cell.getFamilyLength());
//          获取单元格的列名
                String cn = Bytes.toString(cell.getQualifierArray(), cell.getQualifierOffset(), cell.getQualifierLength());
//          获取单元格的值
                String value = Bytes.toString(cell.getValueArray(), cell.getValueOffset(), cell.getValueLength());
                System.out.println(cf + ":" + cn + "->" + value);
            }
            System.out.println("===============================================");
        }
//        9.关闭
        resultScanner.close();
        table.close();
    }
    @AfterTest
    public void afterTest() throws IOException {
//        4.关闭admin
        admin.close();
        connection.close();
    }
}
注意事项
遇到的延时问题的解决办法
得在windows中C:\Windows\System32\drivers\etc下加入IP映射


 1219
1219


 被折叠的 条评论
为什么被折叠?
被折叠的 条评论
为什么被折叠?
 到【灌水乐园】发言


