


原生h5使用gulp自动编译打包js/css/html/静态资源
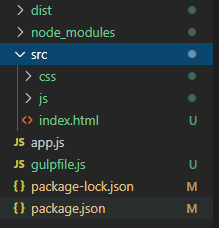
目录结构:
需要安装的包以及运行命令如package.json:
注意哦,paython环境
{
  "name": "testh5simple",
  "version": "1.0.0",
  "description": "",
  "main": "app.js",
  "scripts": {
    "test": "echo \"Error: no test specified\" && exit 1",
    "dev": "gulp & cd dist/dev & python -m http.server 8008"
  },
  "author": "",
  "license": "ISC",
  "dependencies": {
    "express": "^4.17.1",
    "del": "5.1.0",
    "gulp": "4.0.2",
    "gulp-minify-css": "1.2.4",
    "gulp-minify-html": "1.0.6",
    "gulp-px2rem-plugin": "0.4.0",
    "gulp-replace": "1.0.0",
    "gulp-uglify": "3.0.2"
  }
}
gulpfile.js:
const gulp = require('gulp')
const minifyCss = require('gulp-minify-css')   //css压缩
const uglify = require('gulp-uglify')   //js压缩
const minifyHtml = require('gulp-minify-html')   //js压缩
const px2rem = require('gulp-px2rem-plugin')
const gulpReplace = require('gulp-replace')
const del = require('del')
const fs = require('fs')
exports.default = gulp.series(function (cb) {
  del(['dist'])
  setTimeout(cb, 2000)
},
// 打包出测试服务器用的代码
function(){
  return gulp.src('src/**/*.css')      //设置css
  // .pipe(px2rem({width_design: 750, pieces: 10, ignore_selector: ['.loading-img']}))
  .pipe(px2rem({width_design: 750, pieces: 10, }))
  .pipe(minifyCss())                    //压缩css文件
  .pipe(gulp.dest('dist/dev'))            //输出文件目录
}, function(){
  return gulp.src('src/**/*.js')
  .pipe(uglify())                        //压缩Js
  .pipe(gulp.dest('dist/dev'))
}, function(){
  return gulp.src('src/**/*.html')
  .pipe(gulpReplace(/\.((?:js))\?noCache=[^"]+?">/g, '.$1?noCache=' + new Date().getTime() + '">'))
  .pipe(gulpReplace(/\.((?:css))\?noCache=[^"]+?"/g, '.$1?noCache=' + new Date().getTime() + '"'))
  .pipe(gulpReplace(/^.+jsonFormat\..+$/mg, '')) // 删除模拟数据
  .pipe(gulpReplace(/^.+mock\..+$/mg, '')) // 删除模拟数据
  .pipe(minifyHtml())                   //压缩html代码
  .pipe(gulp.dest('dist/dev'))
}, function(){
  return gulp.src(['src/**/*.*', '!src/**/*.js', '!src/**/*.css', '!src/**/*.html'])  //除js,css,html之外的直接移动过去
  .pipe(gulp.dest('dist/dev'))
},
运行命令:
npm run dev

浏览器打开:

这里需要安装paython
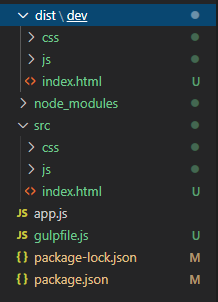
打包后的目录:
看下里面的js:

css:


 695
695


 被折叠的 条评论
为什么被折叠?
被折叠的 条评论
为什么被折叠?
 到【灌水乐园】发言


