


一、创建工程
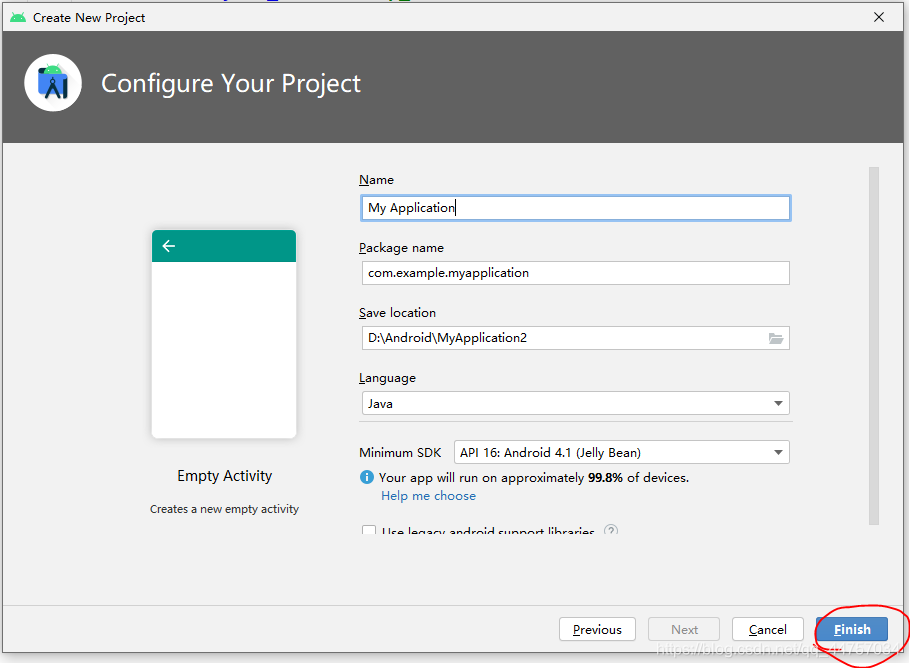
1、创建一个空白工程

2、随便起一个名称
3、设置网络连接权限
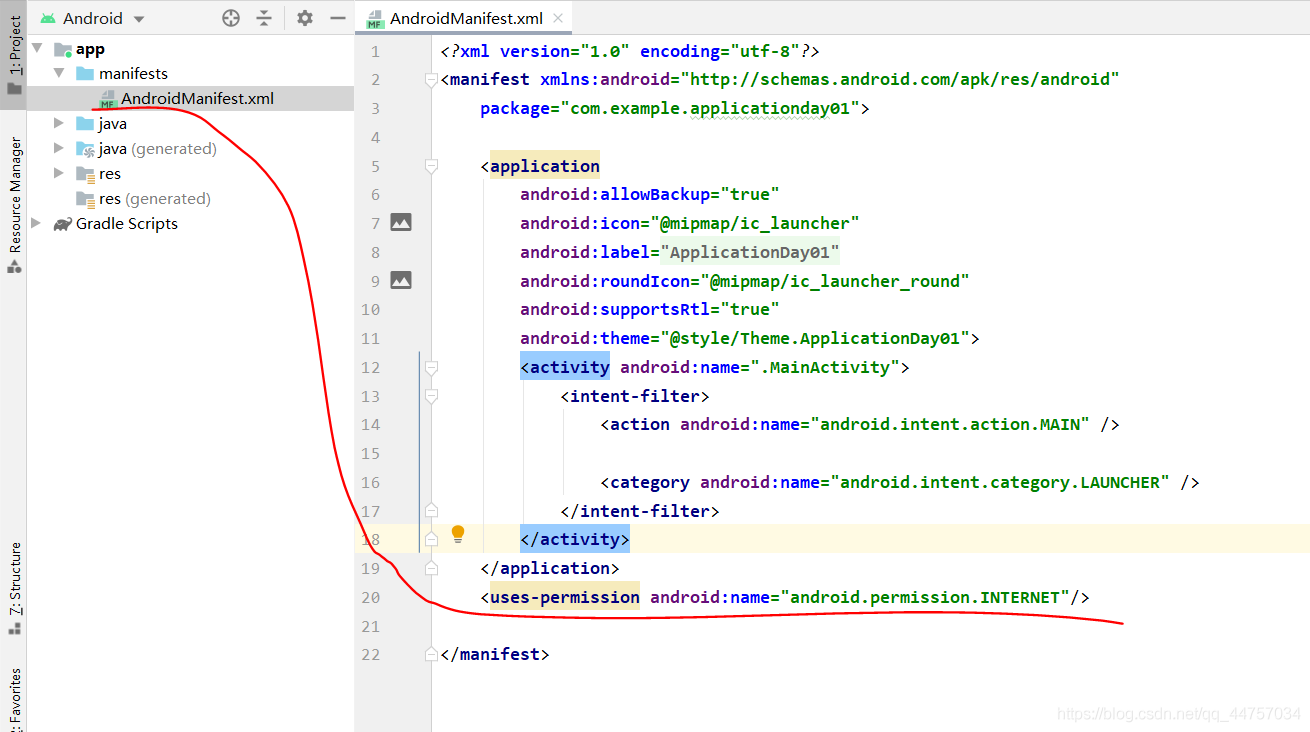
<uses-permission android:name="android.permission.INTERNET" />
二、引入Mysql驱动包
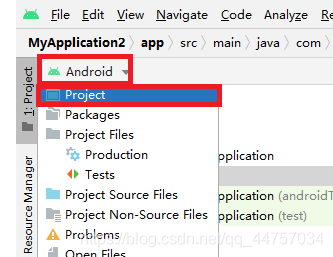
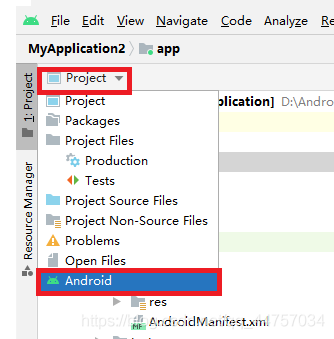
1、切换到普通Java工程
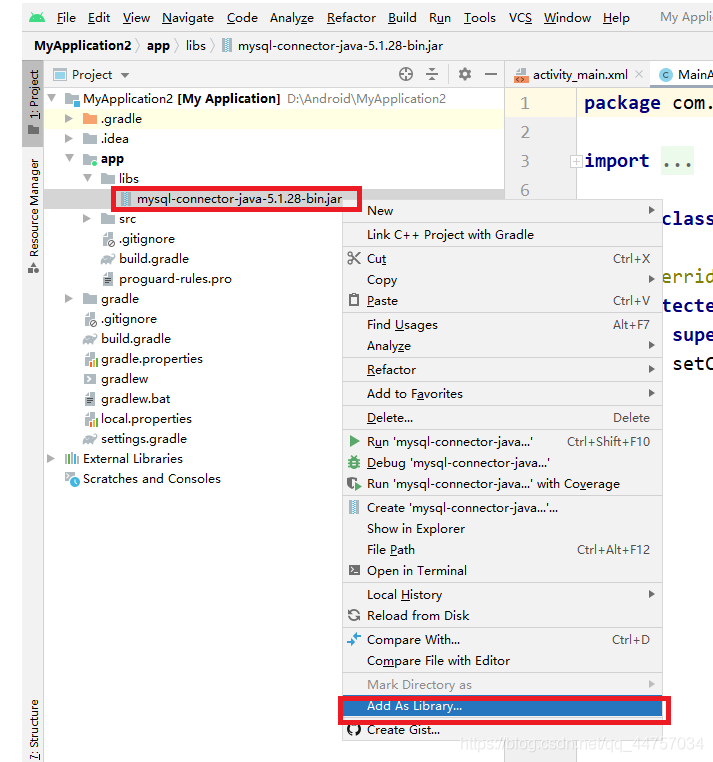
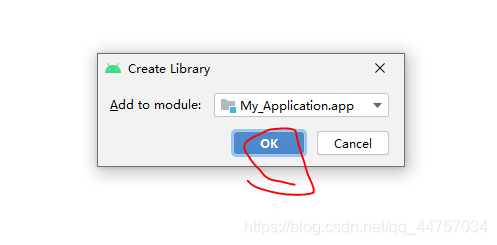
2、在libs当中引入MySQL的jar包
将mysql的驱动包复制到libs当中
三、编写数据库和dao以及JDBC相关代码
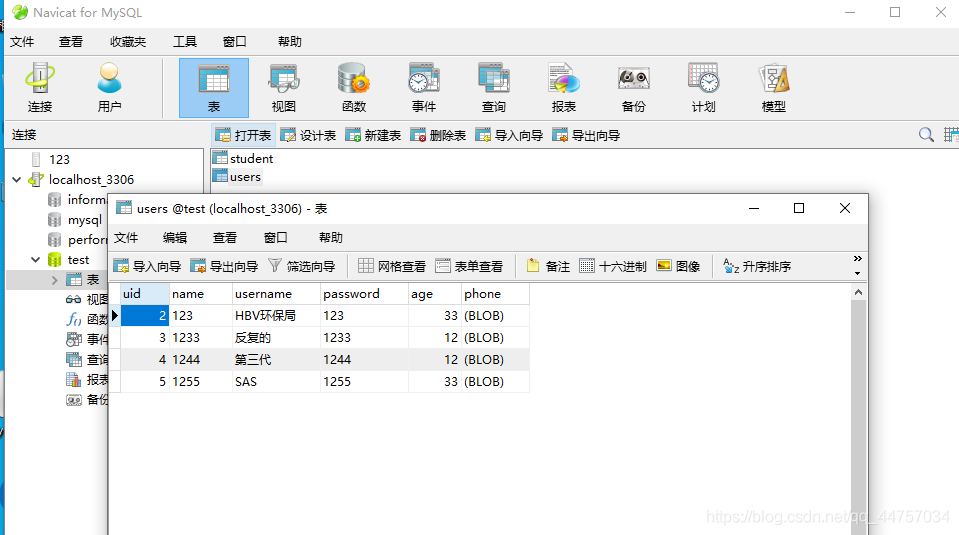
1、在数据库当中创建表
SQL语句
/*
Navicat MySQL Data Transfer

Source Server         : localhost_3306
Source Server Version : 50562
Source Host           : localhost:3306
Source Database       : test

Target Server Type    : MYSQL
Target Server Version : 50562
File Encoding         : 65001

Date: 2021-05-10 17:28:36
*/

SET FOREIGN_KEY_CHECKS=0;

-- ----------------------------
-- Table structure for `student`
-- ----------------------------
DROP TABLE IF EXISTS `student`;
CREATE TABLE `student` (
  `sid` int(11) NOT NULL AUTO_INCREMENT,
  `sname` varchar(255) NOT NULL,
  `sage` int(11) NOT NULL,
  `address` varchar(255) NOT NULL,
  PRIMARY KEY (`sid`)
) ENGINE=InnoDB AUTO_INCREMENT=3 DEFAULT CHARSET=utf8;

-- ----------------------------
-- Records of student
-- ----------------------------
INSERT INTO `student` VALUES ('1', 'andi', '21', '21212');
INSERT INTO `student` VALUES ('2', 'a', '2121', '2121');

-- ----------------------------
-- Table structure for `users`
-- ----------------------------
DROP TABLE IF EXISTS `users`;
CREATE TABLE `users` (
  `uid` int(11) NOT NULL AUTO_INCREMENT,
  `name` varchar(255) NOT NULL,
  `username` varchar(255) NOT NULL,
  `password` varchar(255) NOT NULL,
  `age` int(255) NOT NULL,
  `phone` longblob NOT NULL,
  PRIMARY KEY (`uid`)
) ENGINE=InnoDB AUTO_INCREMENT=6 DEFAULT CHARSET=utf8;

-- ----------------------------
-- Records of users
-- ----------------------------
INSERT INTO `users` VALUES ('2', '123', 'HBV环保局', '123', '33', 0x3133333333333333333333);
INSERT INTO `users` VALUES ('3', '1233', '反复的', '1233', '12', 0x3132333333333333333333);
INSERT INTO `users` VALUES ('4', '1244', '第三代', '1244', '12', 0x3133333333333333333333);
INSERT INTO `users` VALUES ('5', '1255', 'SAS', '1255', '33', 0x3133333333333333333333);
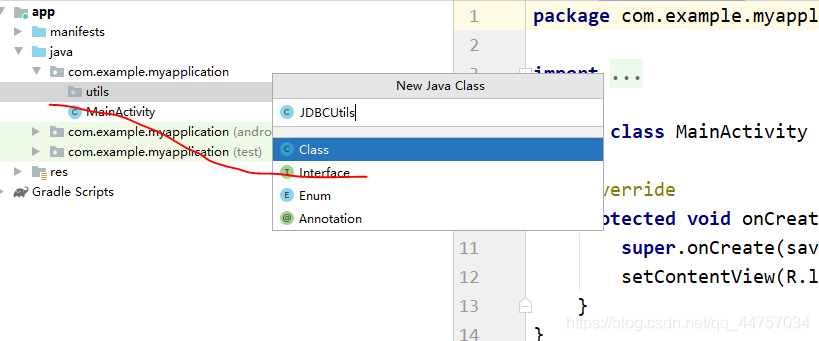
2、在Android Studio当中创建JDBCUtils类
切换会Android视图
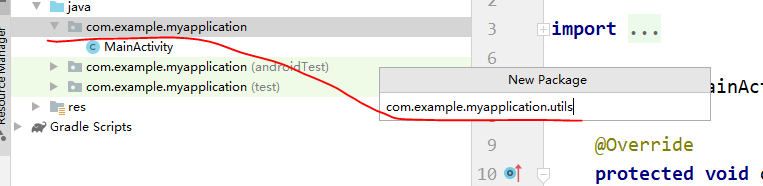
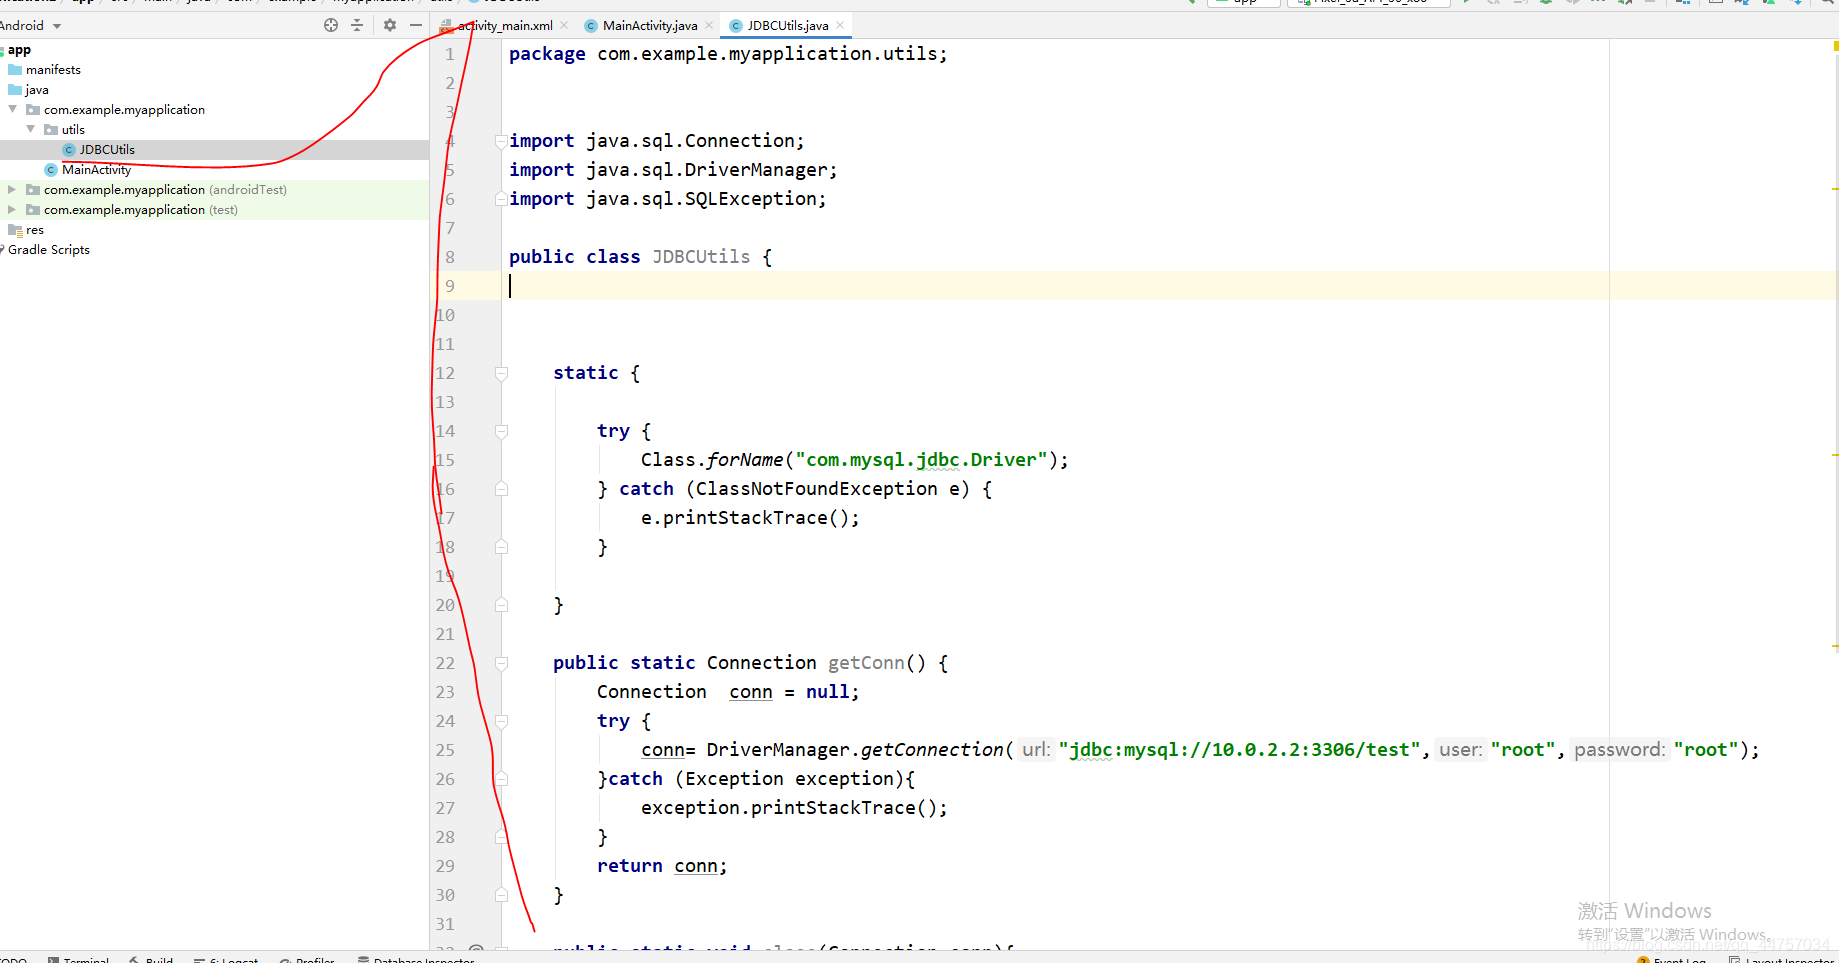
注意链接数据库的地址是:jdbc:mysql://10.0.2.2:3306/test
package com.example.myapplication.utils;


import java.sql.Connection;
import java.sql.DriverManager;
import java.sql.SQLException;

public class JDBCUtils {


    static {

        try {
            Class.forName("com.mysql.jdbc.Driver");
        } catch (ClassNotFoundException e) {
            e.printStackTrace();
        }

    }

    public static Connection getConn() {
        Connection  conn = null;
        try {
            conn= DriverManager.getConnection("jdbc:mysql://10.0.2.2:3306/test","root","root");
        }catch (Exception exception){
            exception.printStackTrace();
        }
        return conn;
    }

    public static void close(Connection conn){
        try {
            conn.close();
        } catch (SQLException throwables) {
            throwables.printStackTrace();
        }
    }

}
3、创建User实体类
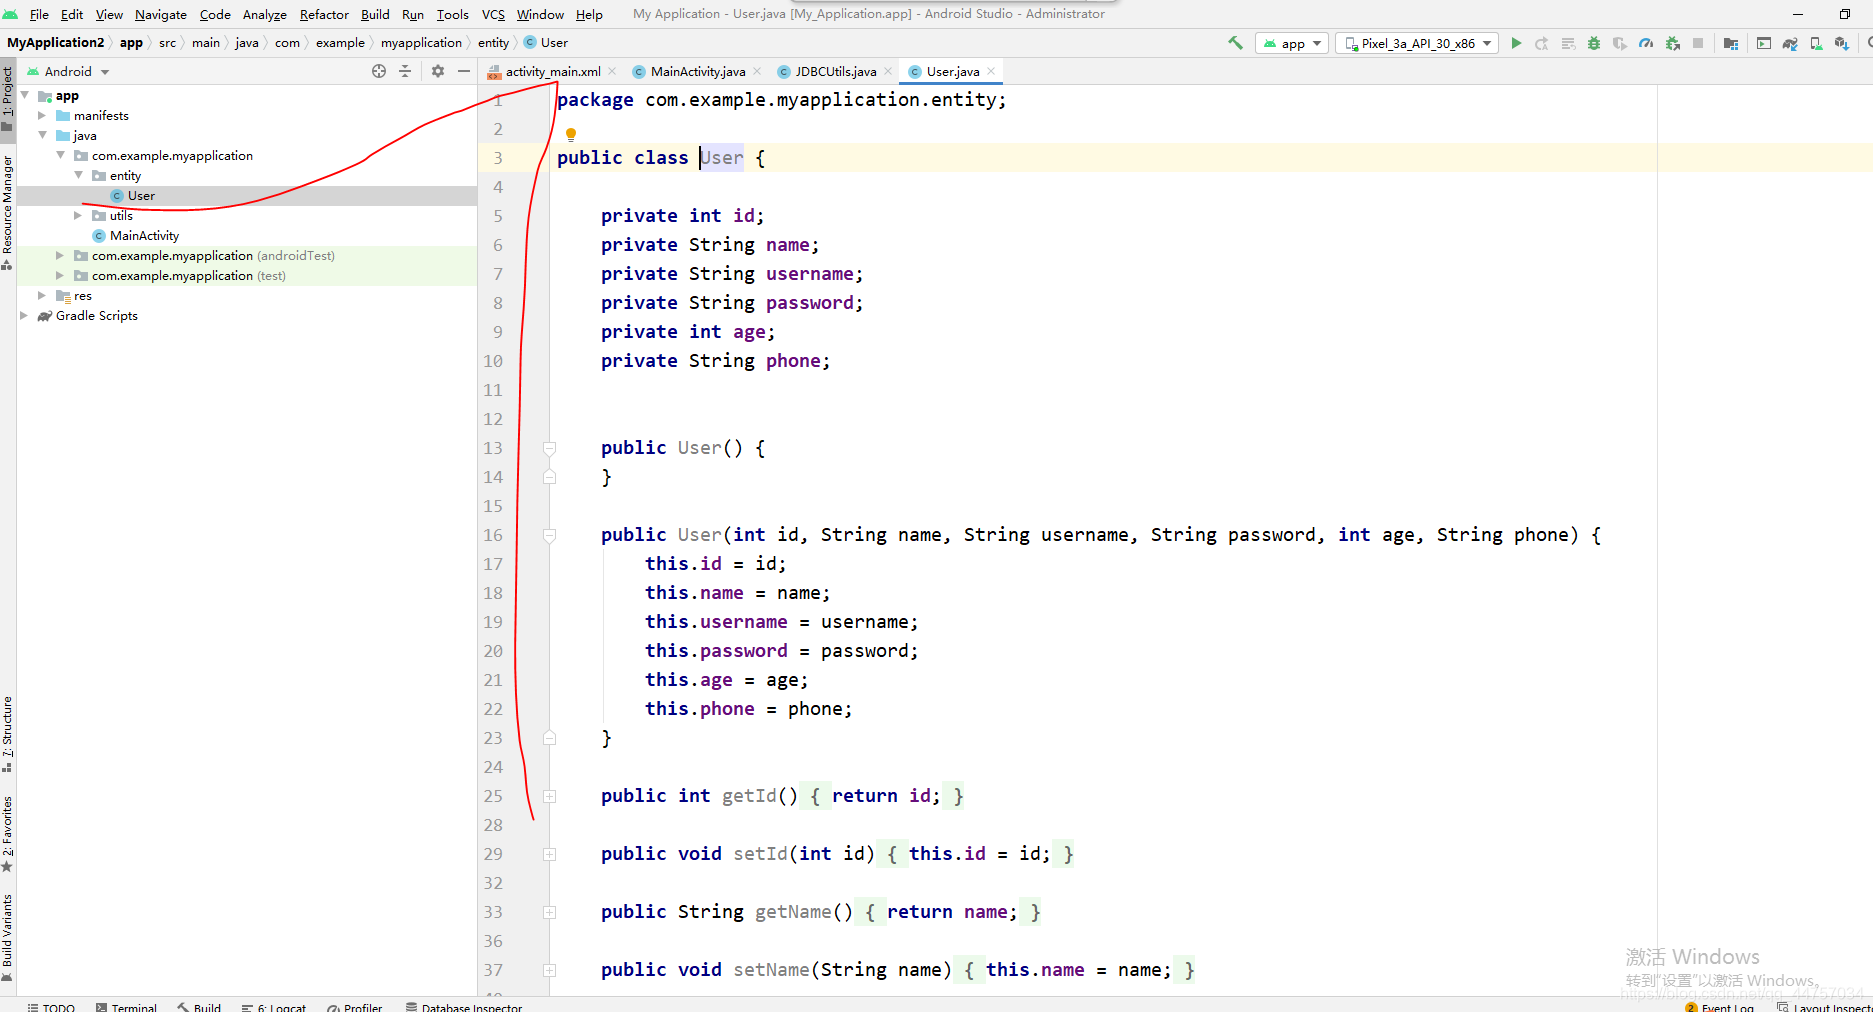
package com.example.myapplication.entity;

public class User {

    private int id;
    private String name;
    private String username;
    private String password;
    private int age;
    private String phone;


    public User() {
    }

    public User(int id, String name, String username, String password, int age, String phone) {
        this.id = id;
        this.name = name;
        this.username = username;
        this.password = password;
        this.age = age;
        this.phone = phone;
    }

    public int getId() {
        return id;
    }

    public void setId(int id) {
        this.id = id;
    }

    public String getName() {
        return name;
    }

    public void setName(String name) {
        this.name = name;
    }

    public String getUsername() {
        return username;
    }

    public void setUsername(String username) {
        this.username = username;
    }

    public String getPassword() {
        return password;
    }

    public void setPassword(String password) {
        this.password = password;
    }

    public int getAge() {
        return age;
    }

    public void setAge(int age) {
        this.age = age;
    }

    public String getPhone() {
        return phone;
    }

    public void setPhone(String phone) {
        this.phone = phone;
    }
}
4、创建dao层和UserDao

package com.example.myapplication.dao;

import com.example.myapplication.entity.User;
import com.example.myapplication.utils.JDBCUtils;

import java.sql.Connection;
import java.sql.PreparedStatement;
import java.sql.ResultSet;
import java.sql.SQLException;

public class UserDao {


    public boolean login(String name,String password){

        String sql = "select * from users where name = ? and password = ?";

        Connection  con = JDBCUtils.getConn();

        try {
            PreparedStatement pst=con.prepareStatement(sql);

            pst.setString(1,name);
            pst.setString(2,password);

            if(pst.executeQuery().next()){

                return true;

            }

        } catch (SQLException throwables) {
            throwables.printStackTrace();
        }finally {
            JDBCUtils.close(con);
        }

        return false;
    }

    public boolean register(User user){

        String sql = "insert into users(name,username,password,age,phone) values (?,?,?,?,?)";

        Connection  con = JDBCUtils.getConn();

        try {
            PreparedStatement pst=con.prepareStatement(sql);

            pst.setString(1,user.getName());
            pst.setString(2,user.getUsername());
            pst.setString(3,user.getPassword());
            pst.setInt(4,user.getAge());
            pst.setString(5,user.getPhone());

            int value = pst.executeUpdate();

            if(value>0){
                return true;
            }


        } catch (SQLException throwables) {
            throwables.printStackTrace();
        }finally {
            JDBCUtils.close(con);
        }
        return false;
    }

    public User findUser(String name){

        String sql = "select * from users where name = ?";

        Connection  con = JDBCUtils.getConn();
        User user = null;
        try {
            PreparedStatement pst=con.prepareStatement(sql);

            pst.setString(1,name);

            ResultSet rs = pst.executeQuery();

            while (rs.next()){

               int id = rs.getInt(0);
               String namedb = rs.getString(1);
               String username = rs.getString(2);
               String passworddb  = rs.getString(3);
               int age = rs.getInt(4);
                String phone = rs.getString(5);
               user = new User(id,namedb,username,passworddb,age,phone);
            }

        } catch (SQLException throwables) {
            throwables.printStackTrace();
        }finally {
            JDBCUtils.close(con);
        }

        return user;
    }


}
四、编写页面和Activity相关代码
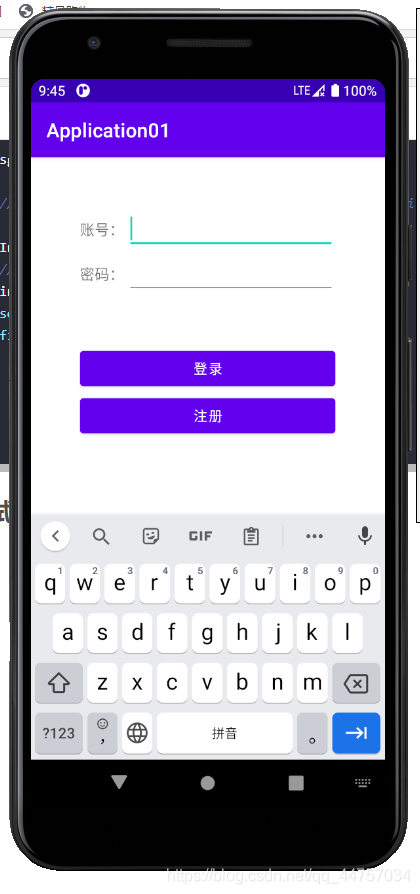
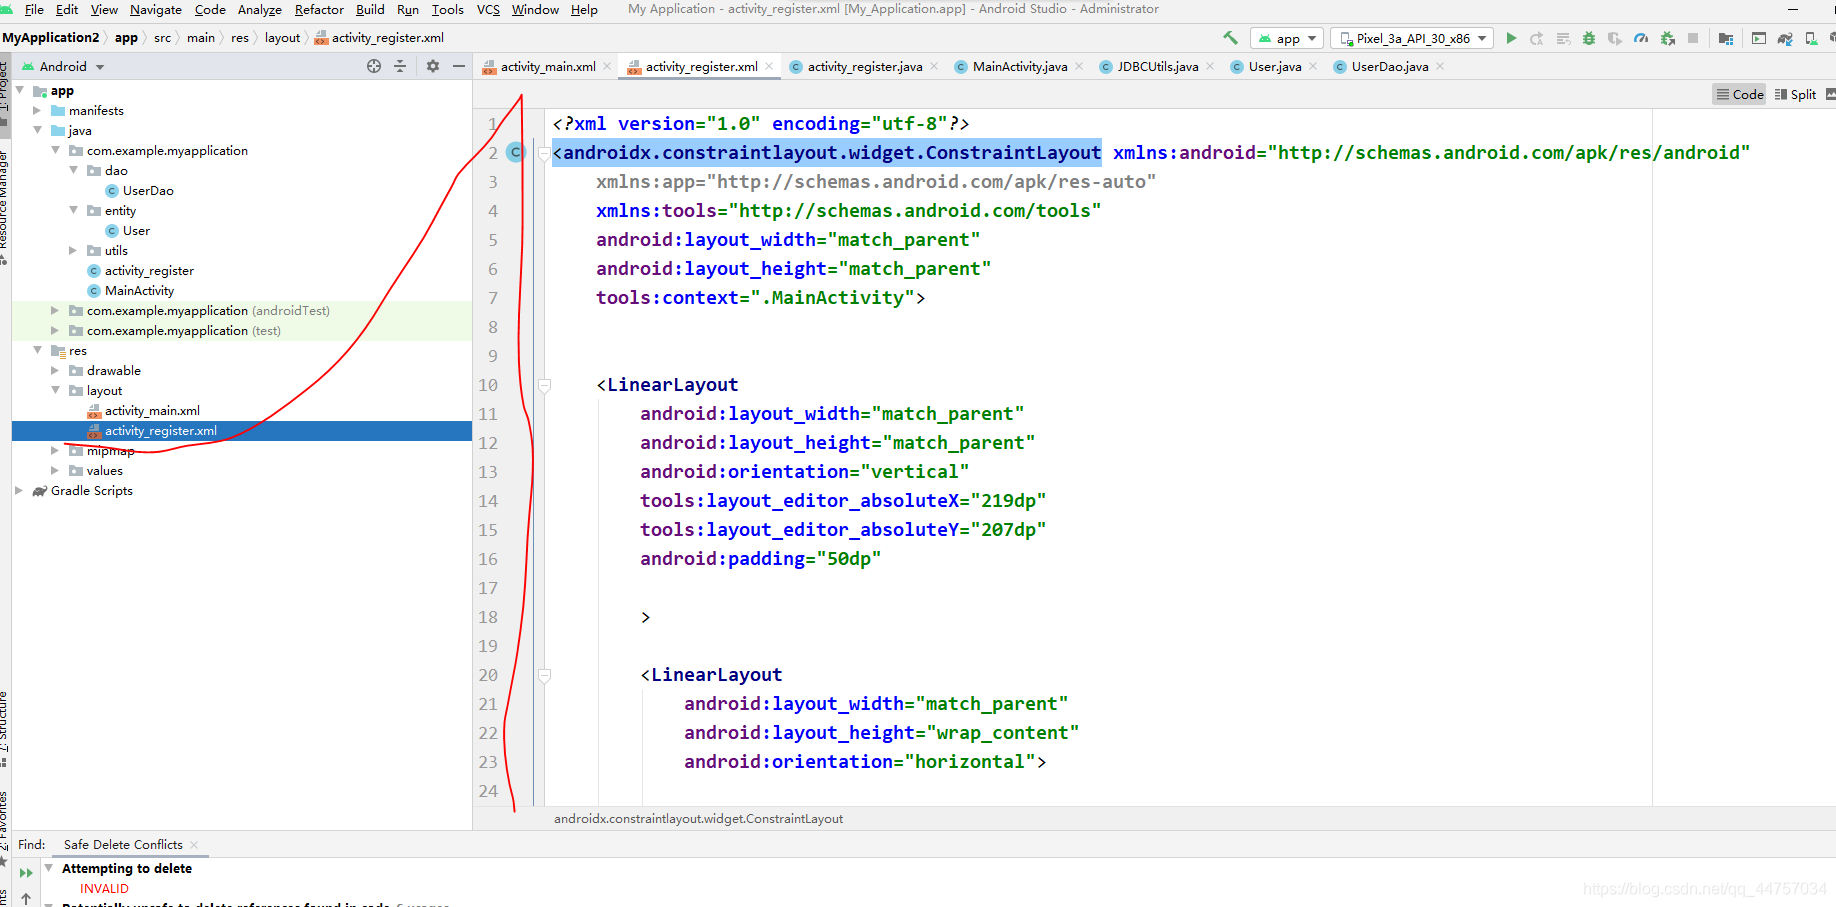
1、编写登录页面
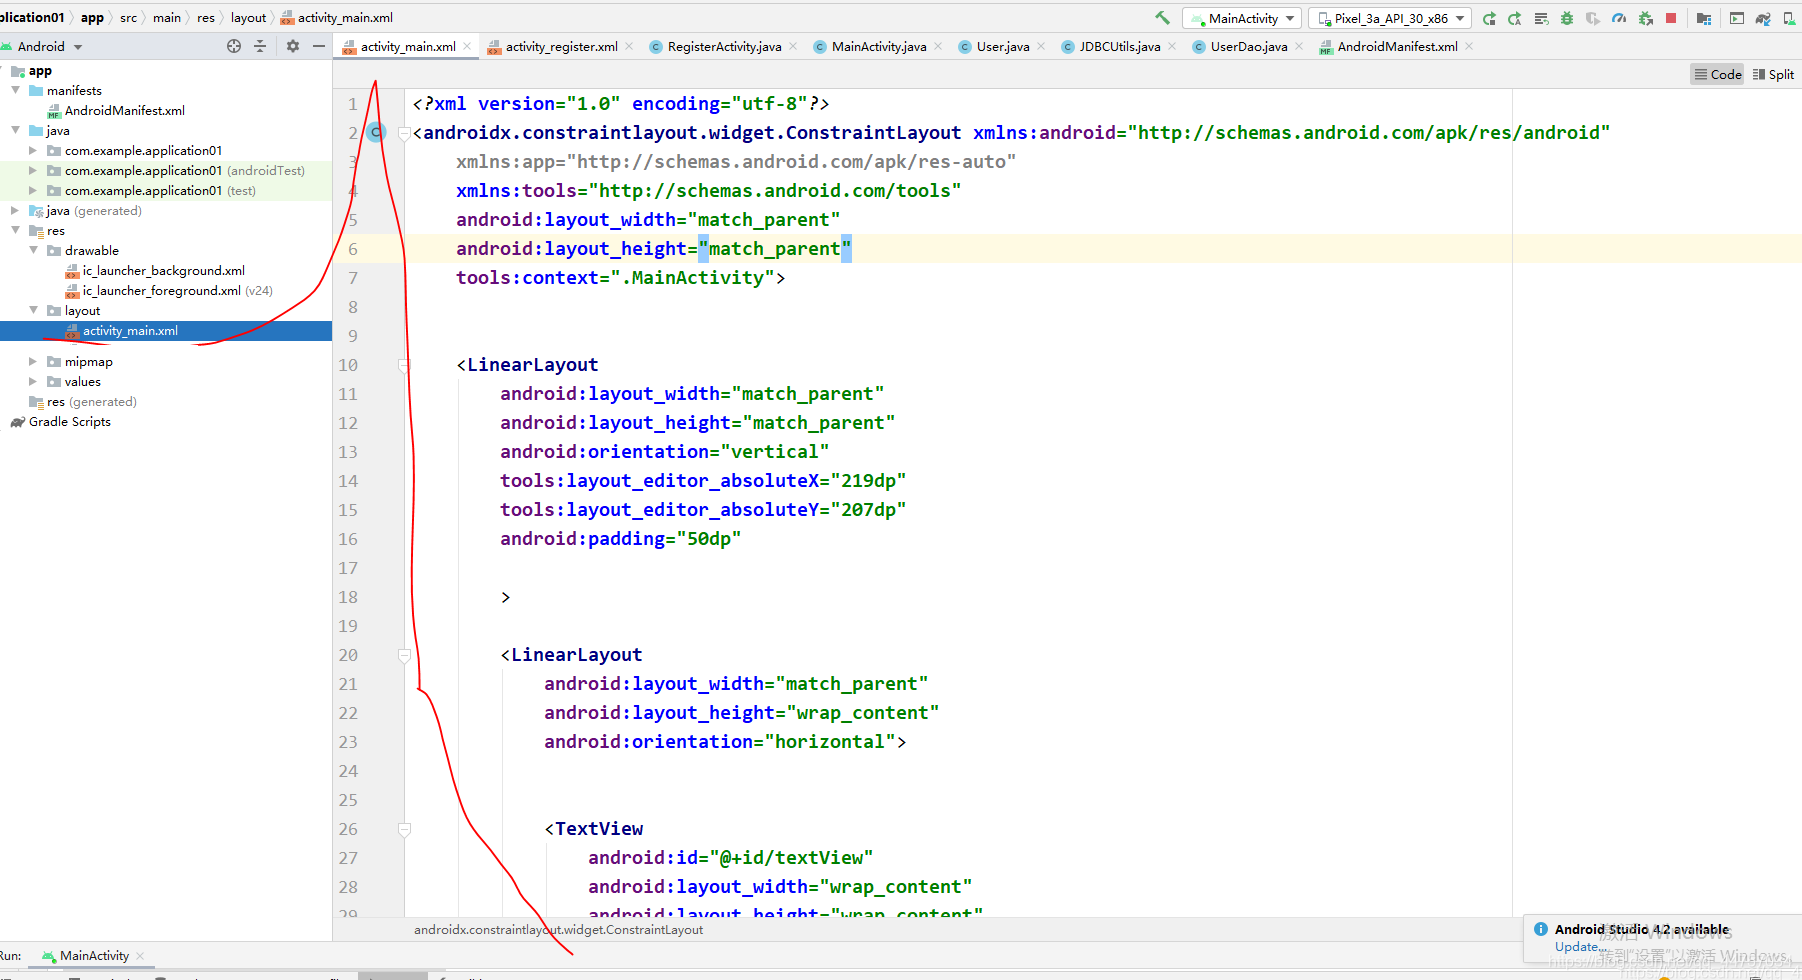
<?xml version="1.0" encoding="utf-8"?>
<androidx.constraintlayout.widget.ConstraintLayout xmlns:android="http://schemas.android.com/apk/res/android"
    xmlns:app="http://schemas.android.com/apk/res-auto"
    xmlns:tools="http://schemas.android.com/tools"
    android:layout_width="match_parent"
    android:layout_height="match_parent"
    tools:context=".MainActivity">


    <LinearLayout
        android:layout_width="match_parent"
        android:layout_height="match_parent"
        android:orientation="vertical"
        tools:layout_editor_absoluteX="219dp"
        tools:layout_editor_absoluteY="207dp"
        android:padding="50dp"

        >

        <LinearLayout
            android:layout_width="match_parent"
            android:layout_height="wrap_content"
            android:orientation="horizontal">


            <TextView
                android:id="@+id/textView"
                android:layout_width="wrap_content"
                android:layout_height="wrap_content"
                android:layout_weight="1"
                android:textSize="15sp"
                android:text="账号:" />

            <EditText
                android:id="@+id/name"
                android:layout_width="wrap_content"
                android:layout_height="wrap_content"
                android:layout_weight="1"
                android:ems="10"
                android:inputType="textPersonName"
                android:text="" />
        </LinearLayout>
        <LinearLayout
            android:layout_width="match_parent"
            android:layout_height="wrap_content"
            android:orientation="horizontal">


            <TextView
                android:id="@+id/textView2"
                android:layout_width="wrap_content"
                android:layout_height="wrap_content"
                android:layout_weight="1"
                android:textSize="15sp"
                android:text="密码:"

                />

            <EditText
                android:id="@+id/password"
                android:layout_width="wrap_content"
                android:layout_height="wrap_content"
                android:layout_weight="1"
                android:ems="10"
                android:inputType="textPersonName"
               />
        </LinearLayout>
        <LinearLayout
            android:layout_width="match_parent"
            android:layout_height="wrap_content"
            android:orientation="horizontal">


        </LinearLayout>

        <Button
            android:layout_marginTop="50dp"
            android:id="@+id/button2"
            android:layout_width="match_parent"
            android:layout_height="wrap_content"
            android:text="登录"
            android:onClick="login"
            />

        <Button
            android:id="@+id/button3"
            android:layout_width="match_parent"
            android:layout_height="wrap_content"
            android:onClick="reg"
            android:text="注册" />
    </LinearLayout>
</androidx.constraintlayout.widget.ConstraintLayout>
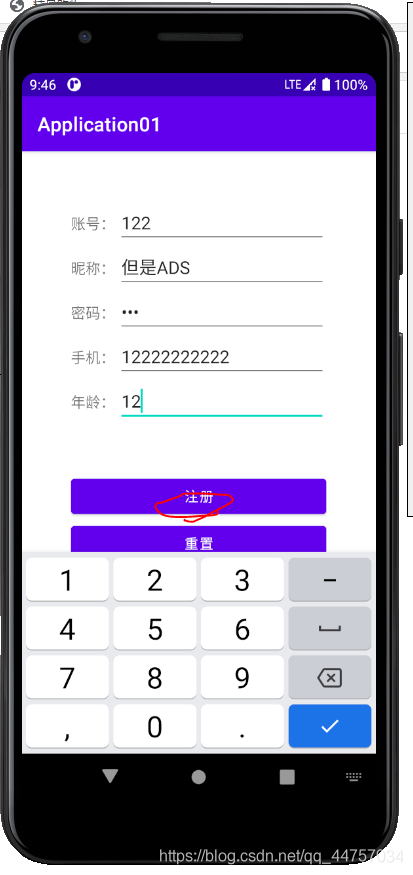
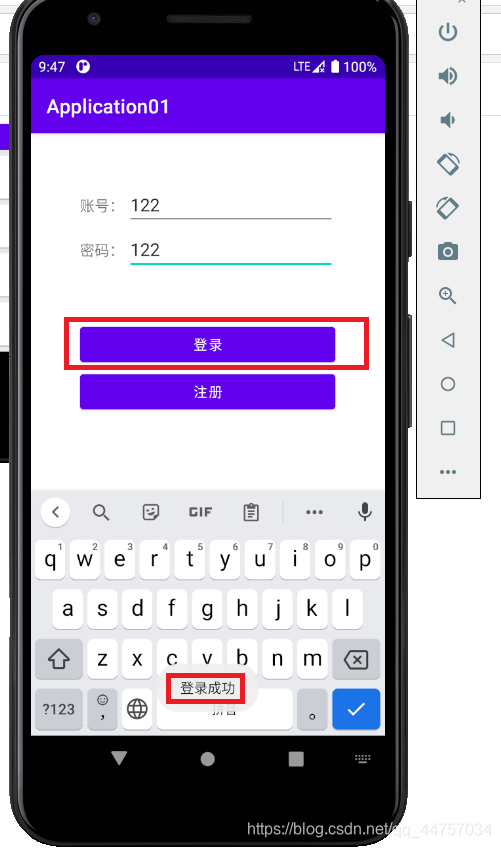
效果
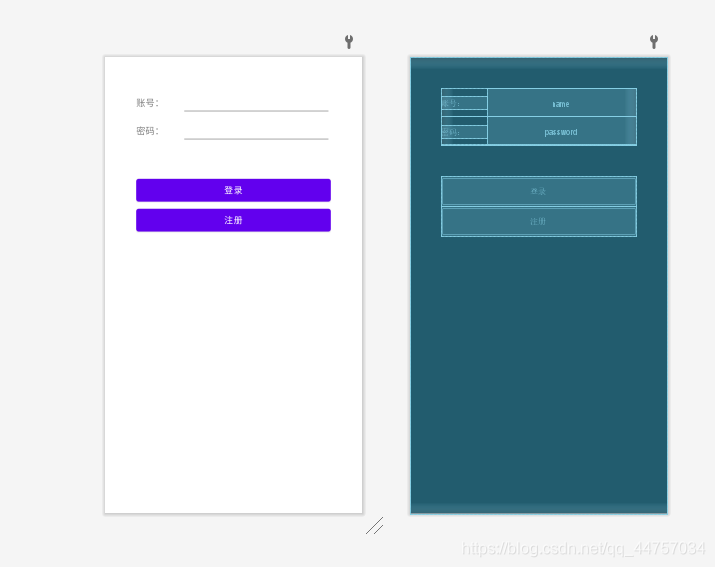
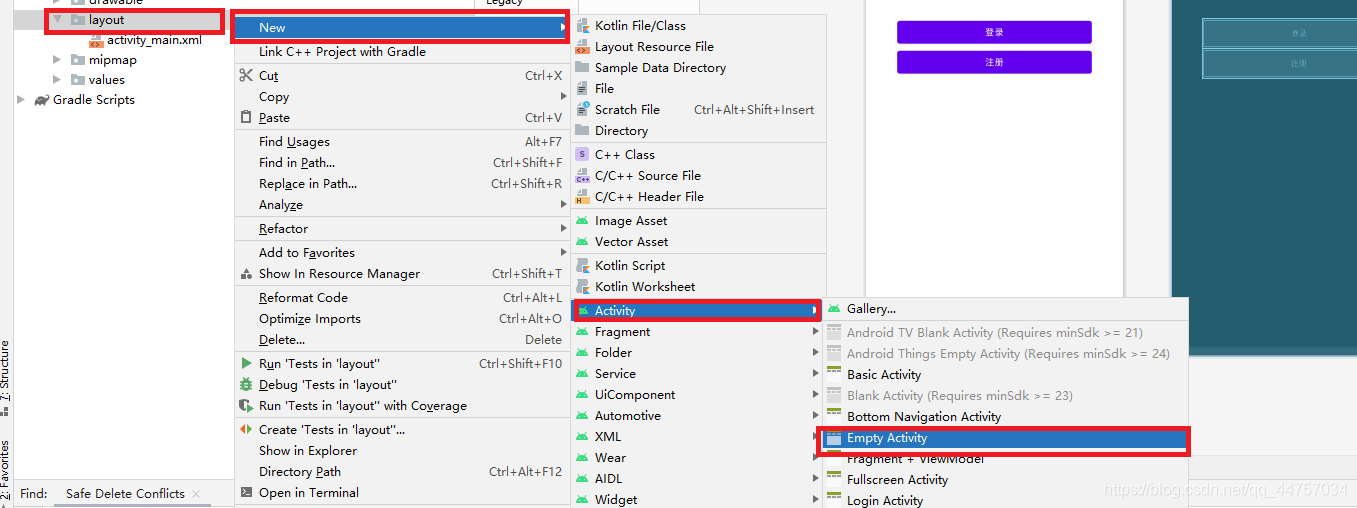
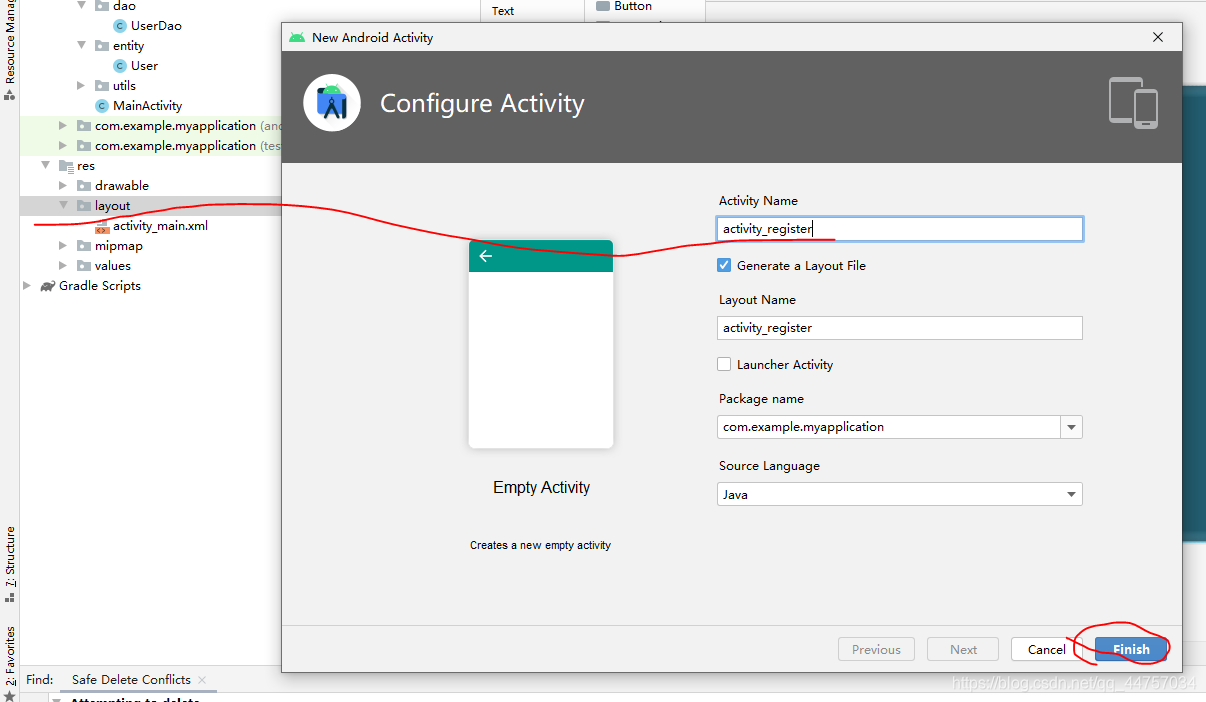
2、编写注册页面代码
<?xml version="1.0" encoding="utf-8"?>
<androidx.constraintlayout.widget.ConstraintLayout xmlns:android="http://schemas.android.com/apk/res/android"
    xmlns:app="http://schemas.android.com/apk/res-auto"
    xmlns:tools="http://schemas.android.com/tools"
    android:layout_width="match_parent"
    android:layout_height="match_parent"
    tools:context=".RegisterActivity">

    <LinearLayout
        android:layout_width="match_parent"
        android:layout_height="match_parent"
        android:orientation="vertical"
        tools:layout_editor_absoluteX="219dp"
        tools:layout_editor_absoluteY="207dp"
        android:padding="50dp"

        >

        <LinearLayout
            android:layout_width="match_parent"
            android:layout_height="wrap_content"
            android:orientation="horizontal">


            <TextView
                android:id="@+id/textView"
                android:layout_width="wrap_content"
                android:layout_height="wrap_content"
                android:layout_weight="1"
                android:textSize="15sp"
                android:text="账号:" />

            <EditText
                android:id="@+id/name"
                android:layout_width="wrap_content"
                android:layout_height="wrap_content"
                android:layout_weight="1"
                android:ems="10"
                android:inputType="textPersonName"
                 />
        </LinearLayout>
        <LinearLayout
            android:layout_width="match_parent"
            android:layout_height="wrap_content"
            android:orientation="horizontal">


            <TextView
                android:layout_width="wrap_content"
                android:layout_height="wrap_content"
                android:layout_weight="1"
                android:textSize="15sp"
                android:text="昵称:" />

            <EditText
                android:id="@+id/username"
                android:layout_width="wrap_content"
                android:layout_height="wrap_content"
                android:layout_weight="1"
                android:ems="10"
                android:inputType="textPersonName"
                />
        </LinearLayout>
        <LinearLayout
            android:layout_width="match_parent"
            android:layout_height="wrap_content"
            android:orientation="horizontal">


            <TextView
                android:id="@+id/textView2"
                android:layout_width="wrap_content"
                android:layout_height="wrap_content"
                android:layout_weight="1"

                android:textSize="15sp"
                android:text="密码:"

                />

            <EditText
                android:id="@+id/password"
                android:layout_width="wrap_content"
                android:layout_height="wrap_content"
                android:layout_weight="1"
                android:ems="10"
                android:inputType="textPassword"
                />
        </LinearLayout>
        <LinearLayout
            android:layout_width="match_parent"
            android:layout_height="wrap_content"
            android:orientation="horizontal">


            <TextView
                android:layout_width="wrap_content"
                android:layout_height="wrap_content"
                android:layout_weight="1"

                android:textSize="15sp"
                android:text="手机:"

                />

            <EditText
                android:id="@+id/phone"
                android:layout_width="wrap_content"
                android:layout_height="wrap_content"
                android:layout_weight="1"
                android:ems="10"
                android:inputType="phone"
                />
        </LinearLayout>
        <LinearLayout
            android:layout_width="match_parent"
            android:layout_height="wrap_content"
            android:orientation="horizontal">


            <TextView
                android:layout_width="wrap_content"
                android:layout_height="wrap_content"
                android:layout_weight="1"

                android:textSize="15sp"
                android:text="年龄:"

                />

            <EditText
                android:id="@+id/age"
                android:layout_width="wrap_content"
                android:layout_height="wrap_content"
                android:layout_weight="1"
                android:ems="10"
                android:inputType="number"
                />
        </LinearLayout>
        <LinearLayout
            android:layout_width="match_parent"
            android:layout_height="wrap_content"
            android:orientation="horizontal">


        </LinearLayout>

        <Button
            android:layout_marginTop="50dp"
            android:id="@+id/button2"
            android:layout_width="match_parent"
            android:layout_height="wrap_content"
            android:text="注册"
            android:onClick="register"
            />

        <Button
            android:id="@+id/button3"
            android:layout_width="match_parent"
            android:layout_height="wrap_content"
            android:text="重置" />
    </LinearLayout>
</androidx.constraintlayout.widget.ConstraintLayout>
3、完善MainActivity
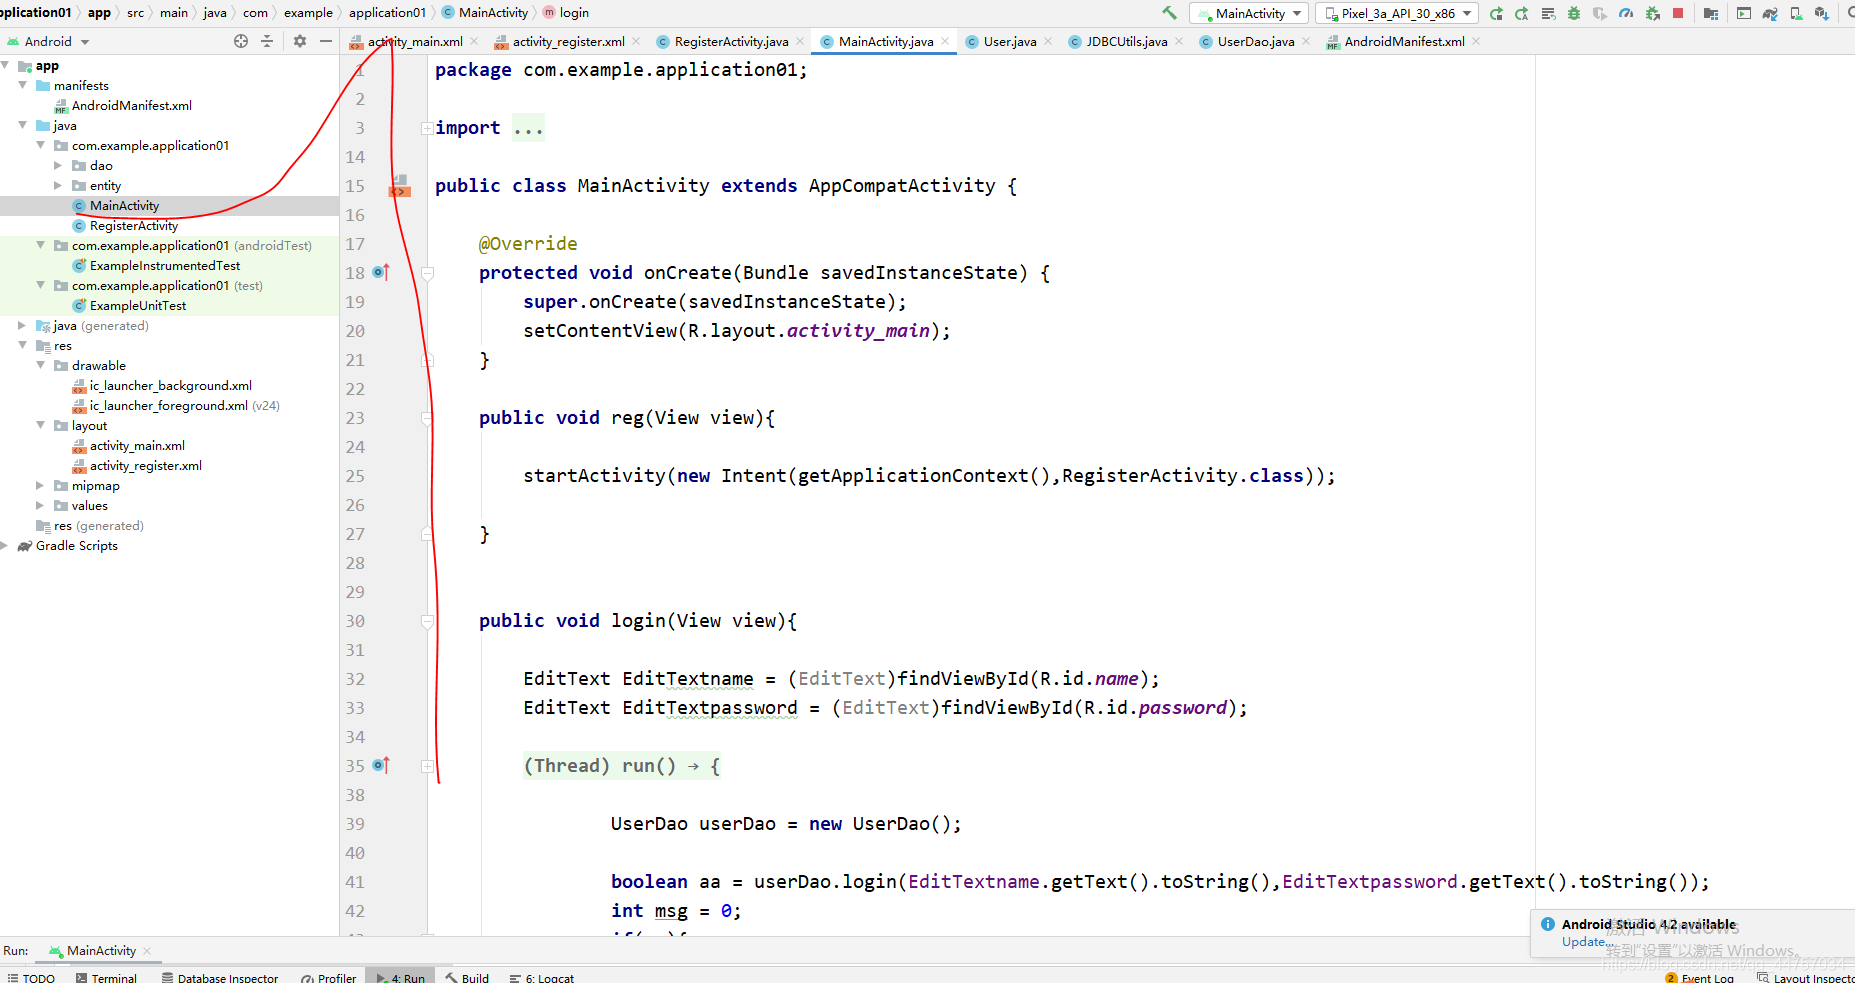
package com.example.application01;

import androidx.appcompat.app.AppCompatActivity;

import android.content.Intent;
import android.os.Bundle;
import android.os.Handler;
import android.os.Message;
import android.view.View;
import android.widget.EditText;
import android.widget.Toast;

import com.example.application01.dao.UserDao;

public class MainActivity extends AppCompatActivity {

    @Override
    protected void onCreate(Bundle savedInstanceState) {
        super.onCreate(savedInstanceState);
        setContentView(R.layout.activity_main);
    }

    public void reg(View view){

        startActivity(new Intent(getApplicationContext(),RegisterActivity.class));

    }


    public void login(View view){

        EditText EditTextname = (EditText)findViewById(R.id.name);
        EditText EditTextpassword = (EditText)findViewById(R.id.password);

        new Thread(){
            @Override
            public void run() {

                UserDao userDao = new UserDao();

                boolean aa = userDao.login(EditTextname.getText().toString(),EditTextpassword.getText().toString());
                int msg = 0;
                if(aa){
                    msg = 1;
                }

                hand1.sendEmptyMessage(msg);


            }
        }.start();


    }
    final Handler hand1 = new Handler()
    {
        @Override
        public void handleMessage(Message msg) {

            if(msg.what == 1)
            {
                Toast.makeText(getApplicationContext(),"登录成功",Toast.LENGTH_LONG).show();

            }
            else
            {
                Toast.makeText(getApplicationContext(),"登录失败",Toast.LENGTH_LONG).show();
            }
        }
    };

}
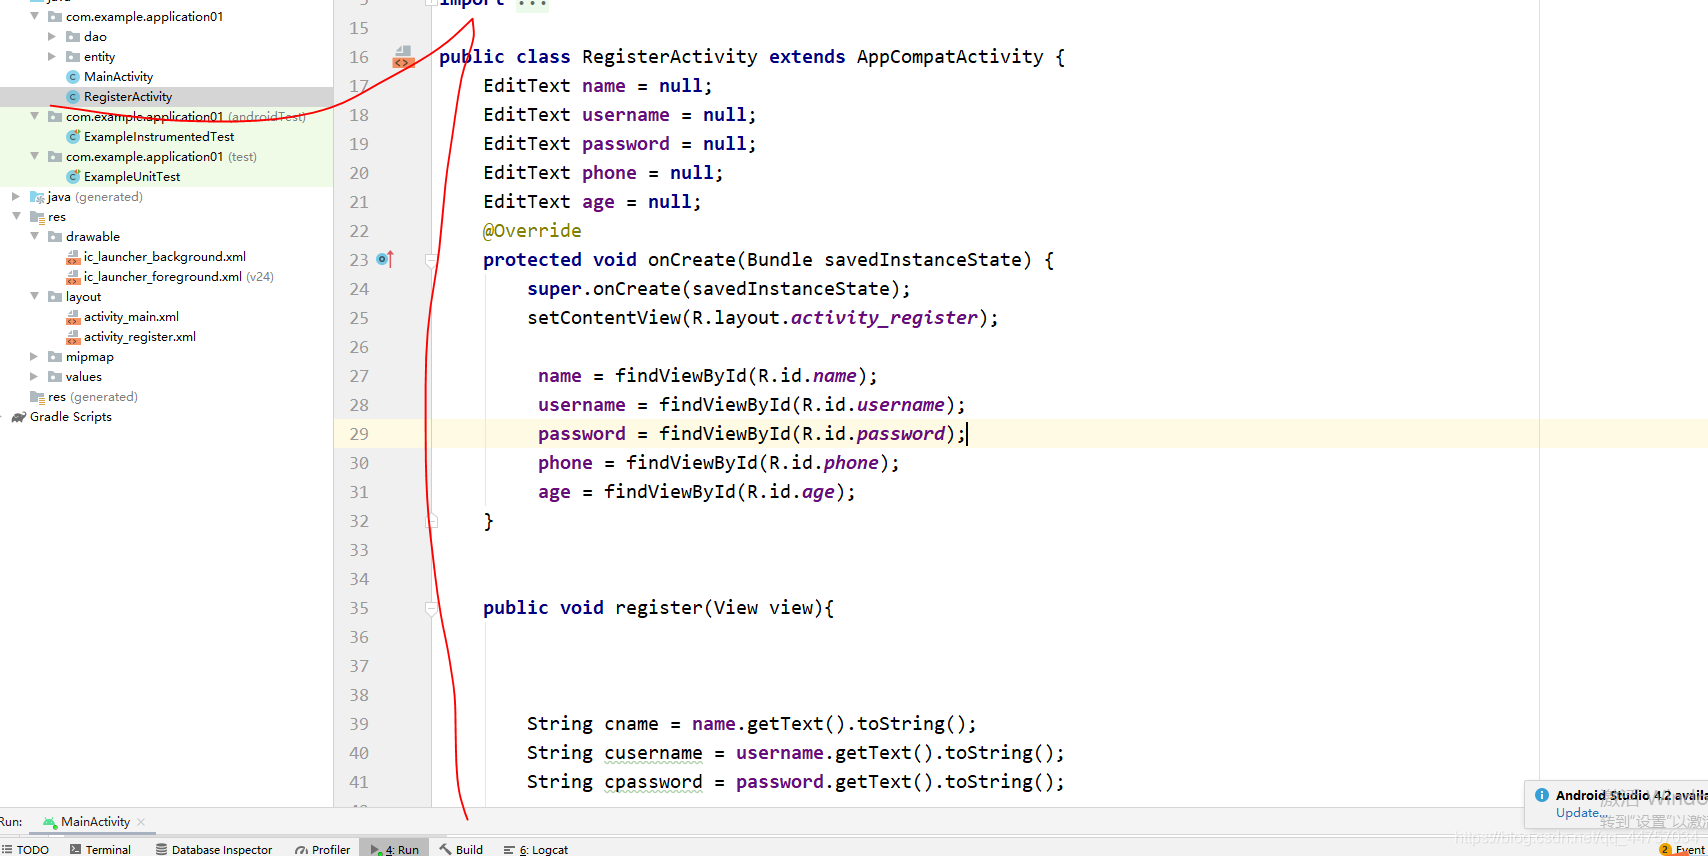
4、完善RegisterActivity
package com.example.application01;

import androidx.appcompat.app.AppCompatActivity;

import android.content.Intent;
import android.os.Bundle;
import android.os.Handler;
import android.os.Message;
import android.view.View;
import android.widget.EditText;
import android.widget.Toast;

import com.example.application01.dao.UserDao;
import com.example.application01.entity.User;

public class RegisterActivity extends AppCompatActivity {
    EditText name = null;
    EditText username = null;
    EditText password = null;
    EditText phone = null;
    EditText age = null;
    @Override
    protected void onCreate(Bundle savedInstanceState) {
        super.onCreate(savedInstanceState);
        setContentView(R.layout.activity_register);

         name = findViewById(R.id.name);
         username = findViewById(R.id.username);
         password = findViewById(R.id.password);
         phone = findViewById(R.id.phone);
         age = findViewById(R.id.age);
    }


    public void register(View view){


        String cname = name.getText().toString();
        String cusername = username.getText().toString();
        String cpassword = password.getText().toString();

        System.out.println(phone.getText().toString());

        String cphone = phone.getText().toString();
        int cgae = Integer.parseInt(age.getText().toString());

        if(cname.length() < 2 || cusername.length() < 2 || cpassword.length() < 2 ){
            Toast.makeText(getApplicationContext(),"输入信息不符合要求请重新输入",Toast.LENGTH_LONG).show();
            return;

        }


        User user = new User();

        user.setName(cname);
        user.setUsername(cusername);
        user.setPassword(cpassword);
        user.setAge(cgae);
        user.setPhone(cphone);

        new Thread(){
            @Override
            public void run() {

                int msg = 0;

                UserDao userDao = new UserDao();

                User uu = userDao.findUser(user.getName());

                if(uu != null){
                    msg = 1;
                }

                boolean flag = userDao.register(user);
                if(flag){
                    msg = 2;
                }
                hand.sendEmptyMessage(msg);

            }
        }.start();


    }
    final Handler hand = new Handler()
    {
        @Override
        public void handleMessage(Message msg) {
            if(msg.what == 0)
            {
                Toast.makeText(getApplicationContext(),"注册失败",Toast.LENGTH_LONG).show();

            }
            if(msg.what == 1)
            {
                Toast.makeText(getApplicationContext(),"该账号已经存在,请换一个账号",Toast.LENGTH_LONG).show();

            }
            if(msg.what == 2)
            {
                //startActivity(new Intent(getApplication(),MainActivity.class));

                Intent intent = new Intent();
                //将想要传递的数据用putExtra封装在intent中
                intent.putExtra("a","註冊");
                setResult(RESULT_CANCELED,intent);
                finish();
            }

        }
    };
}
五、运行测试效果


 4865
4865


 被折叠的 条评论
为什么被折叠?
被折叠的 条评论
为什么被折叠?
 到【灌水乐园】发言


