


 本文详细阐述了在SpringBoot项目中遇到的启动报错,涉及排除DataSourceAutoConfiguration、接口注入失败及组件扫描等问题的解决方案。通过实例代码和配置详解,助你快速定位并解决这些问题。
关于springboot启动报错的一些问题
-
启动报错问题
首次启动要在启动类,加上@SpringBootApplication(exclude{DataSourceAutoConfiguration.class})
@SpringBootApplication(exclude{DataSourceAutoConfiguration.class})
- 然后出现dao或者mapper里面的接口注入失败Field personProperties in com.example.controller.HelloController required a bean of type ‘com.example.PersonProperties’ that could not be found.
- 在dao层或则mapper里面给接口加上@Mapper和@Component
package com.example.demo.Dao;

import com.example.demo.bean.Account;
import org.apache.ibatis.annotations.Mapper;
import org.springframework.stereotype.Component;

import java.util.List;
@Mapper
@Component
public interface accoutDao {
    List<Account> findAll();
}
然后引入的包要引入对应
- 在启动类加上@ComponentScan(basePackages = “com.example”)扫描example下全部的包,并且去掉
@SpringBootApplication(exclude{DataSourceAutoConfiguration.class})
后面的exclude{DataSourceAutoConfiguration.class}自动注入数据。代码如下:
package com.example.demo;

import org.springframework.boot.SpringApplication;
import org.springframework.boot.autoconfigure.SpringBootApplication;
import org.springframework.context.annotation.ComponentScan;

@SpringBootApplication()
@ComponentScan(basePackages = "com.example")
public class DemoApplication {

	public static void main(String[] args) {
		SpringApplication.run(DemoApplication.class, args);
	}

}
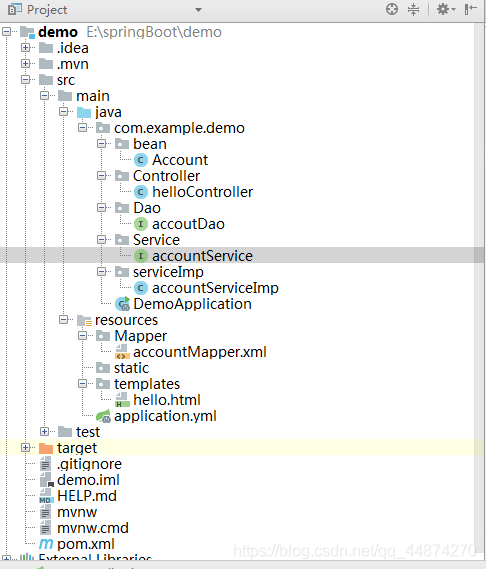
下面附上我的目录和各层的代码
实体类Account.java
package com.example.demo.bean;

public class Account {
    private Integer id;
    private String user;
    private String psw;

    public Integer getId() {
        return id;
    }

    public void setId(Integer id) {
        this.id = id;
    }

    public String getUser() {
        return user;
    }

    public void setUser(String user) {
        this.user = user;
    }

    public String getPsw() {
        return psw;
    }

    public void setPsw(String psw) {
        this.psw = psw;
    }
}
DAO层accoutDao.java
package com.example.demo.Dao;

import com.example.demo.bean.Account;
import org.apache.ibatis.annotations.Mapper;
import org.springframework.stereotype.Component;

import java.util.List;
@Mapper
@Component
public interface accoutDao {
    List<Account> findAll();
}
Mapper中的accountMapper.xml
<?xml version="1.0" encoding="UTF-8"?>
<!DOCTYPE mapper PUBLIC "-//mybatis.org//DTD Mapper 3.0//EN" "http://mybatis.org/dtd/mybatis-3-mapper.dtd" >
<mapper namespace="com.example.demo.Dao.accoutDao">

    <select id="findAll" resultType="com.example.demo.bean.Account">
        SELECT * FROM account
    </select>

</mapper>
Service层accountService.java
package com.example.demo.Service;

import com.example.demo.bean.Account;

import java.util.List;

public interface accountService {
    List<Account> findAll();
}
实现类accountServiceImp.java
package com.example.demo.serviceImp;

import com.example.demo.Dao.accoutDao;
import com.example.demo.Service.accountService;
import com.example.demo.bean.Account;
import org.springframework.beans.factory.annotation.Autowired;
import org.springframework.stereotype.Service;

import java.util.List;
@Service
public class accountServiceImp implements accountService {

    @Autowired
    private accoutDao ado;

    @Override
    public List<Account> findAll() {
        return ado.findAll();
    }
}
控制层helloController.java,这里使用的是@RestController注解,直接输入内容到游览器
package com.example.demo.Controller;

import com.example.demo.Dao.accoutDao;
import com.example.demo.Service.accountService;
import com.example.demo.bean.Account;
import org.springframework.beans.factory.annotation.Autowired;
import org.springframework.stereotype.Controller;
import org.springframework.web.bind.annotation.RequestMapping;
import org.springframework.web.bind.annotation.RestController;

import java.util.List;

@RestController
public class helloController {

    @Autowired
    private accountService aService;

    @RequestMapping("/hello")
    public List hello(){
        return aService.findAll() ;
    }
}
运行结果

配置文件application.yml
spring:
  datasource:
    url: jdbc:mysql://localhost:3306/testspringboot
    username: root
    password: haroot
    driver-class-name: com.mysql.jdbc.Driver
server:
  port: 8083
mybatis:
  mapper-locations: classpath:Mapper/*.xml
  type-aliases-package: com.example.demo.bean
以上就是我在学习springboot过程中遇到的全部问题,如有问题可以在评论区中留言,大家一起讨论交流。


 2万+
2万+

 被折叠的 条评论
为什么被折叠?
被折叠的 条评论
为什么被折叠?
 到【灌水乐园】发言


