


 文章介绍了如何使用PyTorch库分别实现K-NearestNeighbor(KNN)、支持向量机(SVM)和神经网络对鸢尾花数据集进行分类。首先,详细描述了鸢尾花数据集的属性信息。接着,分别展示了KNN算法通过计算欧氏距离找到最近邻并确定预测标签的过程,SVM利用线性支持向量机和多类边际损失进行训练和预测,以及神经网络的构建和训练过程。最后,对模型的测试阶段和准确度进行了评估。
一、数据集介绍

Data Set Information:
This is perhaps the best known database to be found in the pattern recognition literature. Fisher’s paper is a classic in the field and is referenced frequently to this day. (See Duda & Hart, for example.) The data set contains 3 classes of 50 instances each, where each class refers to a type of iris plant. One class is linearly separable from the other 2; the latter are NOT linearly separable from each other.
Attribute Information:
- sepal length in cm
- sepal width in cm
- petal length in cm
- petal width in cm
- class:
– Iris Setosa
– Iris Versicolour
– Iris Virginica
二、使用KNN分类
这里使用了 k-Nearest Neighbor (KNN) 分类器,对于每个测试数据,计算其与所有训练数据的欧氏距离,并选择距离最近的 k 个训练数据的标签中出现最多的标签作为预测标签。使用 PyTorch 中的 torch.topk 函数选择距离最近的 k 个训练数据,使用 torch.bincount 函数计算 k 个训练数据的标签的出现次数,使用 torch.argmax 函数选择出现次数最多的标签作为预测标签。在测试阶段,使用测试数据计算预测标签,并计算模型的准确度。
import torch
import torch.nn as nn
from sklearn.datasets import load_iris
from sklearn.model_selection import train_test_split

# Load the iris dataset
iris = load_iris()
X = iris.data
y = iris.target

# Split the data into training and testing sets
X_train, X_test, y_train, y_test = train_test_split(X, y, test_size=0.2, random_state=42)

# Convert the data to PyTorch tensors
X_train = torch.tensor(X_train, dtype=torch.float32)
X_test = torch.tensor(X_test, dtype=torch.float32)
y_train = torch.tensor(y_train, dtype=torch.long)
y_test = torch.tensor(y_test, dtype=torch.long)

# Define the k-Nearest Neighbor classifier model
class KNN(nn.Module):
    def __init__(self, k=3):
        super().__init__()
        torch.manual_seed(2)
        self.k = k

    def forward(self, x_train, y_train, x_test):
        num_train = x_train.shape[0]
        num_test = x_test.shape[0]
        y_pred = torch.zeros(num_test, dtype=torch.long)
        for i in range(num_test):
            distances = torch.sum((x_train - x_test[i])**2, dim=1)
            _, indices = torch.topk(distances, self.k, largest=False)
            k_nearest_labels = y_train[indices]
            y_pred[i] = torch.bincount(k_nearest_labels).argmax()
        return y_pred

model = KNN(k=3)

# Evaluate the model on the test data
y_pred = model(X_train, y_train, X_test)
accuracy = (y_pred == y_test).float().mean()
print("Accuracy: %.2f %%" % (accuracy.item() * 100))

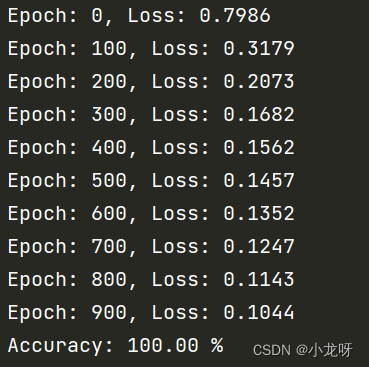
三、使用支持向量机分类
这里使用了线性支持向量机,对于每个输入数据,使用线性函数对其进行分类。使用多类边际损失作为损失函数,使用随机梯度下降优化器进行训练。在测试阶段,使用测试数据计算预测标签,并计算模型的准确度。
import torch
import torch.nn as nn
import torch.optim as optim
from sklearn.datasets import load_iris
from sklearn.model_selection import train_test_split

# Load the iris dataset
iris = load_iris()
X = iris.data
y = iris.target

# Split the data into training and testing sets
X_train, X_test, y_train, y_test = train_test_split(X, y, test_size=0.2, random_state=42)

# Convert the data to PyTorch tensors
X_train = torch.tensor(X_train, dtype=torch.float32)
X_test = torch.tensor(X_test, dtype=torch.float32)
y_train = torch.tensor(y_train, dtype=torch.long)

# Define the model
class SVM(nn.Module):
    def __init__(self):
        super().__init__()
        torch.manual_seed(2)
        self.linear = nn.Linear(4, 3)

    def forward(self, x):
        return self.linear(x)

model = SVM()

# Define the loss function
criterion = nn.MultiMarginLoss()

# Define the optimizer
optimizer = optim.SGD(model.parameters(), lr=0.01)

# Train the model
for epoch in range(1000):
    optimizer.zero_grad()
    y_pred = model(X_train)
    loss = criterion(y_pred, y_train)
    loss.backward()
    optimizer.step()
    if epoch % 100 == 0:
        print("Epoch: %d, Loss: %.4f" % (epoch, loss.item()))

# Evaluate the model on the test data
y_pred = model(X_test)
y_pred = y_pred.argmax(dim=1).numpy()
accuracy = (y_pred == y_test).mean()
print("Accuracy: %.2f %%" % (accuracy.item() * 100))
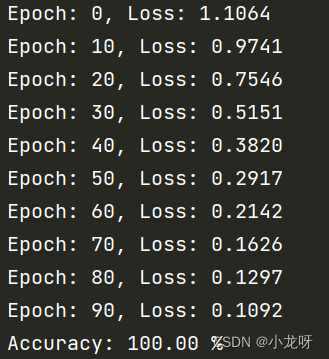
四、使用神经网络分类
import torch
import torch.nn as nn
import torch.nn.functional as F
import torch.optim as optim
from sklearn import datasets
import numpy as np

# 加载鸢尾花数据集
iris = datasets.load_iris()
X = iris["data"].astype(np.float32) # X为(150,4)的array数组
y = iris["target"].astype(np.int64) # y为标签0,1,2

# 将数据分为训练集和测试集
# 将150个样本分成:训练:120;测试:30
train_ratio = 0.8
index = np.random.permutation(X.shape[0])
train_index = index[:int(X.shape[0] * train_ratio)]
test_index = index[int(X.shape[0] * train_ratio):]
X_train, y_train = X[train_index], y[train_index]
X_test, y_test = X[test_index], y[test_index]

# 定义神经网络模型
class Net(nn.Module):
    def __init__(self):
        super(Net, self).__init__()
        torch.manual_seed(2)
        self.fc1 = nn.Linear(4, 32)
        self.fc2 = nn.Linear(32, 32)
        self.fc3 = nn.Linear(32, 3)

    def forward(self, x):
        x = F.relu(self.fc1(x))
        x = F.relu(self.fc2(x))
        x = self.fc3(x)
        return x

# 初始化模型、损失函数和优化器
model = Net()
criterion = nn.CrossEntropyLoss()
optimizer = optim.SGD(model.parameters(), lr=0.01, momentum=0.9)

# 训练模型
num_epochs = 100
for epoch in range(num_epochs):
    inputs = torch.from_numpy(X_train)
    labels = torch.from_numpy(y_train)
    optimizer.zero_grad()
    outputs = model(inputs)
    loss = criterion(outputs, labels)
    loss.backward()
    optimizer.step()
    if epoch % 10 == 0:
        print("Epoch: %d, Loss: %.4f" % (epoch, loss.item()))


# 评估模型
with torch.no_grad():
    inputs = torch.from_numpy(X_test)
    labels = torch.from_numpy(y_test)
    outputs = model(inputs)
    _, predictions = torch.max(outputs, 1) # 获得outputs每行最大值的索引
    accuracy = (predictions == labels).float().mean() # (predictions == labels):输出值为bool的Tensor
    print("Accuracy: %.2f %%" % (accuracy.item() * 100))


 1万+
1万+

 被折叠的 条评论
为什么被折叠?
被折叠的 条评论
为什么被折叠?
 到【灌水乐园】发言


