


CSS 盒子模型(Box Model)
所有HTML元素可以看做盒子,在CSS中,“box model”这一术语是用来设计和布局时使用。
CSS盒模型本质上是一个盒子,封装周围的HTML元素,它包括:边距、边框、填充和实际内容。盒模型允许我们在其它元素和周围元素边框之间放置元素。


不同部分的说明:
- Margin(外边距):清除边框外的区域,外边距是透明的。
- Border(边框):围绕在内边距和内容外的边框。
- Padding(内边距):清除内容周围的区域,内边距是透明的。
- Content(内容):盒子的内容,显示文本和图像。
padding的使用
- padding是在盒子里面,在盒子与内容之间。
- padding的作用:控制子元素在父元素里面的位置关系。
- padding会把盒子成大。
- padding的间距不能写入内容(文本和图片),但是背景图除外。
- 如果要保持元素padding之前的尺寸,需要在元素的尺寸上减去padding值。
- 添加单边内边距:padding-top/right/bottom/left;分别设置上、右、下、左内边距。
- padding不同参数值:参数与参数之间使用空格隔开。
1)一个参数:padding:40px;表示上右下左内边距均为40px;
2)两个参数:padding:40px 30px;表示上下内边距为40px,左右内边距为30px;
3)三个参数:padding:40px 30px 20px;表示上内边距为40px,左右内边距为30px,下内边距为20px;
4)四个参数:padding:40px 30px 20px 10px;表示上内边距为40培训,右内边距为30px,下内边距为20px,左内边距为10px。
margin的使用
-
margin在元素外围,不会成大元素大小;
-
作用:控制元素与元素之间的间距;
-
添加单边外边距:margin-top/right/bottom/left;分别设置上、右、下、左外边距;
-
margin不同参数值:参数与参数之间使用空格隔开。
1)一个参数:margin:40px;表示上右下左外边距均为40px;
2)两个参数:margin:40px 30px;表示上下外边距为40px,左右外边距为30px;
3)三个参数:margin:40px 30px 20px;表示上外边距为40px,左右外边距为30px,下外边距为20px;
4)四个参数:margin:40px 30px 20px 10px;表示上外边距为40培训,右外边距为30px,下外边距为20px,左外边距为10px。 -
margin:0 auto;让当前元素在父元素里面左右居中;
-
margin常出现的bug:
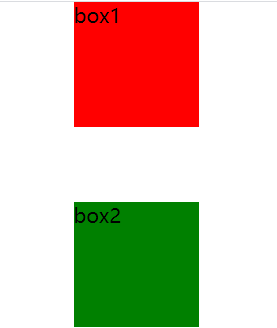
1)两个相邻元素上下的margin值不会叠加,而是按照较大值设置;
        <style>
        .box1{
            background: red;
            width: 100px;
            height: 100px;
            margin-bottom: 40px;
        }
        .box2{
            background: green;
            width: 100px;
            height: 100px;
            margin-top: 20px;
        }
        /*此时,box1的底部和box2的顶部之间的间距为40px*/
        </style>
        <body>
			<div class="box1">box1</div>
			<div class="box2">box2</div>
		</body>

解决办法:
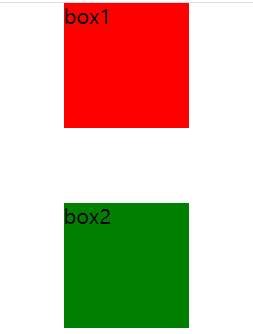
a、写给相邻元素中的一个,margin-top或者margin-bottom,即将box1的margin-bottom和box2的margin-top两个值加起来,然后将box1的margin-bottom设置为合并的值(box1的margin-bottom和box2的margin-top两个值加起来),此时box2不用再设置margin-top。反之也可以设置box2的margin-top,box1不用再设置margin-bottom。
</style>
.box1{
            background: red;
            width: 100px;
            height: 100px;
            margin-bottom: 60px;
        }
        .box2{
            background: green;
            width: 100px;
            height: 100px;
        }
        </style>
        <body>
			<div class="box1">box1</div>
			<div class="box2">box2</div>
		</body>
<style>
.box1{
            background: red;
            width: 100px;
            height: 100px;
        }
        .box2{
            background: green;
            width: 100px;
            height: 100px;
            margin-top: 60px;
        }
</style>
        <body>
			<div class="box1">box1</div>
			<div class="box2">box2</div>
		</body>
b、触发BFC,为box2添加父元素box3,为box3设置overflow: hidden;
<style>
.box1{
            background: red;
            width: 100px;
            height: 100px;
            margin-bottom: 40px;
        }
        .box2{
            background: green;
            width: 100px;
            height: 100px;
            margin-top: 20px;
        }
        .box3{
            overflow: hidden;
        }
</style>
<body>
    <div class="box1">box1</div>
    <div class="box3">
        <div class="box2">box2</div>
    </div>
</body>
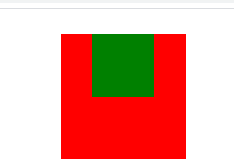
2)如果父元素和第一个子元素没有浮动的情况下,给第一个子元素添加margin-top,浏览器解析时会错误的将margin-top设置给父元素。
    <style>
        .box1{
            background: red;
            width: 100px;
            height: 100px;
        }
        .box2{
            background: green;
            width: 50px;
            height: 50px;
            margin-top: 20px;
        }
        .box3{
            overflow: hidden;
        }
    </style>

<body>
    <div class="box1">
        <div class="box2"></div>
    </div>
</body>
解决方式:
a、投机取巧,给父元素添加padding-top值,再将父元素的height减去padding-top值。
    <style>
        .box1{
            background: red;
            width: 100px;
            height: 80px;
            padding-top: 20px;
        }
        .box2{
            background: green;
            width: 50px;
            height: 50px;
        }
    </style>
<body>
    <div class="box1">
        <div class="box2"></div>
    </div>
</body>
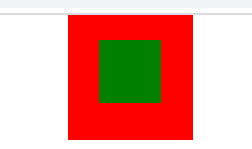
b、触发BFC,例如:给父元素或者子元素添加浮动
    <style>
        .box1{
            background: red;
            width: 100px;
            height: 100px;
            float: left;
        }
        .box2{
            background: green;
            width: 50px;
            height: 50px;
            margin-top: 20px;
        }
    </style>

<body>
    <div class="box1">
        <div class="box2"></div>
    </div>
</body>
    <style>
        .box1{
            background: red;
            width: 100px;
            height: 100px;
        }
        .box2{
            background: green;
            width: 50px;
            height: 50px;
            margin-top: 20px;
            float: left;
        }
    </style>

<body>
    <div class="box1">
        <div class="box2"></div>
    </div>
</body>

盒子模型计算
总元素的宽度=宽度+左填充+右填充+左边框+右边框+左边距+右边距

总元素的高度=高度+顶部填充+底部填充+上边框+下边框+上边距+下边距


 2750
2750


 被折叠的 条评论
为什么被折叠?
被折叠的 条评论
为什么被折叠?
 到【灌水乐园】发言


