


一、实现效果

二、实现思路
1.先根据传入的文本内容,计算出文本的宽度。
2.文本宽度+左右间距,得到正方形的边长、画布宽度。
3.在(0,0)坐标处,绘制正方形。
4.计算文本居中的起始坐标,填充文本。
三、代码实现
<template>
  <div>
    <canvas id="canvas" style="margin:10px;></canvas>
  </div>
</template>

<script>
export default {
  mounted() {
    this.drawSquare(20, 'Microsoft YaHei', '我是居中的文字..')
  },
  methods: {
    /**
     * 绘制正方形并添加文本
     * @param {Number} fonSize // 字号
     * @param {String} fontFace // 字体
     * @param {String} text // 文本
     */
    drawSquare(fonSize, fontFace, text) {
      var canvas = document.getElementById('canvas')
      var ctx = canvas.getContext('2d')
      // 1.计算文本宽度
      let txtWidth = this.getFontWidth(fonSize, fontFace, ctx, text)
      // 2.设置画布宽度
      let ctxWidth = txtWidth + 20
      canvas.width = ctxWidth
      canvas.height = ctxWidth
      console.log(txtWidth,'txtWidth');
      // 3.绘制正方形
      ctx.strokeRect(0, 0, txtWidth + 10, txtWidth + 10)
      // 4.填充文字
      this.fillTextCenter(
        fonSize,
        fontFace,
        txtWidth,
        ctx,
        text,
        txtWidth + 10
      )
    },
    /**
     * 获取文本宽度
     * @param {Object} ctx // CanvasRenderingContext2D
     * @param {String} text // 文本内容
     */
    getFontWidth(fonSize, fontFace, ctx, text) {
      ctx.font = fonSize + 'px ' + fontFace
      let txtWidth = 0
      for (let i = 0; i < text.length; i++) {
        txtWidth += ctx.measureText(text[i]).width
      }
      return txtWidth
    },

    /**
     * 在图形中心位置添加文本
     * @param {Number} fonSize // 字号
     * @param {String} fontFace // 字体
     * @param {Number} txtWidth // 文本宽度
     * @param {Object} ctx // CanvasRenderingContext2D
     * @param {String} text // 文本
     * @param {Number} width // 画布的宽度
     * @param {Number} height // 画布的高度
     */
    fillTextCenter(
      fonSize,
      fontFace,
      txtWidth,
      ctx,
      text,
      width
    ) {
      // 1.设置文本对齐方式
      ctx.textBaseline = 'middle'
      ctx.textAlign = 'center'
      // 2.设置起始坐标
      let s = 0
      let xL = (width - txtWidth-2) / 2 + s
      let yL = width / 2
      // 3.绘制文本
      for (let i = 0; i < text.length; i++) {
        s = ctx.measureText(text[i]).width  // 第i个字符宽度
        xL += s
        ctx.font = fonSize + 'px ' + fontFace
        ctx.fillText(text[i], xL, yL)
      }
    }
  }
}
</script>
四、代码解析
- canvas语法全解析:HTML Canvas 参考手册
getContext():Document.getElementById() 方法获取 HTML 元素的引用。接着,HTMLCanvasElement.getContext() 方法获取这个元素的 context——图像稍后将在此被渲染。measureText():返回包含指定文本宽度的对象textBaseline:设置或返回在绘制文本时使用的当前文本基线textAlign: 设置或返回文本内容的当前对齐方式font:设置或返回文本内容的当前字体属性strokeRect():绘制矩形(无填充)
五、问题
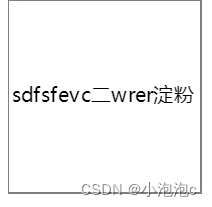
- 问题:文本显示不居中;文本显示叠在一起;具体可见下图。
- 原因:好像是通过
measureText测量出的文本宽度和实际渲染有差异导致的,但是没有找到解决办法。如果有解决方法可以在评论区留言,谢谢。 - 效果图:

六、改进后的代码
1.效果图
2.思路
1)去掉 textAlign='center'
2)使用 measureText 方法返回的 textMetrics 对象的 actualBoundingBoxLeft + actualBoundingBoxRight 属性来计算文字的宽度。这两个属性表示文字的最左边和最右边界,可以更准备地计算文字的宽度。
3)填充文字时,字符坐标应该是加上前一字符宽度,代码中加的是当前字符宽度。改进后代码已修改。
3.代码实现
<template>
  <div>
    <canvas id="canvas" style="margin:10px;"></canvas>
  </div>
</template>

<script>
export default {
  mounted() {
    this.drawSquare(20, 'Microsoft YaHei', '我是居中的文字..')
  },
  methods: {
    /**
     * 绘制正方形并添加文本
     * @param {Number} fonSize // 字号
     * @param {String} fontFace // 字体
     * @param {String} text // 文本
     */
    drawSquare(fonSize, fontFace, text) {
      var canvas = document.getElementById('canvas')
      var ctx = canvas.getContext('2d')
      // 1.计算文本宽度
      let txtWidth = this.getFontWidth(fonSize, fontFace, ctx, text)
      // 2.设置画布宽度
      let ctxWidth = txtWidth + 20
      canvas.width = ctxWidth
      canvas.height = ctxWidth
      // 3.绘制正方形
      ctx.strokeRect(0, 0, txtWidth + 10, txtWidth + 10)
      // 4.填充文字
      this.fillTextCenter(
        fonSize,
        fontFace,
        txtWidth,
        ctx,
        text,
        txtWidth + 10
      )
    },
    /**
     * 获取文本宽度
     * @param {Object} ctx // CanvasRenderingContext2D
     * @param {String} text // 文本内容
     */
    getFontWidth(fonSize, fontFace, ctx, text) {
      ctx.font = fonSize + 'px ' + fontFace
      let txtWidth = 0
      for (let i = 0; i < text.length; i++) {
        txtWidth += (ctx.measureText(text[i]).actualBoundingBoxLeft + ctx.measureText(text[i]).actualBoundingBoxRight)
      }
      return txtWidth
    },

    /**
     * 在图形中心位置添加文本
     * @param {Number} fonSize // 字号
     * @param {String} fontFace // 字体
     * @param {Number} txtWidth // 文本宽度
     * @param {Object} ctx // CanvasRenderingContext2D
     * @param {String} text // 文本
     * @param {Number} width // 画布的宽度
     * @param {Number} height // 画布的高度
     */
    fillTextCenter(
      fonSize,
      fontFace,
      txtWidth,
      ctx,
      text,
      width
    ) {
      // 1.设置文本对齐方式
      ctx.textBaseline = 'middle'
      // 2.设置起始坐标
      let s = 0
      let xL = (width - txtWidth - 2) / 2 + s
      let yL = width / 2
      // 3.绘制文本
      for (let i = 0; i < text.length; i++) {
        xL += s
        ctx.font = fonSize + 'px ' + fontFace
        ctx.font = fonSize + 'px ' + fontFace
        ctx.fillText(text[i], xL, yL)
        s = ctx.measureText(text[i]).actualBoundingBoxLeft + ctx.measureText(text[i]).actualBoundingBoxRight
        // 前一个字符宽度
      }
    }
  }
}
</script>


 3590
3590

 被折叠的 条评论
为什么被折叠?
被折叠的 条评论
为什么被折叠?
 到【灌水乐园】发言


