


【吃透Java手写】SpringBoot-简易版-源码解析
1 SpringbootDemo
引入依赖
<dependencies>
    <dependency>
        <groupId>org.springframework.boot</groupId>
        <artifactId>spring-boot-starter-web</artifactId>
        <version>2.6.2</version>
    </dependency>
</dependencies>
最简单的SpringbootDemo的只包含启动类
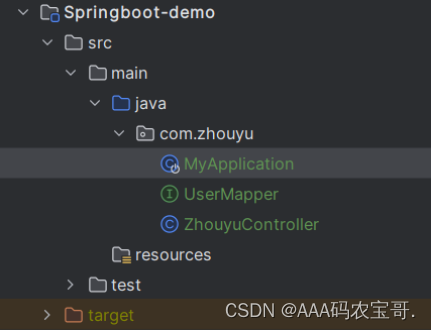
com.zhouyu.MyApplication:
@SpringBootApplication
public class MyApplication {
    public static void main(String[] args) {
        SpringApplication.run(MyApplication.class, args);
    }
}
我们手写自然要模拟MyApplication这个启动类所做的事情以及@SpringBootApplication所做的事情
2 准备工作
两个包:
- springboot模块,表示springboot框架的源码实现
- user包,表示用户业务系统,用来写业务代码来测试我们所模拟出来的SpringBoot
2.1 Springboot-my
2.1.1 依赖
SpringBoot是基于的Spring,所以我们要依赖Spring,然后我希望我们模拟出来的SpringBoot也支持Spring MVC的那一套功能,所以也要依赖Spring MVC,包括Tomcat等,所以在Springboot-my模块中要添加以下依赖:
<dependencies>
	<dependency>
            <groupId>org.springframework</groupId>
            <artifactId>spring-context</artifactId>
            <version>5.3.18</version>
        </dependency>
        <dependency>
            <groupId>org.springframework</groupId>
            <artifactId>spring-web</artifactId>
            <version>5.3.18</version>
        </dependency>
        <dependency>
            <groupId>org.springframework</groupId>
            <artifactId>spring-webmvc</artifactId>
            <version>5.3.18</version>
        </dependency>

        <dependency>
            <groupId>javax.servlet</groupId>
            <artifactId>javax.servlet-api</artifactId>
            <version>4.0.1</version>
        </dependency>

        <dependency>
            <groupId>org.apache.tomcat.embed</groupId>
            <artifactId>tomcat-embed-core</artifactId>
            <version>9.0.60</version>
        </dependency>
</dependencies>
我们在真正使用SpringBoot时,核心会用到SpringBoot一个类和注解:
- @SpringBootApplication,这个注解是加在应用启动类上的,也就是main方法所在的类
- SpringApplication,这个类中有个run()方法,用来启动SpringBoot应用的
所以我们也来模拟实现他们。
2.1.2 @SpringBootApplication
创建org.springboot.SJBSpringBootApplication
@Target(ElementType.TYPE)
@Retention(RetentionPolicy.RUNTIME)
@Configuration
@ComponentScan
public @interface SJBSpringBootApplication {
}
2.1.3 SJBSpringApplication
2.1.3.1 run方法
源码:
public static ConfigurableApplicationContext run(Class<?> primarySource, String... args) {
    return run(new Class[]{primarySource}, args);
}
String... args:可变参数是为了让通过jar包启动的项目可以指定参数,比如-value=xxx等
我们模拟暂时不考虑这些,只保留最基础的功能
创建org.springboot.SJBSpringApplication
public class SJBSpringApplication {
    public static void run(Class<?> primarySource, String... args) {
    }
}
2.2 Springboot-user
我们模拟实现的是SpringBoot,而不是SpringMVC,所以我直接在user包下定义了UserController,最终我希望能运行UserApplication中的main方法,就直接启动了项目,并能在浏览器中正常的访问到UserController中的某个方法。
2.2.1 依赖
引入刚刚的依赖以及Springboot-my的基础依赖
<dependencies>
    <dependency>
        <groupId>org.example</groupId>
        <artifactId>Springboot-my</artifactId>
        <version>1.0-SNAPSHOT</version>
    </dependency>
</dependencies>
2.2.2 UserController
创建com.sjb.user.controller.UserController
@RestController
public class UserController {
    @GetMapping("/test")
    public String test() {
        return "sjb123";
    }
}
2.2.3 UserApplication
创建com.sjb.user.UserApplication,使用我们刚刚创建的SJBSpringApplication启动类以及SJBSpringBootApplication注解
@SJBSpringBootApplication
public class UserApplication {
    public static void main(String[] args) {
        SJBSpringApplication.run(UserApplication.class, args);
    }
}
2.3 分析run方法的逻辑
首先,我们希望run方法一旦执行完,我们就能在浏览器中访问到UserController,那势必在run方法中要启动Tomcat,通过Tomcat就能接收到请求了。
大家如果学过Spring MVC的底层原理就会知道,在SpringMVC中有一个Servlet非常核心,那就是DispatcherServlet,这个DispatcherServlet需要绑定一个Spring容器,因为DispatcherServlet接收到请求后,就会从所绑定的Spring容器中找到所匹配的Controller,并执行所匹配的方法。
所以,在run方法中,我们要实现的逻辑如下:
- 创建一个Spring容器
- 创建Tomcat对象
- 生成DispatcherServlet对象,并且和前面创建出来的Spring容器进行绑定
- 将DispatcherServlet添加到Tomcat中
- 启动Tomcat
2.3.1 创建Spring容器
public static void run(Class<?> configClazz) {
    AnnotationConfigWebApplicationContext applicationContext = new AnnotationConfigWebApplicationContext();
    applicationContext.register(configClazz);
    applicationContext.refresh();
}
我们创建的是一个AnnotationConfigWebApplicationContext容器,并且把run方法传入进来的class作为容器的配置类,比如在UserApplication的run方法中,我们就是把2.2.3中的UserApplication.class传入到了run方法中,最终UserApplication就是所创建出来的Spring容器的配置类,并且由于UserApplication类上有@SJBSpringBootApplication注解,而@SJBSpringBootApplication注解的定义上又存在@ComponentScan注解,所以AnnotationConfigWebApplicationContext容器在执行refresh时,就会解析UserApplication这个配置类,从而发现定义了@ComponentScan注解,也就知道了要进行扫描,只不过扫描路径为空,而AnnotationConfigWebApplicationContext容器会处理这种情况,如果扫描路径会空,则会将UserApplication所在的包路径做为扫描路径,从而就会扫描到UserController。
RestController:
@Target({ElementType.TYPE})
@Retention(RetentionPolicy.RUNTIME)
@Documented
@Controller
@ResponseBody
public @interface RestController {
    @AliasFor(
        annotation = Controller.class
    )
    String value() default "";
}
Controller
@Target({ElementType.TYPE})
@Retention(RetentionPolicy.RUNTIME)
@Documented
@Component
public @interface Controller {
    @AliasFor(
        annotation = Component.class
    )
    String value() default "";
}
所以Spring容器创建完之后,容器内部就拥有了UserController这个Bean。
2.3.2 启动Tomcat
我们用的是Embed-Tomcat,也就是内嵌的Tomcat,真正的SpringBoot中也用的是内嵌的Tomcat,而对于启动内嵌的Tomcat,也并不麻烦
在org.springboot.SJBSpringApplication#run中新建startTomcat方法
public static void startTomcat(WebApplicationContext applicationContext){

	Tomcat tomcat = new Tomcat();

	Server server = tomcat.getServer();
	Service service = server.findService("Tomcat");

	Connector connector = new Connector();
	connector.setPort(8081);

	Engine engine = new StandardEngine();
	engine.setDefaultHost("localhost");

	Host host = new StandardHost();
	host.setName("localhost");

	String contextPath = "";
	Context context = new StandardContext();
	context.setPath(contextPath);
	context.addLifecycleListener(new Tomcat.FixContextListener());

	host.addChild(context);
	engine.addChild(host);

	service.setContainer(engine);
	service.addConnector(connector);

	tomcat.addServlet(contextPath, "dispatcher", new DispatcherServlet(applicationContext));
	context.addServletMappingDecoded("/*", "dispatcher");

	try {
		tomcat.start();
	} catch (LifecycleException e) {
		e.printStackTrace();
	}
}
代码虽然看上去比较多,但是逻辑并不复杂,比如配置了Tomcat绑定的端口为8081,后面向当前Tomcat中添加了DispatcherServlet,并设置了一个Mapping关系,最后启动,其他代码则不用太过关心。
而且在构造DispatcherServlet对象时,传入了一个ApplicationContext对象,也就是一个Spring容器,就是我们前文说的,DispatcherServlet对象和一个Spring容器进行绑定。
接下来,我们只需要在run方法中,调用startTomcat即可:
public static void run(Class<?> configClazz) {
    AnnotationConfigWebApplicationContext applicationContext = new AnnotationConfigWebApplicationContext();
    applicationContext.register(configClazz);
    applicationContext.refresh();
    startTomcat(applicationContext);
}
2.4 启动UserApplication
输出
5月 06, 2024 1:40:03 下午 org.apache.coyote.AbstractProtocol init
信息: Initializing ProtocolHandler ["http-nio-8081"]
5月 06, 2024 1:40:03 下午 org.apache.catalina.core.StandardService startInternal
信息: Starting service [Tomcat]
5月 06, 2024 1:40:03 下午 org.apache.catalina.core.StandardEngine startInternal
信息: Starting Servlet engine: [Apache Tomcat/9.0.60]
5月 06, 2024 1:40:03 下午 org.apache.catalina.util.SessionIdGeneratorBase createSecureRandom
警告: Creation of SecureRandom instance for session ID generation using [SHA1PRNG] took [111] milliseconds.
5月 06, 2024 1:40:03 下午 org.apache.coyote.AbstractProtocol start
信息: Starting ProtocolHandler ["http-nio-8081"]
显示启动成功,访问http://localhost:8081/test
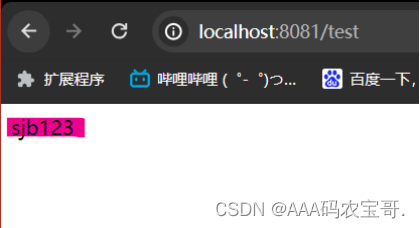
成功访问到并输出
3 功能拓展
虽然我们前面已经实现了一个比较简单的SpringBoot,不过我们可以继续来扩充它的功能,比如现在我有这么一个需求,这个需求就是我现在不想使用Tomcat了,而是想要用Jetty,那该怎么办?
我们前面代码中默认启动的是Tomcat,那我现在想改成这样子:
- 如果项目中有Tomcat的依赖,那就启动Tomcat
- 如果项目中有Jetty的依赖就启动Jetty
- 如果两者都没有则报错
- 如果两者都有也报错
这个逻辑希望SpringBoot自动帮我实现,对于程序员用户而言,只要在Pom文件中添加相关依赖就可以了,想用Tomcat就加Tomcat依赖,想用Jetty就加Jetty依赖。
那SpringBoot该如何实现呢?
3.1 创建WebServer
我们知道,不管是Tomcat还是Jetty,它们都是应用服务器,或者是Servlet容器,所以我们可以定义接口来表示它们,这个接口叫做WebServer(别问我为什么叫这个,因为真正的SpringBoot源码中也叫这个)。
创建org.springboot.WebServer,并且在这个接口中定义一个start方法:
public interface WebServer {
    public void start();
}
有了WebServer接口之后,就针对Tomcat和Jetty提供两个实现类:
创建org.springboot.TomcatWebServer实现类和org.springboot.JettyWebServer实现类
public class TomcatWebServer implements WebServer{
    @Override
    public void start() {
        System.out.println("TomcatWebServer start...");
    }
}
public class JettyWebServer implements WebServer{
    @Override
    public void start() {
        System.out.println("JettyWebServer start...");
    }
}
并且在Springboot-my模块中添加Jetty的依赖
<dependency>
	<groupId>org.eclipse.jetty</groupId>
	<artifactId>jetty-server</artifactId>
	<version>9.4.43.v20210629</version>
</dependency>
3.2 获取对应服务的WebServer
而在SJBSpringApplication中的run方法中,我们就要去获取对应的WebServer,然后启动对应的webServer,代码为:
public static void run(Class clazz){
    AnnotationConfigWebApplicationContext applicationContext = new AnnotationConfigWebApplicationContext();
    applicationContext.register(clazz);
    applicationContext.refresh();

    WebServer webServer = getWebServer(applicationContext);
    webServer.start();
}

public static WebServer getWebServer(AnnotationConfigWebApplicationContext applicationContext){
    return null;
}
这样,我们就只需要在getWebServer方法中去判断到底该返回TomcatWebServer还是JettyWebServer。
前面提到过,我们希望根据项目中的依赖情况,来决定到底用哪个WebServer,所以直接用SpringBoot中的源码实现方式来模拟了。
3.3 条件注解@SJBConditionalOnClass
创建org.springboot.SJBConditionalOnClass注解
@Target({ ElementType.TYPE, ElementType.METHOD })
@Retention(RetentionPolicy.RUNTIME)
@Conditional(SJBOnClassCondition.class)
public @interface SJBConditionalOnClass {
    String value() default "";
}
-
@Conditional注解是从spring4.0才有的,可以用在任何类型或者方法上面,通过@Conditional注解可以配置一些条件判断,当所有条件都满足的时候,被@Conditional标注的目标才会被spring容器处理。
-
Condition接口:用来表示条件判断的接口,源码如下:
@FunctionalInterface public interface Condition { /** * 判断条件是否匹配 * context:条件判断上下文 */ boolean matches(ConditionContext context, AnnotatedTypeMetadata metadata); } -
@Conditional使用的3步骤:
-
自定义一个类,实现Condition或ConfigurationCondition接口,实现matches方法
-
在目标对象上使用@Conditional注解,并指定value的指为自定义的Condition类型
-
启动spring容器加载资源,此时@Conditional就会起作用了
-
注意核心为@Conditional(SJBOnClassCondition.class)中的SJBOnClassCondition,因为它才是真正得条件逻辑:
public class SJBOnClassCondition implements Condition {
    @Override
    public boolean matches(ConditionContext context, AnnotatedTypeMetadata metadata) {
        Map<String, Object> annotationAttributes =
                metadata.getAnnotationAttributes(SJBConditionalOnClass.class.getName());
        String className = (String) annotationAttributes.get("value");
        try {
            context.getClassLoader().loadClass(className);
            return true;
        } catch (ClassNotFoundException e) {
            return false;
        }
    }
}
具体逻辑为,拿到@SJBConditionalOnClass中的value属性,然后用类加载器进行加载,如果加载到了所指定的这个类,那就表示符合条件,如果加载不到,则表示不符合条件。
并且进行可选依赖配置
将Spring-my中的依赖修改
<dependency>
    <groupId>org.eclipse.jetty</groupId>
    <artifactId>jetty-server</artifactId>
    <version>9.4.43.v20210629</version>
    <optional>true</optional>
</dependency>
添加<optional>true</optional>这样只是Spring-user只依赖tomcat,如果要依赖jetty
则修改为
<dependency>
    <groupId>org.springframework</groupId>
    <artifactId>spring-webmvc</artifactId>
    <version>5.3.18</version>
    <exclusions>
        <exclusion>
            <groupId>org.apache.tomcat.embed</groupId>
            <artifactId>tomcat-embed-core</artifactId>
        </exclusion>
    </exclusions>
</dependency>

<!--        <dependency>
    <groupId>org.apache.tomcat.embed</groupId>
    <artifactId>tomcat-embed-core</artifactId>
    <version>9.0.60</version>
</dependency>-->
<dependency>
    <groupId>org.eclipse.jetty</groupId>
    <artifactId>jetty-server</artifactId>
    <version>9.4.43.v20210629</version>
</dependency>
3.4 自动配置类
UserApplication的@SJBSpringBootApplication只会扫描com.sjb.user下的包,自动配置类并没有作为Bean放入容器内
有了条件注解,我们就可以来使用它了,那如何实现呢?这里就要用到自动配置类的概念
创建org.springboot.WebServiceAutoConfiguration
@Configuration
public class WebServiceAutoConfiguration {
    @Bean
    @SJBConditionalOnClass("org.apache.catalina.startup.Tomcat")
    public TomcatWebServer tomcatWebServer(){
        return new TomcatWebServer();
    }
    @Bean
    @SJBConditionalOnClass("org.eclipse.jetty.server.Server")
    public JettyWebServer jettyWebServer(){
        return new JettyWebServer();
    }
}
这个代码还是比较简单的,通过一个WebServiceAutoConfiguration的Spring配置类,在里面定义了两个Bean,一个TomcatWebServer,一个JettyWebServer,不过这两个要生效的前提是符合当前所指定的条件,比如:
- 只有存在"org.apache.catalina.startup.Tomcat"类,那么才有TomcatWebServer这个Bean
- 只有存在"org.eclipse.jetty.server.Server"类,那么才有TomcatWebServer这个Bean
并且我们只需要在SJBSpringApplication中getWebServer方法,如此实现:
public static WebServer getWebServer(ApplicationContext applicationContext){
    // key为beanName, value为Bean对象
    Map<String, WebServer> webServers = applicationContext.getBeansOfType(WebServer.class);
    if (webServers.isEmpty()) {
        throw new NullPointerException();
    }
    if (webServers.size() > 1) {
        throw new IllegalStateException();
    }
    // 返回唯一的一个
    return webServers.values().stream().findFirst().get();
}
这样整体SpringBoot启动逻辑就是这样的:
- 创建一个AnnotationConfigWebApplicationContext容器
- 解析UserApplication类,然后进行扫描
- 通过getWebServer方法从Spring容器中获取WebServer类型的Bean
- 调用WebServer对象的start方法
有了以上步骤,我们还差了一个关键步骤,就是Spring要能解析到WebServiceAutoConfiguration这个自动配置类,因为不管这个类里写了什么代码,Spring不去解析它,那都是没用的,此时我们需要SpringBoot在run方法中,能找到WebServiceAutoConfiguration这个配置类并添加到Spring容器中。
UserApplication是Spring的一个配置类,但是UserApplication是我们传递给SpringBoot,从而添加到Spring容器中去的,而WebServiceAutoConfiguration就需要SpringBoot去自动发现,而不需要程序员做任何配置才能把它添加到Spring容器中去,而且要注意的是,Spring容器扫描也是扫描不到WebServiceAutoConfiguration这个类的,因为我们的扫描路径是"com.sjb.user",而WebServiceAutoConfiguration所在的包路径为"org.springboot"。
3.5 发现自动配置类
3.5.1 方法一 直接@Import
直接在org.springboot.SJBSpringBootApplication注解上加上完成自动装配
@Import(WebServiceAutoConfiguration.class)
3.5.2 方法二 使用SPI
SpringBoot中自己实现了一套SPI机制,也就是我们熟知的spring.factories文件,那么我们模拟就不搞复杂了,就直接用JDK自带的SPI机制。
因为针对后面所有的自动配置类,一个一个导入不现实,所以就需要使用SPI。
然后需要在resources目录下新建META-INF/services目录,并且在这个目录下新建一个与上述接口的全限定名一致的文件org.springboot.AutoConfiguration,在这个文件中写入接口的实现类的全限定名:
org.springboot.WebServiceAutoConfiguration
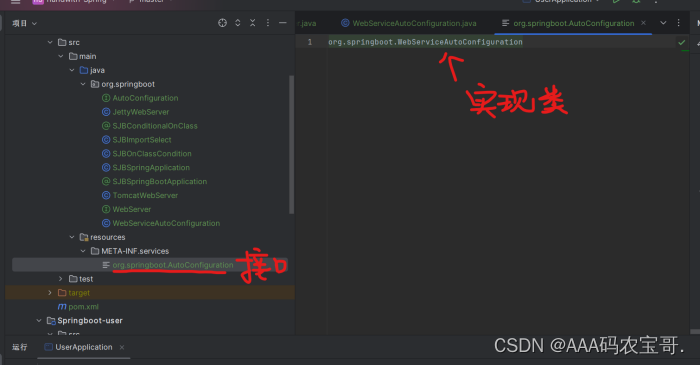
SPI的配置就完成了,相当于通过org.springboot.AutoConfiguration文件配置了springboot中所提供的配置类。
并且提供一个接口:
public interface AutoConfiguration {
}
并且WebServiceAutoConfiguration实现该接口:
@Configuration
public class WebServiceAutoConfiguration implements AutoConfiguration{
    @Bean
    @SJBConditionalOnClass("org.apache.catalina.startup.Tomcat")
    public TomcatWebServer tomcatWebServer(){
        return new TomcatWebServer();
    }
    @Bean
    @SJBConditionalOnClass("org.eclipse.jetty.server.Server")
    public JettyWebServer jettyWebServer(){
        return new JettyWebServer();
    }
}
然后我们再利用spring中的@Import技术来导入这些配置类,我们在@SJBSpringBootApplication的定义上增加如下代码:
@Target(ElementType.TYPE)
@Retention(RetentionPolicy.RUNTIME)
@Configuration
@ComponentScan
@Import(SJBImportSelect.class)
public @interface SJBSpringBootApplication {
}
引入的SJBImportSelect如下,通过serviceLoader加载实现类并调用:
public class SJBImportSelect implements DeferredImportSelector {
    @Override
    public String[] selectImports(AnnotationMetadata importingClassMetadata) {
        ServiceLoader<AutoConfiguration> serviceLoader = ServiceLoader.load(AutoConfiguration.class);

        List<String> list = new ArrayList<>();
        for (AutoConfiguration autoConfiguration : serviceLoader) {
            list.add(autoConfiguration.getClass().getName());
        }

        return list.toArray(new String[0]);
    }
}
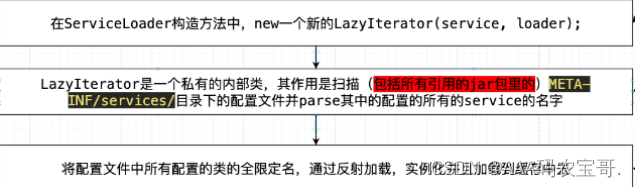
ServiceLoader这个类的源码如下:
public final class ServiceLoader<S> implements Iterable<S> {
    //扫描目录前缀
    private static final String PREFIX = "META-INF/services/";
    // 被加载的类或接口
    private final Class<S> service;
    // 用于定位、加载和实例化实现方实现的类的类加载器
    private final ClassLoader loader;
    // 上下文对象
    private final AccessControlContext acc;
    // 按照实例化的顺序缓存已经实例化的类
    private LinkedHashMap<String, S> providers = new LinkedHashMap<>();
    // 懒查找迭代器
    private java.util.ServiceLoader.LazyIterator lookupIterator;
    // 私有内部类,提供对所有的service的类的加载与实例化
    private class LazyIterator implements Iterator<S> {
        Class<S> service;
        ClassLoader loader;
        Enumeration<URL> configs = null;
        String nextName = null;
        //...
        private boolean hasNextService() {
            if (configs == null) {
                try {
                    //获取目录下所有的类
                    String fullName = PREFIX + service.getName();
                    if (loader == null)
                        configs = ClassLoader.getSystemResources(fullName);
                    else
                        configs = loader.getResources(fullName);
                } catch (IOException x) {
                    //...
                }
                //....
            }
        }
        private S nextService() {
            String cn = nextName;
            nextName = null;
            Class<?> c = null;
            try {
                //反射加载类
                c = Class.forName(cn, false, loader);
            } catch (ClassNotFoundException x) {
            }
            try {
                //实例化
                S p = service.cast(c.newInstance());
                //放进缓存
                providers.put(cn, p);
                return p;
            } catch (Throwable x) {
                //..
            }
            //..
        }
    }
}
这就完成了从org.springboot.AutoConfiguration文件中获取自动配置类的名字,并导入到Spring容器中,从而Spring容器就知道了这些配置类的存在,而对于user项目而言,是不需要修改代码的。
3.5.3 spring.factories源码解析
@ComponentScan 注解只能扫描 Spring Boot 项目包内的 bean 并注册到 Spring 容器中,项目依赖包中的 bean 不会被扫描和注册。此时,我们需要使用 @EnableAutoConfiguration 注解来注册项目依赖包中的 bean。而 spring.factories 文件,可用来记录项目包外需要注册的 bean 类名。
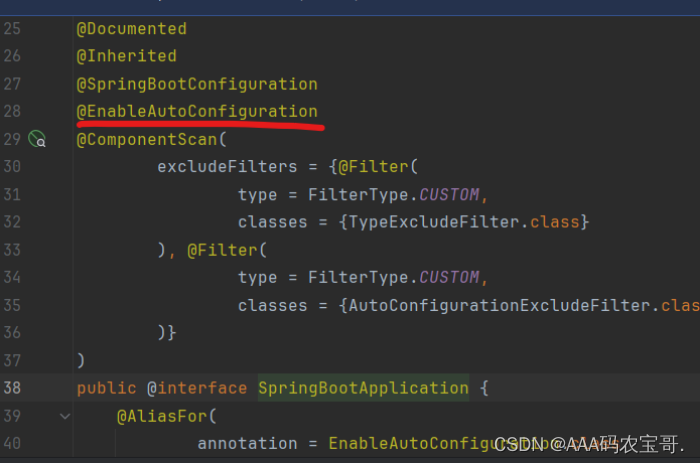
EnableAutoConfiguration注解:
@Target({ElementType.TYPE})
@Retention(RetentionPolicy.RUNTIME)
@Documented
@Inherited
@AutoConfigurationPackage
@Import({AutoConfigurationImportSelector.class})
public @interface EnableAutoConfiguration {
    String ENABLED_OVERRIDE_PROPERTY = "spring.boot.enableautoconfiguration";

    Class<?>[] exclude() default {};

    String[] excludeName() default {};
}
导入的类AutoConfigurationImportSelector.class:
根据接口获取其接口类的名称,这个方法返回的是类名的列表,获取所有的依赖包组成Map
public static List<String> loadFactoryNames(Class<?> factoryType, @Nullable ClassLoader classLoader) {
    ClassLoader classLoaderToUse = classLoader;
    if (classLoader == null) {
        classLoaderToUse = SpringFactoriesLoader.class.getClassLoader();
    }

    String factoryTypeName = factoryType.getName();
    return (List)loadSpringFactories(classLoaderToUse).getOrDefault(factoryTypeName, Collections.emptyList());
}
在org.springframework.core.io.support.SpringFactoriesLoader#loadSpringFactories中
然后从Map集合中找到Value,找他的META-INF/spring.factories,
private static Map<String, List<String>> loadSpringFactories(ClassLoader classLoader) {
    Map<String, List<String>> result = (Map)cache.get(classLoader);
    if (result != null) {
        return result;
    } else {
        Map<String, List<String>> result = new HashMap();

        try {
            Enumeration<URL> urls = classLoader.getResources("META-INF/spring.factories");

            while(urls.hasMoreElements()) {
                URL url = (URL)urls.nextElement();
                UrlResource resource = new UrlResource(url);
spring.factories的是通过Properties解析得到的,所以我们在写文件中的内容都是安装下面这种方式配置的:
com.xxx.interface=com.xxx.classname
当在Maven中引入依赖时,Maven会负责下载并管理这些依赖包,但并不涉及具体的配置和集成。而当你在项目中需要使用Spring框架来管理组件、配置和依赖时,你可能需要在META-INF/spring.factories文件中注册一些类或者配置,以便Spring框架在应用启动时自动扫描并按照这些配置进行初始化。
所以,Maven用于管理依赖,而META-INF/spring.factories用于Spring框架的自动化配置和集成,它们可以配合使用来构建一个完整的项目。
需不需要META-INF这取决于依赖包本身的设计和功能。有些依赖包可能已经完全集成了Spring框架,并且在其内部已经做好了相应的自动化配置,因此你只需引入依赖即可直接在Spring项目中使用,而不需要手动添加额外的配置。
另一方面,有些依赖包可能提供了一些Spring框架的扩展或者功能,但并没有直接与Spring框架进行深度集成。在这种情况下,你可能需要在项目中手动配置一些内容,例如在META-INF/spring.factories文件中添加一些配置,以便Spring框架能够识别和使用这些扩展或功能。
因此,需要在META-INF中添加配置的情况取决于依赖包本身的特性以及与Spring框架的集成程度。


 1173
1173


 被折叠的 条评论
为什么被折叠?
被折叠的 条评论
为什么被折叠?
 到【灌水乐园】发言


