


参考视频(编程不良人)
身份验证的过程
在自定义身份验证的数据源之前,首先回顾一下SS身份验证的流程。
在ss的官网里有这样一张图
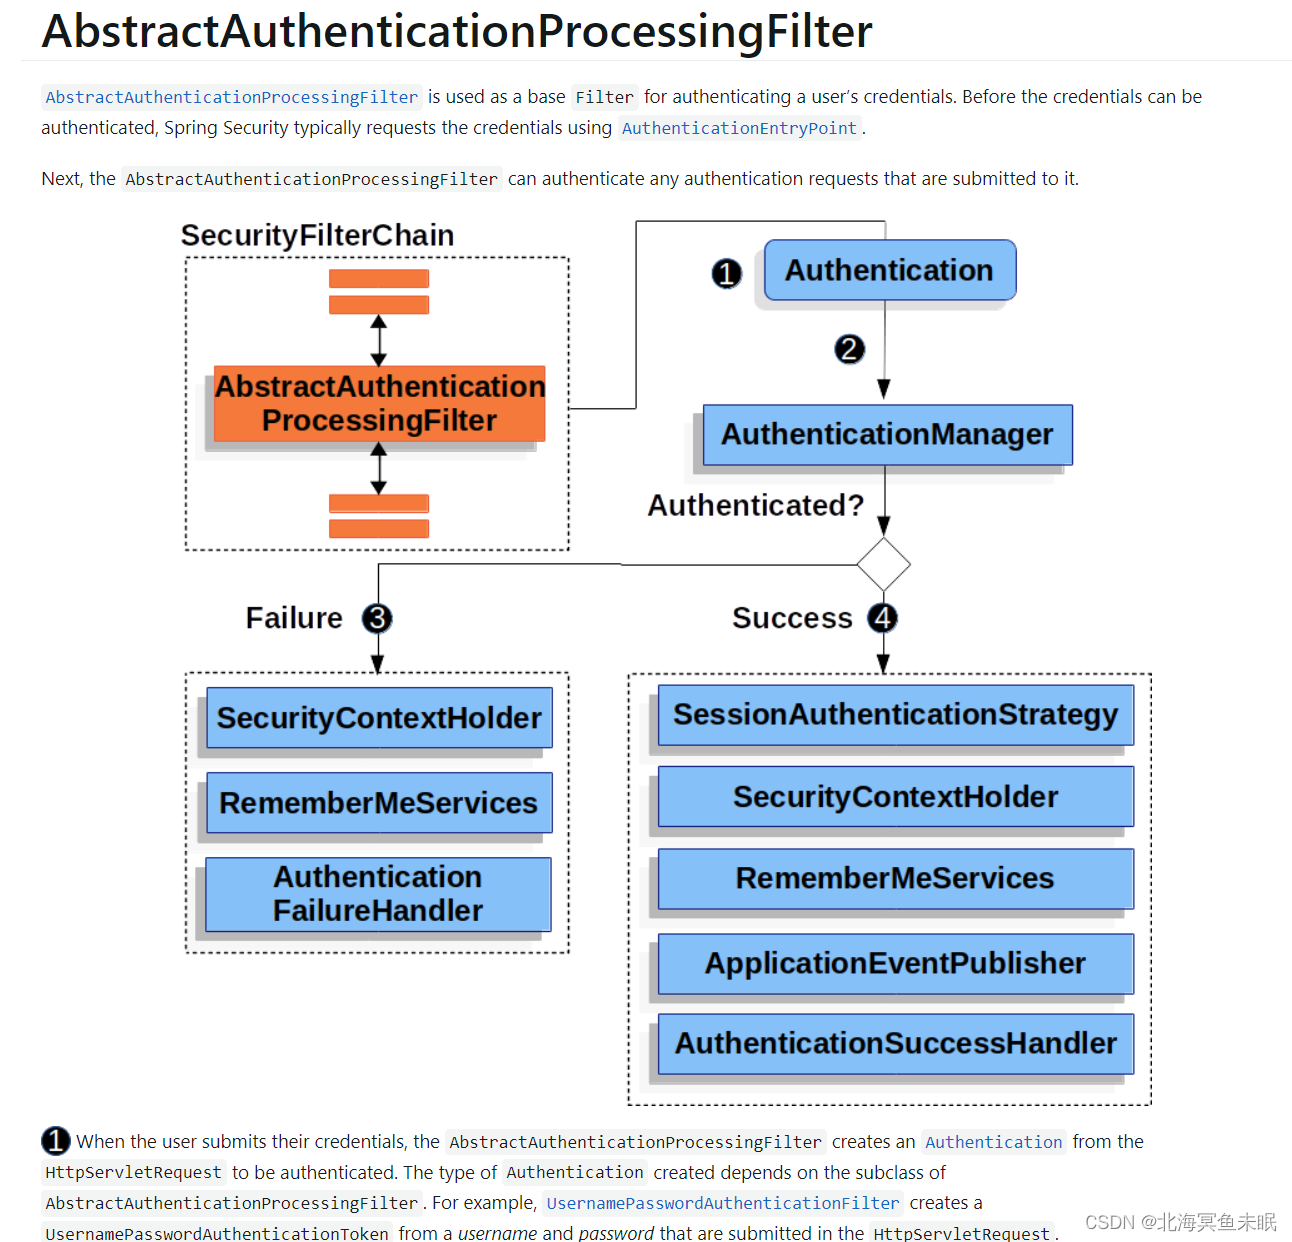
首先过滤器会走到接口AuthenticationManager的实现类ProviderManager里面。它里面的方法
public Authentication authenticate(Authentication authentication)
会把请求的username、password封装成一个完整的Authentication 对象。这个方法实现逻辑是这样的。
ProviderManager有一个变量private List<AuthenticationProvider> providers = Collections.emptyList();,首先遍历这个List里面所有的AuthenticationProvider,只要有一个验证的过去就会验证通过,如果所有的都验证不通过就会进入下面的代码
if (result == null && parent != null) {
			// Allow the parent to try.
			try {
				result = parentResult = parent.authenticate(authentication);
			}
			catch (ProviderNotFoundException e) {
				// ignore as we will throw below if no other exception occurred prior to
				// calling parent and the parent
				// may throw ProviderNotFound even though a provider in the child already
				// handled the request
			}
			catch (AuthenticationException e) {
				lastException = parentException = e;
			}
		}
可以看到这里面有一个parent变量private AuthenticationManager parent;这也是ProviderManager里面的一个成员变量,对应的是一个父类的AuthenticationManager ,这是一个全局的变量,可以有多个孩子,如果孩子的都不通过就会去父类里面的进行验证,这就是ss源码实现的一部分流程。
默认情况下,全局的AuthenticationManager 会调用DaoAuthenticationProvider实现认证,这个类里面有下面这个方法
protected final UserDetails retrieveUser(String username,
			UsernamePasswordAuthenticationToken authentication)
			throws AuthenticationException {
		prepareTimingAttackProtection();
		try {
			UserDetails loadedUser = this.getUserDetailsService().loadUserByUsername(username);
			if (loadedUser == null) {
				throw new InternalAuthenticationServiceException(
						"UserDetailsService returned null, which is an interface contract violation");
			}
			return loadedUser;
		}
		catch (UsernameNotFoundException ex) {
			mitigateAgainstTimingAttack(authentication);
			throw ex;
		}
		catch (InternalAuthenticationServiceException ex) {
			throw ex;
		}
		catch (Exception ex) {
			throw new InternalAuthenticationServiceException(ex.getMessage(), ex);
		}
	}
里面的验证又调用了UserDetailsService接口的实现类进行验证,默认的实现类是InMemoryUserDetailsManager,里面的验证方法如下
public UserDetails loadUserByUsername(String username)
			throws UsernameNotFoundException {
		UserDetails user = users.get(username.toLowerCase());

		if (user == null) {
			throw new UsernameNotFoundException(username);
		}

		return new User(user.getUsername(), user.getPassword(), user.isEnabled(),
				user.isAccountNonExpired(), user.isCredentialsNonExpired(),
				user.isAccountNonLocked(), user.getAuthorities());
	}
这里就是从内存中验证对象了。
通过上面的流程梳理我们知道了,如果想要实现自定义的数据源的认证,只需要覆盖UserDetailsService里面的loadUserByUsername方法,在这个方法里面自定义验证的逻辑,并且把这个UserDetailsService的实现类配置到AuthenticationManager 里面去即可。
自定义全局的
AuthenticationManager
我们也可以自己创建一个UserDetailService类型的bean这样就可以使得自动配置类UserDetailsServiceAutoConfiguration 失效。部分源码如下
@Configuration(proxyBeanMethods = false)
@ConditionalOnClass(AuthenticationManager.class)
@ConditionalOnBean(ObjectPostProcessor.class)
@ConditionalOnMissingBean(
		value = { AuthenticationManager.class, AuthenticationProvider.class, UserDetailsService.class },
		type = { "org.springframework.security.oauth2.jwt.JwtDecoder",
				"org.springframework.security.oauth2.server.resource.introspection.OpaqueTokenIntrospector" })
public class UserDetailsServiceAutoConfiguration {

	private static final String NOOP_PASSWORD_PREFIX = "{noop}";

	private static final Pattern PASSWORD_ALGORITHM_PATTERN = Pattern.compile("^\\{.+}.*$");
注入的UserDetailService如下:
@Configuration
public class WebSecurityConfiguration extends WebSecurityConfigurerAdapter {
//直接创建一个bean破坏
@Bean
public UserDetailsService userDetailsService(){
InMemoryUserDetailsManager inMemoryUserDetailsManager = new InMemoryUserDetailsManager();
inMemoryUserDetailsManager.createUser(User.withUsername("aaa").password("{noop}123").roles("admin").build());
return inMemoryUserDetailsManager;
}
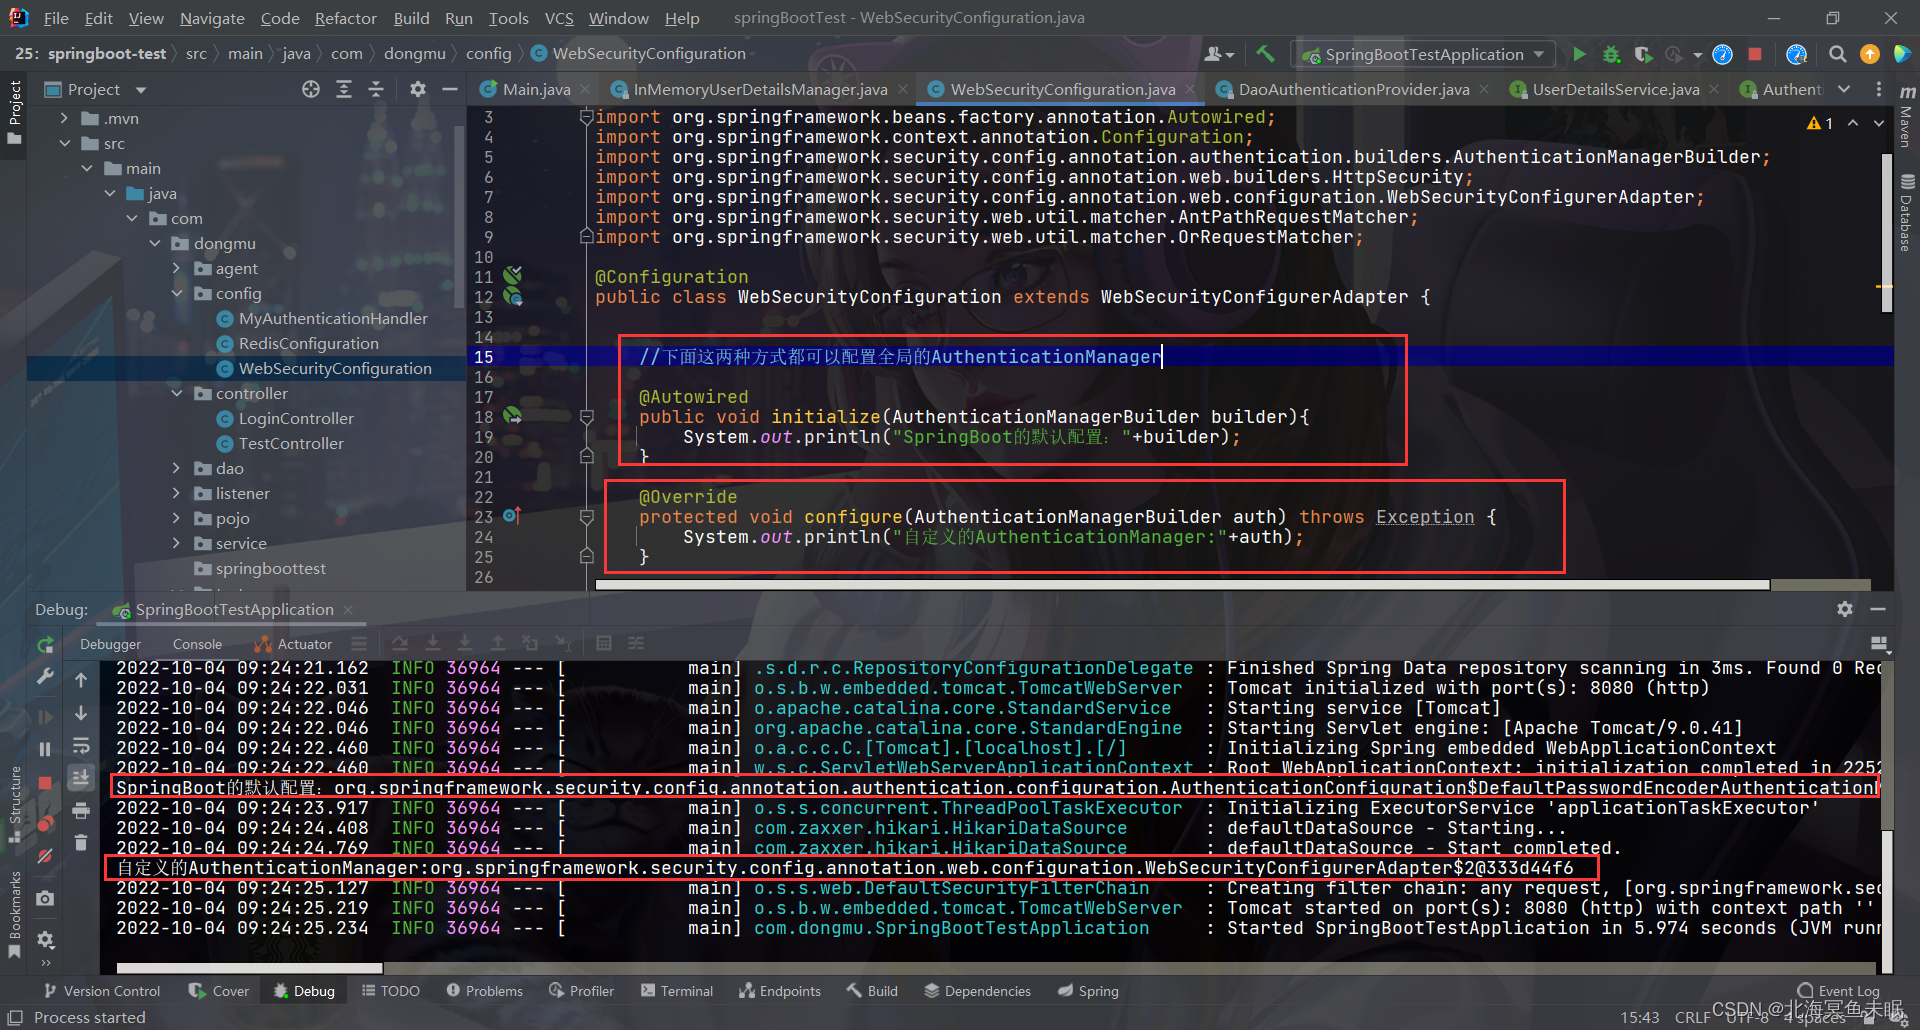
//下面这两种方式都可以配置全局的AuthenticationManager
//这种是默认的全局的AuthenticationManager
// @Autowired
// public void initialize(AuthenticationManagerBuilder builder) throws Exception {
//
// InMemoryUserDetailsManager inMemoryUserDetailsManager = new InMemoryUserDetailsManager();
//
// inMemoryUserDetailsManager.createUser(User.withUsername("aaa").password("{noop}123").roles("admin").build());
//
// builder.userDetailsService(inMemoryUserDetailsManager);
// //上面的配置会把全局的配置文件里面的配置替换掉
//
// System.out.println("SpringBoot的默认配置:"+builder);
// }
//这里自定义的AuthenticationManager会把工厂默认的覆盖掉,
// 这样即使上面创建了UserDetailService的bean也不会自动注入进去,这就需要我们自己指定
//认证的数据源对象,也就是UserDetailService。
@Bean
@Override
protected void configure(AuthenticationManagerBuilder builder) throws Exception {
builder.userDetailsService(userDetailsService());
System.out.println("自定义的AuthenticationManager:"+builder);
}
数据库表的设计
首先看UserDetailService接口返回的是一个UserDetails 对象
public interface UserDetailsService {
	// ~ Methods
	// ========================================================================================================

	/**
	 * Locates the user based on the username. In the actual implementation, the search
	 * may possibly be case sensitive, or case insensitive depending on how the
	 * implementation instance is configured. In this case, the <code>UserDetails</code>
	 * object that comes back may have a username that is of a different case than what
	 * was actually requested..
	 *
	 * @param username the username identifying the user whose data is required.
	 *
	 * @return a fully populated user record (never <code>null</code>)
	 *
	 * @throws UsernameNotFoundException if the user could not be found or the user has no
	 * GrantedAuthority
	 */
	UserDetails loadUserByUsername(String username) throws UsernameNotFoundException;
}
Userdetails又是一个接口
/*
 * Copyright 2004, 2005, 2006 Acegi Technology Pty Limited
 *
 * Licensed under the Apache License, Version 2.0 (the "License");
 * you may not use this file except in compliance with the License.
 * You may obtain a copy of the License at
 *
 *      https://www.apache.org/licenses/LICENSE-2.0
 *
 * Unless required by applicable law or agreed to in writing, software
 * distributed under the License is distributed on an "AS IS" BASIS,
 * WITHOUT WARRANTIES OR CONDITIONS OF ANY KIND, either express or implied.
 * See the License for the specific language governing permissions and
 * limitations under the License.
 */

package org.springframework.security.core.userdetails;

import org.springframework.security.core.Authentication;
import org.springframework.security.core.GrantedAuthority;

import java.io.Serializable;
import java.util.Collection;

/**
 * Provides core user information.
 *
 * <p>
 * Implementations are not used directly by Spring Security for security purposes. They
 * simply store user information which is later encapsulated into {@link Authentication}
 * objects. This allows non-security related user information (such as email addresses,
 * telephone numbers etc) to be stored in a convenient location.
 * <p>
 * Concrete implementations must take particular care to ensure the non-null contract
 * detailed for each method is enforced. See
 * {@link org.springframework.security.core.userdetails.User} for a reference
 * implementation (which you might like to extend or use in your code).
 *
 * @see UserDetailsService
 * @see UserCache
 *
 * @author Ben Alex
 */
public interface UserDetails extends Serializable {
	// ~ Methods
	// ========================================================================================================

	/**
	 * Returns the authorities granted to the user. Cannot return <code>null</code>.
	 *
	 * @return the authorities, sorted by natural key (never <code>null</code>)
	 */
	Collection<? extends GrantedAuthority> getAuthorities();

	/**
	 * Returns the password used to authenticate the user.
	 *
	 * @return the password
	 */
	String getPassword();

	/**
	 * Returns the username used to authenticate the user. Cannot return <code>null</code>.
	 *
	 * @return the username (never <code>null</code>)
	 */
	String getUsername();

	/**
	 * Indicates whether the user's account has expired. An expired account cannot be
	 * authenticated.
	 *
	 * @return <code>true</code> if the user's account is valid (ie non-expired),
	 * <code>false</code> if no longer valid (ie expired)
	 */
	boolean isAccountNonExpired();

	/**
	 * Indicates whether the user is locked or unlocked. A locked user cannot be
	 * authenticated.
	 *
	 * @return <code>true</code> if the user is not locked, <code>false</code> otherwise
	 */
	boolean isAccountNonLocked();

	/**
	 * Indicates whether the user's credentials (password) has expired. Expired
	 * credentials prevent authentication.
	 *
	 * @return <code>true</code> if the user's credentials are valid (ie non-expired),
	 * <code>false</code> if no longer valid (ie expired)
	 */
	boolean isCredentialsNonExpired();

	/**
	 * Indicates whether the user is enabled or disabled. A disabled user cannot be
	 * authenticated.
	 *
	 * @return <code>true</code> if the user is enabled, <code>false</code> otherwise
	 */
	boolean isEnabled();
}
它的实现类中有一个是User
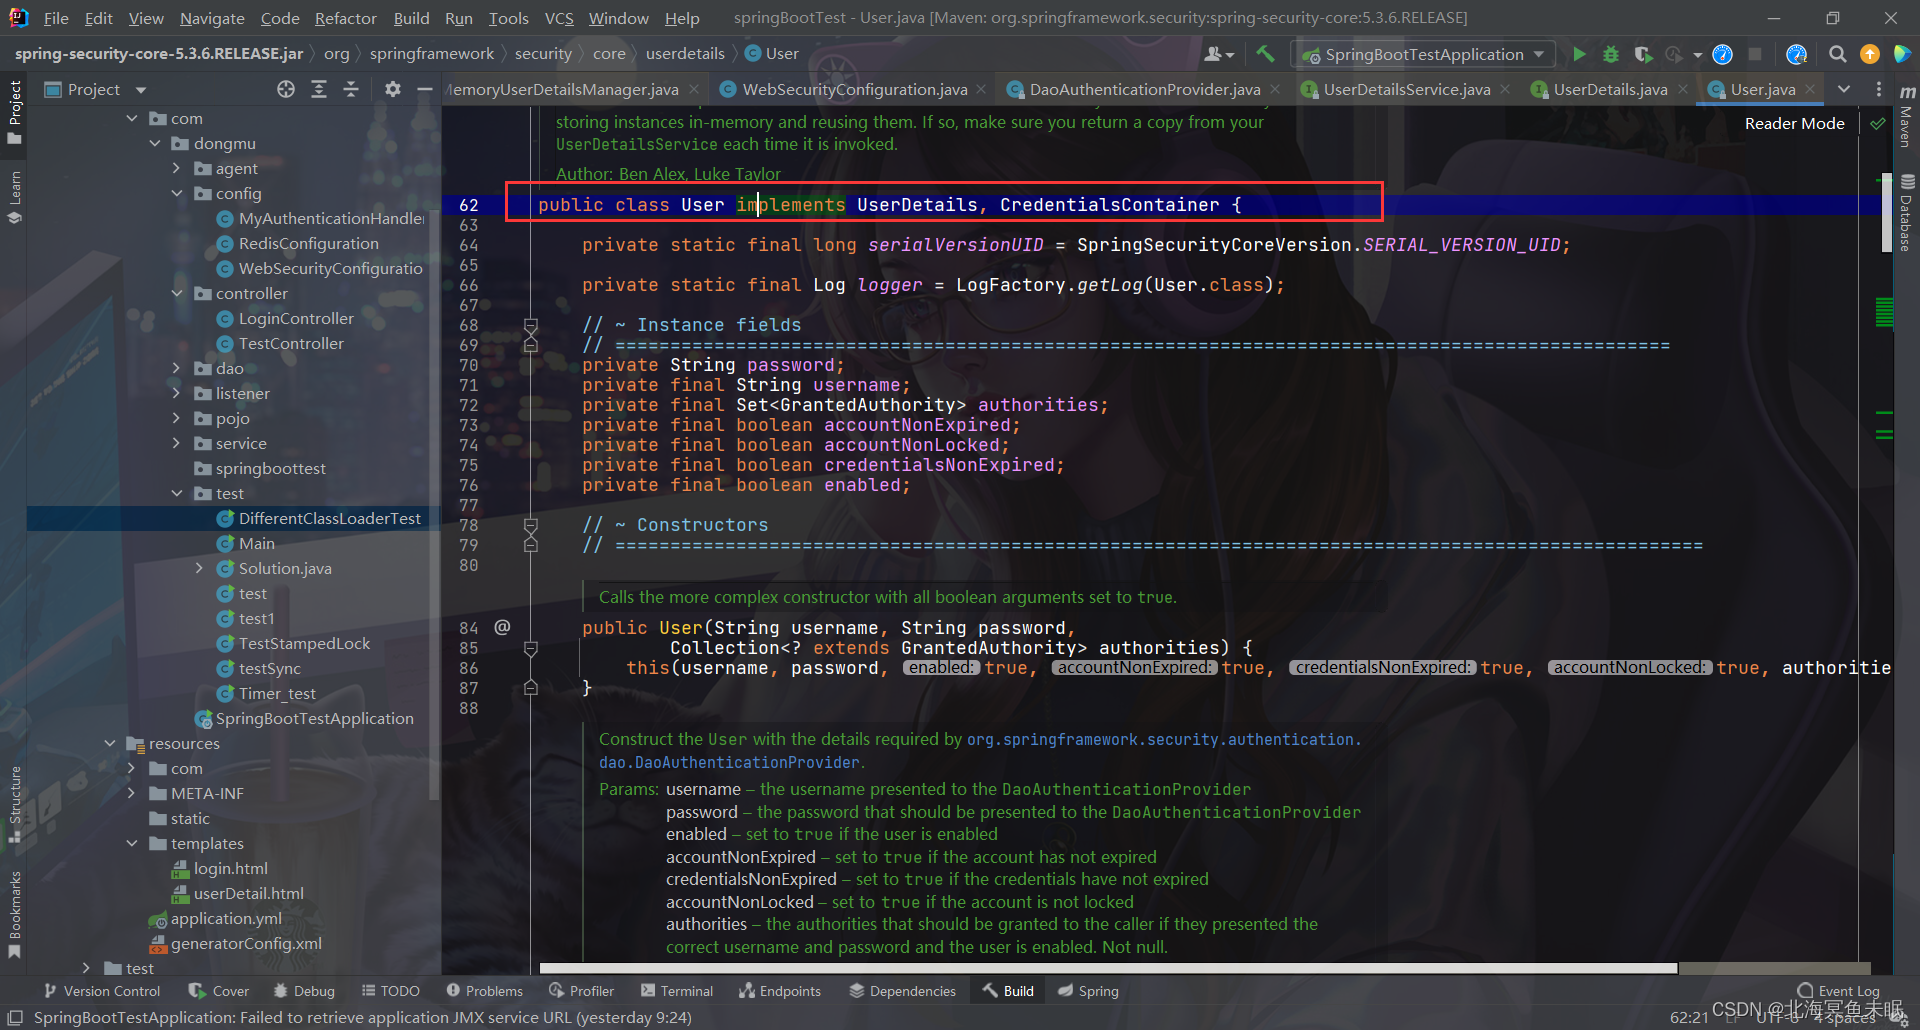
首先根据User类的内部的字段信息创建如下的数据库表并设置测试用例
用户表User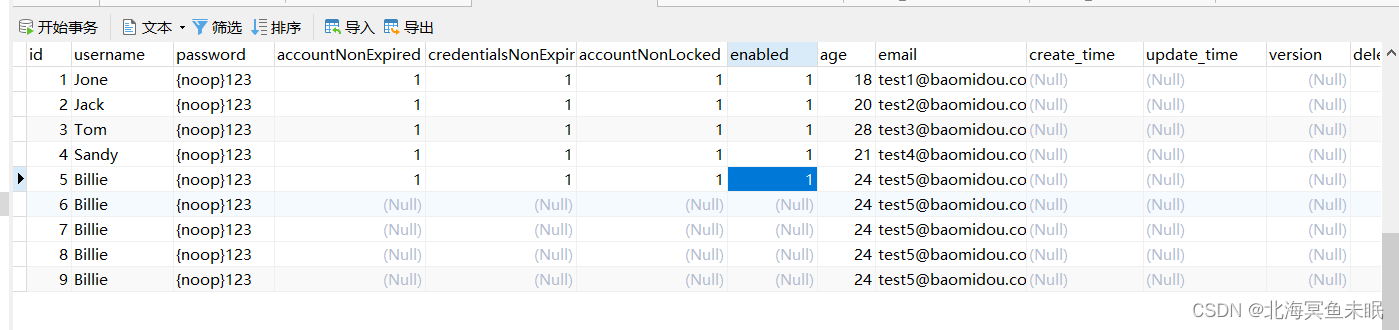
角色表role
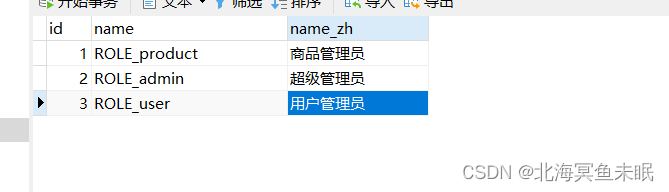
关系表user_role

之后我们使用mybatis的代码生成器直接生成代码
<?xml version="1.0" encoding="UTF-8"?>
<!DOCTYPE generatorConfiguration
PUBLIC "-//mybatis.org//DTD MyBatis Generator Configuration 1.0//EN"
"http://mybatis.org/dtd/mybatis-generator-config_1_0.dtd">
<generatorConfiguration>
<context id="DB2Tables" targetRuntime="MyBatis3">
<commentGenerator>
<property name="suppressDate" value="true"/>
<property name="suppressAllComments" value="true"/>
</commentGenerator>
<!--数据库链接地址账号密码-->
<jdbcConnection driverClass="com.mysql.jdbc.Driver"
connectionURL="jdbc:mysql://localhost:3306/db01?useUnicode=true&serverTimezone=GMT%2b8&characterEncoding=UTF-8&useSSL=false&failOverReadOnly=false"
userId="root" password="123456">
</jdbcConnection>
<javaTypeResolver>
<property name="forceBigDecimals" value="false"/>
</javaTypeResolver>
<!--生成Model类存放位置-->
<javaModelGenerator targetPackage="com.dongmu.pojo" targetProject="src/main/java">
<property name="enableSubPackages" value="true"/>
<property name="trimStrings" value="true"/>
</javaModelGenerator>
<!--生成映射文件存放位置-->
<!--这个位置一定要和dao接口的路径一样才能找到-->
<sqlMapGenerator targetPackage="com.dongmu.dao" targetProject="src/main/resources">
<property name="enableSubPackages" value="true"/>
</sqlMapGenerator>
<!--生成Dao类存放位置-->
<!-- 客户端代码,生成易于使用的针对Model对象和XML配置文件 的代码
type="ANNOTATEDMAPPER",生成Java Model 和基于注解的Mapper对象
type="MIXEDMAPPER",生成基于注解的Java Model 和相应的Mapper对象
type="XMLMAPPER",生成SQLMap XML文件和独立的Mapper接口
-->
<javaClientGenerator type="XMLMAPPER" targetPackage="com.dongmu.dao" targetProject="src/main/java">
<property name="enableSubPackages" value="true"/>
</javaClientGenerator>
<!--生成对应表及类名-->
<table tableName="user" domainObjectName="User" enableCountByExample="false" enableUpdateByExample="false"
enableDeleteByExample="false" enableSelectByExample="false" selectByExampleQueryId="false">
<!--添加属性useActualColumnNames为true,那么生成的对象字段就跟表一样-->
<property name="useActualColumnNames" value="true"/>
</table>
<table tableName="role" domainObjectName="Role" enableCountByExample="false" enableUpdateByExample="false"
enableDeleteByExample="false" enableSelectByExample="false" selectByExampleQueryId="false">
<!--添加属性useActualColumnNames为true,那么生成的对象字段就跟表一样-->
<property name="useActualColumnNames" value="true"/>
</table>
<table tableName="user_role" domainObjectName="UserRole" enableCountByExample="false" enableUpdateByExample="false"
enableDeleteByExample="false" enableSelectByExample="false" selectByExampleQueryId="false">
<!--添加属性useActualColumnNames为true,那么生成的对象字段就跟表一样-->
<property name="useActualColumnNames" value="true"/>
</table>
<!--<table tableName="stockTheme" domainObjectName="StockTheme" enableCountByExample="false" enableUpdateByExample="false" enableDeleteByExample="false" enableSelectByExample="false" selectByExampleQueryId="false"></table>-->
</context>
</generatorConfiguration>
在接口里面写代码测试
@RequestMapping("/public/test")
    public String justatest(){
//        testServiceImpl.test01();
//        Dept dept = deptMapper.selectByPrimaryKey(1l);
//        System.out.println(dept);

        Role role = roleMapper.selectByPrimaryKey(1l);

        System.out.println(role.toString());
        return "just a test,这个是公共资源!";
    }
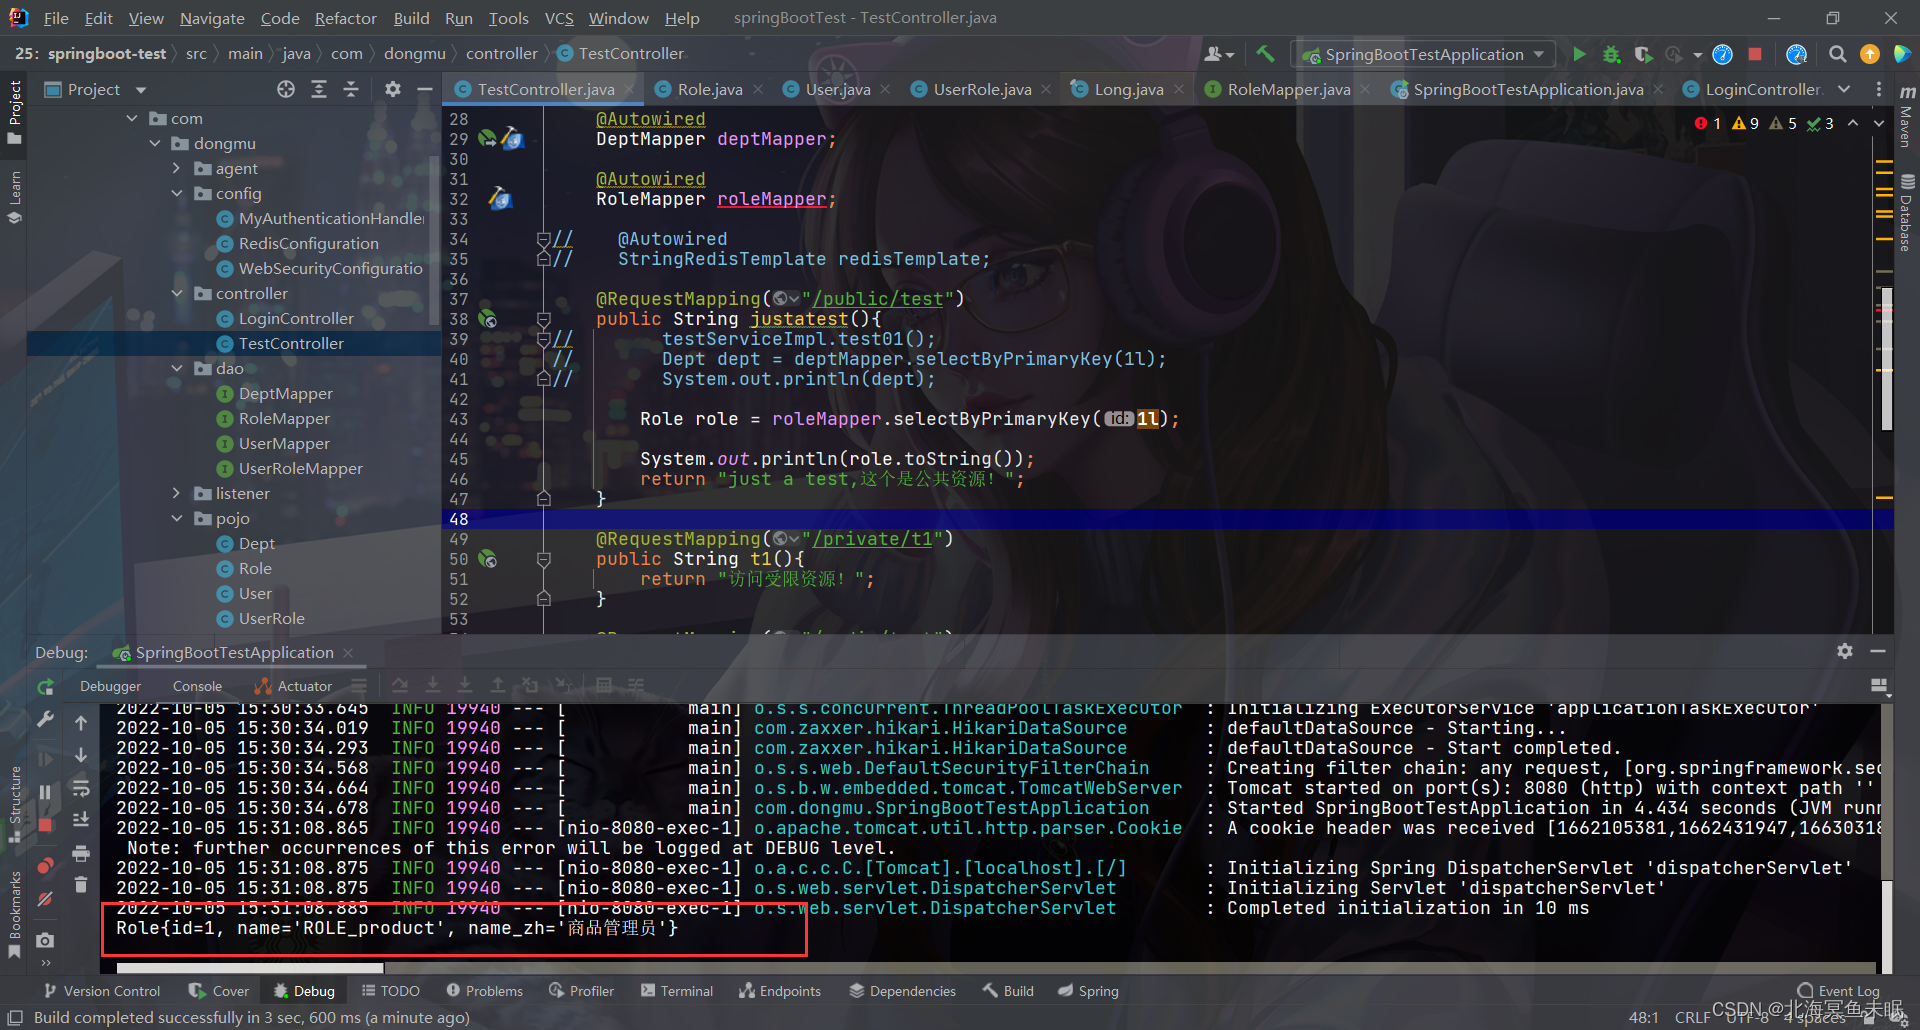
访问之后可以看到数据库连接成功。
配置文件
# 应用名称
spring:

  thymeleaf:
    cache: false #可以让我们的修改立即生效

  security:
    user:
      name: root
      password: root
      roles:
        -


  application:
  name: springBootTest
  datasource:
    type: com.alibaba.druid.pool.DruidDataSource
    url: jdbc:mysql://localhost:3306/db01?useSSL=false&serverTimezone=UTC
    name: defaultDataSource
    driver-class-name: com.mysql.cj.jdbc.Driver
    username: root
    password: 123456
#下面这些内容是为了让MyBatis映射
#指定Mybatis的Mapper文件
mybatis:
  configuration:
    log-impl: org.apache.ibatis.logging.stdout.StdOutImpl
  mapper-locations:
  classpath: mappers/*xml
#指定Mybatis的实体目录
  type-aliases-package: com.dongmu.springboottest.mybatis.entity
server:
  port: 8080

#spring.aop.proxy-target-class=false


redis:
  host: localhost
  port: 6379
  #password: xxx
  lettuce:
    pool:
      max-active: 8 # 连接池最大连接数(使用负值表示没有限制)
      max-wait: -1 # 连接池最大阻塞等待时间(使用负值表示没有限制)
      max-idle: 8 # 连接池中的最大空闲连接
      min-idle: 0 # 连接池中的最小空闲连接
  timeout: 3000 # 连接超时时间(毫秒)
我们对实体类User进行修改如下
package com.dongmu.pojo;

import lombok.Data;
import lombok.ToString;
import org.springframework.security.core.GrantedAuthority;
import org.springframework.security.core.authority.SimpleGrantedAuthority;
import org.springframework.security.core.userdetails.UserDetails;

import java.util.*;

@Data
@ToString
public class User implements UserDetails {
    private Long id;

    private String username;

    private String password;

    private Boolean accountNonExpired;

    private Boolean credentialsNonExpired;

    private Boolean accountNonLocked;

    private Boolean enabled;

    private Integer age;

    private String email;

    private Date create_time;

    private Date update_time;

    private Integer version;

    private Byte deleted;

    private List<Role> roles = new ArrayList<>();

    //返回权限信息
    @Override
    public Collection<? extends GrantedAuthority> getAuthorities() {
        Set<SimpleGrantedAuthority> simpleGrantedAuthorities = new HashSet<>();
        roles.forEach(role -> {
            SimpleGrantedAuthority simpleGrantedAuthority = new SimpleGrantedAuthority(this.username);
            simpleGrantedAuthorities.add(simpleGrantedAuthority);
        });
        return simpleGrantedAuthorities;
    }

    @Override
    public boolean isAccountNonExpired() {
        return accountNonExpired;
    }

    @Override
    public boolean isAccountNonLocked() {
        return accountNonLocked;
    }

    @Override
    public boolean isCredentialsNonExpired() {
        return credentialsNonExpired;
    }

    @Override
    public boolean isEnabled() {
        return enabled;
    }
}
然后我们自定义UserDetailService方法,并且创建bean
package com.dongmu.config;

import com.dongmu.dao.UserMapper;
import com.dongmu.dao.UserRoleMapper;
import com.dongmu.pojo.Role;
import com.dongmu.pojo.User;
import org.springframework.beans.factory.annotation.Autowired;
import org.springframework.security.core.userdetails.UserDetails;
import org.springframework.security.core.userdetails.UserDetailsService;
import org.springframework.security.core.userdetails.UsernameNotFoundException;
import org.springframework.stereotype.Component;

import java.util.ArrayList;
import java.util.List;


@Component
public class MyUserDetailService implements UserDetailsService {

    @Autowired
    UserMapper userMapper;

    @Autowired
    UserRoleMapper userRoleMapper;

    @Override
    public UserDetails loadUserByUsername(String username) throws UsernameNotFoundException {
        User user = userMapper.selectByUserName(username);

        if (user==null) throw new RuntimeException("用户名不存在。");

        //查询用户的权限信息
        List<Long> longs = userRoleMapper.selectUserRoleIdsByUserId(user.getId());
        if (longs!=null&&longs.size()>0){
            List<Role> roles = userRoleMapper.selectUserRolesByUserId(user.getId());
            user.setRoles(roles);
        }else {
            user.setRoles(new ArrayList<>());
        }
        return user;
    }
}
然后在WebSecurityConfiguration 中使用构造注入的方式注入进去,
@Configuration
public class WebSecurityConfiguration extends WebSecurityConfigurerAdapter {

    private final MyUserDetailService myUserDetailService;

    public WebSecurityConfiguration(MyUserDetailService myUserDetailService) {
        this.myUserDetailService = myUserDetailService;
    }
    @Override
    protected void configure(AuthenticationManagerBuilder builder) throws Exception {
//        builder.userDetailsService(userDetailsService());
        builder.userDetailsService(myUserDetailService);

        System.out.println("自定义的AuthenticationManager:"+builder);
    }

    //这个覆盖的作用是,上面我们自己定义的AuthenticationManager不会暴漏在spring工厂中,只能内部使用,无法注入
    //到其他的组件当中,如果我们想要注入到其他的组件当中,就需要覆盖父类中的这个方法。
    @Bean
    @Override
    protected AuthenticationManager authenticationManager() throws Exception {
        return super.authenticationManager();
    }
}
这时候我们启动项目访问受限资源,只有使用user表中的用户名和密码才可以访问
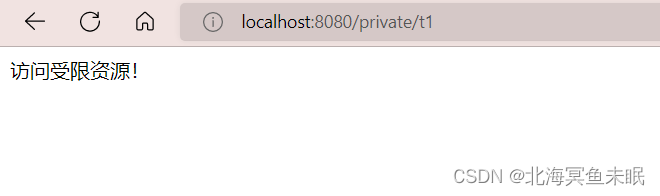
使用其他账号访问就会出现异常。


 562
562


 被折叠的 条评论
为什么被折叠?
被折叠的 条评论
为什么被折叠?
 到【灌水乐园】发言


