【ESP-IDF】如何安装ESP-IDF?

【ESP-IDF】如何安装ESP-IDF?


首先参考这篇视频:https://www.bilibili.com/blackboard/webplayer/embed-whitelist-other.html?aid=520120377&bvid=BV1hM411k7zz&cid=888070526&page=1

本篇教程以Windows电脑为例

Windows命令行安装ESP-IDF

官方文档如下:

快速入门 - ESP32 - — ESP-IDF 编程指南 latest 文档

依据官方文档,我们直接参考Windows 平台工具链的标准设置,安装如下ESP-IDF工具安装器:
在这里插入图片描述
这里官方文档已经写的很详细了,就不过多赘述(直接按照默认下一步即可)

Vs Code 图形IDE

首先安装VS Code,这里直接去官网下载即可。

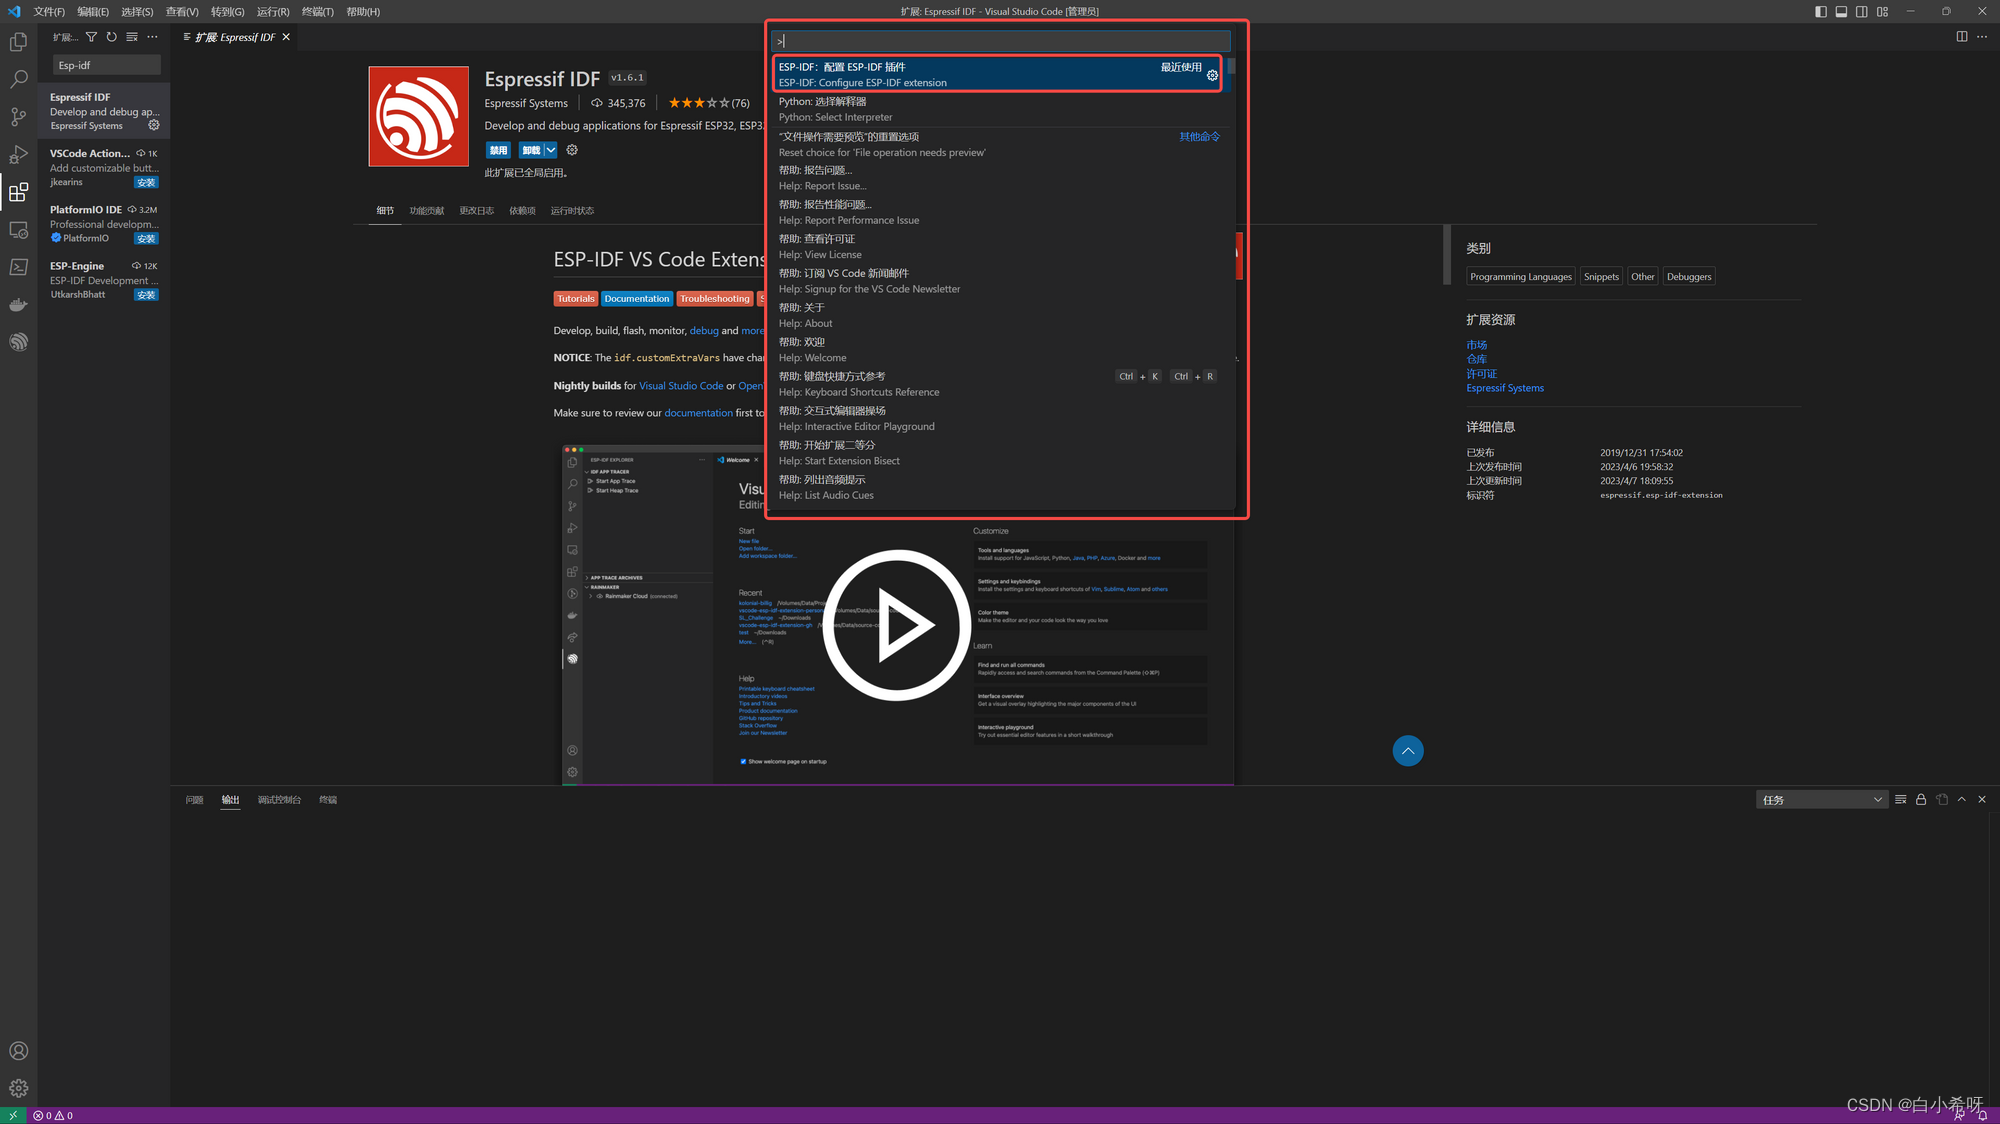
接着在VS Code插件中心下载Espressif IDF
在这里插入图片描述
安装好后,按住键盘上的Ctrl + Shift + P,配置ESP-IDF的插件

在这里插入图片描述
在这里选择USE EXISTING SETUP
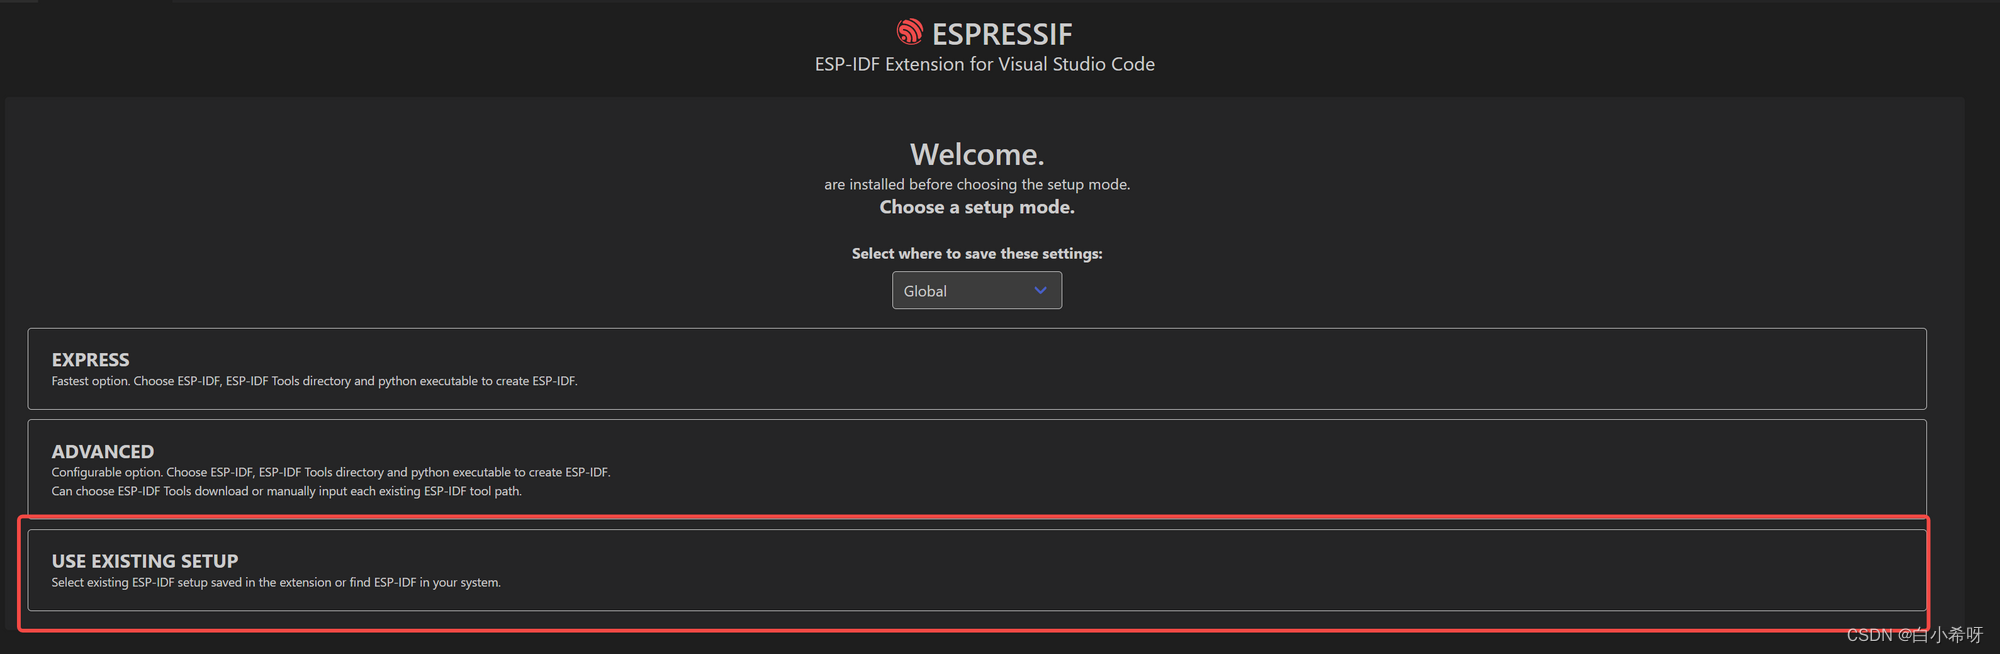
在这里插入图片描述
点击进去之后
在这里插入图片描述
可以发现这里显示了我们之前安装的ESP-IDF环境,如果没有的话请重启电脑再次尝试

在这里插入图片描述
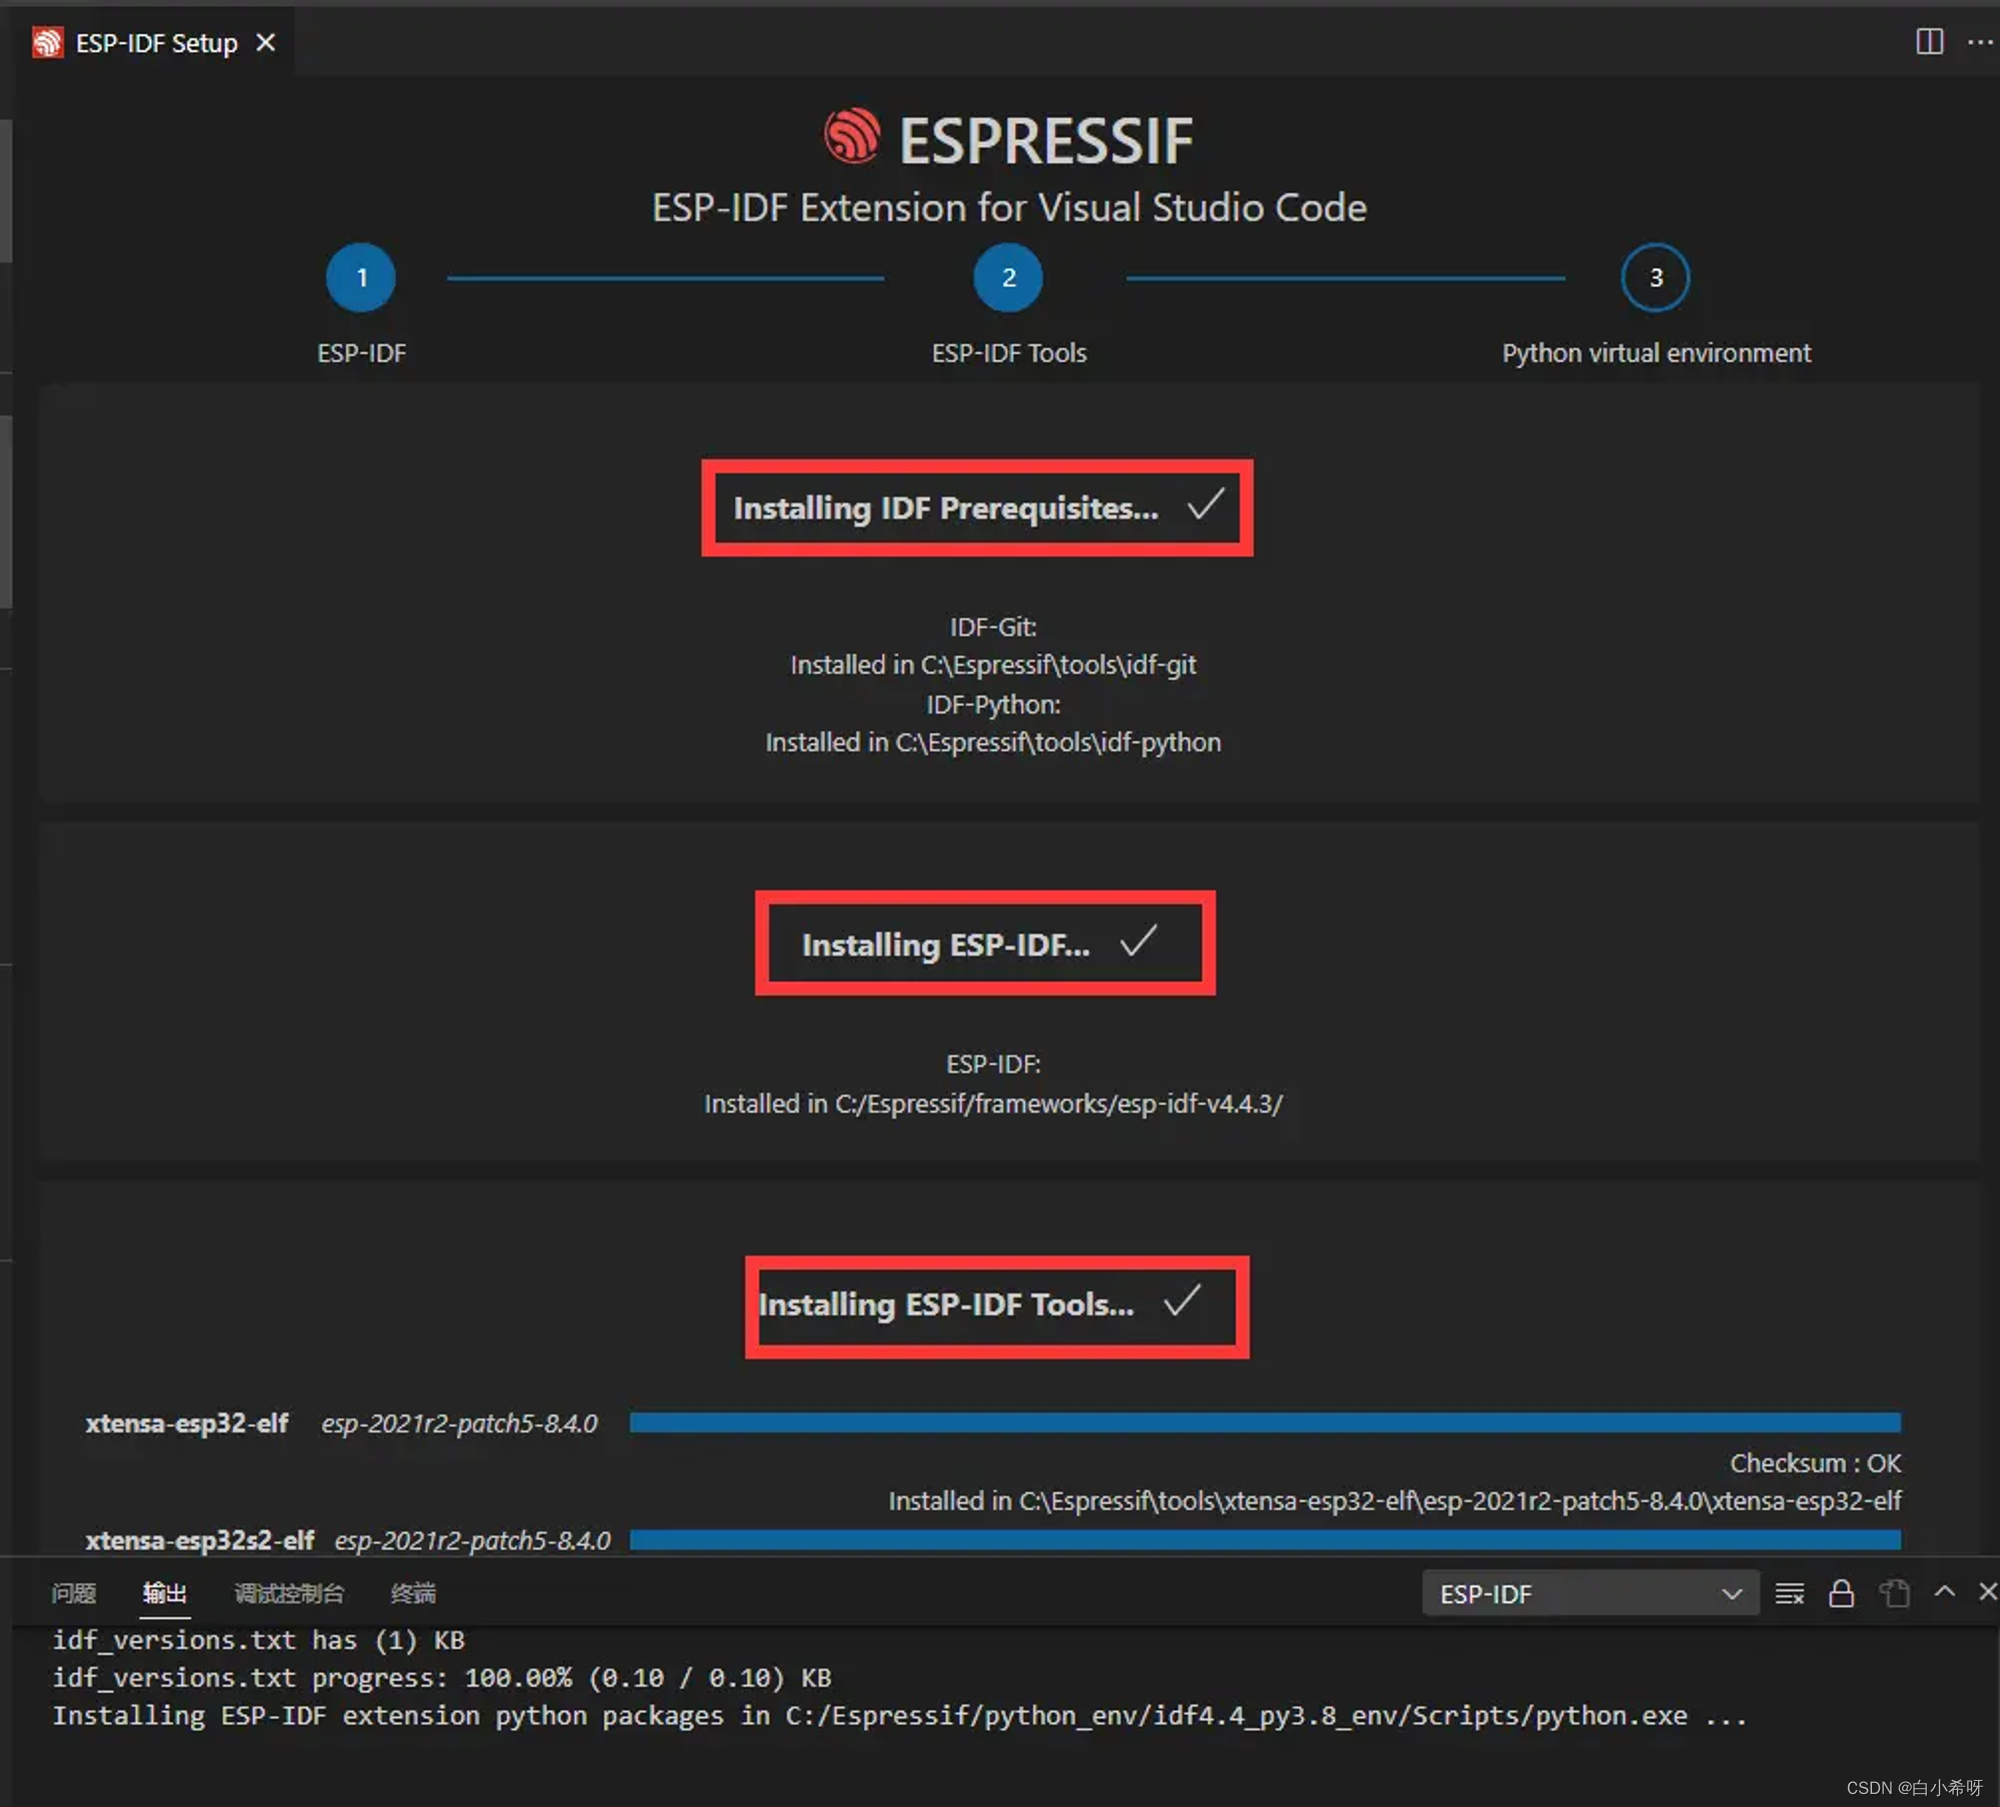
点击之后,你会发现就直接跳转到这个进度,接着等待就好了。
在这里插入图片描述
当你最后出现这个的时候,就说明你已经安装成功了!

  • 1
    点赞
  • 0
    收藏
    觉得还不错? 一键收藏
  • 打赏
    打赏
  • 0
    评论
esp32-freertos-sdk 工具包 See the Getting Started guide links above for a detailed setup guide. This is a quick reference for common commands when working with ESP-IDF projects: Setup Build Environment (See Getting Started guide for a full list of required steps with details.) Install host build dependencies mentioned in Getting Started guide. Add tools/ directory to the PATH Run python -m pip install -r requirements.txt to install Python dependencies Configuring the Project idf.py menuconfig Opens a text-based configuration menu for the project. Use up & down arrow keys to navigate the menu. Use Enter key to go into a submenu, Escape key to go out or to exit. Type ? to see a help screen. Enter key exits the help screen. Use Space key, or Y and N keys to enable (Yes) and disable (No) configuration items with checkboxes "[*]" Pressing ? while highlighting a configuration item displays help about that item. Type / to search the configuration items. Once done configuring, press Escape multiple times to exit and say "Yes" to save the new configuration when prompted. Compiling the Project idf.py build ... will compile app, bootloader and generate a partition table based on the config. Flashing the Project When the build finishes, it will print a command line to use esptool.py to flash the chip. However you can also do this automatically by running: idf.py -p PORT flash Replace PORT with the name of your serial port (like COM3 on Windows, /dev/ttyUSB0 on Linux, or /dev/cu.usbserial-X on MacOS. If the -p option is left out, idf.py flash will try to flash the first available serial port. This will flash the entire project (app, bootloader and partition table) to a new chip. The settings for serial port flashing can be configured with idf.py menuconfig. You don't need to run idf.py build before running idf.py flash, idf.py flash will automatically rebuild anything which needs it. Viewing Serial Output The idf.py monitor target uses the idf_monitor tool to display se

“相关推荐”对你有帮助么?

  • 非常没帮助
  • 没帮助
  • 一般
  • 有帮助
  • 非常有帮助
提交
评论
添加红包

请填写红包祝福语或标题

红包个数最小为10个

红包金额最低5元

当前余额3.43前往充值 >
需支付:10.00
成就一亿技术人!
领取后你会自动成为博主和红包主的粉丝 规则
hope_wisdom
发出的红包

打赏作者

YuZou 邹宇

你的鼓励将是我创作的最大动力

¥1 ¥2 ¥4 ¥6 ¥10 ¥20
扫码支付:¥1
获取中
扫码支付

您的余额不足,请更换扫码支付或充值

打赏作者

实付
使用余额支付
点击重新获取
扫码支付
钱包余额 0

抵扣说明:

1.余额是钱包充值的虚拟货币,按照1:1的比例进行支付金额的抵扣。
2.余额无法直接购买下载,可以购买VIP、付费专栏及课程。

余额充值