


一、什么是service
用于定义一组Pod的访问方式。在Kubernetes集群中,Pods可以动态地启动和停止,它们可能在不同的节点上以不同的IP地址运行。服务提供了一个固定的虚拟IP地址和与之关联的DNS名称,这使得无论Pod在集群中的位置如何,其他服务或外部用户都可以通过该虚拟IP地址或DNS名称访问这组Pod。
通俗一点就是:实现对外服务的统一入口防止pod失联,定义一组pod的访问策略服务发现、负载均衡
特点:
1. 稳定的网络标识符(Stable Network Identifier):
每个服务都有一个唯一的虚拟IP地址和DNS名称,它们是服务的稳定网络标识符。这使得其他组件无需关心Pod的具体位置,而只需访问服务。
2. 负载均衡(Load Balancing):
服务可以将请求分发到其背后的多个Pod,从而实现负载均衡。这对于确保高可用性和提高性能非常重要。
3. 服务发现(Service Discovery):
服务提供了一种简化的服务发现机制。通过服务,其他应用程序和服务可以通过服务的虚拟IP地址或DNS名称来发现和访问特定Pod集合。
4. 标签选择器(Label Selectors):
服务使用标签选择器来定义它所代表的Pod的集合。当Pod具有与服务定义的标签匹配的标签时,它们就成为服务的一部分。
5. ClusterIP、NodePort和LoadBalancer类型:
Kubernetes支持不同类型的服务,例如ClusterIP(默认类型,内部服务)、NodePort(在每个节点上暴露服务端口)和LoadBalancer(通过云提供商的负载均衡器公开服务)。
二、Pod与service的关系
service和pod是通过selector.app标签选择器进行关联的,由它去指定pod的标签labels.app
举例说明:
spec: # 描述
  selector: # 标签选择器确定当前service代理控制哪些pod
    app: nginx
yaml文件:
apiVersion: v1
kind: Service
metadata:
  creationTimestamp: null
  name: test-svc
spec:
  ports:
  - port: 80  # service服务端口
    protocol: TCP
    targetPort: 80 # pod端口常规和容器内部端口一致
  selector:
    app: nginx
status:
  loadBalancer: {}
三、service常用的类型
先创建一个Deployment方便下面类型测试,名称为my-deployment,标签为:my-app,运行端口为80
[root@longxi-01 ~]# vim my-deployment.yaml

apiVersion: apps/v1
kind: Deployment
metadata:
  name: my-deployment
spec:
  replicas: 3
  selector:
    matchLabels:
      app: my-app
  template:
    metadata:
      labels:
        app: my-app
    spec:
      containers:
      - name: my-container
        image: nginx:1.7.9
        ports:
        - containerPort: 80
创建deplayment
[root@longxi-01 ~]# kubectl apply -f  my-deployment.yaml
deployment.apps/my-deployment created
[root@longxi-01 ~]# kubectl get pod --show-labels
NAME                                      READY   STATUS    RESTARTS       AGE     LABELS
my-deployment-7bd9c76786-5kpkq            1/1     Running   0              64s     app=my-app,pod-template-hash=7bd9c76786
my-deployment-7bd9c76786-jqrx2            1/1     Running   0              64s     app=my-app,pod-template-hash=7bd9c76786
my-deployment-7bd9c76786-kkv8m            1/1     Running   0              64s     app=my-app,pod-template-hash=7bd9c76786
nfs-client-provisioner-855774bfd4-rp8nh   1/1     Running   11 (96m ago)   6d16h   app=nfs-client-provisioner,pod-template-hash=855774bfd4
1、ClusterIP
ClusterIP 一般作为集群内部应用互相访问时使用,即分配一个稳定的IP地址(VIP),只能在集群内部访问。接下来通过实际演示进行详细的说明
编写yaml文件,创建名为:my-service 绑定上述Deplayment为它设置一个ClusterIP
[root@longxi-01 ~]# vim my-service.yaml
apiVersion: v1
kind: Service
metadata:
  name: my-service
spec:
  selector:
    app: my-app
  ports:
    - protocol: TCP
      port: 80
      targetPort: 80
  type: ClusterIP
创建并测试
[root@longxi-01 ~]# kubectl apply -f  my-service.yaml
service/my-service created
#查看是否生成my-service
[root@longxi-01 ~]# kubectl get service
NAME         TYPE        CLUSTER-IP      EXTERNAL-IP   PORT(S)   AGE
kubernetes   ClusterIP   10.254.0.1      <none>        443/TCP   33d
my-service   ClusterIP   10.254.18.241   <none>        80/TCP    42s
[root@longxi-01 ~]# kubectl describe svc my-service
Name:              my-service
Namespace:         default
Labels:            <none>
Annotations:       <none>
Selector:          app=my-app
Type:              ClusterIP
IP Family Policy:  SingleStack
IP Families:       IPv4
IP:                10.254.17.232
IPs:               10.254.17.232
Port:              <unset>  80/TCP
TargetPort:        80/TCP
Endpoints:         10.244.1.109:80,10.244.1.110:80,10.244.5.232:80
Session Affinity:  None
Events:            <none>
#测试访问
[root@longxi-01 ~]# curl 10.254.18.241
<!DOCTYPE html>
<html>
<head>
<title>Welcome to nginx!</title>
<style>
    body {
        width: 35em;
        margin: 0 auto;
        font-family: Tahoma, Verdana, Arial, sans-serif;
    }
</style>
</head>
<body>
<h1>Welcome to nginx!</h1>
<p>If you see this page, the nginx web server is successfully installed and
working. Further configuration is required.</p>

<p>For online documentation and support please refer to
<a href="http://nginx.org/">nginx.org</a>.<br/>
Commercial support is available at
<a href="http://nginx.com/">nginx.com</a>.</p>

<p><em>Thank you for using nginx.</em></p>
</body>
</html>
测试成功,已经映射出内部访问的VIP,最后删除掉service哈,更直观一点
kubectl delete -f my-service.yaml2、NodePort
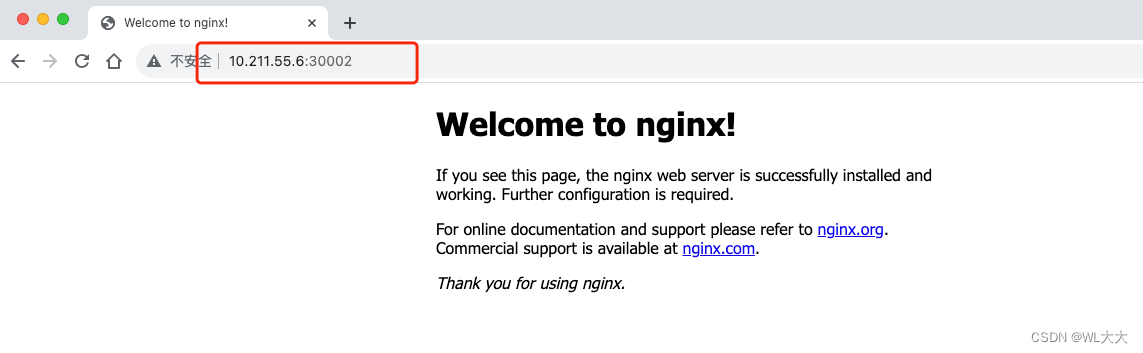
NodePort一般作为集群外部访问时使用,外访问应用使用在ClusterIP基础上为Service在每台机器上绑定一个端口就可以通过: ip+NodePort来访问该服务,默认NodePort端口范围:30000-32767
这里我们指定一下对外开放的端口30002,不指定的话会随机生成
[root@longxi-01 ~]# vim my-service.yaml
apiVersion: v1
kind: Service
metadata:
  name: my-service
spec:
  selector:
    app: my-app
  ports:
    - protocol: TCP
      port: 80
      targetPort: 80
      nodePort: 30002
  type: NodePort
创建NodePort
[root@longxi-01 ~]# kubectl apply -f  my-service.yaml
service/my-service created
[root@longxi-01 ~]#
[root@longxi-01 ~]# kubectl get svc
NAME         TYPE        CLUSTER-IP       EXTERNAL-IP   PORT(S)        AGE
kubernetes   ClusterIP   10.254.0.1       <none>        443/TCP        33d
my-service   NodePort    10.254.224.131   <none>        80:30002/TCP   40s
测试:访问方式为:任意node节点IP:30002
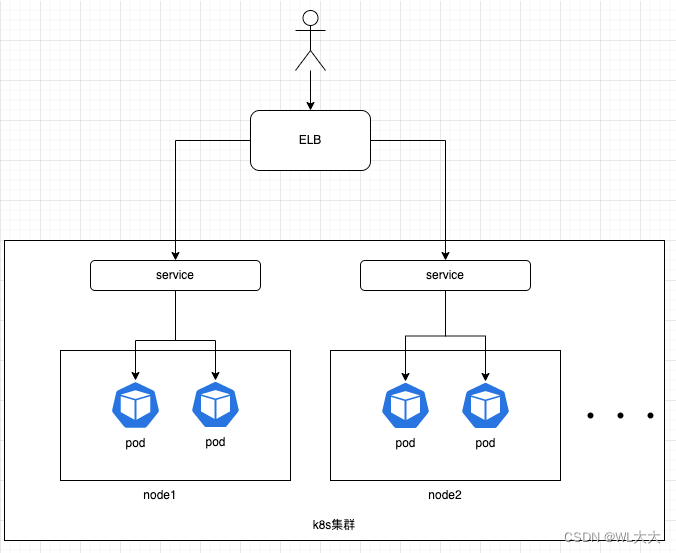
3、LoadBalancer
LoadBalancer是通过云提供商的负载均衡器公开服务的,其实和NodePort类似,在每个节点启动端口暴露服务,然后在通过云服务商的ELB,将node节点:端口 添加进去


 502
502


 被折叠的 条评论
为什么被折叠?
被折叠的 条评论
为什么被折叠?
 到【灌水乐园】发言


