


文章目录
Nginx的概述
nginx是一个高性能的HTTP和反向代理的web服务器,nginx相比于apache都可以作为一个HTTP服务器,但是nginx的抗并发能力比apache要强得多,且占用的内存比较小
Nginx常见的功能
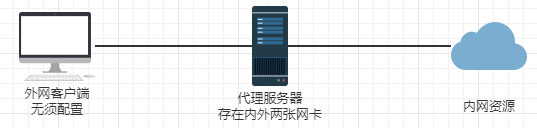
正向代理
nginx不仅可以作为反向代理服务器,也可以作为正向代理服务器,何为正向代理,就是内网客户端想要访问外网的资源,就需要通过代理服务器来进行转发。且客户端需要配置代理服务器的地址
示例图

反向代理
代理服务器对于客户端是透明的,客户端不需要进行任何代理的配置。客户端只需要访问代理服务器就可以访问到真是服务器,这个是从外到内的。对于服务器而已,暴露的IP地址是代理服务器的IP地址
示例图
负载均衡
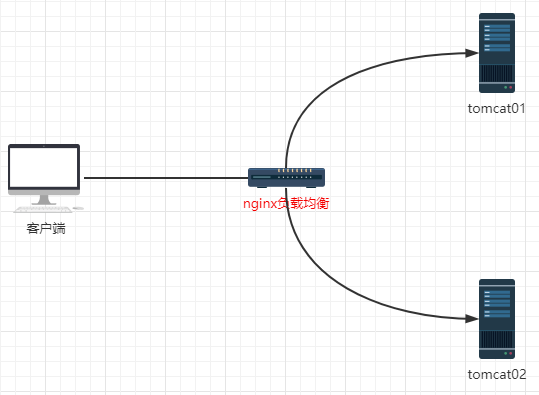
在负载均衡里面,nginx就起到了一个调度器的作用,将用户的请求依次分发给后端的服务器去处理,每台服务器分担集群节点的压力,工作目标一致、工作内容一致,极大的提高了工作效率
示例图

动静分离
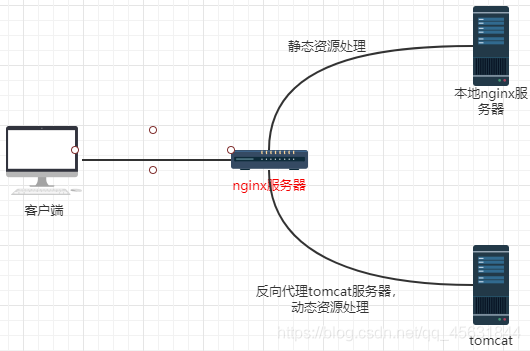
为了加快网站的解析速度,通常可以把动态页面和静态页面交由不同的服务器去处理,以此来加快解析的速度,从而给用户提供更快的访问,也降低了单个服务器的压力。通常我们可以把静态页面交由nginx去处理,然后动态页面交由tomcat去处理
示例图

nginx的搭建
采用源码编译的方式来进行安装
[root@nginx ~]# yum install gcc gcc-c++ autoconf automake  libtool make zlib zlib-devel openssl openssl-devel pcre* pcre-devel  -y
[root@nginx ~]# useradd -s /sbin/nologin -M nginx
[root@nginx ~]# wget http://nginx.org/download/nginx-1.8.0.tar.gz
[root@nginx ~]# tar -xf nginx-1.8.0.tar.gz
[root@nginx ~]# cd nginx-1.8.0
[root@nginx nginx-1.8.0]# ./configure --prefix=/usr/local/nginx --with-http_dav_module --with-http_stub_status_module --with-http_addition_module --with-http_sub_module --with-http_flv_module --with-http_mp4_module --with-pcre
[root@nginx nginx-1.8.0]# make && make install

启动
[root@nginx ~]# /usr/local/nginx/sbin/nginx
[root@nginx ~]# ss -tan | grep 80
LISTEN     0      128          *:80                       *:*
访问测试

Nginx配置文件详解
Nginx的配置文件所在目录(源码方式)
/usr/local/nginx/conf
配置文件名称为nginx.conf 包含的内容如下:
worker_processes  1;   和nginx并发处理相关的配置,值越大,支持的并发处理量就越多,但是会受硬件、软件等设备的制约

events {
    worker_connections  1024;
}
##这个模块主要是设置用户的最大连接数的,在实际生活中应该灵活配置
http {
    include       mime.types;   定义mime.type的类型
    default_type  application/octet-stream;  默认的媒体类型
    sendfile        on;  开启高效传输模式
    keepalive_timeout  65;   连接超时时间
    server {     每一个server块都表示一个虚拟机主机
        listen       80;
        server_name  localhost;
        location / {
            root   html;
            index  index.html index.htm;
        }
        error_page   500 502 503 504  /50x.html;  出现500 502等这些代码时用50x,html去回应
        location = /50x.html {
            root   html;
        }
    }
}
Nginx配置文件有三部分组成:全局块、events块、(http全局块、server块)
nginx反向代理配置案例
拓扑图
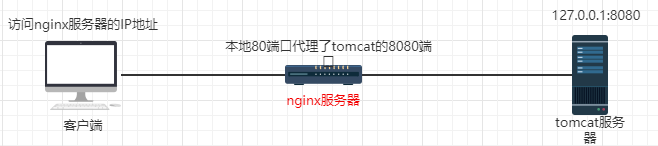
工作原理:Windows客户端通过访问nginx服务器的IP地址,nginx通过反向代理将请求转发给tomcat服务器去处理,然后返回给用户即访问成功
tomcat服务器的搭建
下载地址:https://mirrors.bfsu.edu.cn/apache/tomcat/tomcat-8/v8.5.69/bin/
安装Java环境
[root@nginx ~]# yum install -y java java-devel
[root@nginx ~]# tar -xf apache-tomcat-8.5.68.tar.gz
[root@nginx ~]# mv apache-tomcat-8.5.68 /usr/local/tomcat
tomcat的主配置文件位置在
/usr/local/tomcat/conf/server.xml
修改如下此处即可修改tomcat服务器的端口号
<Connector port=“8080” protocol=“HTTP/1.1”
connectionTimeout=“20000”
redirectPort=“8443” />
启动tomcat服务器
在/usr/local/tomcat/bin/目录下有两个脚本都可以启动tomcat服务器
startup.sh 只能够启动,不能够关闭
catalina.sh 可以指定参数比如stop start 等
启动tomcat服务器
[root@nginx bin]# ./startup.sh
Using CATALINA_BASE:   /usr/local/tomcat
Using CATALINA_HOME:   /usr/local/tomcat
Using CATALINA_TMPDIR: /usr/local/tomcat/temp
Using JRE_HOME:        /usr
Using CLASSPATH:       /usr/local/tomcat/bin/bootstrap.jar:/usr/local/tomcat/bin/tomcat-juli.jar
Using CATALINA_OPTS:
Tomcat started.
[root@nginx bin]# ss -tan | grep 8080
LISTEN     0      100         :::8080                    :::*
访问测试

nginx的配置
[root@nginx ~]# vi /usr/local/nginx/conf/nginx.conf
 server {
        listen       80;   本地80端口
        server_name  192.168.111.10;

        #charset koi8-r;

        #access_log  logs/host.access.log  main;

        location / {
            root   html;
            index  index.html index.htm;
            proxy_pass http://127.0.0.1:8080;   代理本地的8080端口即tomcat服务器
        }
重启服务
[root@nginx ~]# /usr/local/nginx/sbin/nginx -s reload
访问测试

nginx负载均衡配置案例
结构拓扑图
配置tomcat服务器
解压两个tomcat分别到如下目录
[root@nginx ~]# mkdir /usr/local/tomcat{1,2}
[root@nginx ~]# tar -xf apache-tomcat-8.5.68.tar.gz -C /usr/local/tomcat1
[root@nginx ~]# tar -xf apache-tomcat-8.5.68.tar.gz -C /usr/local/tomcat2
因为tomcat默认端口号为8080,且同一台机器上不能够存在两个相同的端口号
修改tomcat2的server默认的端口号、http端口号为8081、api协议端口号
[root@nginx ~]# vi /usr/local/tomcat2/apache-tomcat-8.5.68/conf/server.xml
修改server默认的端口号8005:
<Server port="8091" shutdown="SHUTDOWN">
修改http端口号,默认为8080:
<Connector port="8081" protocol="HTTP/1.1"
connectionTimeout="20000"
redirectPort="8443" />
修改api协议端口号,默认为8009:
<Connector protocol="AJP/1.3"
address="::1"
port="9001"
redirectPort="8443" />
分别启动两个tomcat服务器
[root@nginx ~]# /usr/local/tomcat1/apache-tomcat-8.5.68/bin/startup.sh
[root@nginx ~]# /usr/local/tomcat2/apache-tomcat-8.5.68/bin/startup.sh
查看端口号
[root@nginx ~]# ss -tan | grep 808
LISTEN 0 100 :::8080 :::*
LISTEN 0 100 :::8081 :::*
为两台tomcat服务器添加网页
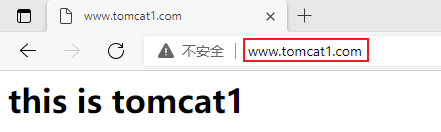
[root@nginx ~]# echo "<h1>this is tomcat1</h1>" >> /usr/local/tomcat1/apache-tomcat-8.5.68/webapps/ROOT/index.html
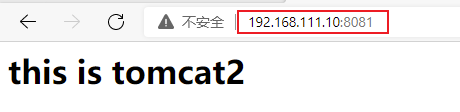
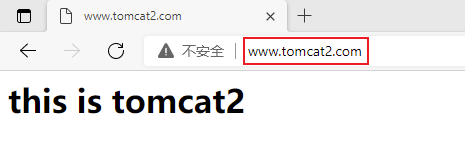
[root@nginx ~]# echo "<h1>this is tomcat2</h1>" >> /usr/local/tomcat2/apache-tomcat-8.5.68/webapps/ROOT/index.html
访问测试

nginx服务器的配置
[root@nginx ~]# vi /usr/local/nginx/conf/nginx.conf
在HTTP模块下添加如下信息
    upstream mytomcat {
        server 127.0.0.1:8080;
        server 127.0.0.1:8081;
  }
server {
        listen       80;
        server_name  192.168.111.10;

        #charset koi8-r;

        #access_log  logs/host.access.log  main;

        location / {
            root   html;
            proxy_pass http://mytomcat;     代理负载均衡里面的内容
            index  index.html index.htm;
        }
 }
重启nginx服务器即可
[root@nginx ~]# /usr/local/nginx/sbin/nginx -s reload
访问测试
nginx负载均衡的策略
轮询策略:默认策略
每个请求轮流分配到不同的后端服务器,如果后端服务区down掉,那么自动剔除
upstream mytomcat {
        server 127.0.0.1:8080;
        server 127.0.0.1:8081;
  }
  这里的server 就是后端服务器,可自行增减
权重策略:
每个请求根据权重的比值分发到对应的后端服务器上,weight值越大就越会被优先访问
用于后端服务器性能不均的情况
upstream mytomcat {
        server 127.0.0.1:8080 weight=5;
        server 127.0.0.1:8081 weight=2;
  }
ip_hash策略:
也叫IP绑定,将IP绑定在某一个后端服务器,从始至终客户端都请求改后端服务器
常用于解决session的问题
upstream mytomcat {
        ip_hash;
        server 127.0.0.1:8080;
        server 127.0.0.1:8081;
  }
最少连接策略:
客户端的请求会被转发到连接数量最少的服务器上
upstream mytomcat {
        least_conn;
        server 127.0.0.1:8080;
        server 127.0.0.1:8081;
  }
nginx宕机配置:
指定后端服务器为backup服务器
为backup状态的服务器只有在其他服务器down了才会顶替
upstream mytomcat {
        least_conn;
        server 127.0.0.1:8080;
        server 127.0.0.1:8081 backup;
  }


指定后端服务器为down状态
状态为down的服务器不参与负载均衡配置
upstream mytomcat {
        least_conn;
        server 127.0.0.1:8080;
        server 127.0.0.1:8081 down;
  }
nginx动静分离配置案例
将动态请求和静态请求交给不同的服务器去处理
动态资源:jsp等就交由tomcat去处理
静态资源:js、css、图片等就交由nginx去处理
结构拓扑图
这里基于上面的负载均衡环境来进行配置
nginx的配置
[root@nginx ~]# vi /usr/local/nginx/conf/nginx.conf
upstream mytomcat {
        server 127.0.0.1:8080;
        server 127.0.0.1:8081;
  }

    server {
        listen       80;
        server_name  192.168.111.10;

        #charset koi8-r;

        #access_log  logs/host.access.log  main;

        #动态资源

        location / {
            root   html;
            proxy_pass http://mytomcat;
            index  index.html index.htm;
        }

        #静态资源

        location /images {
            root /;
            autoindex on;
        }
静态资源的访问

动态资源的访问
访问到tomcat服务器上了

nginx虚拟主机配置案例
nginx的配置文件中每一个server块就代表一个虚拟主机
虚拟主机的类型:
1.基于域名的虚拟主机(同IP不同域名)
2.基于IP的虚拟主机(不同IP)
3.基于端口的虚拟主机(同IP不同端口号)
基于域名的虚拟主机配置案例
[root@nginx ~]# vi /usr/local/nginx/conf/nginx.conf
upstream tomcat1 {
        server 127.0.0.1:8080;
  }
upstream tomcat2 {
        server 127.0.0.1:8081;
  }
    server {
        listen  80;
        server_name www.tomcat1.com;    #tomcat1的访问域名
        location / {
             root  html;
             proxy_pass http://tomcat1;
        }
  }
     server {
         listen 80;
         server_name www.tomcat2.com;  #tomcat2的访问域名
         location / {
              root html;
              proxy_pass http://tomcat2;
        }
  }

重启服务
[root@nginx ~]# /usr/local/nginx/sbin/nginx -s reload

编辑window下的hosts文件添加如下信息
192.168.111.10	www.tomcat1.com
192.168.111.10	www.tomcat2.com
www.tomcat1.com访问测试
www.tomcat2.com访问测试
基于端口的虚拟主机配置案例
[root@nginx ~]# vi /usr/local/nginx/conf/nginx.conf
upstream tomcat1 {
server 127.0.0.1:8080;
}
upstream tomcat2 {
server 127.0.0.1:8081;
}
server {
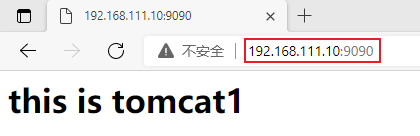
listen 9090; # tomcat1通过9090访问
server_name 192.168.111.10;
location / {
root html;
proxy_pass http://tomcat1; #tomcat1的访问
}
}
server {
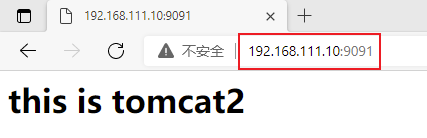
listen 9091; # tomcat1通过9091访问
server_name 192.168.111.10;
location / {
root html;
proxy_pass http://tomcat2; #tomcat2的访问
}
}
重启服务
[root@nginx ~]# /usr/local/nginx/sbin/nginx -s reload
192.168.111.10:9090访问测试
192.168.111.10:9091访问测试
nginx相关优化操作
状态页(sub_status)
通过状态页可以了解nginx当前的状态、连接数量、处理了多少连接、请求等。
配置方法:
[root@nginx ~]# vi /usr/local/nginx/conf/nginx.conf
 location /ngx_status {
                stub_status on;   #开启状态页
                access_log off;
 }
 [root@nginx ~]# curl http://127.0.0.1/ngx_status
Active connections: 1
server accepts handled requests
 21 21 100
Reading: 0 Writing: 1 Waiting: 0

server:共处理了多少连接
accepts:共创建了多少次握手
handled requests:共处理了多少次请求
认证(auth_basic_module)
设置某一些用户访问指定页面需要提供用户名和密码
[root@nginx ~]# vi /usr/local/nginx/conf/nginx.conf
server {
        listen  9090;
        server_name 192.168.111.10;
        location / {
             root  html;
             proxy_pass http://tomcat1;
             auth_basic "tomcat1 Auth";    #描述字段
             auth_basic_user_file /usr/local/nginx/conf/password;    #验证的用户名和密码存放目录
             autoindex on;    #列出当前目录中的内容
        }
  }

添加用户名和密码
htpassword需要下载http-tools工具
[root@nginx ~]# yum install -y httpd-tools
[root@nginx ~]# cd /usr/local/nginx/conf/    #进入到指定的目录  配置文件里面配置的
[root@nginx conf]# htpasswd -c password admin
New password:
Re-type new password:
Adding password for user admin
首次创建需要用-c 参数   创建完成以后会自动生成一个文件
[root@nginx conf]# cat password
admin:$apr1$FJMGMEP7$Mo0dQQPpPT0dzhMlwp7ig0
重启服务
[root@nginx ~]# /usr/local/nginx/sbin/nginx -s reload
访问测试

还有很多优化操作,这里就不多说了,自行上网查询即可


 1万+
1万+


 被折叠的 条评论
为什么被折叠?
被折叠的 条评论
为什么被折叠?
 到【灌水乐园】发言


