


文章目录
torchvision简介
 torchvision是pytorch的一个图形库,它服务于PyTorch深度学习框架的,
 主要用来构建计算机视觉模型。以下是torchvision的构成:
- torchvision.transforms: 常用的图片变换,例如裁剪、旋转等;
- torchvision.datasets: 一些加载数据的函数及常用的数据集接口;
- torchvision.models: 包含常用的模型结构(包含预训练模型),例如VGG、ResNet等;
- torchvision.utils: 其他的一些有用的方法。
torchvision.transforms
transforms是 PyTorch 中提供的一个图像预处理模块,可以方便地对图像进行各种变换操作。
导包:from torchvision import transforms
查看底层源码:此模块所包含的类如下(部分):
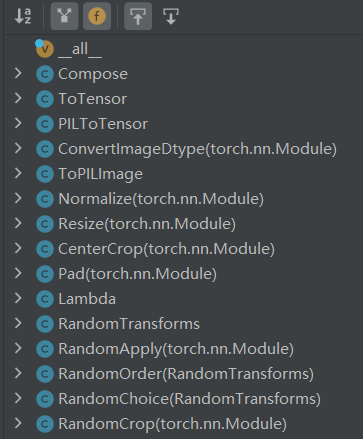
ToTensor类
class ToTensor:   是将PIL图像或者ndarray类型图像转换为tensor类型
    """Convert a PIL Image or ndarray to tensor and scale the values accordingly.
实例:
from torchvision import transforms
import cv2
rgb_dir = "D:\\AdeepLearningTest\\Code\\NYUDepthv2\\RGB\\1.jpg"
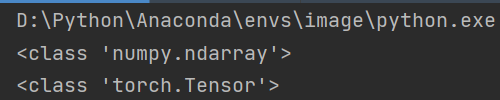
img = cv2.imread(rgb_dir)
print(type(img))
#图片转成Tensor类型
tensor_trans = transforms.ToTensor()
tensor_img = tensor_trans(img)
print(type(tensor_img))
查看Tensor与ndarray的区别
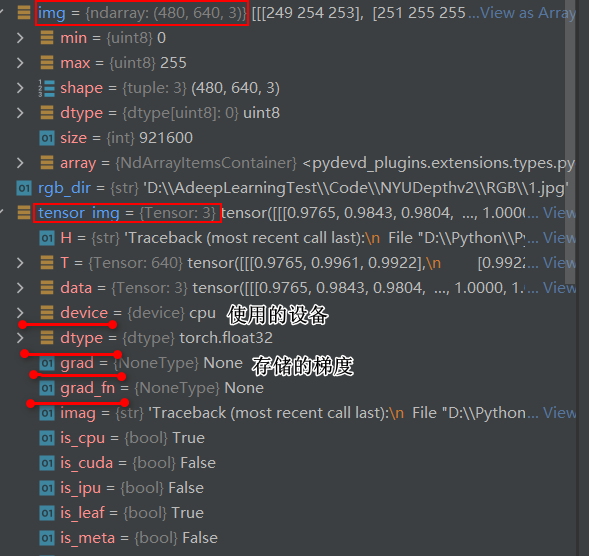
总结:Tensor是构建和操作神经网络的基本数据结构,是专门为深度学习创造的
Normalize类
class Normalize(torch.nn.Module): 通过均值和标准差归一化图像  Normalize a tensor image with mean and standard deviation.
     This transform does not support PIL Image.  不支持PIL Image
    ``output[channel] = (input[channel] - mean[channel]) / std[channel]``
Args:
    mean (sequence): Sequence of means for each channel.
    std (sequence): Sequence of standard deviations for each channel.
    inplace(bool,optional): Bool to make this operation in-place.
实例:
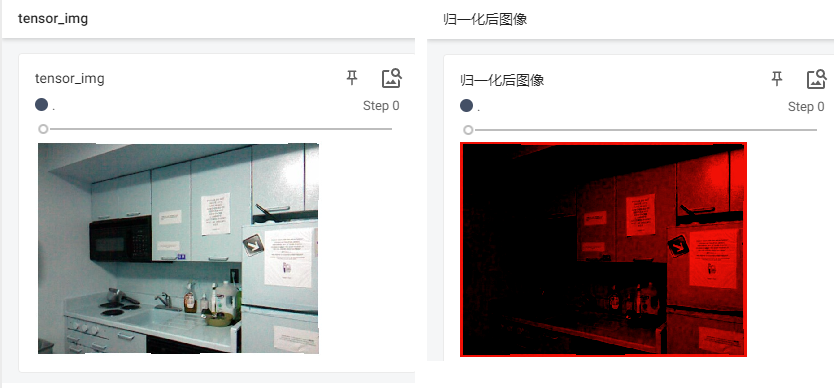
trans_norm = transforms.Normalize([0.5, 3, 5], [0.5, 0.5, 0.5])
img_norm = trans_norm(tensor_img)
writer=SummaryWriter("logs")
writer.add_image("tensor_img",tensor_img)
writer.add_image("归一化后图像",img_norm)
writer.close()
Resize类
class Resize(torch.nn.Module):修改尺寸
               Resize the input image to the given size.
实例:
print(tensor_img.shape)
tensor_resize=transforms.Resize((240,320))
new_img=tensor_resize(tensor_img)
print(new_img.shape)

产生一个警告:
 UserWarning: The default value of the antialias parameter of all the resizing transforms (Resize(), RandomResizedCrop(), etc.) will change from None to True in v0.17,
 in order to be consistent across the PIL and Tensor backends.
 To suppress this warning, directly pass antialias=True (recommended, future default), antialias=None (current default, which means False for Tensors and True for PIL), or antialias=False (only works on Tensors - PIL will still use antialiasing). This also applies if you are using the inference transforms from the models weights: update the call to weights.transforms(antialias=True)
提示你在下一个版本中(v0.17)transforms 默认的 antialias 参数值将从 None 更改为 True,以使 PIL 和 Tensor 后端保持一致。
CenterCrop类
 class CenterCrop(torch.nn.Module):  对图片中心进行裁剪
       """Crops the given image at the center.
       If the image is torch Tensor, it is expected to have [..., H, W] shape, where ... means an arbitrary number of leading dimensions.
       If image size is smaller than output size along any edge, image is padded with 0 and then center cropped.

Args:
    size (sequence or int): Desired output size of the crop. If size is an
        int instead of sequence like (h, w), a square crop (size, size) is
        made. If provided a sequence of length 1, it will be interpreted as (size[0], size[0]).
"""
实例:
img_Cencrop1=transforms.CenterCrop(200)
img_crop200=img_Cencrop1(tensor_img)
img_Cencrop2=transforms.CenterCrop(800)
img_crop800=img_Cencrop2(tensor_img)
writer.add_image("裁剪尺寸为200",img_crop200)
writer.add_image("裁剪尺寸为800",img_crop800)
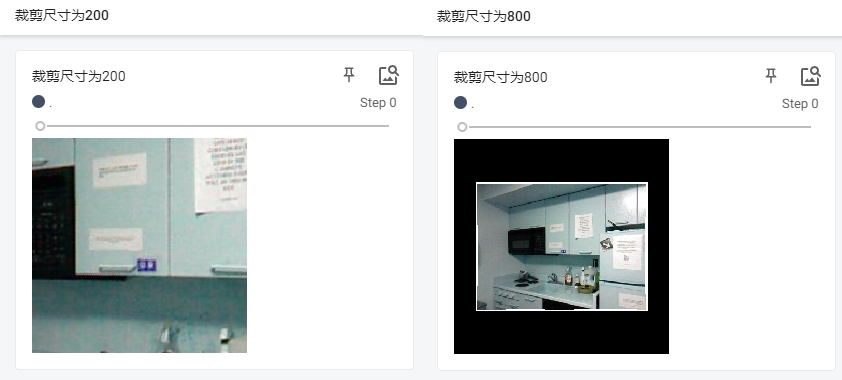
注意:如果裁剪的 size 比原图大,那么会填充值为 0 的像素。
RandomHorizontalFlip类
 以给定的概率随机水平旋转给定的PIL的图像,默认为0.5
 class RandomHorizontalFlip(torch.nn.Module):
      Horizontally flip the given image randomly with a given probability.
    Args:
         p (float): probability of the image being flipped. Default value is 0.5
实例:
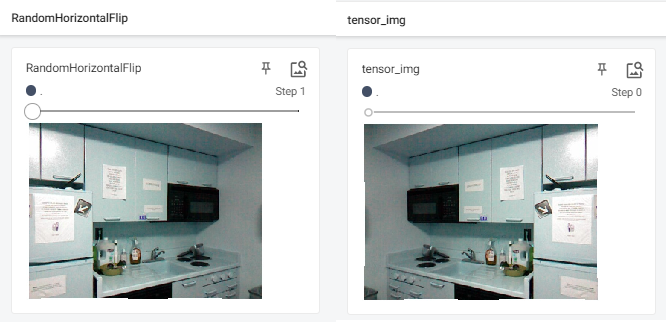
img1 = transforms.RandomHorizontalFlip()(tensor_img)
writer.add_image("RandomHorizontalFlip",img1,1)
ConvertImageDtype类
将tensor图像转换为给定的数据类型并相应地缩放值。
 class ConvertImageDtype(torch.nn.Module):
          Convert a tensor image to the given ``dtype`` and scale the values accordingly.
This function does not support PIL Image.
Raises:
    RuntimeError: When trying to cast :class:`torch.float32` to :class:`torch.int32` or :class:`torch.int64` as
        well as for trying to cast :class:`torch.float64` to :class:`torch.int64`. These conversions might lead to
        overflow errors since the floating point ``dtype`` cannot store consecutive integers over the whole range
        of the integer ``dtype``.
注意:RuntimeError–尝试强制将torch.float32转换至torch.int32或者torch.int64以及试图将torch.float64转换成torch.int64.
这些转换可能会导致溢出错误,因为浮点数据类型无法在整数数据类型的整个范围内连续存储。
实例:
print(tensor_img.dtype)
img_newType=transforms.ConvertImageDtype(torch.float64)(tensor_img)
print(img_newType.dtype)
img_newType2=transforms.ConvertImageDtype(torch.int64)(tensor_img)
print(img_newType2.dtype)

Compose类
transforms.Compose(),将一系列的transforms操作有序组合,实现时按照这些方法依次对图像操作。
    Args:
        transforms (list of ``Transform`` objects): list of transforms to compose.

    Example:
        >>> transforms.Compose([
        >>>     transforms.CenterCrop(10),
        >>>     transforms.PILToTensor(),
        >>>     transforms.ConvertImageDtype(torch.float),
        >>> ])
torchvision.datasets
def __init__(
    self,
    root: str,
    train: bool = True,
    transform: Optional[Callable] = None,
    target_transform: Optional[Callable] = None,
    download: bool = False,
)
- 第一个参数:数据集的下载路径
- 第二个参数:是否为训练集
- 第三个参数:对数据集进行transforms操作
- 第四个参数:对target进行预处理操作
- 第五个参数:是否进行下载
数据集的下载:

数据集中数据类型修改:
data_transform=torchvision.transforms.Compose([
    torchvision.transforms.ToTensor()
])
train_set=torchvision.datasets.CIFAR10(root="./dataset",train=True,transform=data_transform,download=True)
test_set=torchvision.datasets.CIFAR10(root="./dataset",train=False,transform=data_transform,download=True)
img,target=test_set[0]
print(img.shape)
print(test_set.classes)       #分类数据集有几种类型
print(target)             #查看第一章图片属于那个类别


 1万+
1万+


 被折叠的 条评论
为什么被折叠?
被折叠的 条评论
为什么被折叠?
 到【灌水乐园】发言


