


@TOC
一、i排他思想(算法)
<body>
    <button>按钮1</button>
    <button>按钮2</button>
    <button>按钮3</button>
    <button>按钮4</button>
    <button>按钮5</button>
    <script>
        var btns = document.getElementsByTagName('button');//这个兼容,querySelectorAll不兼容,得到一个伪数组  里面的每一个元素 btns[i]
        for (var i = 0; i < btns.length; i++) {

            btns[i].onclick = function () {
                for (var i = 0; i < btns.length; i++) {
                    btns[i].style.backgroundColor = '';
                }
                this.style.backgroundColor = 'pink';

            }
        }
        //2. 首先先排除其他人,然后才设置自己的样式 这种排除其他人的思想我们成为排他思想
    </script>
</body>
二、i练习-百度换肤效果
<body>
    <ul class="baidu">
        <li><img src="images/1.jpg" alt=""></li>
        <li><img src="images/2.jpg" alt=""></li>
        <li><img src="images/3.jpg" alt=""></li>
        <li><img src="images/4.jpg" alt=""></li>
    </ul>
    <script>
        var imgs = document.querySelector('.baidu').getElementsByTagName('img');
        var body = document.body;
        for (var i = 0; i < imgs.length; i++) {
            imgs[i].onclick = function () {
                body.style.backgroundImage = 'url(' + this.src + ')';

            }
        }
    </script>
</body>
三、表格隔行变色
  <style>
        table {
            width: 800px;
            margin: 100px auto;
            text-align: center;
            border-collapse: collapse;
            font-size: 14px;
        }

        tr {
            height: 30px;
        }

        thead tr {

            background-color: skyblue;
        }

        tbody td {
            border-bottom: 1px solid #d7d7d7;
            font-size: 12px;
            color: blue;

        }

        .bg {
            background-color: skyblue;
        }
    </style>
    <body>
    <table>
        <thead>
            <tr>
                <th>代码</th>
                <th>名称</th>
                <th>最新公布净值</th>
                <th>累计净值</th>
                <th>前单位</th>
                <th>净值增长率</th>
            </tr>
        </thead>
        <tbody>
            <tr>
                <td>003526</td>
                <td>农银金穗3个月定期开放债券</td>
                <td>1.075</td>
                <td>1.076</td>
                <td>1.054</td>
                <td>+0.047%</td>
            </tr>
            <tr>
                <td>003526</td>
                <td>农银金穗3个月定期开放债券</td>
                <td>1.075</td>
                <td>1.079</td>
                <td>1.074</td>
                <td>+0.047%</td>
            </tr>
            <tr>
                <td>003526</td>
                <td>农银金穗3个月定期开放债券</td>
                <td>1.075</td>
                <td>1.079</td>
                <td>1.074</td>
                <td>+0.047%</td>
            </tr>
            <tr>
                <td>003526</td>
                <td>农银金穗3个月定期开放债券</td>
                <td>1.075</td>
                <td>1.079</td>
                <td>1.074</td>
                <td>+0.047%</td>
            </tr>
            <tr>
                <td>003526</td>
                <td>农银金穗3个月定期开放债券</td>
                <td>1.075</td>
                <td>1.079</td>
                <td>1.074</td>
                <td>+0.047%</td>
            </tr>
            <tr>
                <td>003526</td>
                <td>农银金穗3个月定期开放债券</td>
                <td>1.075</td>
                <td>1.079</td>
                <td>1.074</td>
                <td>+0.047%</td>
            </tr>
        </tbody>
    </table>
    <script>
        var trs = document.querySelector('tbody').querySelectorAll('tr');
        for (var i = 0; i < trs.length; i++) {
            trs[i].onmouseover = function () {
                this.className = 'bg'
            }

            trs[i].onmouseout = function () {
                this.className = '';
            }
        }
    </script>

</body>
四、ii全选反选
 <style>
        * {
            padding: 0;
            margin: 0;
        }
        .wrap {
            width: 300px;
            margin: 100px auto;
        }
        table {
            border-collapse: collapse;
            border-spacing: 0;
            border: 1px solid #c0c0c0;
            width: 300px;
        }
        th,
        td {
            border: 1px solid #d0d0d0;
            color: #404060;
            padding: 10px;
        }
        th {
            background-color: #09c;
            font: bold 16px "微软雅黑";
            color: #fff;
        }

        td {
            font: 14px "微软雅黑";
        }

        tbody tr {
            background-color: #f0f0f0;
        }

        tbody tr:hover {
            cursor: pointer;
            background-color: #fafafa;
        }
    </style>
    <body>
    <div class="wrap">
        <table>
            <thead>
                <tr>
                    <th><input type="checkbox" id="j_cbAll"></th>
                    <th>商品</th>
                    <th>价钱</th>
                </tr>
            </thead>
            <tbody id="j_tb">
                <tr>
                    <td><input type="checkbox"></td>
                    <td>iphone15</td>
                    <td>8888</td>
                </tr>
                <tr>
                    <td><input type="checkbox"></td>
                    <td>iphone15</td>
                    <td>8888</td>
                </tr>
                <tr>
                    <td><input type="checkbox"></td>
                    <td>iphone15</td>
                    <td>8888</td>
                </tr>
                <tr>
                    <td><input type="checkbox"></td>
                    <td>iphone15</td>
                    <td>8888</td>
                </tr>
            </tbody>
        </table>
    </div>
    <script>
        // var cball = document.querySelector('#j_cbAll');
        // var ipts = document.querySelector('#j_tb').querySelectorAll('input');
        // 1. 全选和取消全选做法:  让下面所有复选框的checked属性(选中状态) 跟随 全选按钮即可
        // 获取元素
        var cball = document.getElementById('j_cbAll');
        var ipts = document.getElementById('j_tb').getElementsByTagName('input');    // 下面所有的复选框
        // 注册事件
        cball.onclick = function () {
            // this.checked 它可以得到当前复选框的选中状态如果是true 就是选中,如果是false 就是未选中
            // if (this.checked) {
            //     for (var i = 0; i < ipts.length; i++) {
            //         ipts[i].checked = 'true';
            //     }
            // } else {
            //     for (var i = 0; i < ipts.length; i++) {
            //         ipts[i].checked = '';
            //     }
            // }

            for (var i = 0; i < ipts.length; i++) {
                ipts[i].checked = this.checked;
            }
        }

        // 2. 下面复选框需要全部选中, 上面全选才能选中做法: 给下面所有复选框绑定点击事件,每次点击,都要循环查看下面所有的复选框是否有没选中的,如果有一个没选中的, 上面全选就不选中。
        for (var i = 0; i < ipts.length; i++) {


            ipts[i].onclick = function () {

                // flag 控制全选按钮是否选中
                var flag = true;
                // 每次点击下面的复选框都要循环检查者4个小按钮是否全被选中
                for (var i = 0; i < ipts.length; i++) {
                    if (!ipts[i].checked) {
                        flag = false;
                        break; // 退出for循环 这样可以提高执行效率 因为只要有一个没有选中,剩下的就无需循环判断了

                    }

                }
                cball.checked = flag;


            }


        }

    </script>
</body>
运行结果:

五、自定义属性操作
<body>
    <div id="demo" index="1" class="nav"></div>
    <script>
        var div = document.getElementById('demo');
        // 1. 获取元素的属性值
        // (1) element.属性
        console.log(div.id);
        //(2) element.getAttribute('属性')  get得到获取 attribute 属性的意思 我们程序员自己添加的属性我们称为自定义属性 index
        console.log(div.getAttribute('id'));;
        console.log(div.getAttribute('index'));
        // 2. 设置元素属性值
        // (1) element.属性= '值'
        div.id = 'test';

        // (2) element.setAttribute('属性', '值');  主要针对于自定义属性
        div.setAttribute('index', 2);
        div.className = 'navs';
        div.setAttribute('class', 'footer');
          // 3 移除属性 removeAttribute(属性)
        div.removeAttribute('index');


    </script>
</body>
六、ii练习tab栏切换(重要)
 <style>
        * {
            margin: 0;
            padding: 0;
        }

        li {
            list-style-type: none;
        }

        .tab {
            width: 978px;
            margin: 100px auto;
        }

        .tab_list {
            height: 39px;
            border: 1px solid #ccc;
            background-color: #f1f1f1;
        }

        .tab_list li {
            float: left;
            height: 39px;
            line-height: 39px;
            padding: 0 20px;
            text-align: center;
            cursor: pointer;
        }

        .tab_list .current {
            background-color: #c81623;
            color: #fff;
        }

        .item_info {
            padding: 20px 0 0 20px;
        }

        .item {
            display: none;
        }
    </style>
<body>
    <div class="tab">
        <div class="tab_list">
            <ul>
                <li class="current">商品介绍</li>
                <li>规格与包装</li>
                <li>售后保障</li>
                <li>商品评价(50000)</li>
                <li>手机社区</li>
            </ul>
        </div>
        <div class="tab_con">
            <div class="item" style="display: block;">
                商品介绍模块内容
            </div>
            <div class="item">
                规格与包装模块内容
            </div>
            <div class="item">
                售后保障模块内容
            </div>
            <div class="item">
                商品评价(50000)模块内容
            </div>
            <div class="item">
                手机社区模块内容
            </div>

        </div>
    </div>
    <script>
        // 获取元素
        var tab_list = document.querySelector('.tab_list');
        var lis = tab_list.querySelectorAll('li');
        var items = document.querySelectorAll('.item');
        // for循环绑定点击事件
        for (let i = 0; i < lis.length; i++) {
            // 开始给5个小li 设置索引号
            // lis[i].setAttribute('index', i);


            lis[i].onclick = function () {
                // 1. 上的模块选项卡,点击某一个,当前这一个底色会是红色,其余不变(排他思想) 修改类名的方式

                // 干掉所有人 其余的li清除 class 这个类
                for (let i = 0; i < lis.length; i++) {
                    lis[i].className = '';
                }
                // 留下我自己
                this.className = 'current';
                // 2. 下面的显示内容模块
                // let index = this.getAttribute('index');
                // console.log(index);
                // 干掉所有人 让其余的item 这些div 隐藏
                for (let i = 0; i < items.length; i++) {
                    items[i].style.display = 'none';
                }
                // 留下我自己 让对应的item 显示出来
                items[i].style.display = 'block';
            }
        }
    </script>
</body>
运行结果:

七、H5自定义属性
<body>
    <div data-getTime="20" data-list-name="andy"></div>
    <script>
        var div = document.querySelector('div');
        console.log(div.getAttribute('data-getTime'));
        div.setAttribute('data-index', 5)
        console.log(div.getAttribute('data-list-name'));
        // h5新增的获取自定义属性的方法 它只能获取data-开头的
        // dataset 是一个集合里面存放了所有以data开头的自定义属性
        console.log(div.dataset.index);
        console.log(div.dataset['index']);
         // 如果自定义属性里面有多个-链接的单词,我们获取的时候采取 驼峰命名法
            console.log(div.dataset['listName']);
        console.log(div.dataset.listName);
    </script>
</body>
八、节点概述
<body>
    <div>我是div</div>
    <span>我是span</span>
    <ul>
        <li>我是li</li>
        <li>我是li</li>
        <li>我是li</li>
        <li>我是li</li>
    </ul>
    <div class="box">
        <span class="erweima">×</span>
    </div>
    <script>
        var box=document.querySelector('.box');
        console.dir(box);

    </script>

</body>
九、父节点操作
<body>
    <div>我是div</div>
    <span>我是span</span>
    <ul>
        <li>我是li</li>
        <li>我是li</li>
        <li>我是li</li>
        <li>我是li</li>
    </ul>
    <div class="demo">
        <div class="box">
            <span class="erweima">×</span>
        </div>
    </div>

    <script>
        // 1. 父节点 parentNode
        var erweima = document.querySelector('.erweima');
        console.log(erweima.parentNode);
        // var box = document.querySelector('.box');
        // 得到的是离元素最近的父级节点(亲爸爸) 如果找不到父节点就返回为 null

    </script>
</body>
十、子节点操作
<body>
    <!-- 节点的优点 -->
    <div>我是div</div>
    <span>我是span</span>
    <ul>
        <li>我是li</li>
        <li>我是li</li>
        <li>我是li</li>
        <li>我是li</li>
    </ul>
    <ol>
        <li>我是li</li>
        <li>我是li</li>
        <li>我是li</li>
        <li>我是li</li>
    </ol>

    <div class="demo">
        <div class="box">
            <span class="erweima">×</span>
        </div>
    </div>
    <script>
        var ul = document.querySelector('ul');
        // 1. 子节点  childNodes 所有的子节点 包含 元素节点 文本节点等等
        console.log(ul.childNodes);
        console.log(ul.childNodes[0].nodeType);
        console.log(ul.childNodes[1].nodeType);
        // 2. children 获取所有的子元素节点 也是我们实际开发常用的
        console.log(ul.children);
    </script>
</body>
十一、子节点-第一个子元素和最后一个子元素
<body>
    <ol>
        <li>我是li1</li>
        <li>我是li2</li>
        <li>我是li3</li>
        <li>我是li4</li>
    </ol>
    <script>
        var ol = document.querySelector('ol');
        // 1. firstChild 第一个子节点 不管是文本节点还是元素节点
        console.log(ol.firstChild);
        console.log(ol.lastChild);
        // 2. firstElementChild 返回第一个子元素节点 ie9才支持
        console.log(ol.firstElementChild);
        console.log(ol.lastElementChild);
        // 3. 实际开发的写法  既没有兼容性问题又返回第一个子元素
        console.log(ol.children[0]);
        console.log(ol.children[ol.children.length - 1]);
    </script>
</body>
十二、i新浪下拉菜单
 <style>
        * {
            margin: 0;
            padding: 0;
        }

        li {
            list-style-type: none;
        }

        a {
            text-decoration: none;
            font-size: 14px;
        }

        .nav {
            margin: 100px;
        }

        .nav>li {
            position: relative;
            float: left;
            width: 80px;
            height: 41px;
            text-align: center;
        }

        .nav li a {
            display: block;
            width: 100%;
            height: 100%;
            line-height: 41px;
            color: #333;
        }

        .nav>li>a:hover {
            background-color: #eee;
        }

        .nav ul {
            display: none;
            /* border-collapse: collapse; */
            position: absolute;
            top: 41px;
            left: 0;
            width: 100%;
            border-left: 1px solid #FECC5B;
            border-right: 1px solid #FECC5B;
        }

        .nav ul li {
            border-bottom: 1px solid #FECC5B;
        }

        .nav ul li a:hover {
            background-color: #FFF5DA;
        }
    </style>
    <body>
    <ul class="nav">
        <li>
            <a href="#">微博</a>
            <ul>
                <li><a href="">私信</a></li>
                <li><a href="">私信</a></li>
                <li><a href="">私信</a></li>
            </ul>
        </li>
        <li>
            <a href="#">微博</a>
            <ul>
                <li><a href="">私信</a></li>
                <li><a href="">私信</a></li>
                <li><a href="">私信</a></li>
            </ul>
        </li>
        <li>
            <a href="#">微博</a>
            <ul>
                <li><a href="">私信</a></li>
                <li><a href="">私信</a></li>
                <li><a href="">私信</a></li>
            </ul>
        </li>

    </ul>
    <script>
        var nav = document.querySelector('.nav');
        var lis = nav.children;
        for (var i = 0; i < lis.length; i++) {
            lis[i].onmouseover = function () {
                this.children[1].style.display = 'block';
            }
            lis[i].onmouseout = function () {
                this.children[1].style.display = 'none';
            }
        }
    </script>
</body>
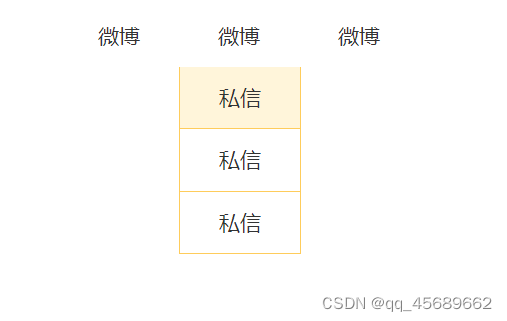
运行结果:
十三、创建和添加节点
<body>
    <ul>
        <li>123</li>
    </ul>
    <script>
        // 1. 创建节点元素节点
        var li = document.createElement('li');
        // 2. 添加节点 node.appendChild(child)  node 父级  child 是子级 后面追加元素  类似于数组中的push
        var ul = document.querySelector('ul');
        ul.appendChild(li);
        // 3. 添加节点 node.insertBefore(child, 指定元素);
        var lili = document.createElement('li');
        ul.insertBefore(lili, ul.children[0]);
        // 4. 我们想要页面添加一个新的元素 : 1. 创建元素 2. 添加元素
    </script>
</body>
十四、简单版发布留言案例
    <style>
        *{
            margin: 0;
            padding: 0;
        }
        body{
            padding: 100px;
        }
        input {
            /* display: block;
            margin: 100px auto; */
            border: 1px solid black;
            width: 200px;
            height: 200px;
            outline: none;
            resize: none;

        }
ul{
    margin-top: 50px;
}
        li {
            width: 300px;
            padding: 5px;
            background-color:rgb(245,209,243);
            color: red;
            font-size: 14px;
            margin: 15px 0;
        }
    </style>
    <body>
<textarea class="ipt"></textarea>
    <button class="btn">发布</button>
    <ul></ul>
    <script>
        var ipt = document.querySelector('.ipt');
        var btn = document.querySelector('.btn');
        var ul = document.querySelector('ul');
        btn.onclick = function () {
            if (ipt.value) {
                var li = document.createElement('li');
                li.innerHTML = ipt.value;
                ul.appendChild(li);
            }
            ipt.value = '';
        }
    </script>
</body>


 34
34


 被折叠的 条评论
为什么被折叠?
被折叠的 条评论
为什么被折叠?
 到【灌水乐园】发言


