


目录
——————————springboot入门———————————
###############################################
###############################################
3.2 application.properties的其他配置
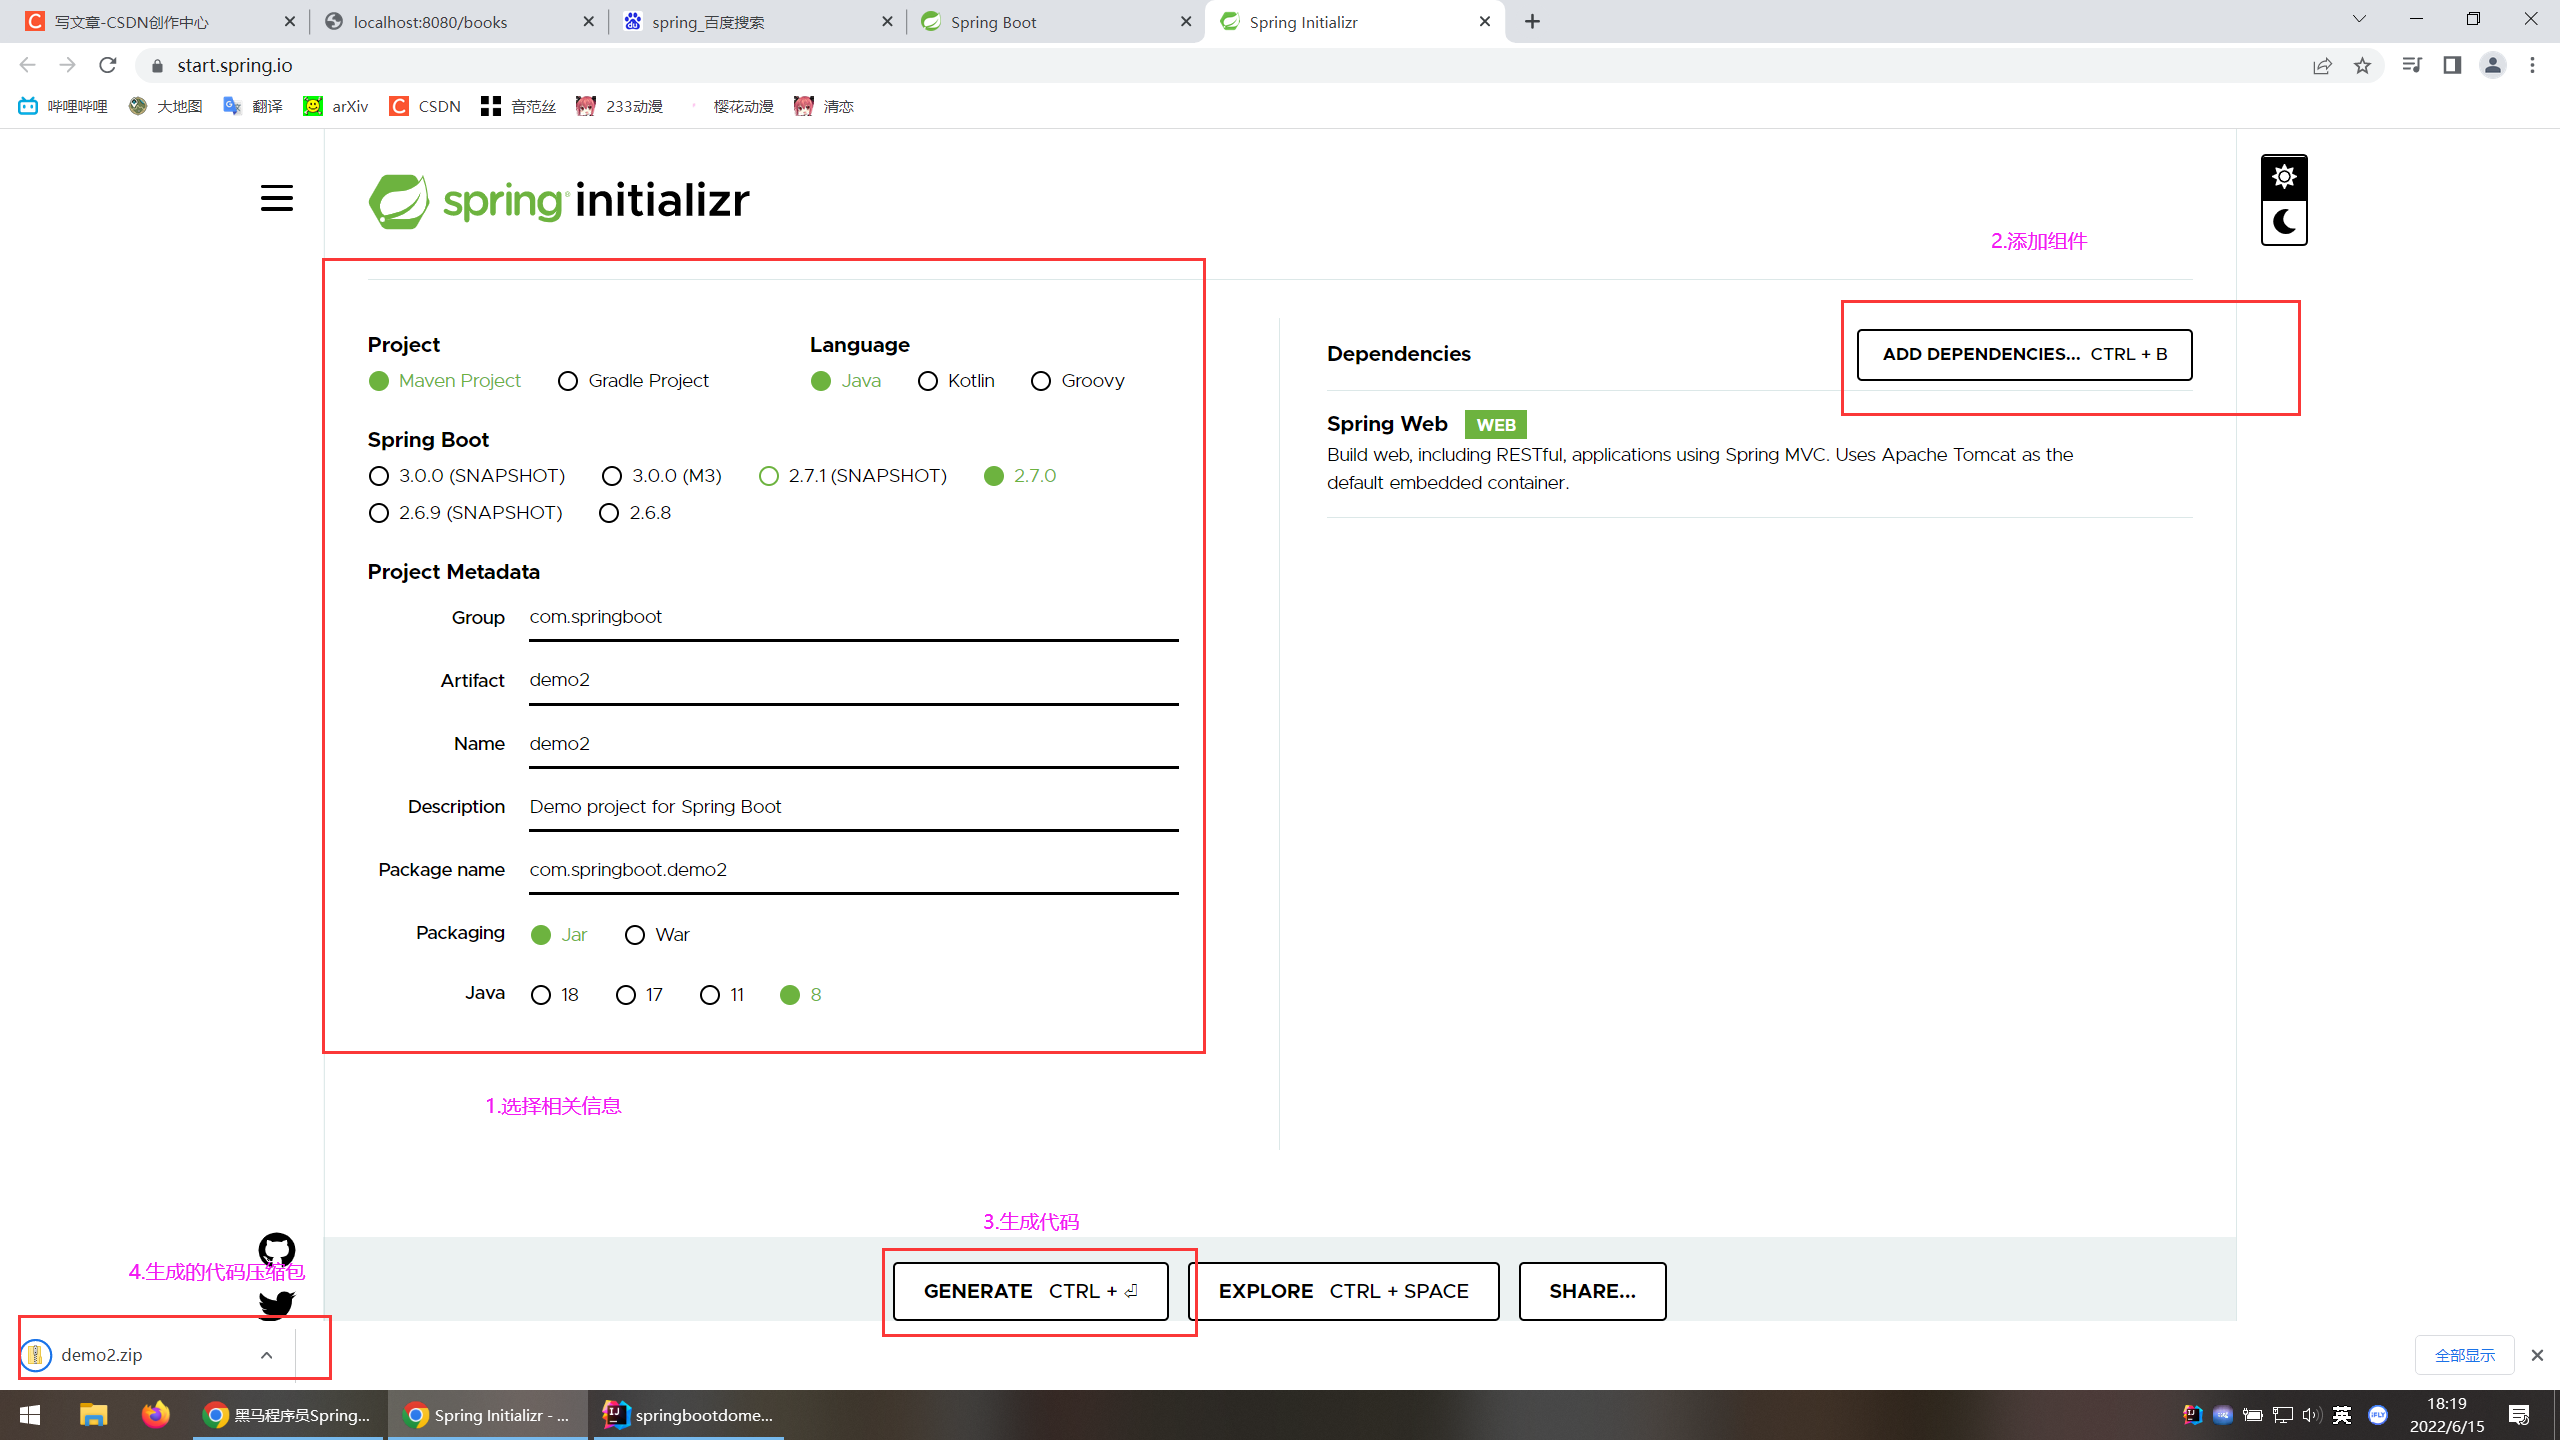
7.1 可以采用国内网址创建springboot项目,如阿里云版 详见
7.2 正常创建,随后去maven官网查找MyBatis-plus的依赖
导入对应的starter 根据提供的配置格式,配置非默认值对应的配置项
——————————springboot入门———————————
1.创建一个简单的springboot工程
1.1 创建一个空项目
1.2 在模块中完成创建
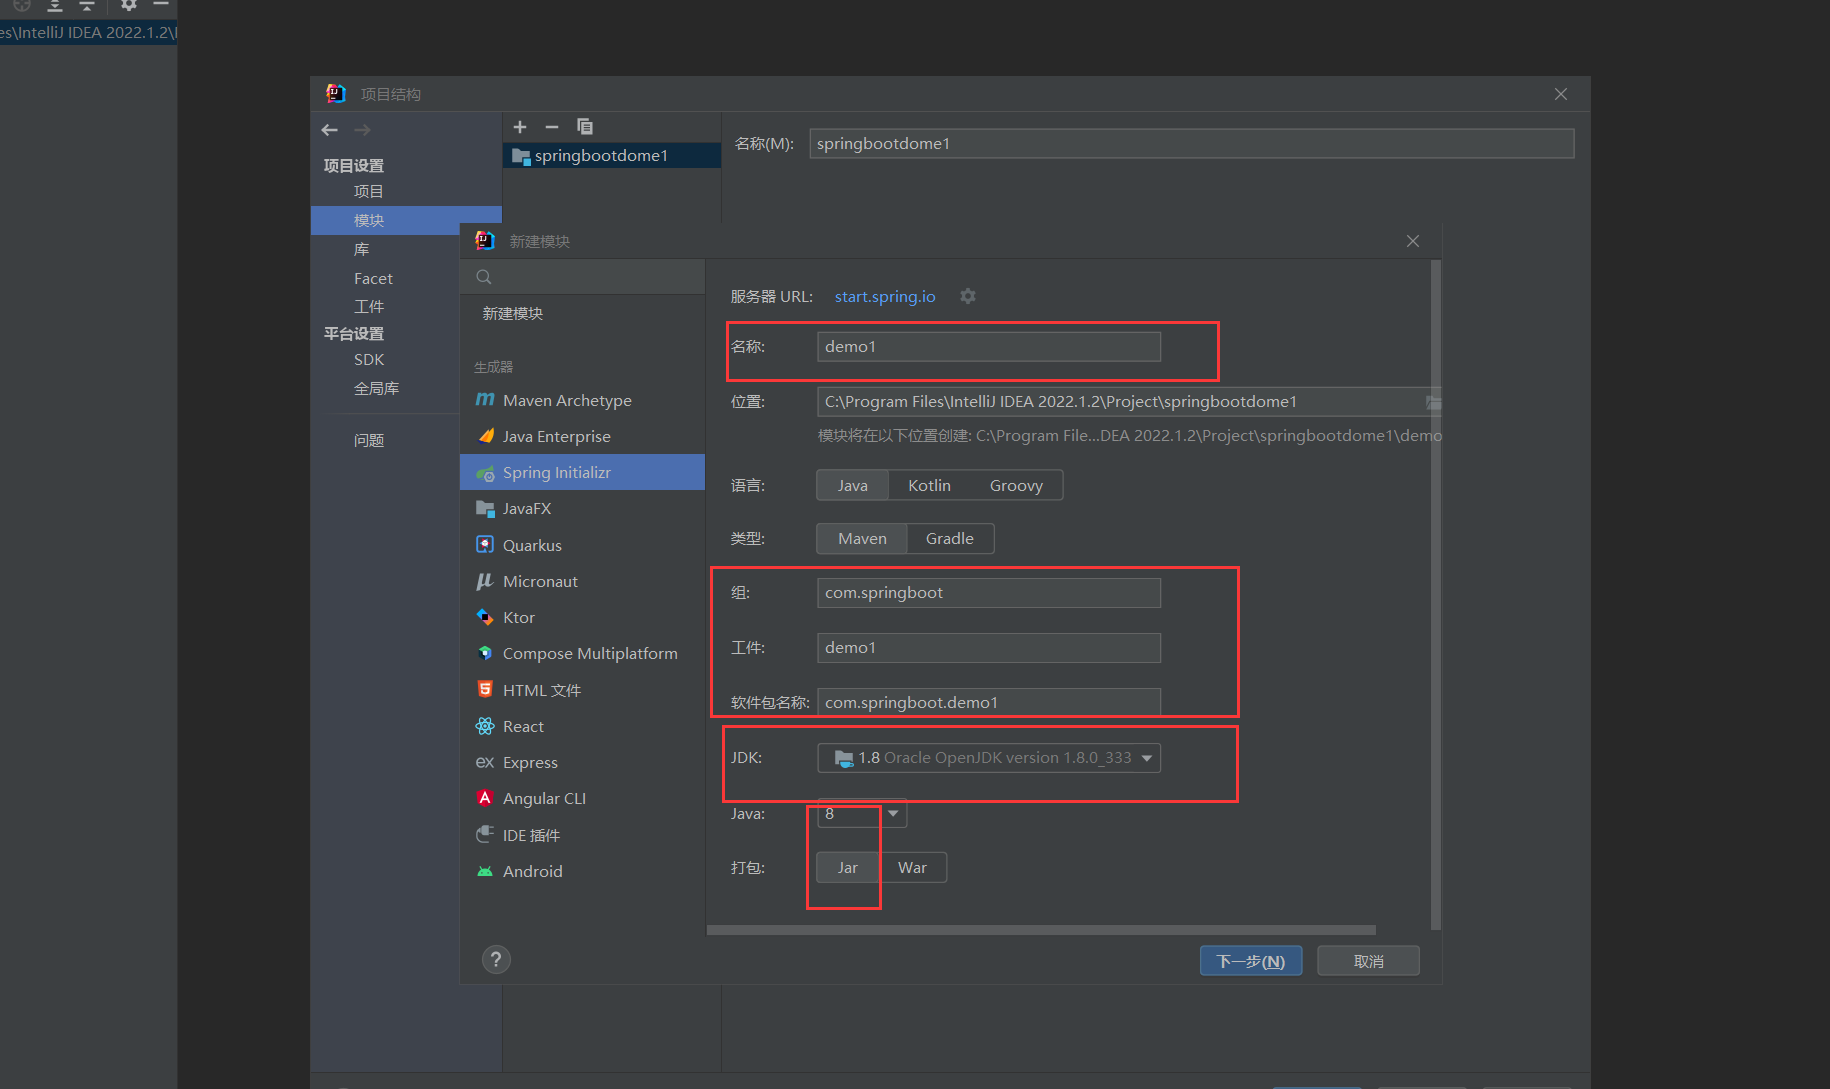
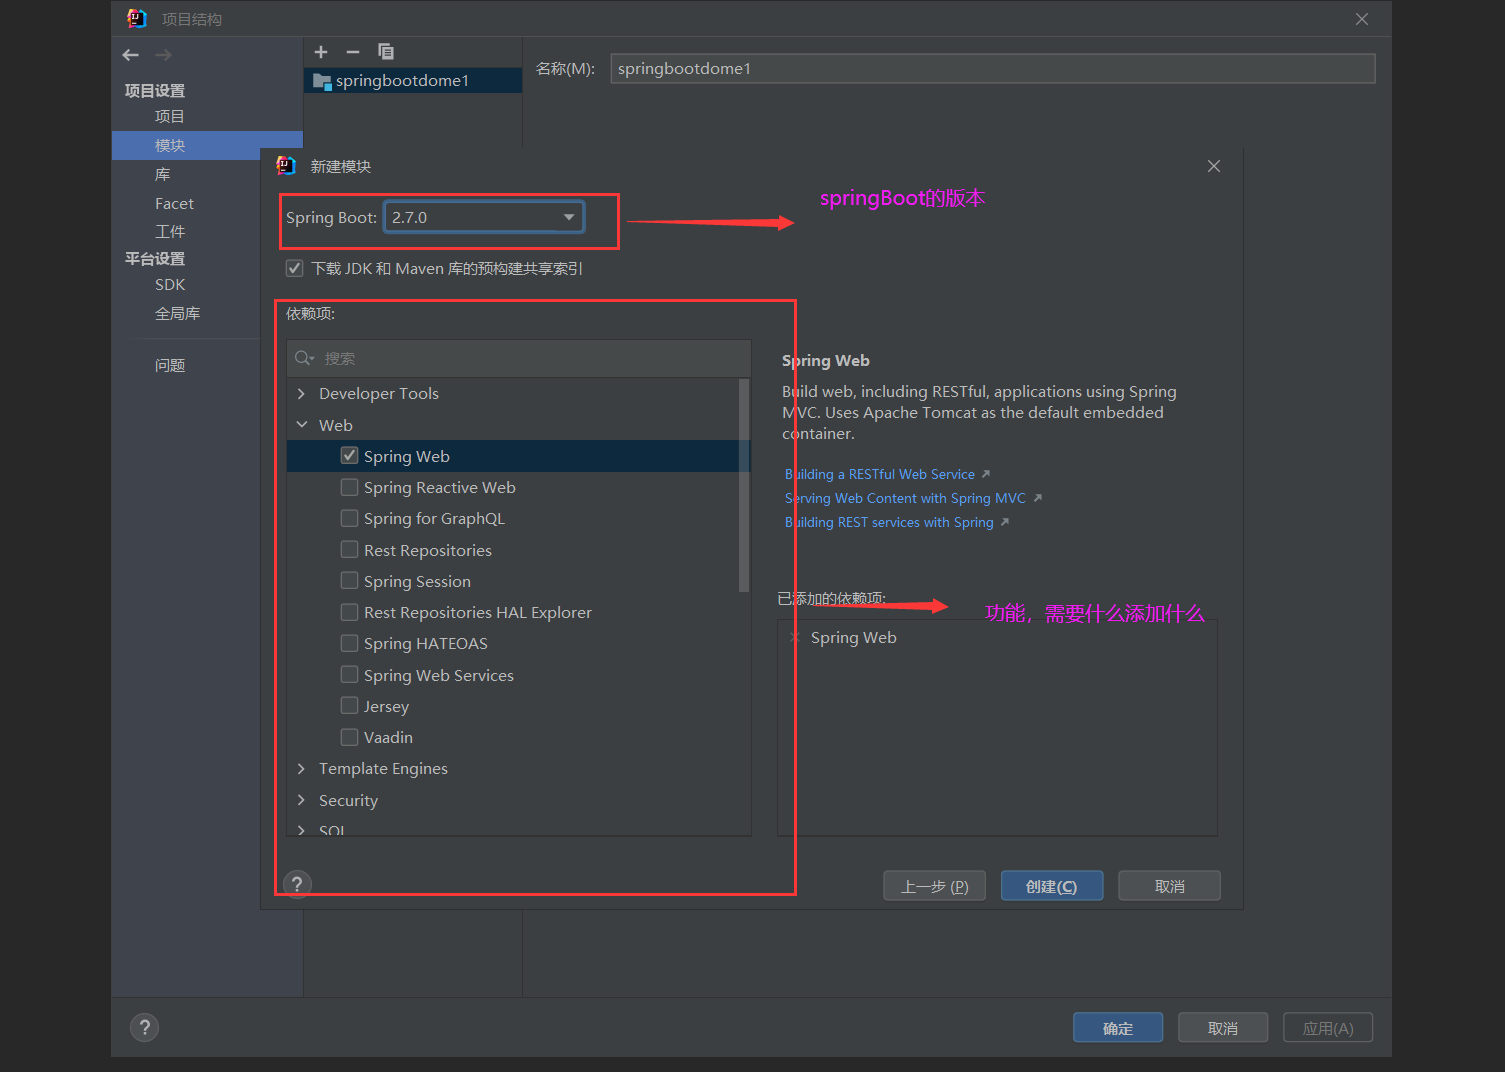 1.3创建完成后的项目结构
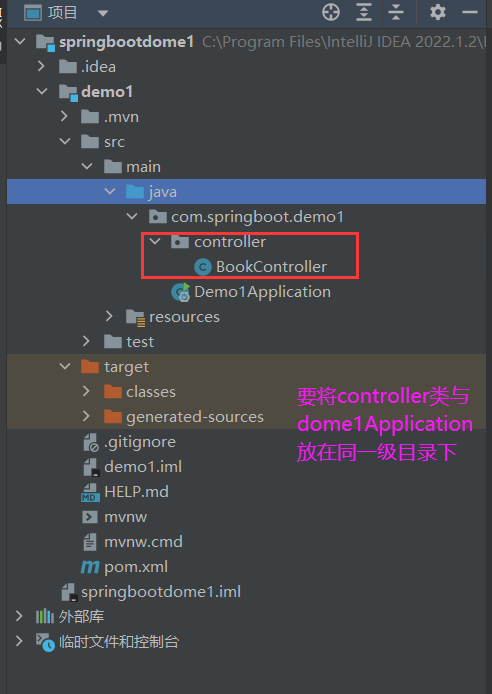
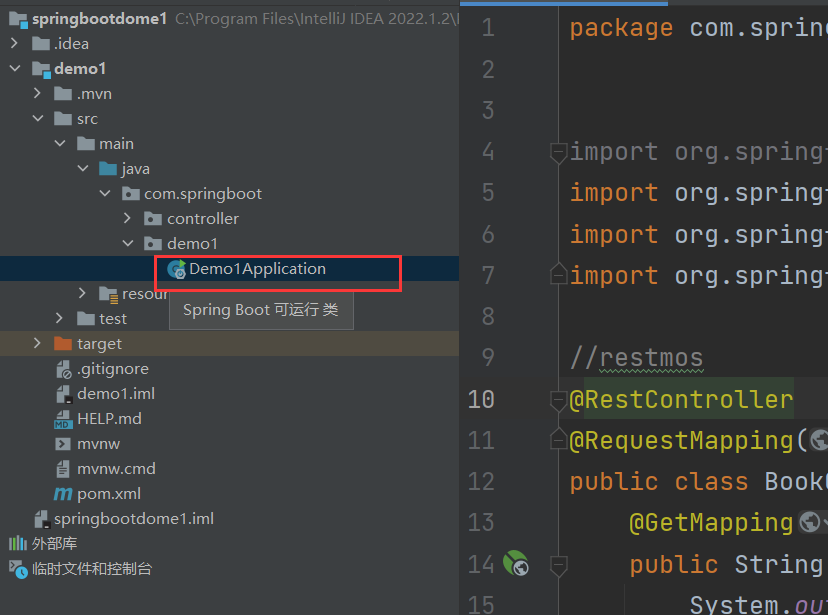
是因为@SpringBootApplication注解中有写到,没有指定包时,默认扫描 所在包及其子包
1.4 编写一个简单的mvc程序
com.springboot.controller.demo1.BookController.java
package com.springboot.controller;


import org.springframework.stereotype.Controller;
import org.springframework.web.bind.annotation.GetMapping;
import org.springframework.web.bind.annotation.RequestMapping;
import org.springframework.web.bind.annotation.RestController;

//restmos
@RestController
@RequestMapping("/book")
public class BookController {
    @GetMapping
    public String getById() {
        System.out.println("springboot is run");
        return "springboot ";
    }

}
1.5 随后运行Demo1Application.java
1.6 看到此图,标志着运行成功

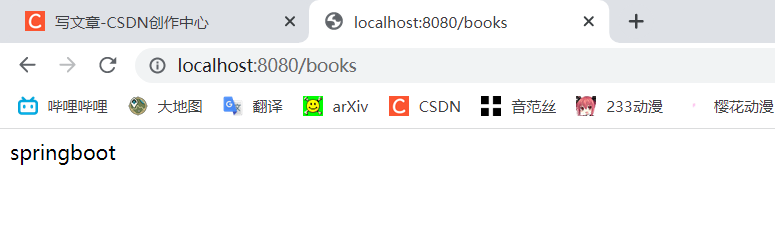
1.7 运行结果展示
1.8 补充 其他几种创建方式,网络质量不行时,外网比较慢
1.8.1 官网版
进入spring官网,点击springboot,拉到最后点击下图
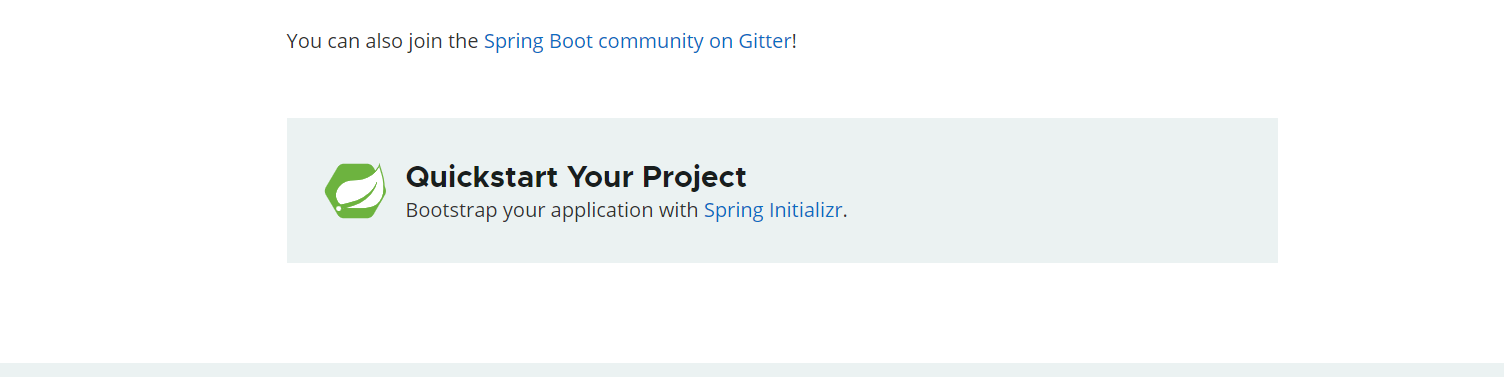
springbook链接![]() https://spring.io/projects/spring-boot
https://spring.io/projects/spring-boot
将文件解压后,加载到工程即可
1.8.2 阿里云版
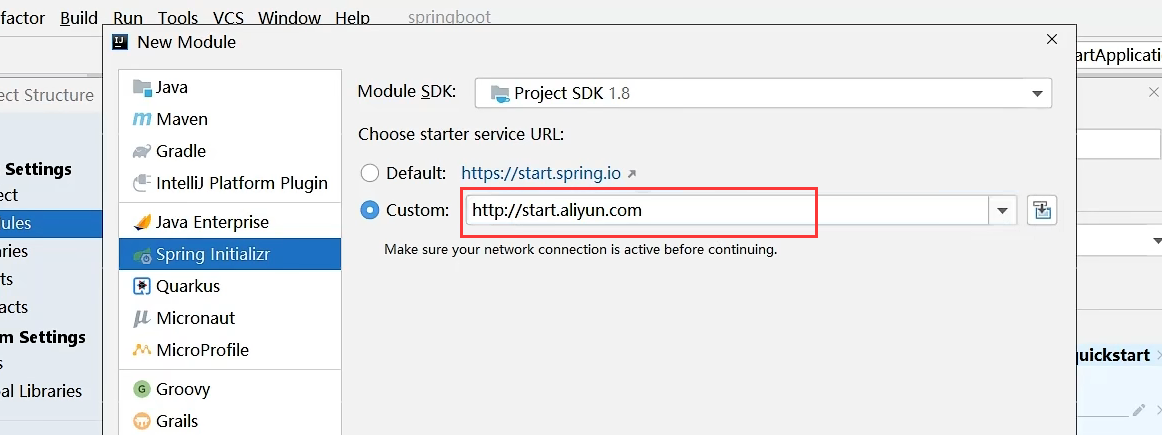
在创建的中途将上图的步骤更改为Custom,填写连接,之后的步骤与前后一样
http://start.aliyun.com
1.8.3 面向断网编程
1.创建一个maven工程
2.在pom.xml中添加依赖
<!--沿用父版本-->
    <parent>
        <groupId>org.springframework.boot</groupId>
        <artifactId>spring-boot-starter-parent</artifactId>
        <version>2.7.0</version>
        <relativePath/> <!-- lookup parent from repository -->
    </parent>


  <!--依赖-->
    <dependencies>
        <dependency>
            <groupId>org.springframework.boot</groupId>
            <artifactId>spring-boot-starter-web</artifactId>
        </dependency>

        <dependency>
            <groupId>org.springframework.boot</groupId>
            <artifactId>spring-boot-starter-test</artifactId>
            <scope>test</scope>
        </dependency>
    </dependencies>
在main中添加Application应用程序 引导类
package com.springboot.dome2;

import org.springframework.boot.SpringApplication;
import org.springframework.boot.autoconfigure.SpringBootApplication;

@SpringBootApplication
public class Application {
    public static void main(String[] args) {
        SpringApplication.run(Application.class,args);
    }
}
编写控制类controller 同上1.4
1.9 parent 解决配置问题
1.开发SpringBoot程序要继承spring-boot-starter-parent
2.spring-boot-starter-parent中定义了若干个依赖管理
3.继承parent模块可以避免多个依赖使用相同的技术时出现依赖版本冲突
4.继承的形式也可以采用引入依赖的形式实现效果
1.10 starter 解决配置问题
包含了若干个定义的坐标定义的pom文件
定义了当前项目使用的所有依赖坐标,已达到减少依赖配置的目的
(只写G和A就行,V不用写)
1.开发Springboot程序需要导入坐标时通常导入对应的starter
2.每个不同的starter根据功能不同,通常包含多个依赖坐标
3.使用starter可以实现快速配置的效果,以达到简化配置的目的
1.11引导类
SpringApplication.run(Demo1Application.class, args);启动spring容器
SpringBoot的引导类是Boot工程的执行入口,运行main方法就可以启动项目
SpringBoot工程运行后初始化Spring容器,扫描引导类所在包加载bean
1.11 辅助功能
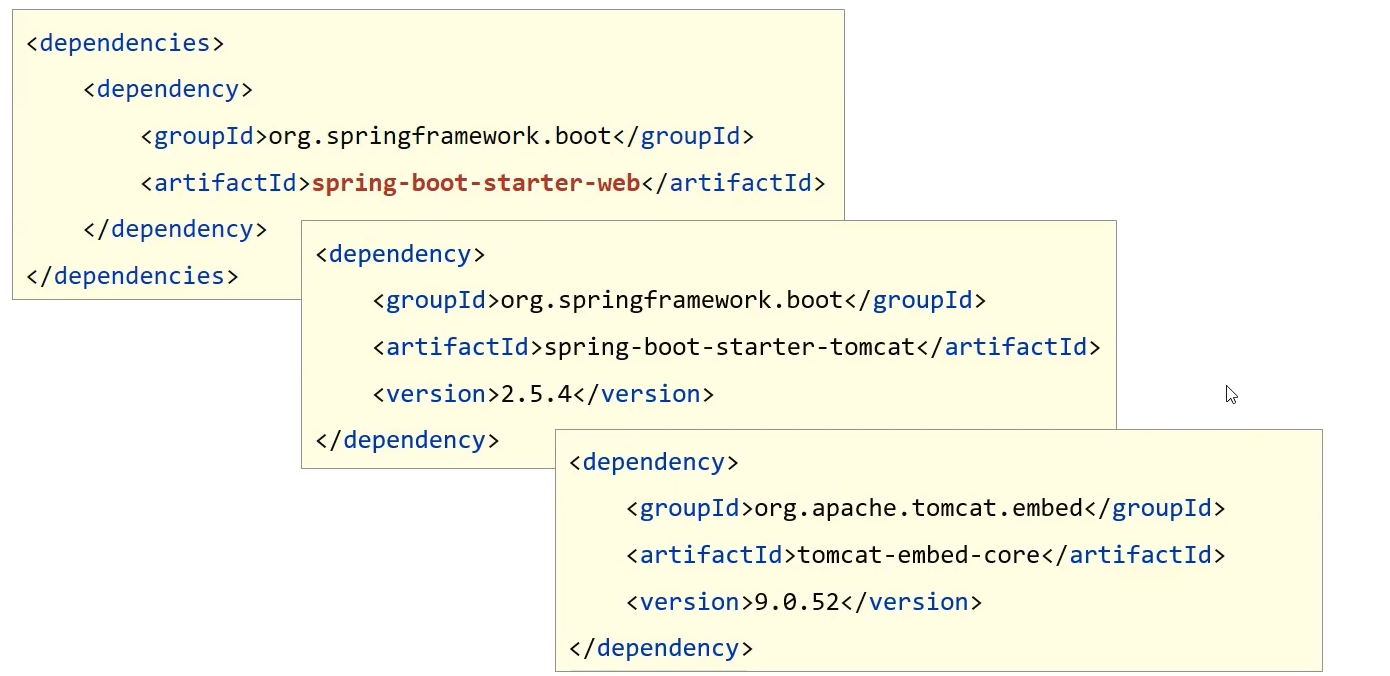
1.内嵌tomcat服务器是springboot的辅助功能之一
2.内嵌tomcat工作原理是将tomcat服务器作为对象运行,并将该对象交给Spring容器管理
3.变更内嵌服务器思想是去除现有服务器,添加全新的服务器
下方的代码 与此章节无关
    <!--依赖-->
    <dependencies>
        <dependency>
            <groupId>org.springframework.boot</groupId>
            <artifactId>spring-boot-starter-web</artifactId>

            <!-- </exclusions>  排除依赖-->
            <exclusions>
                <exclusion>
                    <groupId></groupId>
                    <artifactId></artifactId>
                </exclusion>
            </exclusions>


        </dependency>

        <dependency>
            <groupId>org.springframework.boot</groupId>
            <artifactId>spring-boot-starter-test</artifactId>
            <scope>test</scope>
        </dependency>
    </dependencies>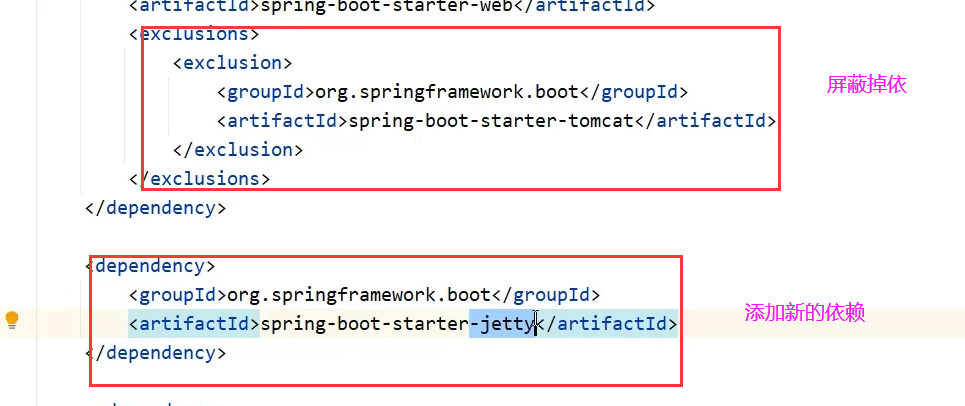
###############################################
————————————小技巧—————————————
2.小技巧
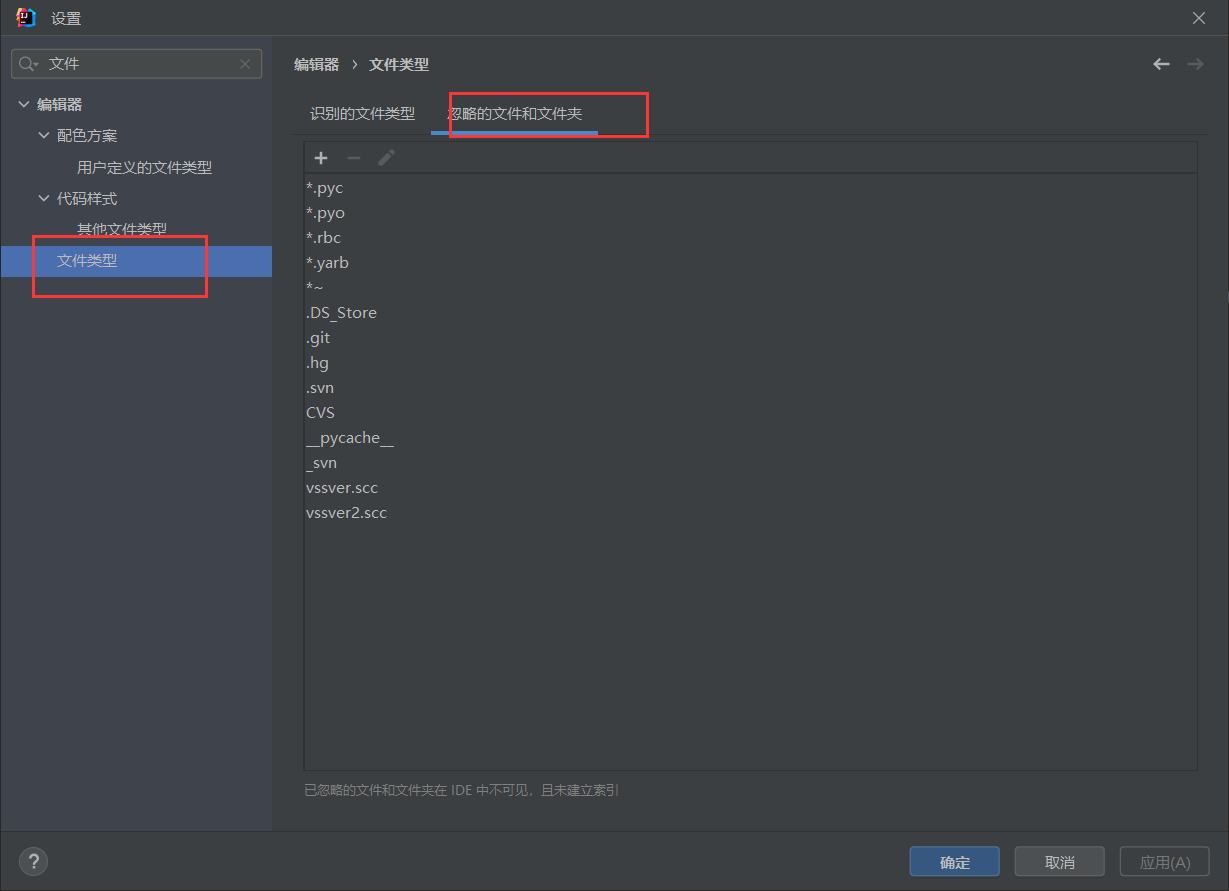
2.1隐藏一些不想看的文件
例如 .mvn等
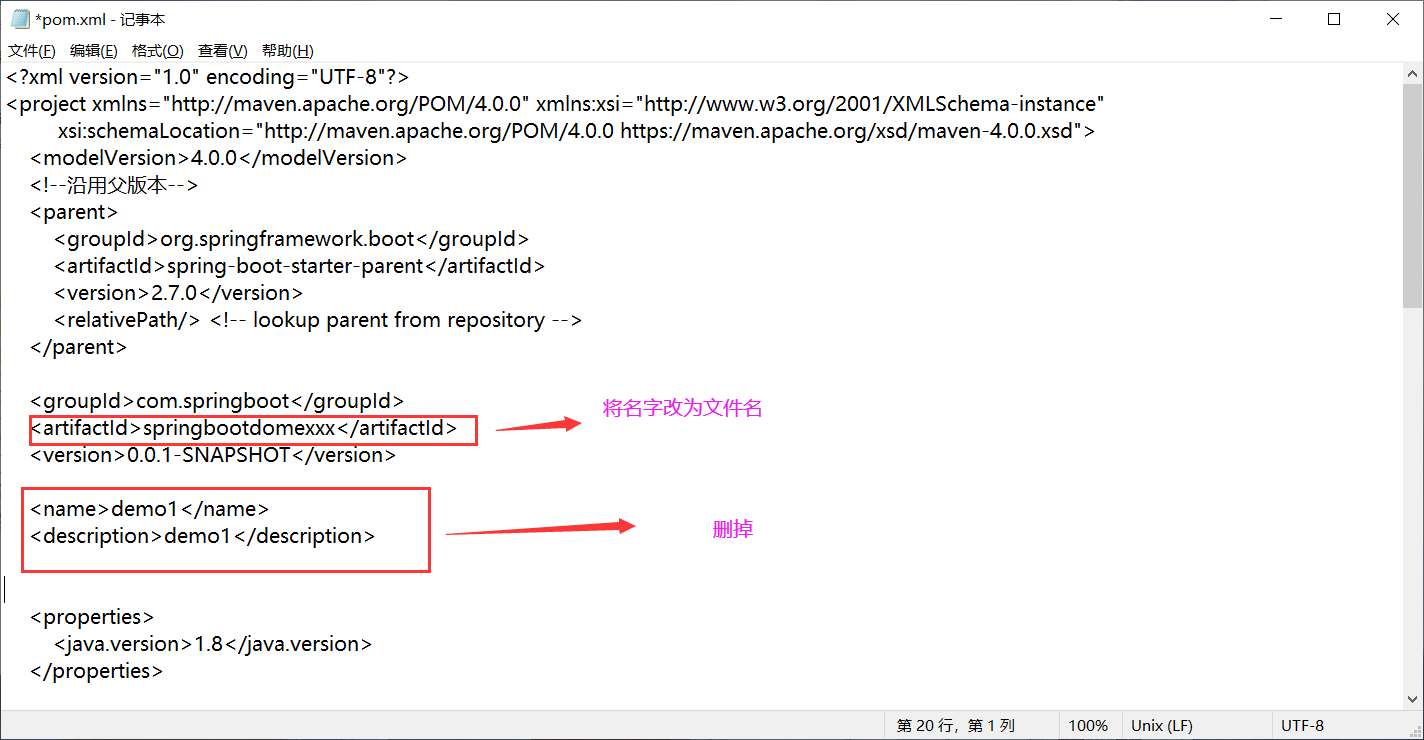
2.2 复制模块
原则:保留工程基础结构 抹掉原始工程痕迹
复制一份基础的springboot文件,更改pom文件
<?xml version="1.0" encoding="UTF-8"?>
<project xmlns="http://maven.apache.org/POM/4.0.0" xmlns:xsi="http://www.w3.org/2001/XMLSchema-instance"
xsi:schemaLocation="http://maven.apache.org/POM/4.0.0 https://maven.apache.org/xsd/maven-4.0.0.xsd">
<modelVersion>4.0.0</modelVersion>
<!--沿用父版本-->
<parent>
<groupId>org.springframework.boot</groupId>
<artifactId>spring-boot-starter-parent</artifactId>
<version>2.7.0</version>
<relativePath/> <!-- lookup parent from repository -->
</parent>
<groupId>com.springboot</groupId>
<artifactId>springbootdomexxx</artifactId>
<version>0.0.1-SNAPSHOT</version>
<properties>
<java.version>1.8</java.version>
</properties>
<!--依赖-->
<dependencies>
<dependency>
<groupId>org.springframework.boot</groupId>
<artifactId>spring-boot-starter-web</artifactId>
<!-- <!– </exclusions> 排除依赖–>-->
<!-- <exclusions>-->
<!-- <exclusion>-->
<!-- <groupId></groupId>-->
<!-- <artifactId></artifactId>-->
<!-- </exclusion>-->
<!-- </exclusions>-->
</dependency>
<dependency>
<groupId>org.springframework.boot</groupId>
<artifactId>spring-boot-starter-test</artifactId>
<scope>test</scope>
</dependency>
</dependencies>
<build>
<plugins>
<plugin>
<groupId>org.springframework.boot</groupId>
<artifactId>spring-boot-maven-plugin</artifactId>
</plugin>
</plugins>
</build>
</project>
删掉不必要的文件
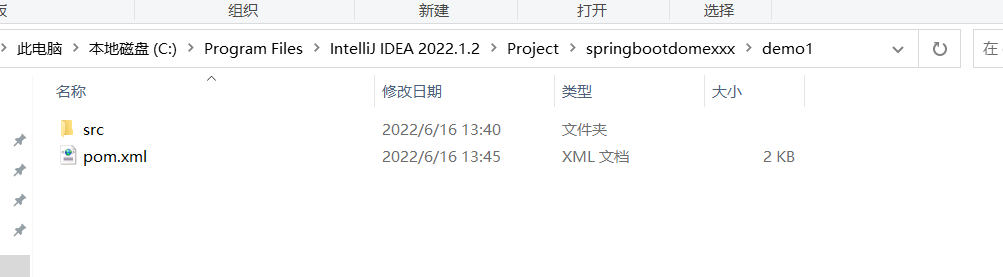
只需留下src与pom
###############################################
————————————基础篇—————————————
3.属性配置
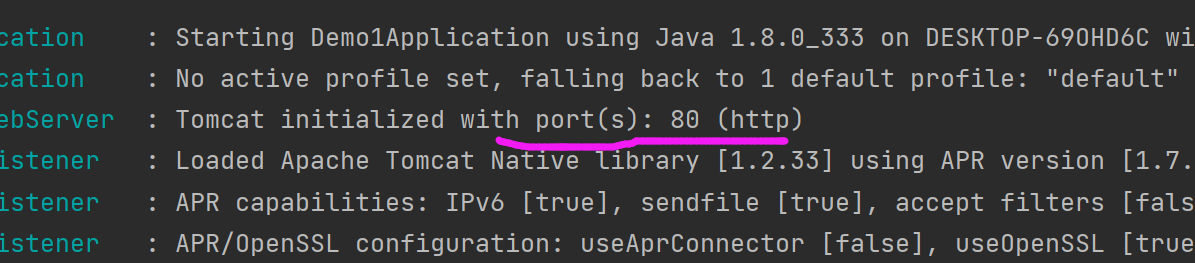
3.1修改服务器端口
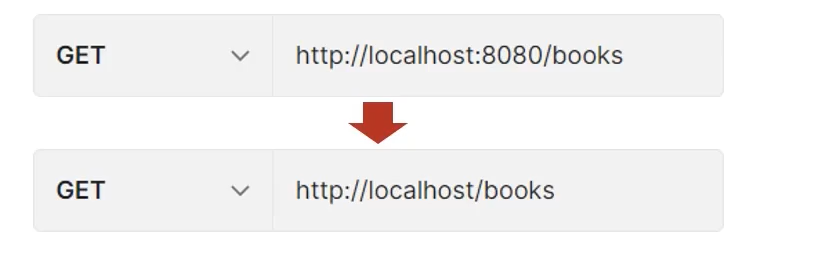
boot 程序的 配置文件 application.properties
#服务器端口配置
server.port=80
3.2 application.properties的其他配置
#修改banner
spring.banner.image.location=qiqi.png

#日志
logging.level.root=error 

谷歌快捷键
Ctrl+G 或 F3 查找与您在”在网页上查找”框中输入的内容相匹配的下一个匹配项
Ctrl+Shift+G 或 Shift+F3 查找与您在”在网页上查找”框中输入的内容相匹配的上一个匹配项
3.3 3种配置文件类型
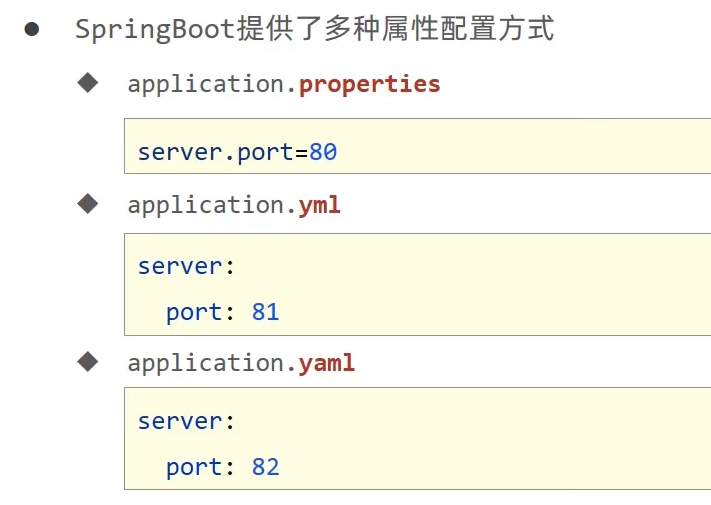
.yml主流
配置文件的加载顺序
properties>yml>yaml
相同配置按照优先级进行覆盖,不同配置全部保留
万一,输入时没有提示,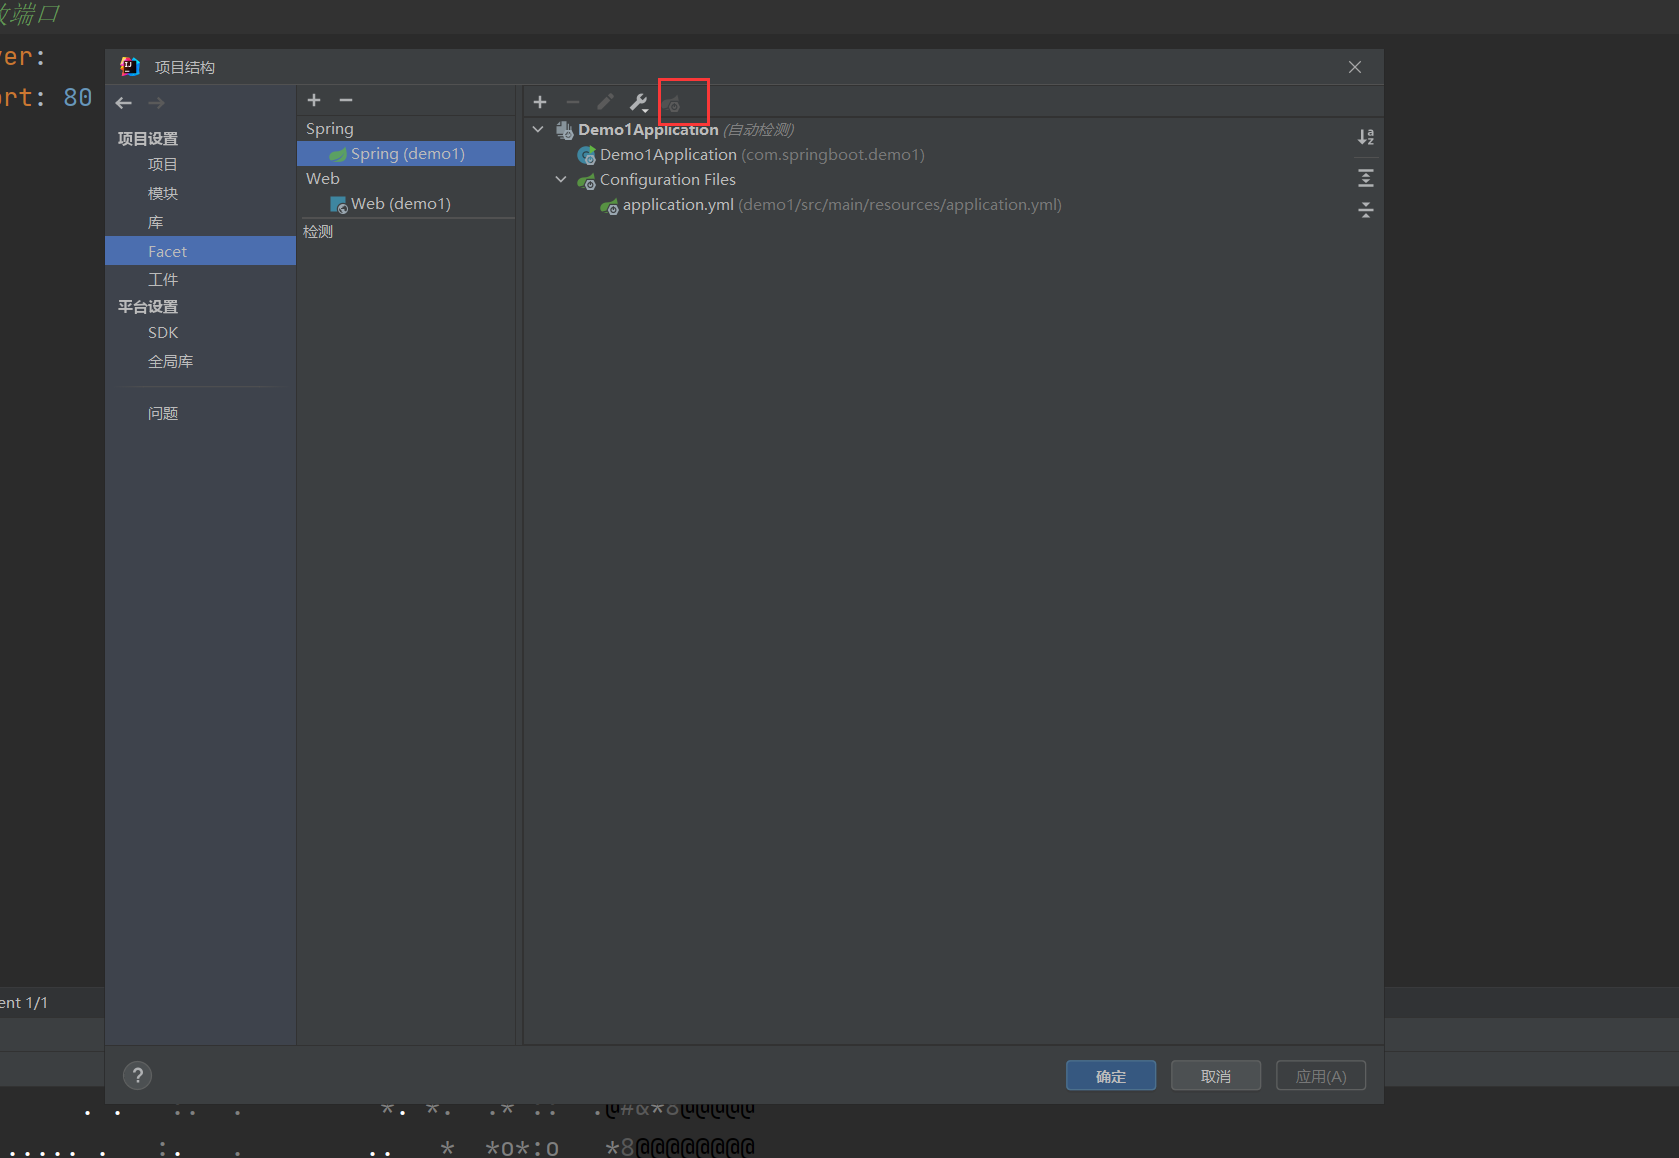
点击此处进行添加 配置文件
4.yaml语言
相比xml更注重数据
4.1语法规则
1. 大小写敏感
2.属性层级关系使用多行描述,每行结尾使用冒号结束
3.使用缩进表示层级关系,同层级左侧对其,只是用空格
4.属性值前面添加空格
5. #表示注释
数据前面要加空格与冒号隔开
4.2yaml格式数据的读取
将数据封装到environment对象中
    //使用自动装配将所有数据封装到一个对象Environment中
    @Autowired
    private Environment environment;


        System.out.println("_____________________________");
        System.out.println(environment.getProperty("server.port"));
重点,常用
#创建类,用于封装下面的数据
#由Spring将数据加载到对象中,
#使用时,从Spring中直接获取
datasource:
  driver: com.mysql.jdbc.Driver
  url: jdbc:mysql://localhost/springboot_db
  username: root
  password: root
package com.springboot;

//1.定义数据模型封装yaml文件
//2.定义为spring管控的bean


import org.springframework.boot.context.properties.ConfigurationProperties;
import org.springframework.stereotype.Component;

@Component
//3.指定加载的数据
@ConfigurationProperties(prefix = "datasource")
public class MyDateSource {
    private String driver;
    private String url;
    private String username;
    private String password;

//get set方法 与tostring方法
}
测试
package com.springboot.controller;


import com.springboot.MyDateSource;
import org.springframework.beans.factory.annotation.Autowired;
import org.springframework.core.env.Environment;
import org.springframework.stereotype.Controller;
import org.springframework.web.bind.annotation.GetMapping;
import org.springframework.web.bind.annotation.RequestMapping;
import org.springframework.web.bind.annotation.RestController;

//rest模式
@RestController

public class BookController {
    //使用自动装配将所有数据封装到一个对象Environment中
    @Autowired
    private Environment environment;

    @Autowired
    private MyDateSource myDateSource;


    @RequestMapping("/books")
    public String getById() {
        System.out.println("springboot is run");
        System.out.println("_____________________________");
        System.out.println(environment.getProperty("server.port"));
        System.out.println("_____________________________");
        System.out.println(myDateSource);
        return "springboot";
    }

}
5.整合Junit
@SpringBootTest 使用注解标注测试
![]()
@SpringBootTest(classes = BookController.class)6.整合MyBatis
6.1 MyBatis流程
核心配置:数据库连接相关信息(连什么,连谁,什么权限)
映射配置:SQL注释(XML/注解)
完成后在pom.xml中会出现
<!--   1.导入对应Starter-->
        <!--        Mybatis与Springboot的整合坐标-->
        <dependency>
            <groupId>org.mybatis.spring.boot</groupId>
            <artifactId>mybatis-spring-boot-starter</artifactId>
            <version>2.2.2</version>
        </dependency>
        <!--数据库jar包-->
        <dependency>
            <groupId>mysql</groupId>
            <artifactId>mysql-connector-java</artifactId>
            <scope>runtime</scope>
        </dependency>
在application.yml中 设置数据源参数
#2.设置数据源参数
spring:
  datasource:
    driver-class-name: com.mysql.cj.jdbc.Driver
    url: jdbc:mysql://localhost:3306/boot
    username: root
    password: root
定义相对应的实体类
package com.example.springbootdemo2.shuju;

public class Book {
    private Integer id;
    private String type;
    private String name;
    private String description;

    @Override
    public String toString() {
        return "Book{" +
                "id=" + id +
                ", type='" + type + '\'' +
                ", name='" + name + '\'' +
                ", description='" + description + '\'' +
                '}';
    }

    public Integer getId() {
        return id;
    }

    public void setId(Integer id) {
        this.id = id;
    }

    public String getType() {
        return type;
    }

    public void setType(String type) {
        this.type = type;
    }

    public String getName() {
        return name;
    }

    public void setName(String name) {
        this.name = name;
    }

    public String getDescription() {
        return description;
    }

    public void setDescription(String description) {
        this.description = description;
    }
}
定义数据层接口与映射配置
package com.example.springbootdemo2.Dao;

import com.example.springbootdemo2.shuju.Book;
import org.apache.ibatis.annotations.Mapper;
import org.apache.ibatis.annotations.Select;


@Mapper
public interface BookDao {
    //为了防止SQL语句写错,建议先到数据库那边写一次进行测试
    @Select("select * from book where id = #{id}")
    public Book getById(Integer id);
}
测试
package com.example.springbootdemo2;

import com.example.springbootdemo2.Dao.BookDao;
import org.junit.jupiter.api.Test;
import org.springframework.beans.factory.annotation.Autowired;
import org.springframework.boot.test.context.SpringBootTest;

@SpringBootTest
class Springbootdemo2ApplicationTests {
    @Autowired
    private BookDao bookDao;

    @Test
    void contextLoads() {
        System.out.println(bookDao.getById(2));
    }

}
测试结果

6.2 降低springboot版本后会出现错误
例如从2.7降到2.4
    <parent>
        <groupId>org.springframework.boot</groupId>
        <artifactId>spring-boot-starter-parent</artifactId>
<!--        <version>2.7.0</version>-->
        <version>2.4.1</version>
        <relativePath/> <!-- lookup parent from repository -->
    </parent>
服务器时区设置问题
java.sql.SQLException: The server time zone value '�й���ʱ��' is unrecognized or represents more than one time zone. You must configure either the server or JDBC driver (via the 'serverTimezone' configuration property) to use a more specific time zone value if you want to utilize time zone support.
配置服务器或 JDBC 驱动程序(通过“serverTimezone”配置属性)
更改方式
在配置文件URL中添加 ?serverTimezone=UTC
#2.设置数据源参数
spring:
  datasource:
    driver-class-name: com.mysql.cj.jdbc.Driver
    url: jdbc:mysql://localhost:3306/boot?serverTimezone=UTC
    username: root
    password: root
结果展示

7. 整合MyBatis-plus
MyBatis-Plus与MyBatis区别
导入坐标不同
数据层实现简化
因为一些原因,在springBoot技术库中没有MyBatis-Plus,解决方法,
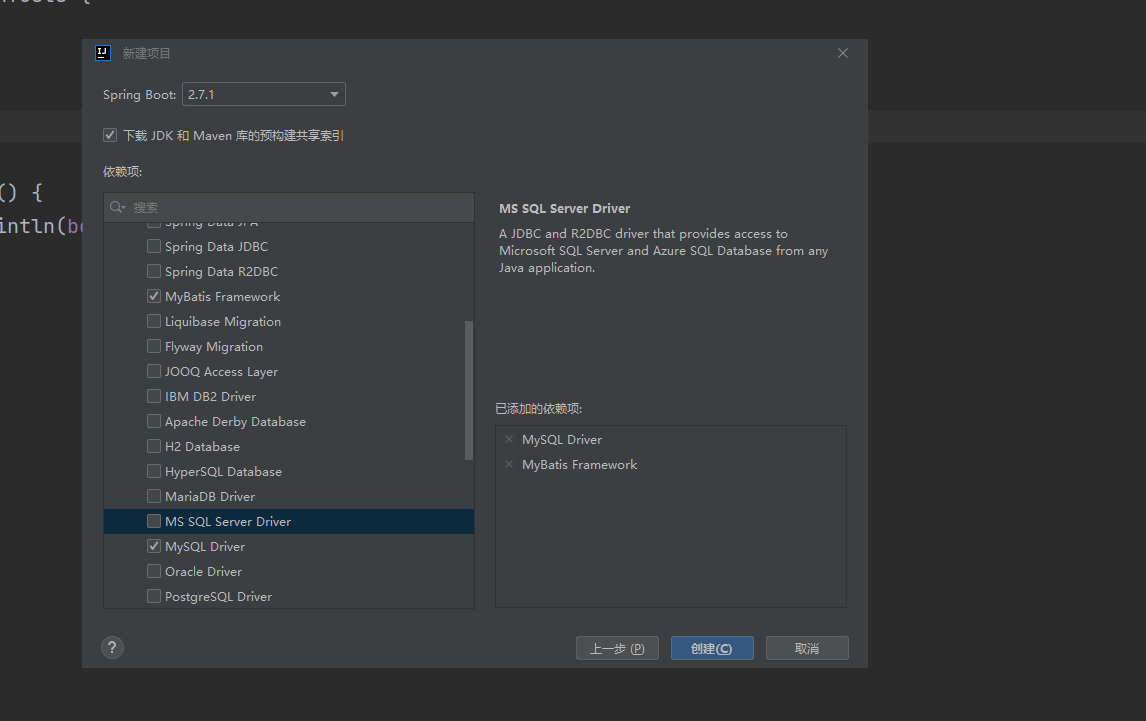
7.1 可以采用国内网址创建springboot项目,如阿里云版 详见
1.8.2 阿里云版
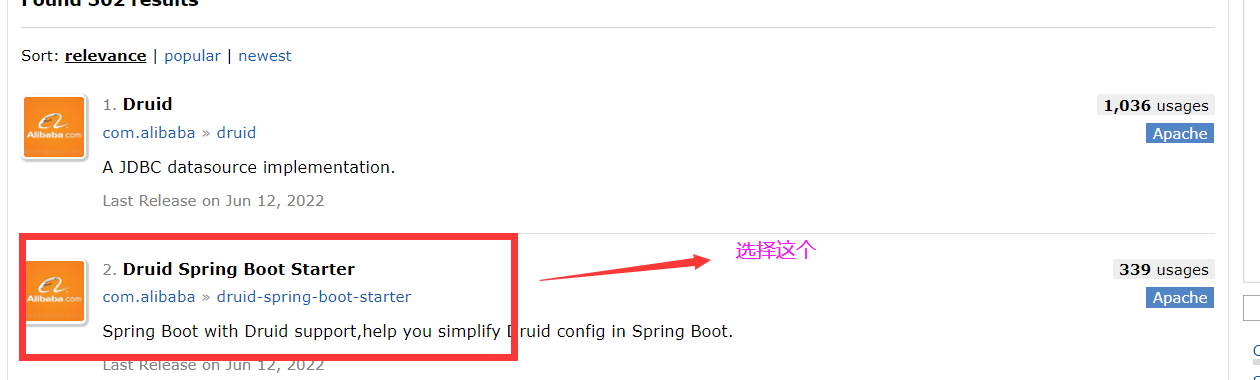
7.2 正常创建,随后去maven官网查找MyBatis-plus的依赖
maven官网![]() https://mvnrepository.com/
https://mvnrepository.com/

选择对应的技术即可 添加到pom文件中
<!-- https://mvnrepository.com/artifact/com.baomidou/mybatis-plus-boot-starter -->
<dependency>
    <groupId>com.baomidou</groupId>
    <artifactId>mybatis-plus-boot-starter</artifactId>
    <version>3.4.3</version>
</dependency>
编写实体类book,
以及定义数据层接口与映射配置bookdao 继承 BaseMapper 将实体类作为泛型传入
package com.example.springbootdemo2.Dao;

import com.baomidou.mybatisplus.core.mapper.BaseMapper;
import com.example.springbootdemo2.shuju.Book;
import org.apache.ibatis.annotations.Mapper;
import org.apache.ibatis.annotations.Select;


//@Mapper
//public interface BookDao {
//    //为了防止SQL语句写错,建议先到数据库那边写一次进行测试
//    @Select("select * from book where id = #{id}")
//    public Book getById(Integer id);
//}

@Mapper
public interface BookDao extends BaseMapper<Book> {

}
测试
package com.example.springbootdemo2;

import com.example.springbootdemo2.Dao.BookDao;
import org.junit.jupiter.api.Test;
import org.springframework.beans.factory.annotation.Autowired;
import org.springframework.boot.test.context.SpringBootTest;

@SpringBootTest
class Springbootdemo2ApplicationTests {
    @Autowired
    private BookDao bookDao;

    @Test
    void contextLoads() {
        System.out.println(bookDao.selectById(3));
    }

}
测试结果

7.2.2 要是报错了
![]()
因为mp有映射,所以呼应不上了
#    设置MP相关配置
mybatis-plus:
  global-config:
    db-config:
      table-prefix: tbl_
8.整合Druid
进入maven官网,查找druid坐标
        <!--德鲁伊连接池-->
        <!-- https://mvnrepository.com/artifact/com.alibaba/druid-spring-boot-starter -->
        <dependency>
            <groupId>com.alibaba</groupId>
            <artifactId>druid-spring-boot-starter</artifactId>
            <version>1.2.6</version>
        </dependency>
随后进行druid的整合
方法一
添加type,作用:配置数据源类型 通用配置
spring:
  datasource:
    driver-class-name: com.mysql.cj.jdbc.Driver
    url: jdbc:mysql://localhost:3306/boot?serverTimezone=UTC
    username: root
    password: root
    type: com.alibaba.druid.pool.DruidDataSource
方法二 更推荐 druid专用配置
#2.设置数据源参数
spring:
  datasource:
    druid:
      driver-class-name: com.mysql.cj.jdbc.Driver
      url: jdbc:mysql://localhost:3306/boot?serverTimezone=UTC
      username: root
      password: root
——————————小知识——————————————
整合第三方技术通用方式
导入对应的starter
根据提供的配置格式,配置非默认值对应的配置项
——————————————————————————


 331
331


 被折叠的 条评论
为什么被折叠?
被折叠的 条评论
为什么被折叠?
 到【灌水乐园】发言


