


Vue + ElementUI 后台管理项目实战
文章目录
项目演示
vue + element-ui 项目演示
七、项目实战七
Ⅰ、用户管理页面
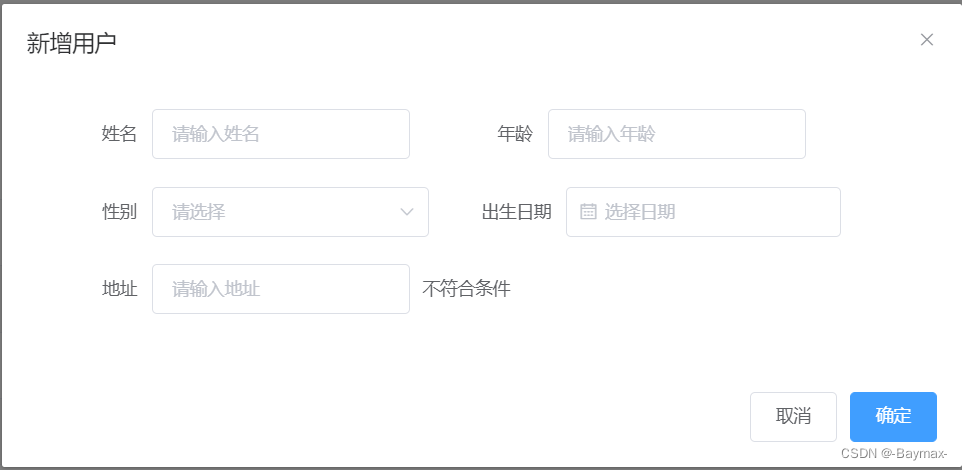
1. Form 表单
使用的是 el-form 组件进行相关配置
- 在 components 文件夹下创建 CommonForm.vue 文件
- 表单中需要引入 Input 组件(文本框)、Select 组件(选择)、Option 组件(Select 组件的下拉值)、Switch 组件、DatePicker 组件(日期)
	<template>
	  <!-- 通过ref可以拿到form实例 -->
	  <!-- :model与form表单实现双向数据绑定,:inline是表单内容的布局方式,为true时一行多列 -->
	  <el-form ref="form" label-width="100px" :model="form" :inline=true>
	    <!-- 表单域 -->
	    <el-form-item
	      v-for="item in formLabel"
	      :key="item.label"
	      :label="item.label"
	    >
	      <!-- 渲染表单元素
	           通过type属性区分
	           数据与表单组件进行双向数据绑定,拿到form数据下的item.model-->
	      <!-- 姓名输入 -->
	      <!-- item.type:用来区分表单组件中应该渲染什么组件 -->
	      <el-input
	        v-if="item.type === 'input'"
	        :placeholder="'请输入' + item.label"
	        v-model="form[item.model]"
	      ></el-input>
	      <!-- 性别判断 -->
	      <el-switch v-if="item.type === 'switch'" v-model="form[item.model]"></el-switch>
	      <!-- 出生日期 -->
	      <!-- value-format:日期格式定义 -->
	      <el-date-picker
	        v-if="item.type === 'date'"
	        type="date"
	        value-format="yyyy-MM-dd"
	        placeholder="选择日期"
	        v-model="form[item.model]"
	      ></el-date-picker>
	      <!-- 性别下拉框 -->
	      <el-select
	        v-if="item.type === 'select'"
	        placeholder="请选择"
	        v-model="form[item.model]"
	      >
	        <!-- 下拉组件,两个选项:男/女
	             opts是配置项,里面有是定义好的数据 -->
	        <el-option
	            v-for="item in item.options"
	            :key="item.value"
	            :label="item.label"
	            :value="item.value"
	        ></el-option>
	      </el-select>
	    </el-form-item>
	    <!-- 如果当前的组件都不满足  -->
	    <el-form-item>
	        <slot>不符合条件</slot>
	    </el-form-item>
	  </el-form>
	</template>

	<script>
	export default {
	  name: "CommonForm",
	  props: {
	    formLabel: Array, //form相关配置的数据
	    form: Object,  //外部组件传入数据,接收数据对其进行双向绑定
	    inline: Boolean, //表单布局:单行/多行
	  },
	  data() {
	    return {};
	  },
	};
	</script>
2. 用户列表页头部 & dialog 弹窗
- 用户列表页的呈现
	<template>
	  <div class="manage">
	    <!-- 对话框 -->
	    <!-- title:点击新增显示【新增用户】,点击编辑显示【更新用户】
	         visible:是否显示Dialog,支持.sync修饰符【vue3-实现子组件与父组件的双向绑定,并且可以实现子组件同步修改父组件的值】-->
	    <el-dialog
	      :title="operateType === 'add' ? '新增用户' : '更新用户'"
	      :visible.sync="isShow"
	    >
	      <common-form
	        :formLabel="opertateFormLabel"
	        :form="operateForm"
	        :inline="true"
	        ref="form"
	      ></common-form>
	      <!-- 给弹窗组件添加自定义底部 -->
	      <div slot="footer" class="dialog-footer">
	        <!-- 点击取消不展示dialog框 -->
	        <el-button @click="isShow = false">取消</el-button>
	        <!-- 点击确定,primary:主要按钮(蓝色),触发confirm方法 -->
	        <el-button type="primary" @click="confirm">确定</el-button>
	      </div>
	    </el-dialog>
	    <!-- 顶部 -->
	    <div class="manage-header">
	      <!-- 新增,点击添加人员信息,primary:信息类型的按钮(蓝色) -->
	      <el-button type="primary" @click="addUser">+ 新增</el-button>
	      <!-- 右侧的输入框 -->
	      <common-form
	        :formLabel="formLabel"
	        :form="searchForm"
	        :inline="true"
	        ref="form"
	      >
	        <!-- 人员查询 -->
	        <el-button type="primary" @click="getList(searchForm.keyword)">搜索</el-button>
	      </common-form>
	    </div>
	    <!-- config:分页的配置数据 -->
	    <common-table
	      :tableData="tableData"
	      :tableLabel="tableLabel"
	      :config="config"
	      @changePage="getList()"
	      @edit="editUser"
	      @del="delUser"
	    ></common-table>
	  </div>
	</template>
- data 中的数据
	operateType: "add",
    // dialog弹窗默认关闭
    isShow: false,
    // 表单标签数据
    opertateFormLabel: [...],
    // 修改表单元素时会通过双向数据绑定修改父组件传递来的数据
    operateForm: {...},
    // 右侧输入框类型及配置
    formLabel: [...],
    // 要传入的数据【关键字】
    searchForm: {...},
    // table表格的数据
    tableData: [...],
    // table中列的配置数据
    tableLabel: [...],
- 点击新增弹出 dialog 框
	addUser() {
      // 点击新增弹出dialog框
      this.isShow = true;
      // 默认为新增
      this.operateType = "add";
      // 数据初始化:都为空
      this.operateForm = {
        name: "",
        addr: "",
        age: "",
        birth: "",
        sex: "",
      };
    }
- Flex 弹性布局
	<style lang="less" scoped>
	// 对新增和搜索框进行flex布局
	.manage-header {
	  display: flex;
	  justify-content: space-between;
	  align-items: center;
	}
	.common-table {
	  margin-top: 35px;
	  height: 465px;
	}
	</style>
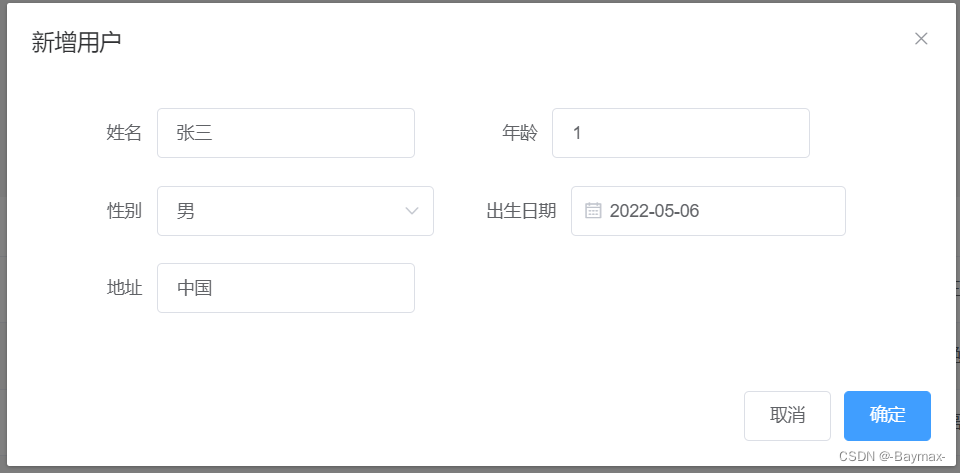
效果图

3. 用户列表新增 & 新增+编辑接口调用
- ./user/index.vue 中添加方法,绑定到 dialog 弹窗的确定按钮,同于添加数据。
	confirm() {
      // operateType的状态为编辑的时候
      if (this.operateType === "edit") {
        // mock模拟数据
        this.$http.post("/user/edit", this.operateForm).then((res) => {
          console.log(res);
          this.isShow = false;  //关闭弹窗
        });
        // 新增的逻辑
      } else {
        this.$http.post("/user/add", this.operateForm).then((res) => {
          console.log(res);
          this.isShow = false;  //关闭弹出
        });
      }
    }
- 在user.js 中定义了createUser 和 updateUser 方法,在mock.js 中拦截
	// 语法:记录用于生成响应数据的函数。
	// 当拦截到匹配 rurl 和 rtype 的 Ajax 请求时,
	// 函数 function(options) 将被执行,并把执行结果作为响应数据返回。
	Mock.mock( rurl?, rtype?, template|function( options ) )
	import userApi from './mockServerData/user'
	Mock.mock(/user\/add/, 'post', userApi.createUser)
	Mock.mock(/user\/edit/, 'post', userApi.updateUser)
用户添加

4. 用户列表 table 组件的数据展示
- 在 components 中创建 CommonTable.vue 组件。
- 使用 Table 组件、TableColumn (表格的列) 组件、Pagination(分页) 组件,来搭建表格。
	<template>
	  <div class="common-table">
	      <!-- stripe斑马条纹 -->
	      <el-table :data="tableData" height="90%" stripe>
	        <!-- 用tooltip显示超长的文案 -->
	        <!-- :width 看看有没有这个宽度,如果有就用,没有用默认定义的 -->
	        <el-table-column
	            show-overflow-tooltip
	            v-for="item in tableLabel"
	            :key="item.props"
	            :label="item.label"
	            :width="item.width ? item.width : 125"
	        >
	            <!-- 接收传入进来的插槽数据 -->
	            <template slot-scope="scope">
	                <!-- scope.row:用插槽拿到当前行row内置属性 -->
	                <span>{{scope.row[item.prop]}}</span>
	            </template>
	        </el-table-column>
	        <!-- 操作列 -->
	        <el-table-column label="操作" min-width="180">
	            <template slot-scope="scope">
	                <!-- scope.row表示当前行的数据 -->
	                <el-button size="mini" @click="handleEdit(scope.row)">编辑</el-button>
	                <el-button size="mini" type="danger" @click="handleDelete(scope.row)">删除</el-button>
	            </template>

	        </el-table-column>
	      </el-table>

	      <!-- 分页组件
	           layout:组件布局,子组件名用逗号分隔
	           :total: 总数据数量
	           current-page.sync:当前页数
	           current-change:改变分页数的回调函数
	           page-size:每页显示个数
	      -->
	      <el-pagination
	        class="pager"
	        layout="prev, pager, next"
	        :total="config.total"
	        :current-page.sync="config.page"
	        @current-change="changePage"
	        :page-size="20"
	      >
	      </el-pagination>
	  </div>
	</template>

	<script>
	export default {
	    name:'CommonTable',
	    props: {
	        tableData: Array,  //表格的数据
	        tableLabel: Array, //表格的首行的提示数据
	        config: Object //用于传输总数据
	    },
	    data(){
	        return{}
	    },
	    methods:{
	        // row为当前分页的数据
	        handleEdit(row) {
	            this.$emit('edit', row) //拿到当前行的数据,向父组件传递
	        },
	        handleDelete(row) {
	            this.$emit('del', row) //拿到当前行的数据,向父组件传递
	        },
	        changePage(page) {
	            this.$emit('changePage', page) //拿到当前分页的数据,向父组件传递
	        }
	    }
	};
	</script>

	<style lang="less" scoped>
	.common-table {
	    height: calc(100% -62px);
	    background-color: #fff;
	    position: relative;
	    .pager {
	        position: absolute;
	        bottom: 0;
	        right: 20px;
	    }
	}
	</style>
- 在 mock.js 中拦截
Mock.mock(/user\/getUser/, 'get', userApi.getUserList)
- 在 data.js 中配置数据请求
	export const getUser = (params) => {
	    return axios.request({
	        url: '/user/getUser', //接口的相关地址
	        method: 'get',        //请求方式
	        params
	    })
	}
- 编辑、删除、显示表格数据、分页
	methods:{
      // 编辑
      editUser(row){
        this.operateType = 'edit'
        this.isShow = true
        // row表示当前行的数据
        this.operateForm = row //数据回写当前行的数据
      },
      // 删除
      delUser(row) {
        //通知栏组件
        this.$confirm("此操作将永久删除该组件,是否继续?", "提示", {
          confirmButtonText: "确认",
          cancelButtonText: "取消",
          type: "warning" //弹窗类型(警告)
        }).then(() => {
          const id = row.id
          this.$http.post("/user/del", {
            params: {id}
          }).then(() => {
            // $message、$confirm 为ElementUI弹出框的相关属性
            this.$message({
              type: 'success',
              message: '删除成功'
            })
            this.getList()
          })
        })
      },
       // 显示表格数据,并进行分页
      getList(name = '') {
        this.config.loading = true  // 获取数据前给它一个loading
        name ? (this.config.page = 1) : ''  //分页名字存在初始页为1
        // 接口调用
        getUser({
          page: this.config.page,
          name
        }).then(res => {
          console.log('getUser', res);
          this.tableData = res.list.map(item => {
            item.sexLabel = item.sex === 0 ? '女' : '男'
            return item
          })
          this.config.total = res.count  //分页数据
          this.config.loading = false  //关闭loading
        })
      },
    },
    created() {
      // 页面加载就调用
      this.getList()
    }
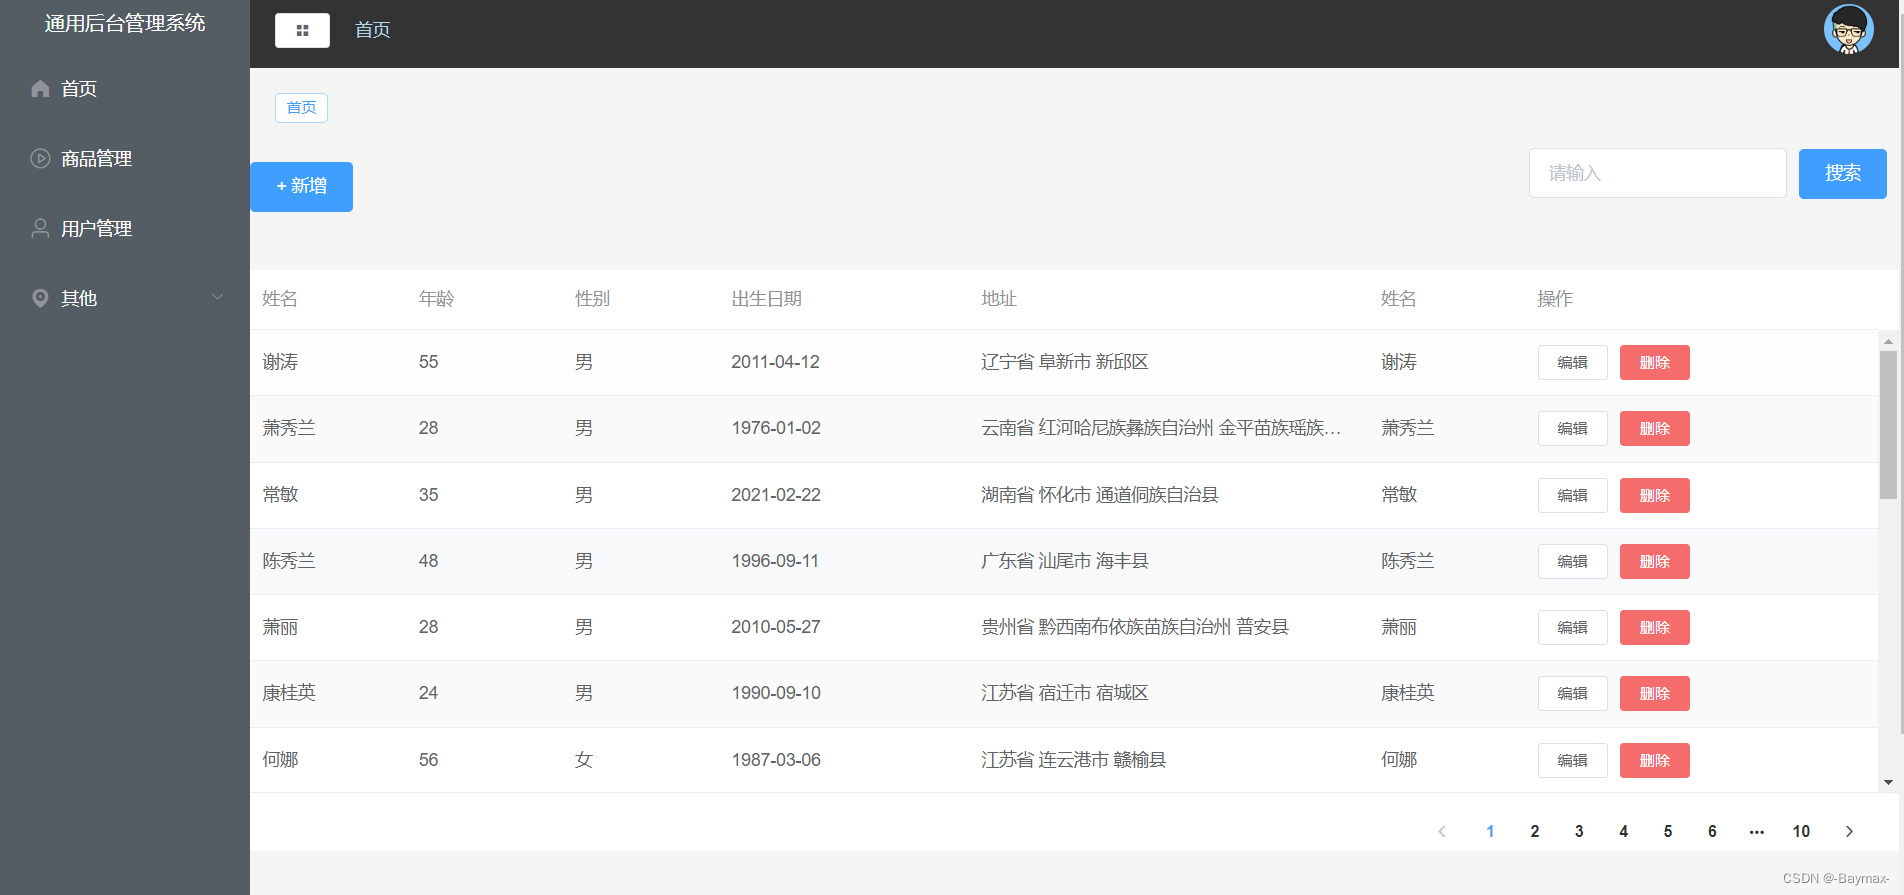
数据显示效果图
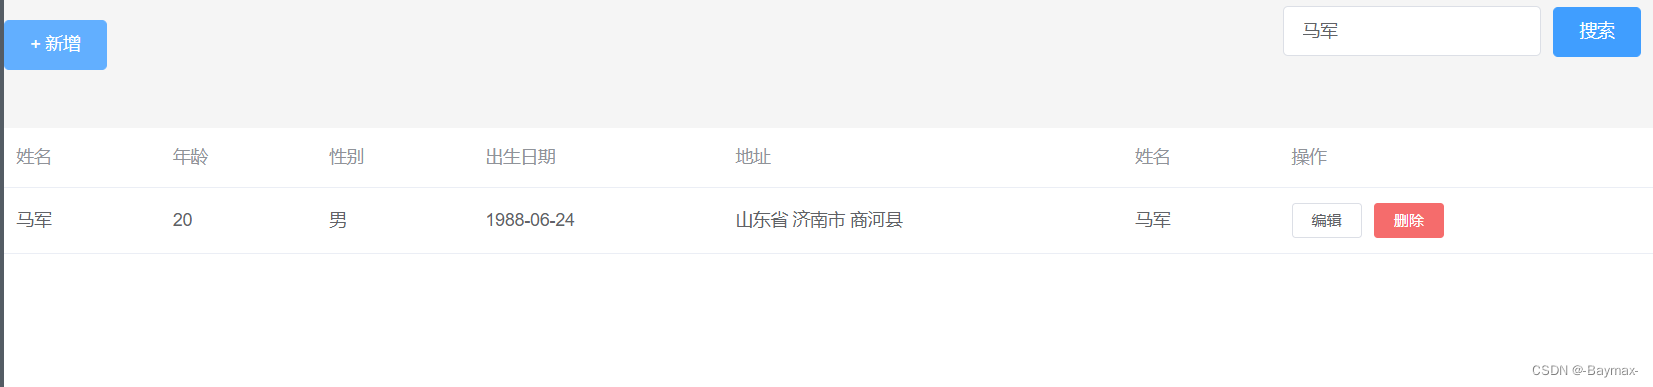
5. 剩余功能的实现
- 查询功能:拿到输入框的关键字
<el-button type="primary" @click="getList(searchForm.keyword)">搜索</el-button>
- 编辑和删除功能
(1)按需引入 MessageBox 组件
(2)main.js 中在 Vue 实例上拿到 MessageBox 下的 confirm 方法
(3)main.js 中在 Vue 实例上拿到 Message
	Vue.prototype.$confirm = MessageBox.confirm
	Vue.prototype.$message = Message
在 CommonTable.vue
	<template slot-scope="scope">
      <!-- scope.row表示当前行的数据 -->
      <el-button size="mini" @click="handleEdit(scope.row)">编辑</el-button>
      <el-button size="mini" type="danger" @click="handleDelete(scope.row)">删除</el-button>
    </template>
效果图


不积跬步无以至千里 不积小流无以成江海
点个关注不迷路,持续更新中…


 543
543

 被折叠的 条评论
为什么被折叠?
被折叠的 条评论
为什么被折叠?
 到【灌水乐园】发言


