


Repeater 控件是 重复作用 根据 model中的index 数量进行重复
废话不说 直接看如何用
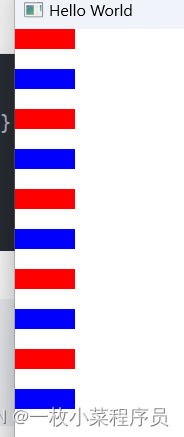
当model 为数字时
Rectangle{
    height: 1200
    width: 500
    visible: true
    anchors.fill: parent
   Column{
       spacing: 20
       Repeater{
           model: 10
           delegate: Rectangle{
               width: 60
               height: 20
               color: index%2 == 0?"red":"blue"
           }
       }
   }
}
结果:
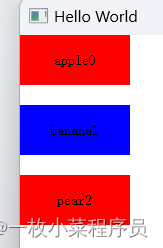
当model 为数组时
Rectangle{
    height: 1200
    width: 500
    visible: true
    anchors.fill: parent
   Column{
       spacing: 20
       Repeater{
           model: ["apple","banana","pear"]
           delegate: Rectangle{
               width: 110
               height: 50
               color: index%2 == 0?"red":"blue"
               Text {
                   id: name
                   text: modelData+index
                   font.pixelSize: 14
                   anchors.centerIn: parent
               }
           }
       }
   }
}
结果:
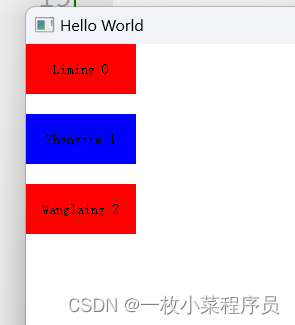
当model 为自定义model时 采用id 传递
Rectangle{
    height: 1200
    width: 500
    visible: true
    anchors.fill: parent
   Column{
       spacing: 20
       Repeater{
           model: modelId
           delegate: Rectangle{
               width: 110
               height: 50
               color: index%2 == 0?"red":"blue"
               Text {
                   id: txt
                   text: name+" "+index
                   font.pixelSize: 14
                   anchors.centerIn: parent
               }
           }
       }
       ListModel{
           id:modelId
           ListElement{
               name:"Liming";
               age: 12
           }
           ListElement{
               name:"Zhangjie";
               age: 19
           }
           ListElement{
               name:"Wanglaing";
               age: 22
           }
       }
   }
}
结果:


 631
631

 被折叠的 条评论
为什么被折叠?
被折叠的 条评论
为什么被折叠?
 到【灌水乐园】发言


