


记录一下,将之前写的IAR的工程代码移植到keil工程,使用的keil是MDK356,关于版本,下载的地方很多,就不赘述,IAR用的是IAR8.22。以下是一次完整的工程移植记录。使用的板子是野火霸天虎V2,代码全是自己写的。
一、IAR工程结构与Keil工程结构
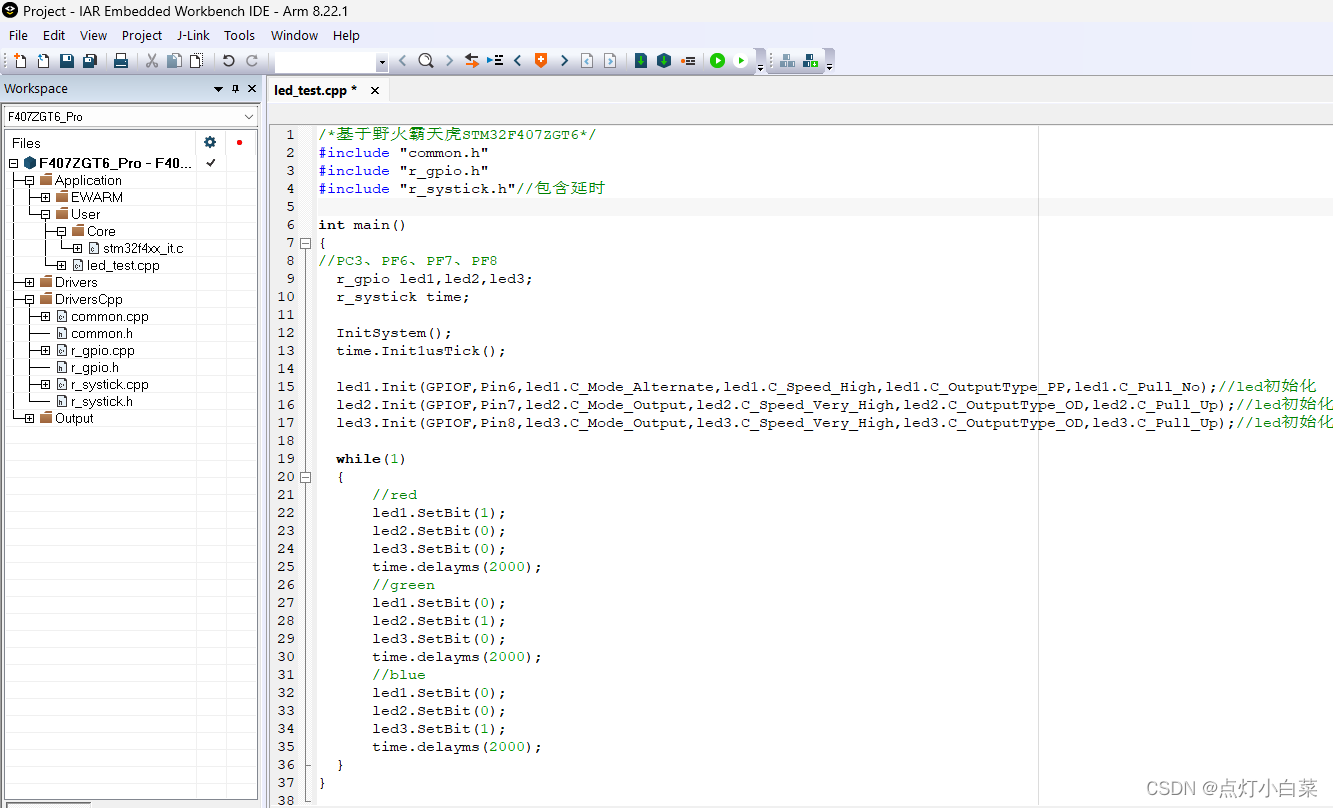
1.IAR工程结构
2.Keil工程结构

3.实现效果
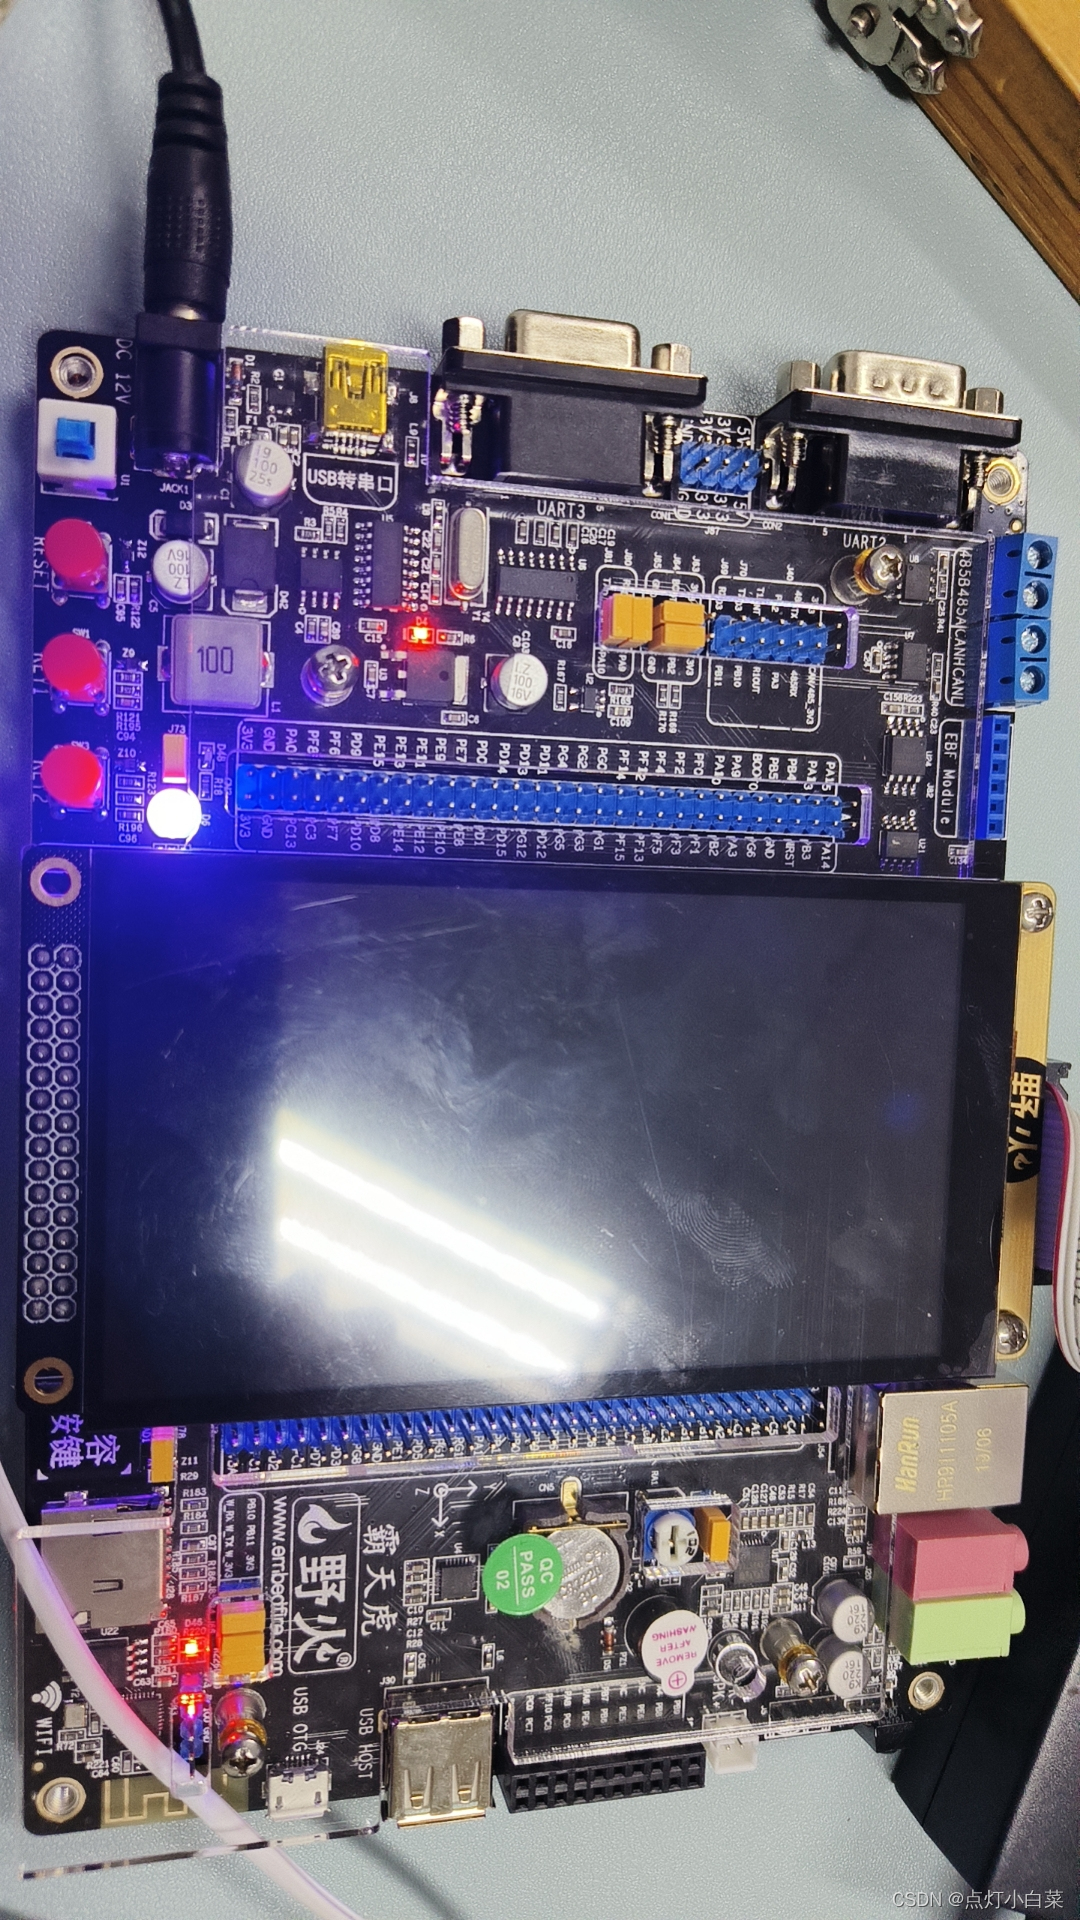
这里其实是一个灯的颜色变化,视频传输不上去,就截图了。
二、详细移植过程
1.驱动移植
由于驱动是自己使用C++语言编写的,这里不贴出来,但是C++语言在硬件编程上面具有不可比拟的优势,在这里,我将使用STM32CubeMx生成的代码中的main.h文件改写为common.h,将main函数中系统初始化的部分写入common.cpp。
//common.h
#ifndef __COMMON_H
#define __COMMON_H

#define u8      uint8_t//ÎÞ·ûºÅ1×Ö½Ú
#define u16     uint16_t//2×Ö½Ú
#define u32     uint32_t//4×Ö½Ú
#define u64     uint64_t//8×Ö½Ú

#define uchar     u8
#define uint u16

#define cu8     const u8//³£Á¿
#define cu16    const u16
#define cu32    const u32
#define cu64    const u64

#define HCLK_FREQ  25000000
#define scu8    static cu8//
#define scu16   static cu16
#define scu32   static cu32
#define scu64   static cu64


#ifdef __cplusplus
extern "C" {
#endif

/* Includes ------------------------------------------------------------------*/
  #include "stm32f4xx_ll_bus.h"
#include "stm32f4xx_ll_gpio.h"
#include "stm32f4xx_ll_rcc.h"
#include "stm32f4xx_ll_system.h"
#include "stm32f4xx_ll_utils.h"

#include "stm32f4xx_ll_exti.h"
#include "stm32f4xx_ll_cortex.h"
#include "stm32f4xx_ll_pwr.h"
#include "stm32f4xx_ll_dma.h"

#if defined(USE_FULL_ASSERT)
#include "stm32_assert.h"
#endif /* USE_FULL_ASSERT */

/* Private includes ----------------------------------------------------------*/
/* USER CODE BEGIN Includes */

/* USER CODE END Includes */

/* Exported types ------------------------------------------------------------*/
/* USER CODE BEGIN ET */

/* USER CODE END ET */

/* Exported constants --------------------------------------------------------*/
/* USER CODE BEGIN EC */

/* USER CODE END EC */

/* Exported macro ------------------------------------------------------------*/
/* USER CODE BEGIN EM */

/* USER CODE END EM */

/* Exported functions prototypes ---------------------------------------------*/

void InitSystem();
void SystemClock_Config(void);

/* USER CODE BEGIN EFP */

/* USER CODE END EFP */

/* Private defines -----------------------------------------------------------*/
#ifndef NVIC_PRIORITYGROUP_0
#define NVIC_PRIORITYGROUP_0         ((uint32_t)0x00000007) /*!< 0 bit  for pre-emption priority,
                                                                 4 bits for subpriority */
#define NVIC_PRIORITYGROUP_1         ((uint32_t)0x00000006) /*!< 1 bit  for pre-emption priority,
                                                                 3 bits for subpriority */
#define NVIC_PRIORITYGROUP_2         ((uint32_t)0x00000005) /*!< 2 bits for pre-emption priority,
                                                                 2 bits for subpriority */
#define NVIC_PRIORITYGROUP_3         ((uint32_t)0x00000004) /*!< 3 bits for pre-emption priority,
                                                                 1 bit  for subpriority */
#define NVIC_PRIORITYGROUP_4         ((uint32_t)0x00000003) /*!< 4 bits for pre-emption priority,
                                                                 0 bit  for subpriority */
#endif

/* USER CODE BEGIN Private defines */

/* USER CODE END Private defines */

#ifdef __cplusplus
}
#endif

#endif /* __MAIN_H */
下面是common.cpp文件
#include "common.h"


void SystemClock_Config(void)
{
  LL_FLASH_SetLatency(LL_FLASH_LATENCY_5);
  while(LL_FLASH_GetLatency()!= LL_FLASH_LATENCY_5)
  {
  }
  LL_PWR_SetRegulVoltageScaling(LL_PWR_REGU_VOLTAGE_SCALE1);
  while (LL_PWR_IsActiveFlag_VOS() == 0)
  {
  }
  LL_RCC_HSE_Enable();

   /* Wait till HSE is ready */
  while(LL_RCC_HSE_IsReady() != 1)
  {

  }
  LL_RCC_PLL_ConfigDomain_SYS(LL_RCC_PLLSOURCE_HSE, LL_RCC_PLLM_DIV_25, 336, LL_RCC_PLLP_DIV_2);
  LL_RCC_PLL_Enable();

   /* Wait till PLL is ready */
  while(LL_RCC_PLL_IsReady() != 1)
  {

  }
  LL_RCC_SetAHBPrescaler(LL_RCC_SYSCLK_DIV_1);
  LL_RCC_SetAPB1Prescaler(LL_RCC_APB1_DIV_4);
  LL_RCC_SetAPB2Prescaler(LL_RCC_APB2_DIV_2);
  LL_RCC_SetSysClkSource(LL_RCC_SYS_CLKSOURCE_PLL);

   /* Wait till System clock is ready */
  while(LL_RCC_GetSysClkSource() != LL_RCC_SYS_CLKSOURCE_STATUS_PLL)
  {

  }
  LL_Init1msTick(168000000);
  LL_SetSystemCoreClock(168000000);
}
void InitSystem()
{
  LL_APB2_GRP1_EnableClock(LL_APB2_GRP1_PERIPH_SYSCFG);
  LL_APB1_GRP1_EnableClock(LL_APB1_GRP1_PERIPH_PWR);
  NVIC_SetPriorityGrouping(NVIC_PRIORITYGROUP_4);
  NVIC_SetPriority(SysTick_IRQn, NVIC_EncodePriority(NVIC_GetPriorityGrouping(),15, 0));
  SystemClock_Config();

}


/* USER CODE BEGIN 4 */

/* USER CODE END 4 */

/**
  * @brief  This function is executed in case of error occurrence.
  * @retval None
  */
void Error_Handler(void)
{
  /* USER CODE BEGIN Error_Handler_Debug */
  /* User can add his own implementation to report the HAL error return state */
  __disable_irq();
  while (1)
  {
  }
  /* USER CODE END Error_Handler_Debug */
}

#ifdef  USE_FULL_ASSERT
/**
  * @brief  Reports the name of the source file and the source line number
  *         where the assert_param error has occurred.
  * @param  file: pointer to the source file name
  * @param  line: assert_param error line source number
  * @retval None
  */
void assert_failed(uint8_t *file, uint32_t line)
{
  /* USER CODE BEGIN 6 */
  /* User can add his own implementation to report the file name and line number,
     ex: printf("Wrong parameters value: file %s on line %d\r\n", file, line) */
  /* USER CODE END 6 */
}
#endif /* USE_FULL_ASSERT */
然后,你的代码完成这一部分之后,就可以将main.h、mian.c从工程删除出去,然后将main.cpp文件改为以下程序:
#include "common.h"
int main()
{
  InitSystem();
  //enter your code
}
这个程序是不是和51单片机的很像,没错,这也是我们大学老师交给我们的一种编程思想,在这里,你就可以加入你自己的代码,比如驱动GPIO的代码。
2.keil设置
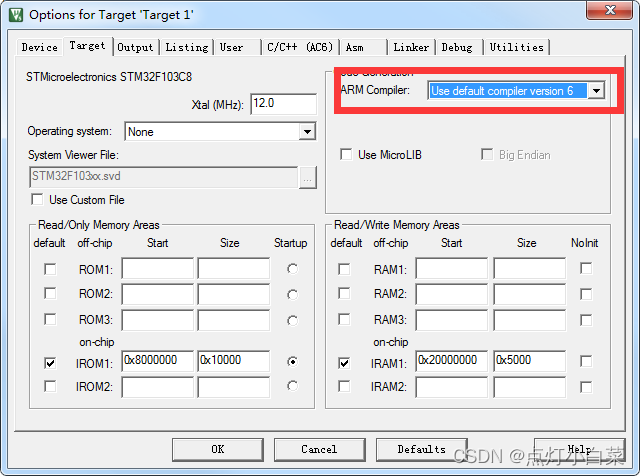
第一步:切换到V6编译器,同时对C/C++进行配置
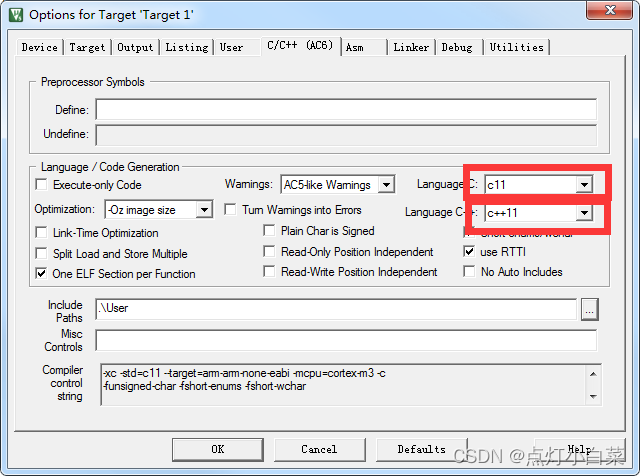
注意:正常情况下按照STM32CubeMx配置步骤,不需要进行额外编译预处理的宏定义,比如定义STM32的芯片密度类型和外设宏等
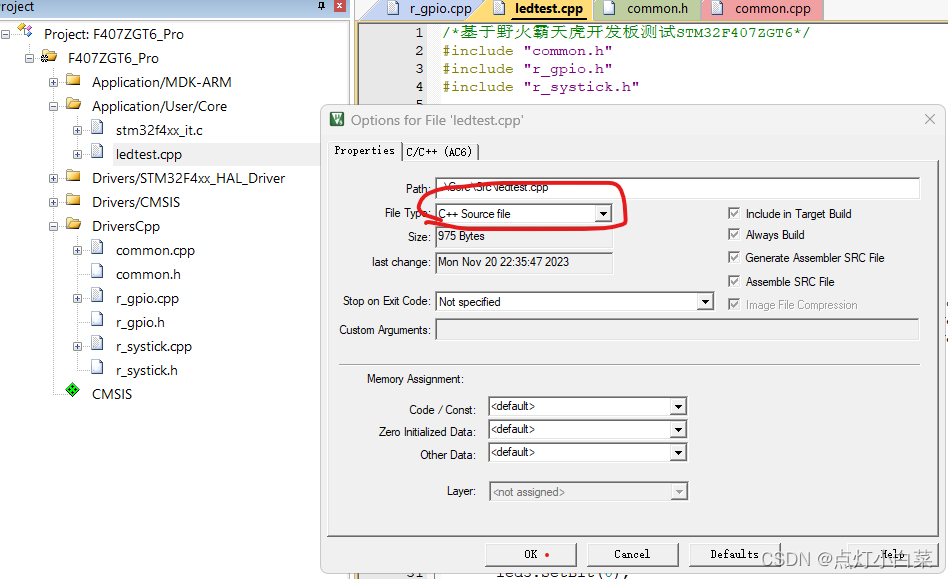
第二步:程序的编写:注意要检查main.cpp文件的类型是不是C++文件类型。然后就可以按照C++方式进行STM32开发,把各种操作包装到C++类里面,进行更方便的开发。
三、总结
以上就是完整的一次从IAR移植工程到keil的整个过程。重点主要在keil编译器的设置上面


 391
391


 被折叠的 条评论
为什么被折叠?
被折叠的 条评论
为什么被折叠?
 到【灌水乐园】发言


