


OceanBase安装部署OBD
前提条件
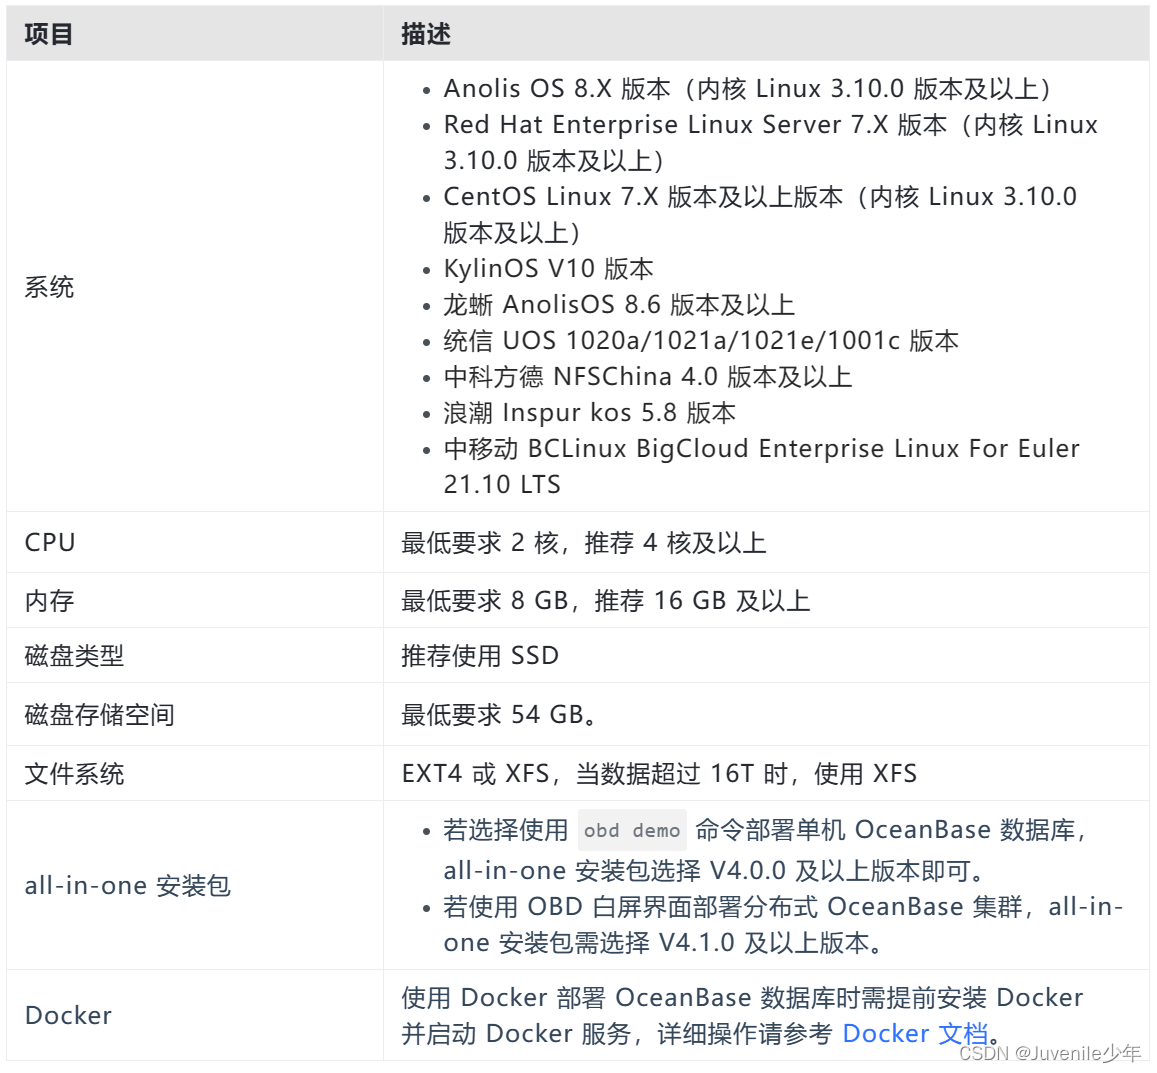
官方给出硬件条件需要满足以下要求
本文操作系统为:Centos7,以下为Red Hat Enterprise Linux 8 64 位二者都可,关注公众号回复03,即可获取Red Hat Enterprise Linux 8 64下载链接。
一、 OceanBase 集群部署规划
1、会话设置
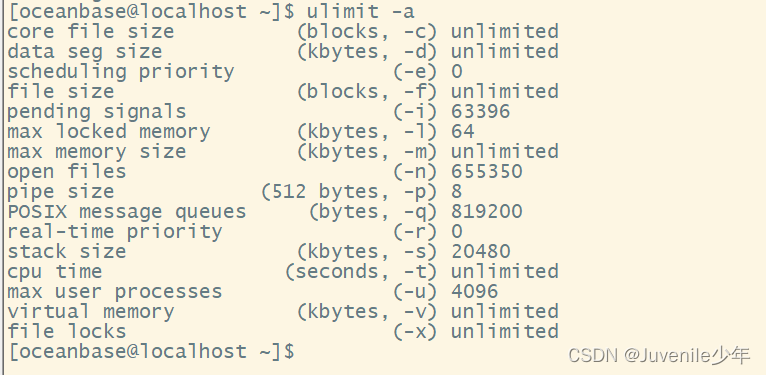
使用命令ulimit可以查看用户会话默认限制。修改下面文件可以默认会话限制修改永久生效。
sudo vi /etc/security/limits.conf
添加以下内容
* soft nofile 655350
* hard nofile 655350
* soft stack 20480
* hard stack 20480
* soft nproc 655360
* hard nproc 655360
* soft core unlimited
* hard core unlimited
退出重登录,检查设置生效
ulimit-a
2、内核参数配置
内核参数主要是网络、内存相关的设置。
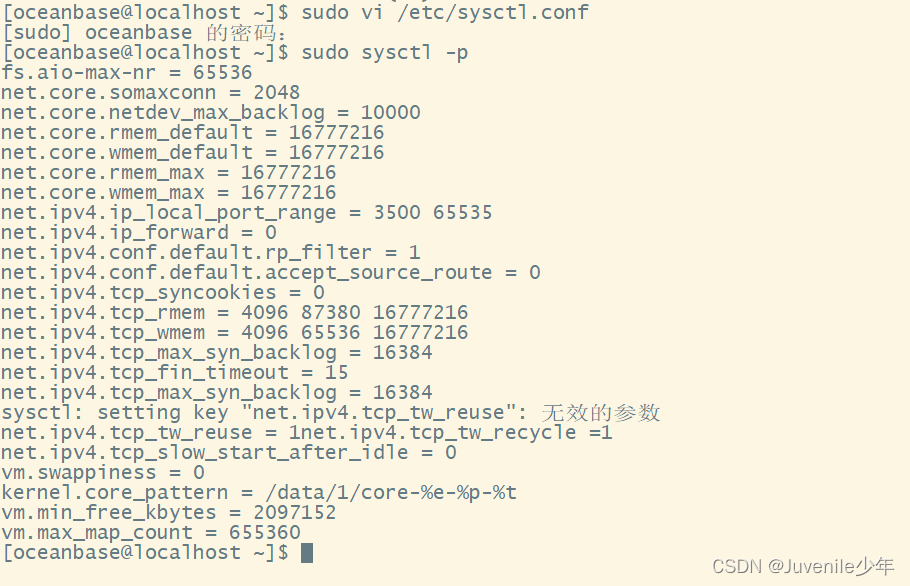
sudo vi /etc/sysctl.conf
添加以下内容
fs.aio-max-nr = 65536
net.core.somaxconn = 2048
net.core.netdev_max_backlog = 10000
net.core.rmem_default = 16777216
net.core.wmem_default = 16777216
net.core.rmem_max = 16777216
net.core.wmem_max = 16777216
net.ipv4.ip_local_port_range = 3500 65535
net.ipv4.ip_forward = 0
net.ipv4.conf.default.rp_filter = 1
net.ipv4.conf.default.accept_source_route = 0
net.ipv4.tcp_syncookies = 0
net.ipv4.tcp_rmem = 4096 87380 16777216
net.ipv4.tcp_wmem = 4096 65536 16777216
net.ipv4.tcp_max_syn_backlog = 16384
net.ipv4.tcp_fin_timeout = 15
net.ipv4.tcp_max_syn_backlog = 16384
net.ipv4.tcp_tw_reuse = 1net.ipv4.tcp_tw_recycle =1
net.ipv4.tcp_slow_start_after_idle=0
vm.swappiness = 0
kernel.core_pattern = /data/1/core-%e-%p-%t
vm.min_free_kbytes = 2097152
vm.max_map_count=655360
检查设置是否生效
sudo sysctl -p
3、创建用户
OceanBase数据库可以在任何用户下运行。该软件包的默认解压目录位于 /home/admin/。为了安全起见,我们将其安装在 admin 用户下。
- 使用以下命令新建用户:
useradd admin
- 给用户admin赋予root权限
使用以下命令进入相关配置文件并进行修改,示例如下图:
vi /etc/sudoers

4、规划目录
| 参数或目录 | 值 | 备注 |
|---|---|---|
| observer部署/启动目录 | /home/admin/oceanbase | RPM包自动创建 |
| observer数据总目录 | /home/admin/oceanbase/store/obdemo | 手动创建 |
| observer数据文件实际目录 | /data/obdemo/sstable | 手动创建,通过软链接映射到数据总目录下 |
| observer事务日志实际目录 | /redo/obdemo/{clog,slog,ilog} | 手动创建,通过软链接映射到数据总目录下 |
| observer参数文件目录 | /home/admin/oceanbase/etc | 启动时在启动目录自动创建或自动读取 |
| observer运行日志目录 | /home/admin/oceanbase/log | 启动时在启动目录自动创建 |
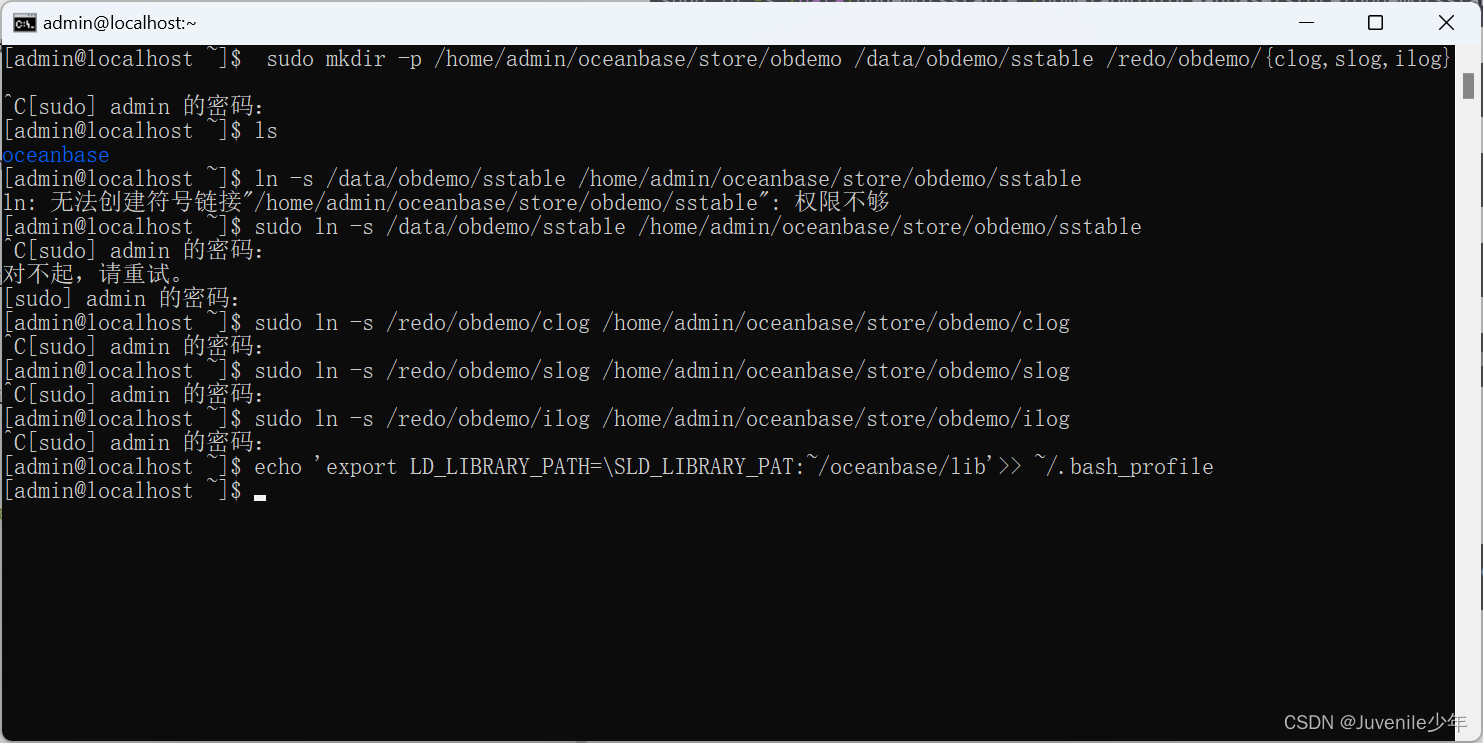
创建命令如下:
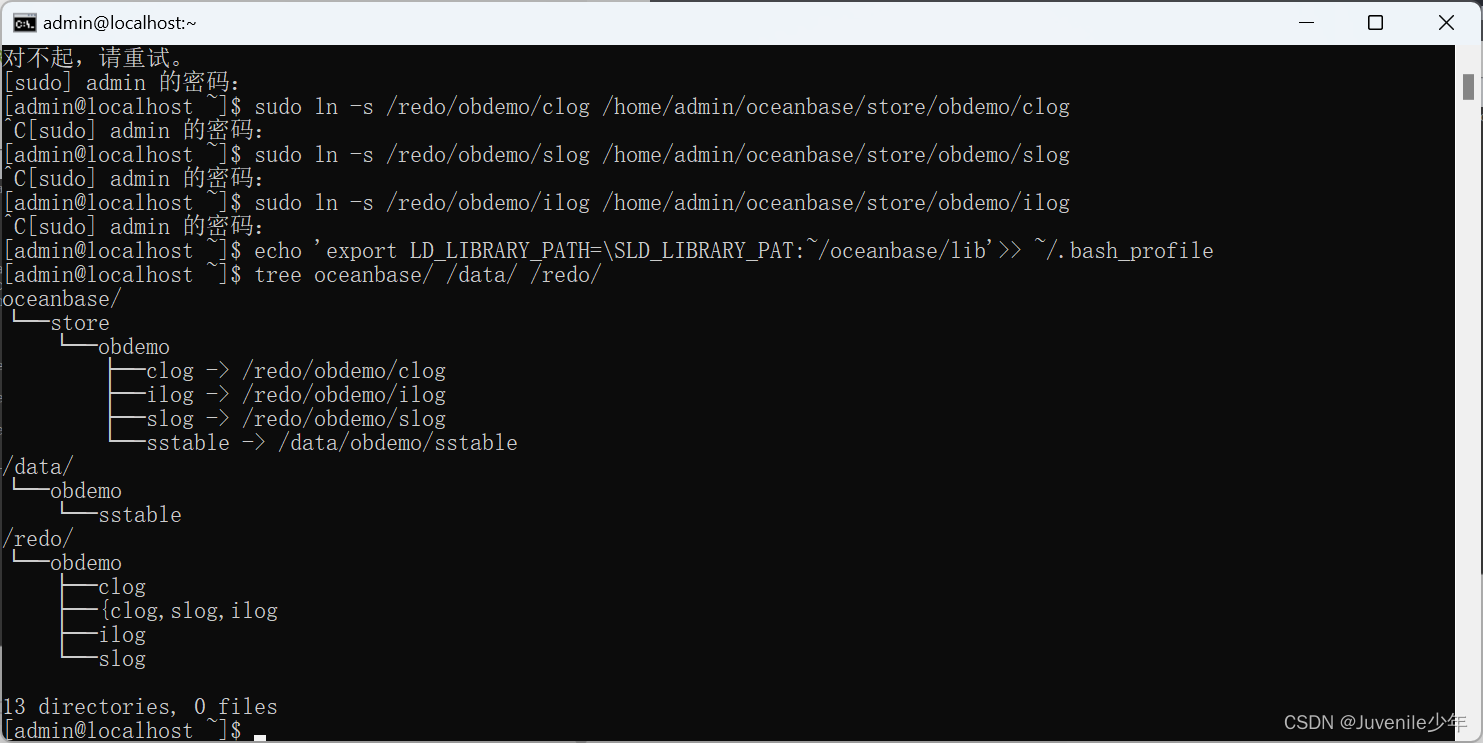
sudo mkdir -p /home/admin/oceanbase/store/obdemo /data/obdemo/sstable /redo/obdemo/{clog,slog,ilog}
sudo ln -s /data/obdemo/sstable /home/admin/oceanbase/store/obdemo/sstable
sudo ln -s /redo/obdemo/slog /home/admin/oceanbase/store/obdemo/slog
sudo ln -s /redo/obdemo/clog /home/admin/oceanbase/store/obdemo/clog
sudo ln -s /redo/obdemo/ilog /home/admin/oceanbase/store/obdemo/ilog
echo 'export LD_LIBRARY_PATH=\SLD_LIBRARY_PAT:~/oceanbase/lib'>> ~/.bash_profile
设置文件所有者
sudo chown -R admin.admin /data /redo
查看目录结构:
tree oceanbase/ /data/ /redo/
二、安装OceanBase环境
1、 方案一:若机器能联网执行如下命令在线下载并安装 all-in-one 安装包
bash -c "$(curl -s https://obbusiness-private.oss-cn-shanghai.aliyuncs.com/download-center/opensource/oceanbase-all-in-one/installer.sh)"
执行完成后显示 Install Finished
然后在执行如下命令设置环境变量
source ~/.oceanbase-all-in-one/bin/env.sh
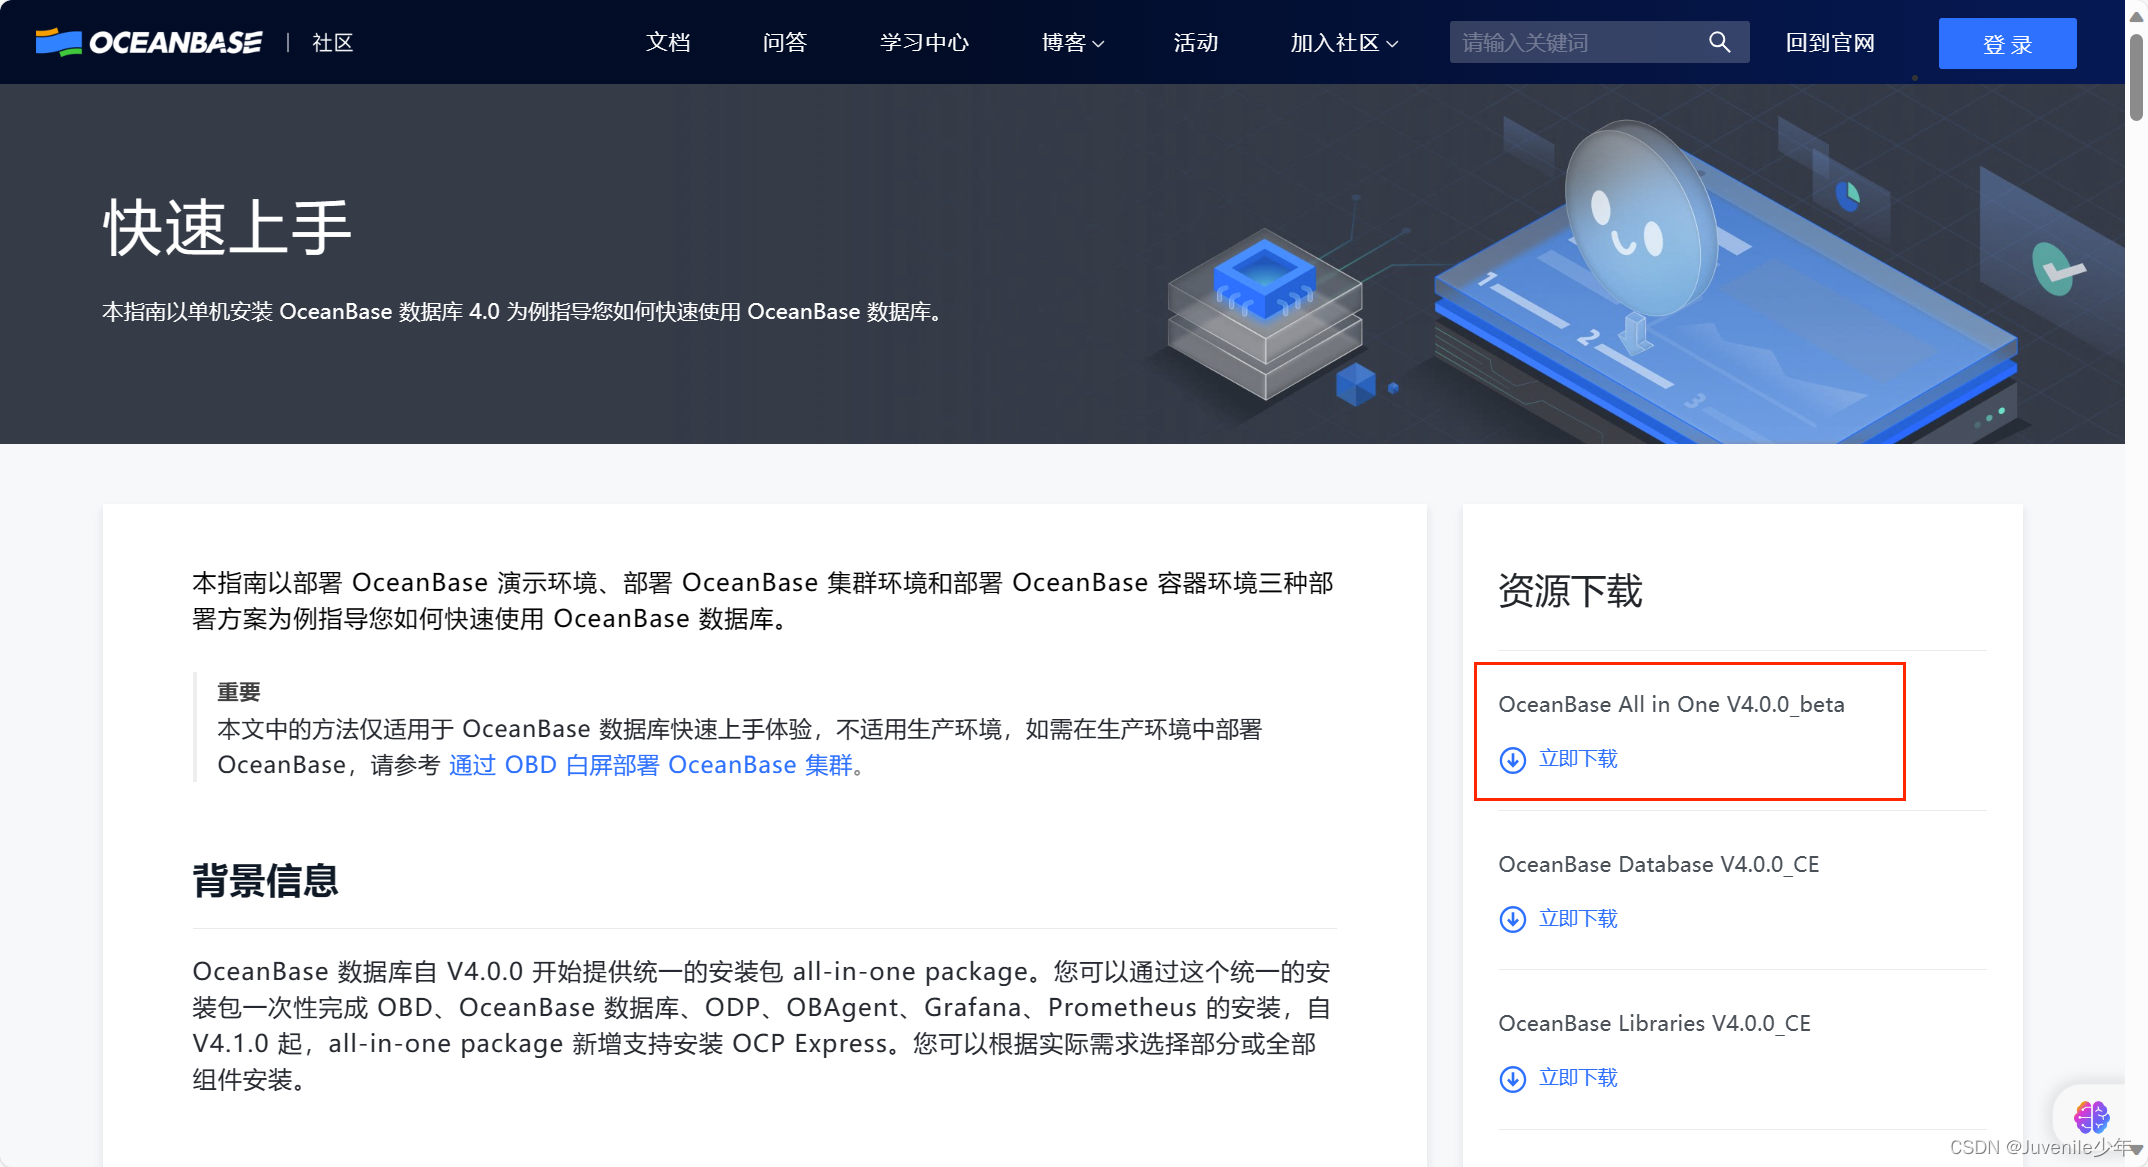
2、 方案二:若机器不能联网需要在官网下载 all-in-one安装包,步骤如下:
(1)进入https://open.oceanbase.com/quickStart下载
(2)上传至虚拟机适当位置(这里我使用的是ssh客户端)
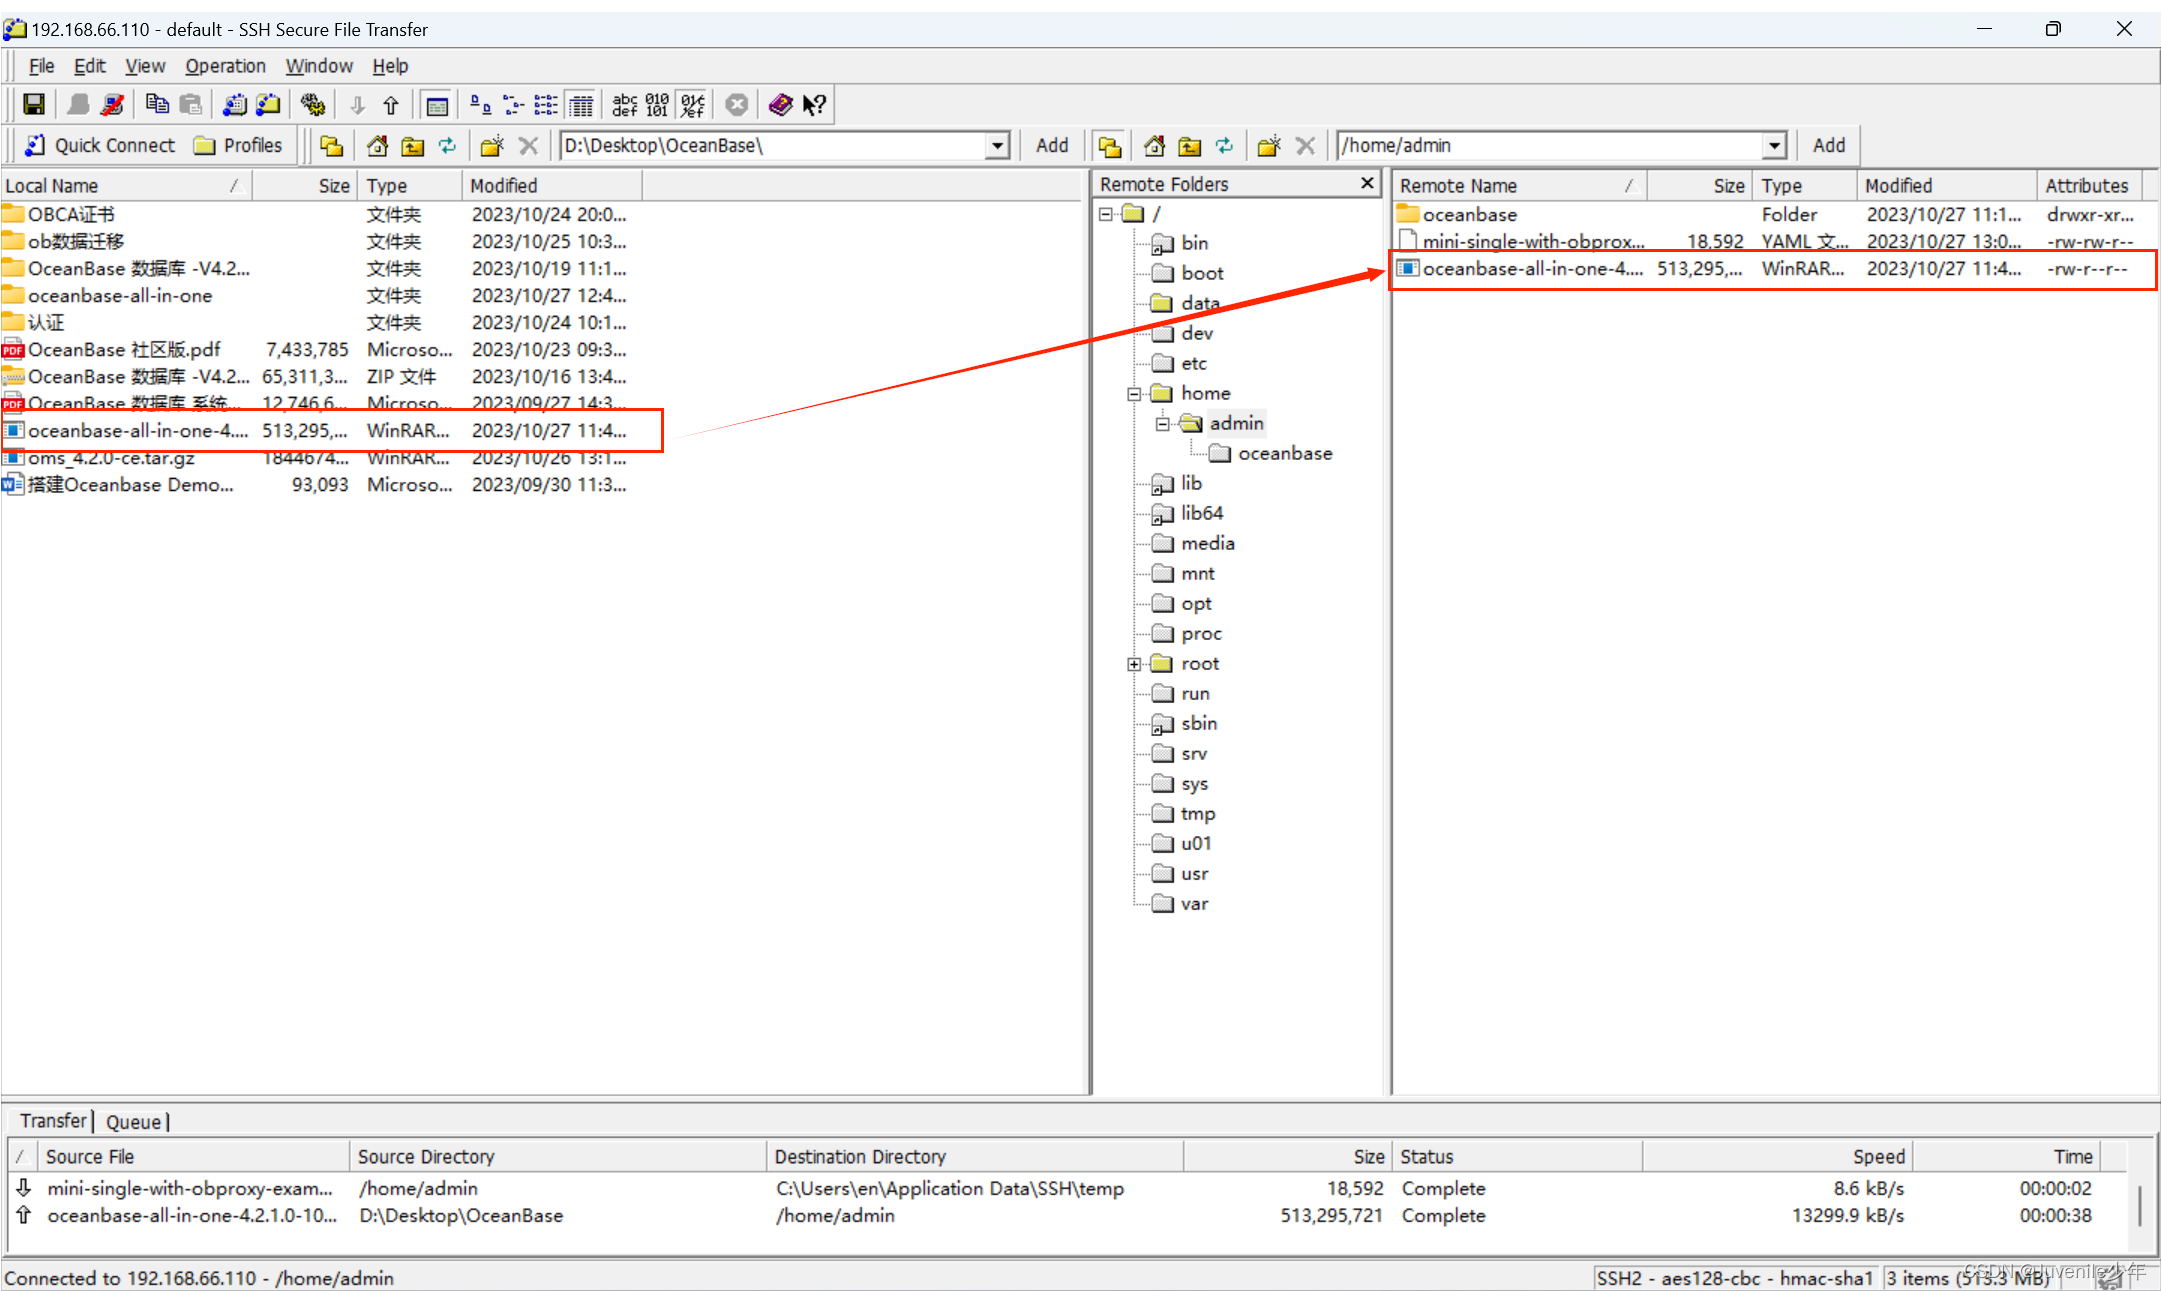
(3)进入其存放目录进行解压并安装
解压命令如下:
tar -xzf oceanbase-all-in-one-*.tar.gz
解压后进入其bin目录下:
cd oceanbase-all-in-one/bin/
执行 ./install.sh进行安装
安装成功后执行source ~/.oceanbase-all-in-one/bin/env.sh,安装环境
示例如下:
[admin@localhost ~]$ ls
mini-single-with-obproxy-example.yaml  oceanbase  oceanbase-all-in-one-4.2.1.0-100120231013145059.el7.x86_64.tar.gz
[admin@localhost ~]$ tar -xzf oceanbase-all-in-one-*.tar.gz
[admin@localhost ~]$ cd oceanbase-all-in-one/bin/
[admin@localhost bin]$ ./install.sh
name: grafana
version: 7.5.17
release:1
arch: x86_64
md5: 1bf1f338d3a3445d8599dc6902e7aeed4de4e0d6
add /home/admin/oceanbase-all-in-one/rpms/grafana-7.5.17-1.el7.x86_64.rpm to local mirror
name: obagent
version: 4.2.0
release:3.el7
arch: x86_64
md5: 30793df12dc6b8ec5ccdc93262e5e9f1d51ed50a
add /home/admin/oceanbase-all-in-one/rpms/obagent-4.2.0-3.el7.x86_64.rpm to local mirror
name: obproxy-ce
version: 4.2.1.0
release:11.el7
arch: x86_64
md5: 0aed4b782120e4248b749f67be3d2cc82cdcb70d
add /home/admin/oceanbase-all-in-one/rpms/obproxy-ce-4.2.1.0-11.el7.x86_64.rpm to local mirror
name: oceanbase-ce
version: 4.2.1.0
release:100000102023092807.el7
arch: x86_64
md5: a8b9979de1f2809d74de71b2a536cff8aab15bff
add /home/admin/oceanbase-all-in-one/rpms/oceanbase-ce-4.2.1.0-100000102023092807.el7.x86_64.rpm to local mirror
name: oceanbase-ce-libs
version: 4.2.1.0
release:100000102023092807.el7
arch: x86_64
md5: c440e2a7f36297521a108c2316ef0e35ce1251f7
add /home/admin/oceanbase-all-in-one/rpms/oceanbase-ce-libs-4.2.1.0-100000102023092807.el7.x86_64.rpm to local mirror
name: ocp-express
version: 4.2.0
release:100000042023073111.el7
arch: x86_64
md5: ccec08112a29067633797d20685b6e6d70e890d9
add /home/admin/oceanbase-all-in-one/rpms/ocp-express-4.2.0-100000042023073111.el7.x86_64.rpm to local mirror
name: prometheus
version: 2.37.1
release:10000102022110211.el7
arch: x86_64
md5: 58913c7606f05feb01bc1c6410346e5fc31cf263
add /home/admin/oceanbase-all-in-one/rpms/prometheus-2.37.1-10000102022110211.el7.x86_64.rpm to local mirror
Trace ID: cd8397b2-748c-11ee-a969-000c2911f467
If you want to view detailed obd logs, please run: obd display-trace cd8397b2-748c-11ee-a969-000c2911f467
Disable remote ok
Trace ID: d00fd7de-748c-11ee-a6eb-000c2911f467
If you want to view detailed obd logs, please run: obd display-trace d00fd7de-748c-11ee-a6eb-000c2911f467

add auto set env logic to profile: /home/admin/.bash_profile

#####################################################################
 Install Finished
=====================================================================
Setup Environment:     source ~/.oceanbase-all-in-one/bin/env.sh
Start Web Service:     obd web
Quick Start:           obd demo
More Details:          obd -h
=====================================================================
[admin@localhost bin]$ source ~/.oceanbase-all-in-one/bin/env.sh
[admin@localhost bin]$
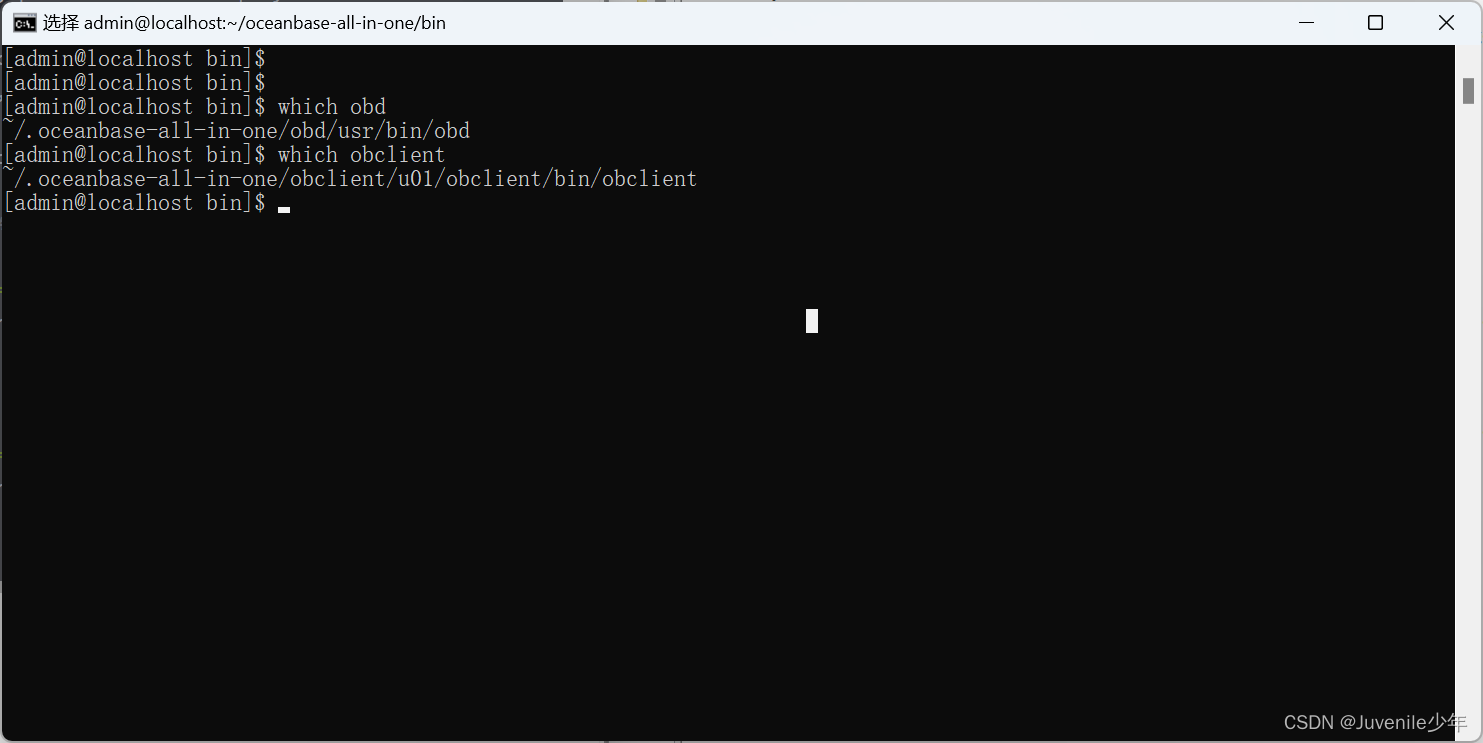
(4)确认OBD是否安装成功
三、OBD部署单节点集群
1、编辑 OBD 配置文件
(1)部署单节点 observer 和 obproxy 进程,需要在官网下载配置文件
https://github.com/oceanbase/obdeploy/blob/master/example/mini-single-with-obproxy-example.yaml
(2)按照自己的设置编辑配置文件
## Only need to configure when remote login is required
user:
  username: admin
  password: 112424wjw
#   key_file: your ssh-key file path if need
#   port: your ssh port, default 22
#   timeout: ssh connection timeout (second), default 30
oceanbase-ce:
  servers:
    # Please don't use hostname, only IP can be supported
    - 192.168.66.110
  global:
    #  The working directory for OceanBase Database. OceanBase Database is started under this directory. This is a required field.
    home_path: /home/admin/oceanbase-ce
    # The directory for data storage. The default value is $home_path/store.
    data_dir: /data
    # The directory for clog, ilog, and slog. The default value is the same as the data_dir value.
    redo_dir: /redo
    # Please set devname as the network adaptor's name whose ip is  in the setting of severs.
    # if set severs as "127.0.0.1", please set devname as "lo"
    # if current ip is 192.168.1.10, and the ip's network adaptor's name is "eth0", please use "eth0"
    devname: ens33 #设置为自己的网卡
    mysql_port: 2881 # External port for OceanBase Database. The default value is 2881. DO NOT change this value after the cluster is started.
    rpc_port: 2882 # Internal port for OceanBase Database. The default value is 2882. DO NOT change this value after the cluster is started.
    zone: zone1
    cluster_id: 1
    # please set memory limit to a suitable value which is matching resource.
    memory_limit: 6G # The maximum running memory for an observer
    system_memory: 2G # The reserved system memory. system_memory is reserved for general tenants. The default value is 30G.
    datafile_size: 2G # Size of the data file.
    datafile_next: 2G # the auto extend step. Please enter an capacity, such as 2G
    datafile_maxsize: 20G # the auto extend max size. Please enter an capacity, such as 20G
    log_disk_size: 13G # The size of disk space used by the clog files.
    cpu_count: 16
    production_mode: false
    syslog_level: WARN
    enable_syslog_wf: false # Print system logs whose levels are higher than WARNING to a separate log file. The default value is true.
    enable_syslog_recycle: true # Enable auto system log recycling or not. The default value is false.
    max_syslog_file_count: 4 # The maximum number of reserved log files before enabling auto recycling. The default value is 0.
    # observer cluster name, consistent with obproxy's cluster_name
    appname: obcluster
    root_password: root # root user password, can be empty
    proxyro_password: root # proxyro user pasword, consistent with obproxy's observer_sys_password, can be empty
obproxy-ce:
  # Set dependent components for the component.
  # When the associated configurations are not done, OBD will automatically get the these configurations from the dependent components.
  depends:
    - oceanbase-ce
  servers:
    - 192.168.66.110
  global:
    listen_port: 2883 # External port. The default value is 2883.
    prometheus_listen_port: 2884 # The Prometheus port. The default value is 2884.
    home_path: /home/admin/obproxy
    # oceanbase root server list
    # format: ip:mysql_port;ip:mysql_port. When a depends exists, OBD gets this value from the oceanbase-ce of the depends.
    rs_list: 192.168.66.110:2881
    enable_cluster_checkout: false
    # observer cluster name, consistent with oceanbase-ce's appname. When a depends exists, OBD gets this value from the oceanbase-ce of the depends.
    # cluster_name: obcluster
    skip_proxy_sys_private_check: true
    enable_strict_kernel_release: false
    # obproxy_sys_password: # obproxy sys user password, can be empty. When a depends exists, OBD gets this value from the oceanbase-ce of the depends.
    # observer_sys_password: # proxyro user pasword, consistent with oceanbase-ce's proxyro_password, can be empty. When a depends exists, OBD gets this value from the oceanbase-ce of the depends.
- 部署集群
使用如下命令部署集群
obd cluster deploy obcluster -c single-with-obproxy.yaml
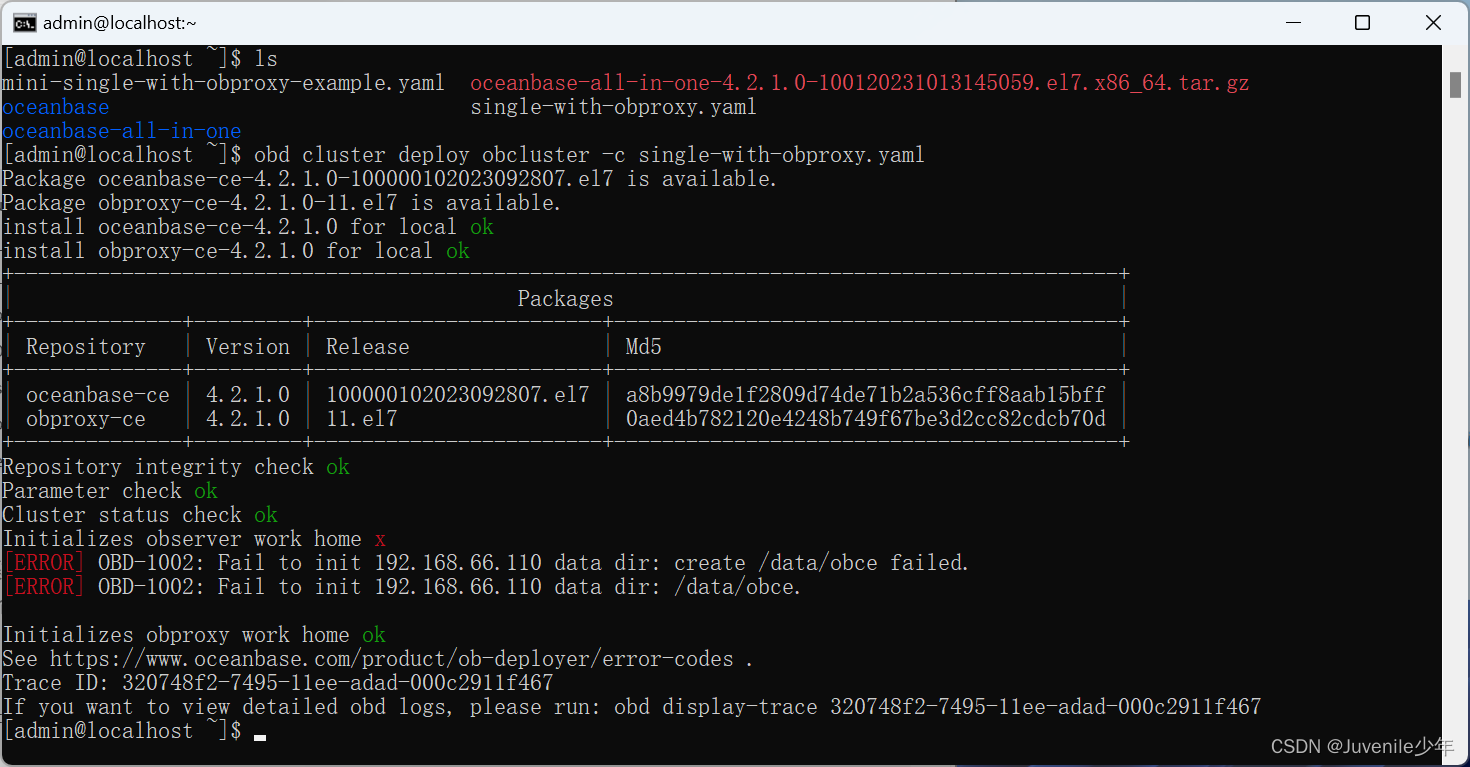
报上图中所示错误原因:配置文件中的 user 用户(未填的情况下默认为当前用户)没有对应目录的写权限。可修改配置文件解决。
待其执行结束如下图所示:
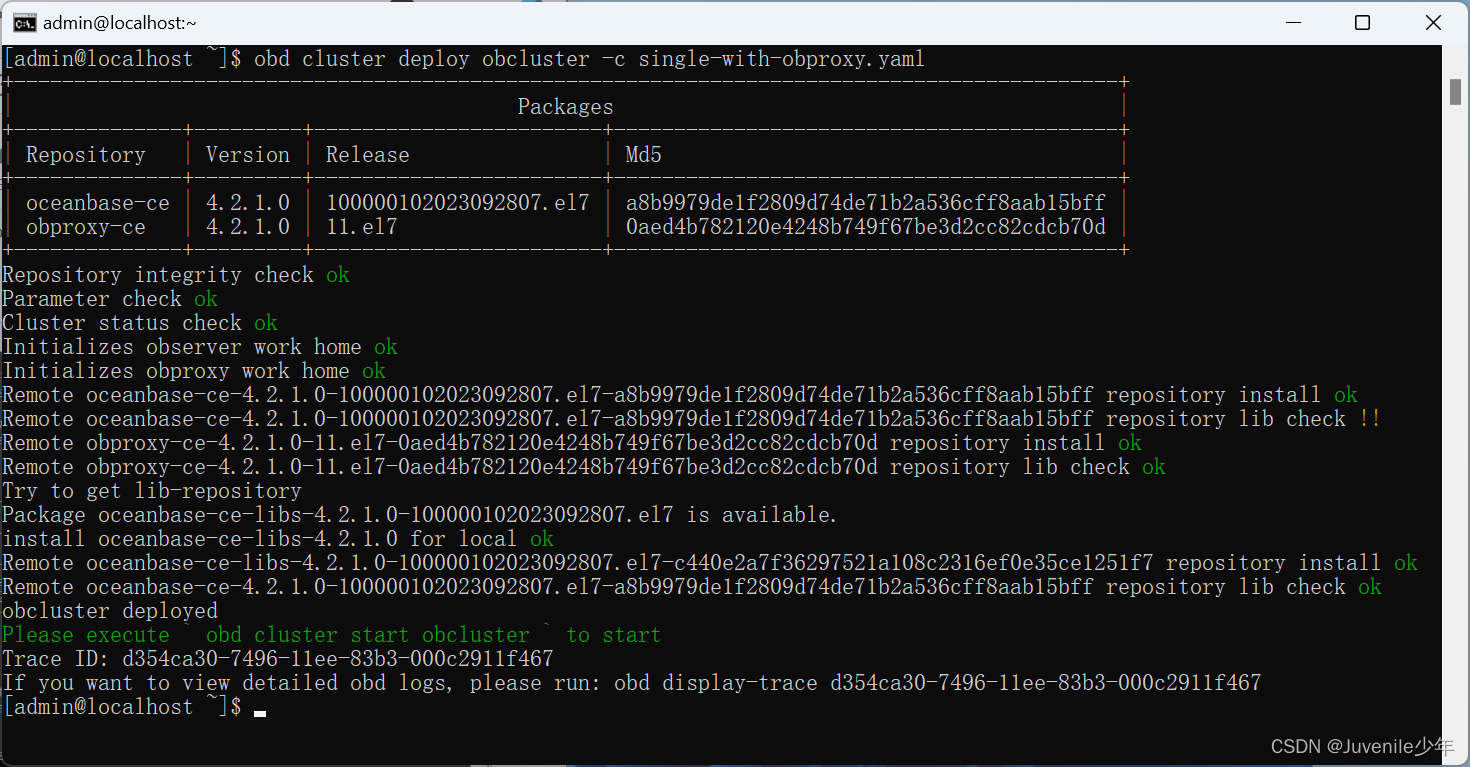
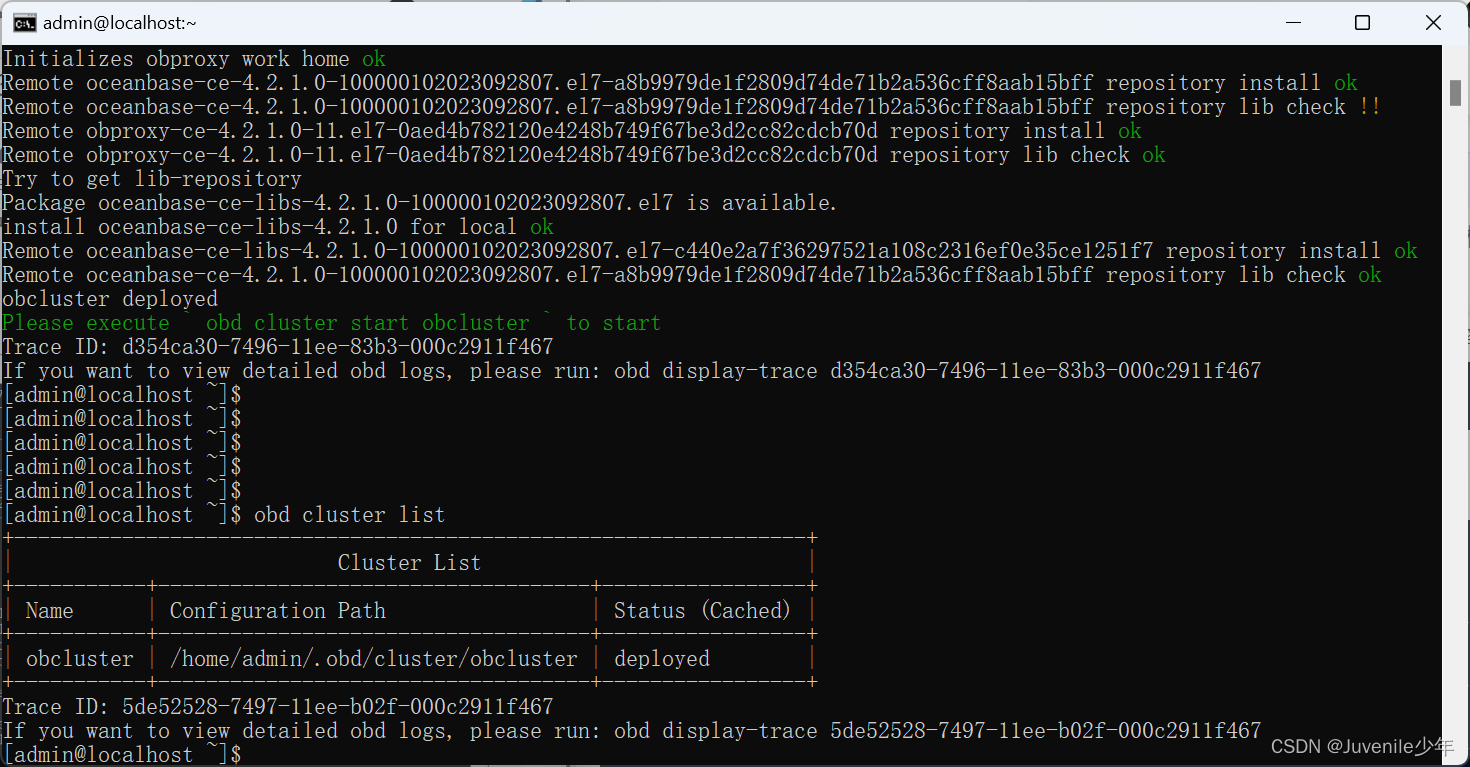
- 部署结果
使用命令obd cluster list查看部署状态
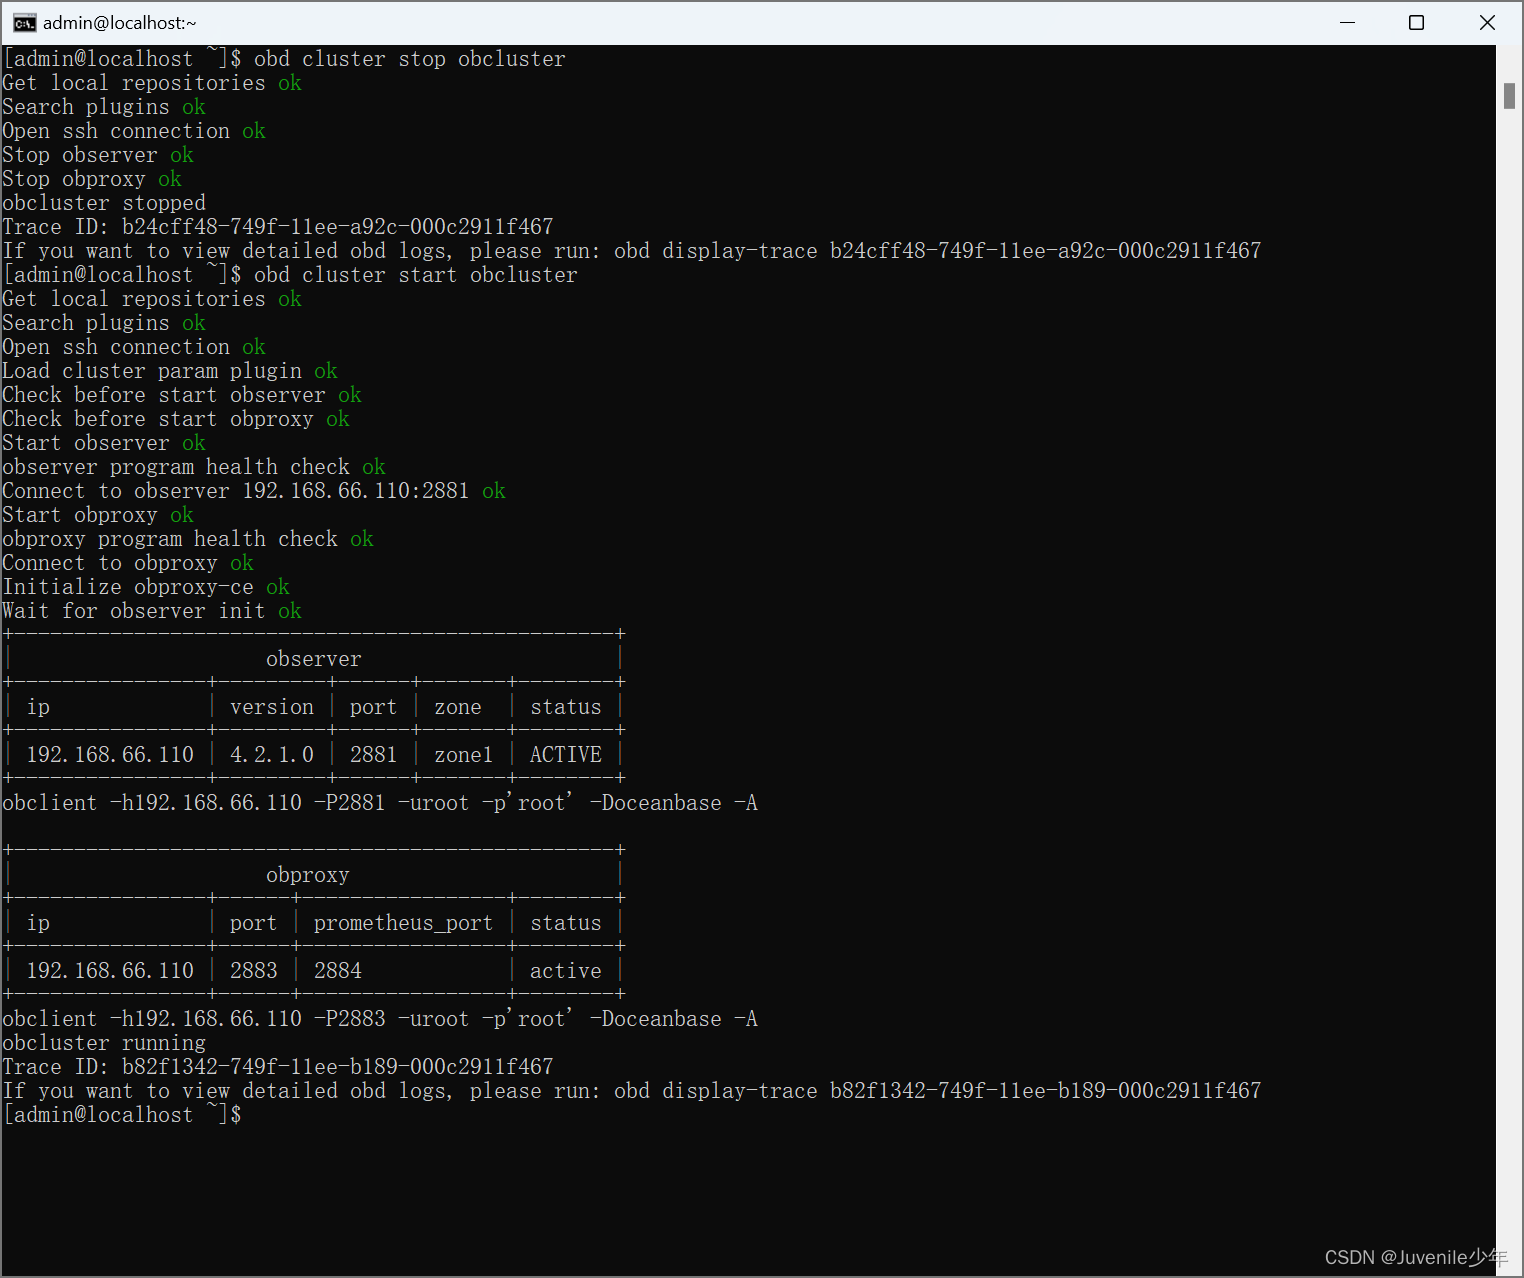
- 启动和初始化集群
obd cluster stop obcluster
四、创建业务租户、业务数据库,以及一些表
CREATE DATABASE t1;
 ALTER DATABASE t1 IDENTIFIED BY 'rootroot';

# 创建资源单元规格
-- create resource unit ut_5c2g MAX_CPU = 4,
-- max_memory = '2G',
-- max_iops = 10000,
-- max_disk_size = '10G',
-- max_session_num = 1000000;
CREATE RESOURCE UNIT ut_5c2g MEMORY_SIZE = '2G',
MAX_CPU = 5,
MIN_CPU = 1,
LOG_DISK_SIZE = '6G',
MAX_IOPS = 10000,
MIN_IOPS = 10000,
IOPS_WEIGHT = 1;
#查看资源单元规格
SELECT * FROM __all_unit_config;
SELECT * FROM oceanbase.DBA_OB_UNIT_CONFIGS WHERE NAME = 'ut_5c2g';
#修改资源单元规格
ALTER RESOURCE UNIT ut_5c2g MEMORY_SIZE = '2G';
# 删除资源单元规格DROP RESOURCE UNIT S1_unit_config;
#创建资源单元池
CREATE RESOURCE POOL p1_5c2g UNIT = 'ut_5c2g', UNIT_NUM = 1;
#查看资源单元池
SELECT * FROM oceanbase.DBA_OB_RESOURCE_POOLS;
#修改资源单元池
ALTER RESOURCE POOL p1_5c2g ZONE_LIST = ('zone1');
#创建租户
CREATE TENANT t1 CHARSET = 'utf8mb4',
ZONE_LIST =('zone1'),
PRIMARY_ZONE = 'zone1',
RESOURCE_POOL_LIST =('p1_5c2g')
SET
   OB_TCP_INVITED_NODES = '%';
#查看租户
SELECT * FROM DBA_OB_TENANTS;
# 修改租户参数
ALTER TENANT t1 TENANT_NAME = 'mq_t1';
# 删除租户
# DROP TENANT oracle_tenant1;

#创建用户
CREATE USER user01 IDENTIFIED BY 'rootroot';
#给用户授权
GRANT all privileges ON t1.* to user01;
 -- 授予全部权限
   GRANT ALL ON t1.* TO user01;
   GRANT ALL PRIVILEGES ON t1.* TO user01;
GRANT SELECT ON t1.* TO user01;


SHOW GRANTS FOR user01;


SHOW TABLES;

#查看所有用户
SELECT u.user_name FROM oceanbase.__all_user u;

SELECT * FROM titles;


 1652
1652


 被折叠的 条评论
为什么被折叠?
被折叠的 条评论
为什么被折叠?
 到【灌水乐园】发言


