


文章目录
写在前面的话
因为做项目受挫所以我爪巴回来二刷springboot了

因为我忘性大所以就顺手做个笔记 希望二刷能让我学到一些新东西叭
留给我的时间已经8多了 希望到今年下半年我不至于去电子厂上班


@Configuration注解
这个注解是标志这个类归于springboot管理
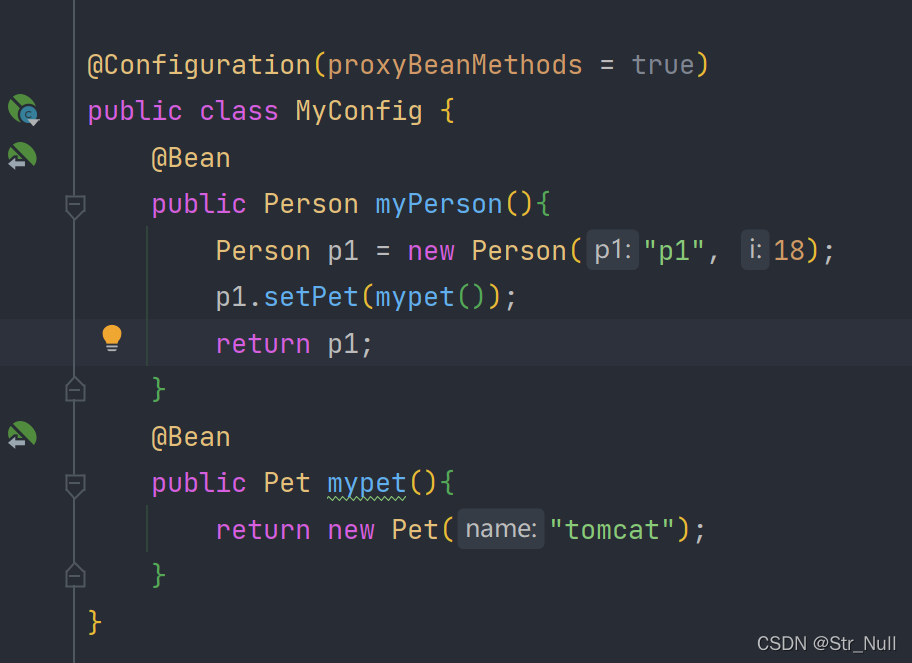
@Configuration(proxyBeanMethods = true)
这个参数如果是true的话里面用的就都是IOC容器里面的同一个对象
如果是flase的话就每用一次就创建一个新的对象
/**
 * 1、配置类里面使用@Bean标注在方法上给容器注册组件,默认也是单实例的
 * 2、配置类本身也是组件
 * 3、proxyBeanMethods:代理bean的方法
 *      Full(proxyBeanMethods = true)(保证每个@Bean方法被调用多少次返回的组件都是单实例的)(默认)
 *      Lite(proxyBeanMethods = false)(每个@Bean方法被调用多少次返回的组件都是新创建的)
 */
@Configuration(proxyBeanMethods = false) //告诉SpringBoot这是一个配置类 == 配置文件
public class MyConfig {

    /**
     * Full:外部无论对配置类中的这个组件注册方法调用多少次获取的都是之前注册容器中的单实例对象
     * @return
     */
    @Bean //给容器中添加组件。以方法名作为组件的id。返回类型就是组件类型。返回的值,就是组件在容器中的实例
    public User user01(){
        User zhangsan = new User("zhangsan", 18);
        //user组件依赖了Pet组件
        zhangsan.setPet(tomcatPet());
        return zhangsan;
    }

    @Bean("tom")
    public Pet tomcatPet(){
        return new Pet("tomcat");
    }
}
@Impot (用在类上面)给容器自动创建出导入类型的组件
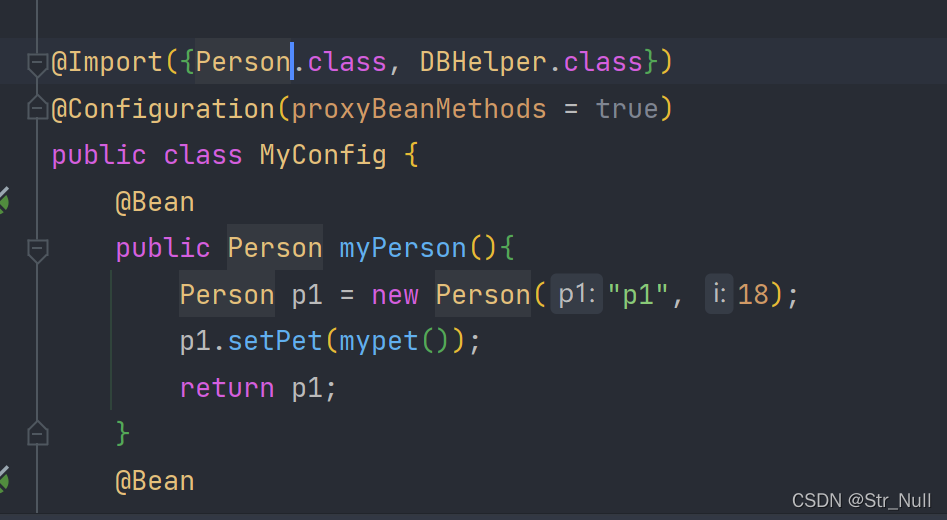
用@Import注入
然后去容器中找看看能不能找到

结果是

确实在IOC容器中能找到
mypersion是用Bean注入的
那个长的是通过Import注入的
@Conditional 条件装入注解
这个注解有很多
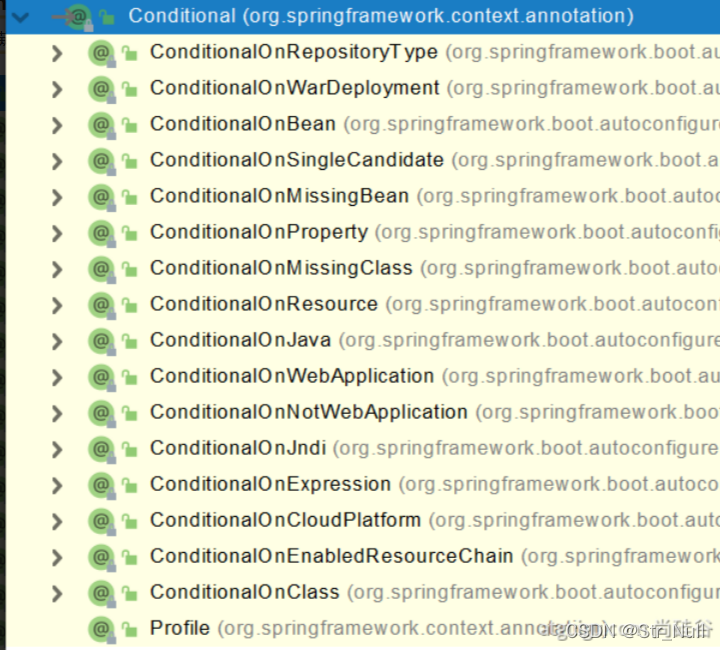
这个注解的意思是如果IOC容器没有mypet这个对象的话这些bean就都不会注入

@ImportResource导入Spring配置文件
一个配置文件
<?xml version="1.0" encoding="UTF-8"?>
<beans ...">

    <bean id="haha" class="com.lun.boot.bean.User">
        <property name="name" value="zhangsan"></property>
        <property name="age" value="18"></property>
    </bean>

    <bean id="hehe" class="com.lun.boot.bean.Pet">
        <property name="name" value="tomcat"></property>
    </bean>
</beans>
使用 把bean给直接装入到ioc里面
@ImportResource("classpath:beans.xml")
public class MyConfig {
...
}
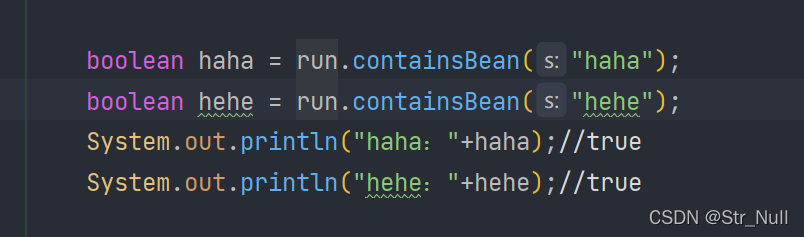
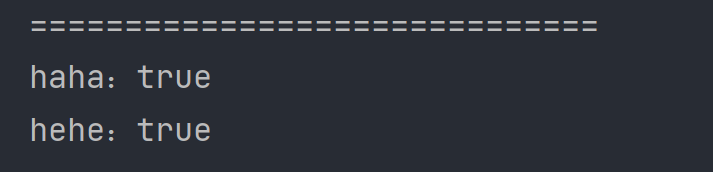
测试
public static void main(String[] args) {
    //1、返回我们IOC容器
    ConfigurableApplicationContext run = SpringApplication.run(MainApplication.class, args);

	boolean haha = run.containsBean("haha");
	boolean hehe = run.containsBean("hehe");
	System.out.println("haha:"+haha);//true
	System.out.println("hehe:"+hehe);//true
}
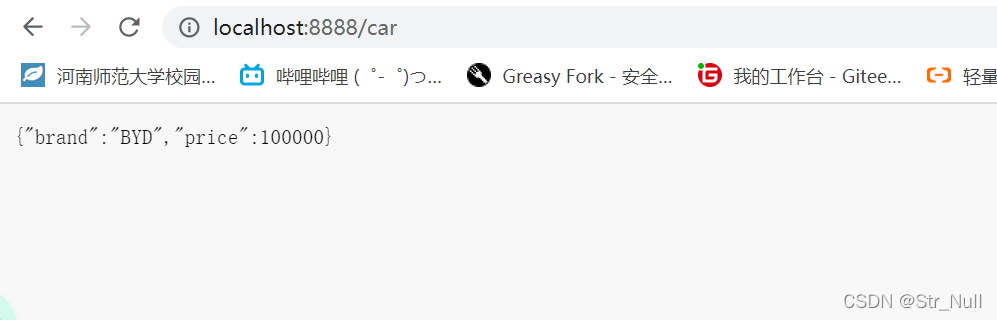
把application.properties的自定义配置注入到类中
注入我们必须要把我们要注入的给放到springboot核心配置文件中去
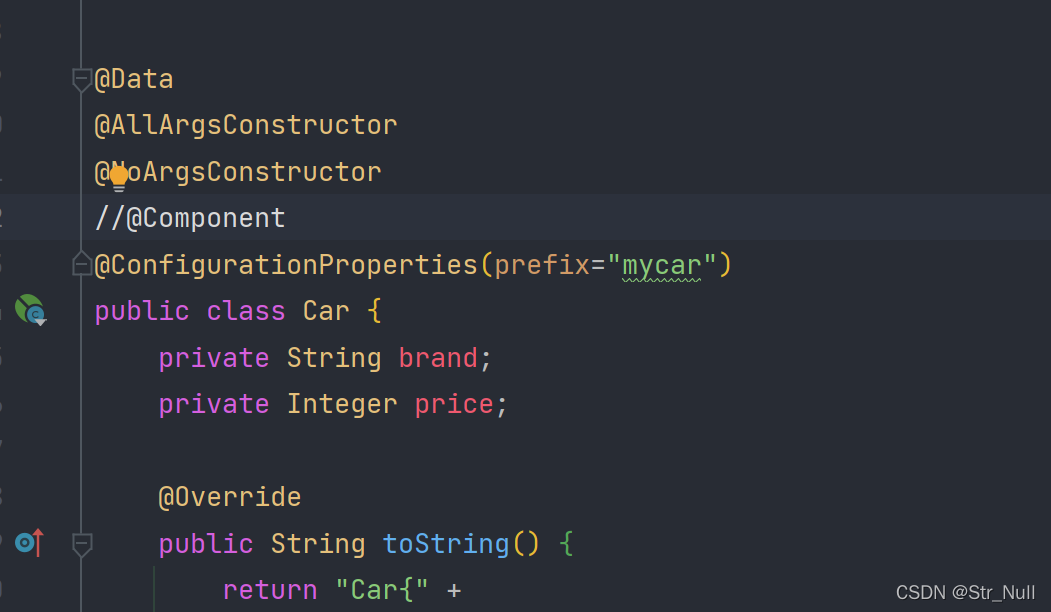
用我们自己写的类:@Component+@ConfigurationProperties()

我们要把mycar的俩数据注入到car中
@Data
@AllArgsConstructor
@NoArgsConstructor
@Component  //把这个类放到容器中
@ConfigurationProperties(prefix="mycar") //读取配置文件中的mycar并把数值给赋给brand和price
public class Car {
    private String brand;
    private Integer price;

    @Override
    public String toString() {
        return "Car{" +
                "brand='" + brand + '\'' +
                ", price=" + price +
                '}';
    }
}
引用第三方包时:@ConfigurationProperties()+@EnableConfigurationProperties
如果我们用第三方库的话我们不能再第三方库上面+@Component
所以我们可以再springboot的运行类上面加上@EnableConfigurationProperties
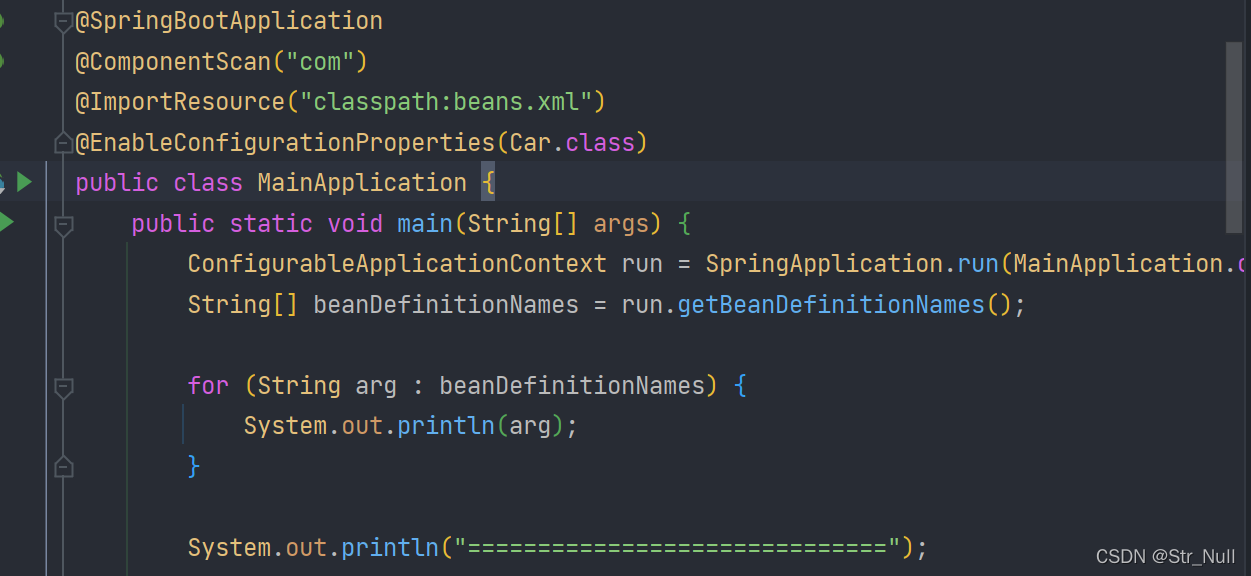
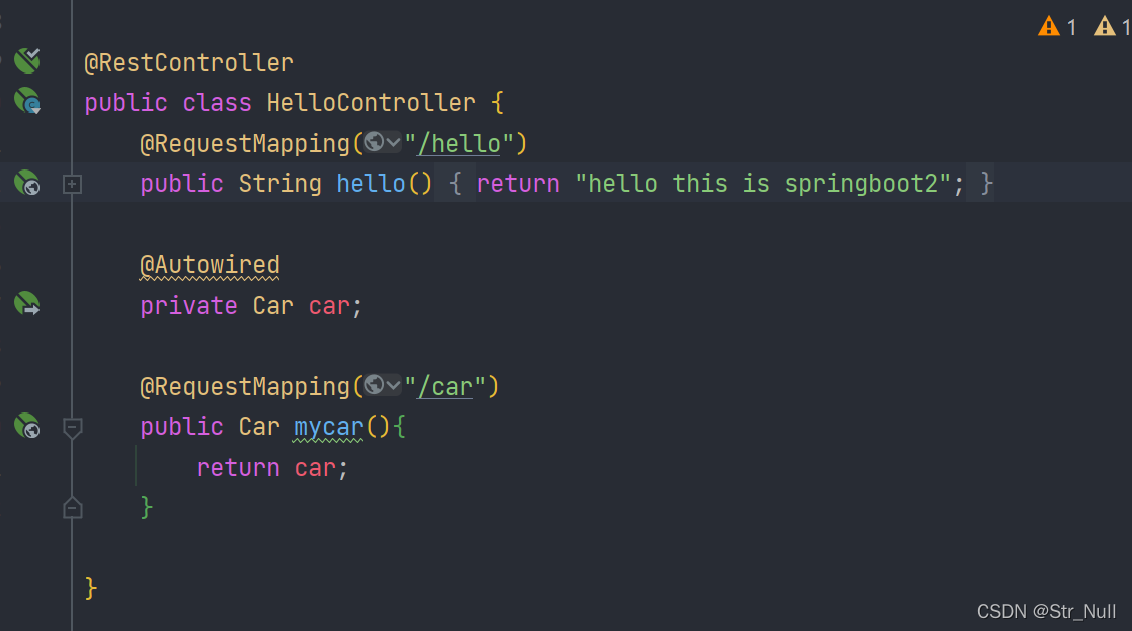
我们访问一下
细嗦@SpringBootApplication
@SpringBootApplication 是由下面三个注解组成的
- @SpringBootConfiguration
- @EnableAutoConfiguration
- @ComponentScan
@SpringBootConfiguration
@EnableAutoConfiguration
@ComponentScan(excludeFilters = { @Filter(type = FilterType.CUSTOM, classes = TypeExcludeFilter.class),
		@Filter(type = FilterType.CUSTOM, classes = AutoConfigurationExcludeFilter.class) })
public @interface SpringBootApplication{}
@SpringBootConfiguration
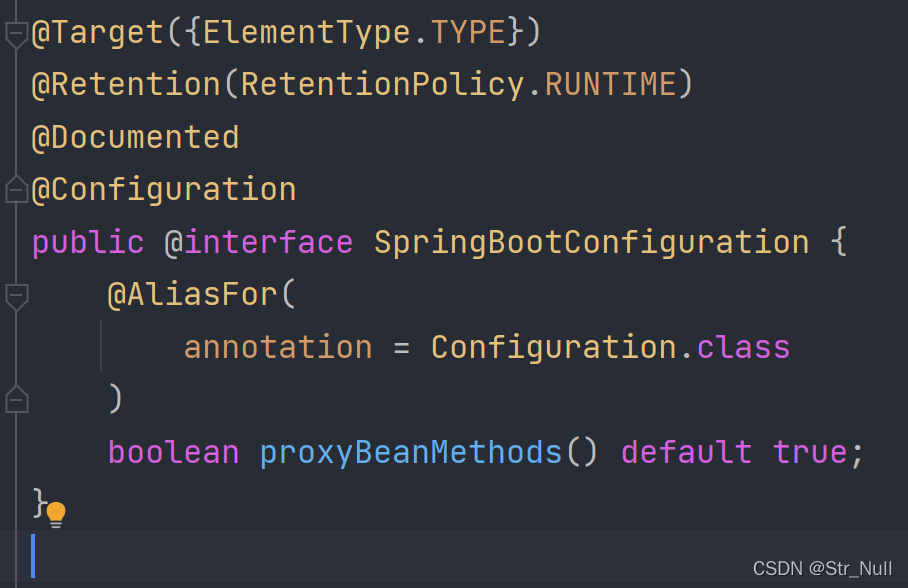
这个注解实际上是一个@Configuration注解

这个注解是标志这个类归于springboot管理 前面已经说过这个注解了
代表当前的类是一个配置类
@ComponentScan
代表我们要扫描那些包
@EnableAutoConfiguration(重点)
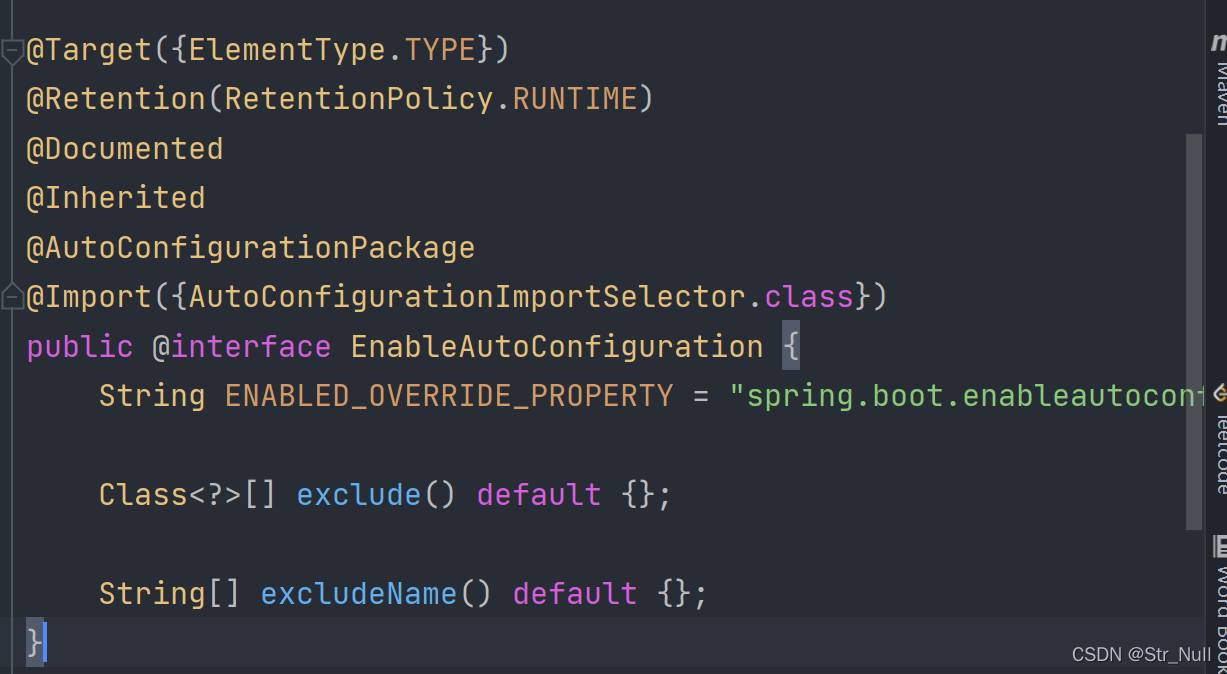
@EnableAutoConfiguration是
- @AutoConfigurationPackage
- @Import({AutoConfigurationImportSelector.class})
的合成注解
@AutoConfigurationPackage
自动配置包注解 制定了默认的包规则

它实际上是一个 Import注解(作用是给容器中导入一个组件)

这个Registrar的作用是批量导入一系列的包 因为源码太长就不放了
既然它是指定包 导入那么它指定的是那个包?
答案当然是
这个包辣
这样也就解释了一个问题 为什么不在这个启动类下的包扫描不到
@Import({AutoConfigurationImportSelector.class})
利用Select机制批量导入
我们进入这个类
找到这个方法
  public String[] selectImports(AnnotationMetadata annotationMetadata) {
        if (!this.isEnabled(annotationMetadata)) {
            return NO_IMPORTS;
        } else {
            AutoConfigurationImportSelector.AutoConfigurationEntry autoConfigurationEntry = this.getAutoConfigurationEntry(annotationMetadata);
            return StringUtils.toStringArray(autoConfigurationEntry.getConfigurations());
        }
    }
现在我们来研究一下这个东西

autoConfigurationEntry.getConfigurations() 给容器中批量导入组件
我们进入这个方法就可以看到这个configuration经过了一系列的操作
比如取出并且去掉相同的这些操作最终得到了我们要导入到容器中的组件
 protected AutoConfigurationImportSelector.AutoConfigurationEntry getAutoConfigurationEntry(AnnotationMetadata annotationMetadata) {
        if (!this.isEnabled(annotationMetadata)) {
            return EMPTY_ENTRY;
        } else {
            AnnotationAttributes attributes = this.getAttributes(annotationMetadata);
            List<String> configurations = this.getCandidateConfigurations(annotationMetadata, attributes);
            configurations = this.removeDuplicates(configurations);
            Set<String> exclusions = this.getExclusions(annotationMetadata, attributes);
            this.checkExcludedClasses(configurations, exclusions);
            configurations.removeAll(exclusions);
            configurations = this.getConfigurationClassFilter().filter(configurations);
            this.fireAutoConfigurationImportEvents(configurations, exclusions);
            return new AutoConfigurationImportSelector.AutoConfigurationEntry(configurations, exclusions);
        }
    }
这个就是获取所有配置类 我们可以打断点看一下

List<String> configurations = this.getCandidateConfigurations(annotationMetadata, attributes);
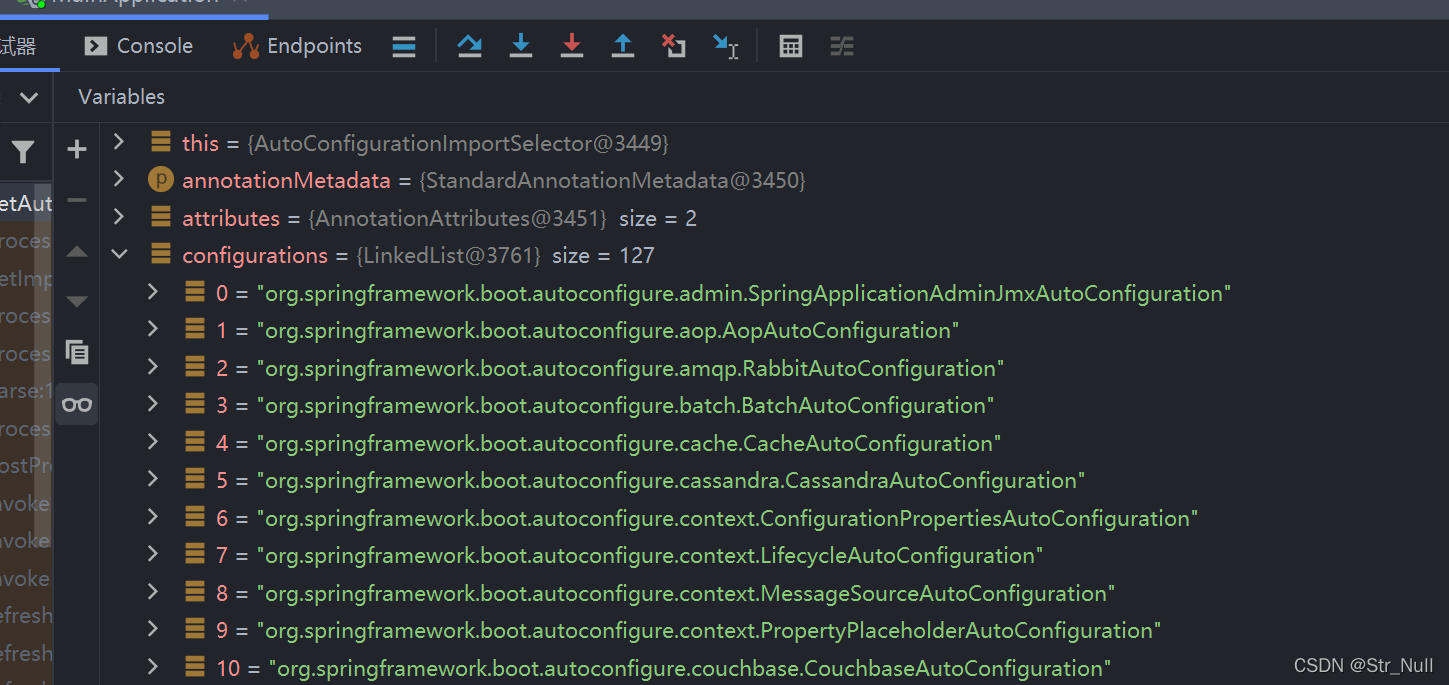
我们debug一下这就是我们加入的配置
我们进入getCandidateConfigurations()这个方法看一下 它是利用加载工厂配置的
    protected List<String> getCandidateConfigurations(AnnotationMetadata metadata, AnnotationAttributes attributes) {
        List<String> configurations = SpringFactoriesLoader.loadFactoryNames(this.getSpringFactoriesLoaderFactoryClass(), this.getBeanClassLoader());
        Assert.notEmpty(configurations, "No auto configuration classes found in META-INF/spring.factories. If you are using a custom packaging, make sure that file is correct.");
        return configurations;
    }
我们在进入这个工厂类看一下

 public static List<String> loadFactoryNames(Class<?> factoryType, @Nullable ClassLoader classLoader) {
        String factoryTypeName = factoryType.getName();
        return (List)loadSpringFactories(classLoader).getOrDefault(factoryTypeName, Collections.emptyList());
    }
我们再进return这里面看看

这个加载了所有的配置方法
private static Map<String, List<String>> loadSpringFactories(@Nullable ClassLoader classLoader) {
        MultiValueMap<String, String> result = (MultiValueMap)cache.get(classLoader);
        if (result != null) {
            return result;
        } else {
            try {
                Enumeration<URL> urls = classLoader != null ? classLoader.getResources("META-INF/spring.factories") : ClassLoader.getSystemResources("META-INF/spring.factories");
                LinkedMultiValueMap result = new LinkedMultiValueMap();

                while(urls.hasMoreElements()) {
                    URL url = (URL)urls.nextElement();
                    UrlResource resource = new UrlResource(url);
                    Properties properties = PropertiesLoaderUtils.loadProperties(resource);
                    Iterator var6 = properties.entrySet().iterator();

                    while(var6.hasNext()) {
                        Entry<?, ?> entry = (Entry)var6.next();
                        String factoryTypeName = ((String)entry.getKey()).trim();
                        String[] var9 = StringUtils.commaDelimitedListToStringArray((String)entry.getValue());
                        int var10 = var9.length;

                        for(int var11 = 0; var11 < var10; ++var11) {
                            String factoryImplementationName = var9[var11];
                            result.add(factoryTypeName, factoryImplementationName.trim());
                        }
                    }
                }

                cache.put(classLoader, result);
                return result;
            } catch (IOException var13) {
                throw new IllegalArgumentException("Unable to load factories from location [META-INF/spring.factories]", var13);
            }
        }
    }
打个断点看看

看这个


我们的资源文件的位置就是在这里
也就是说默认扫描我们当前系统里面的所有
这个位置的文件
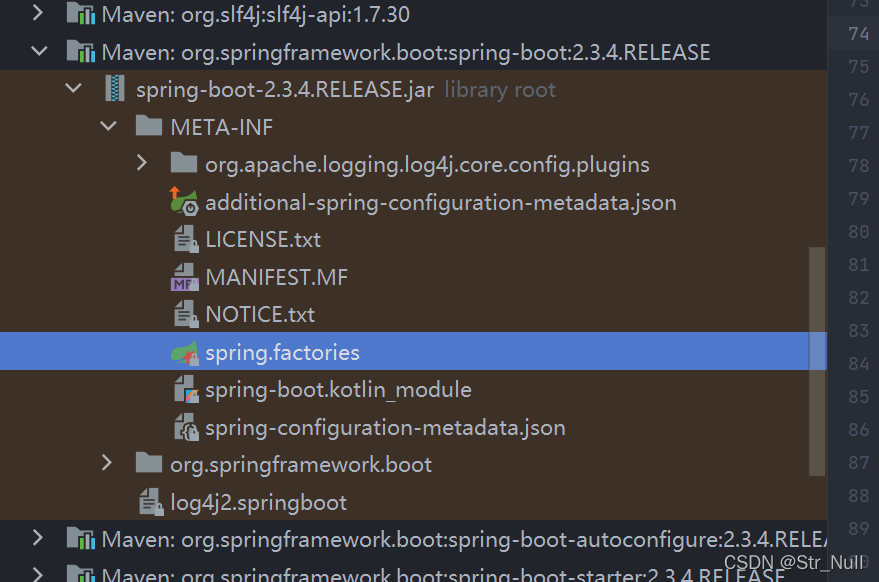
还有这个包

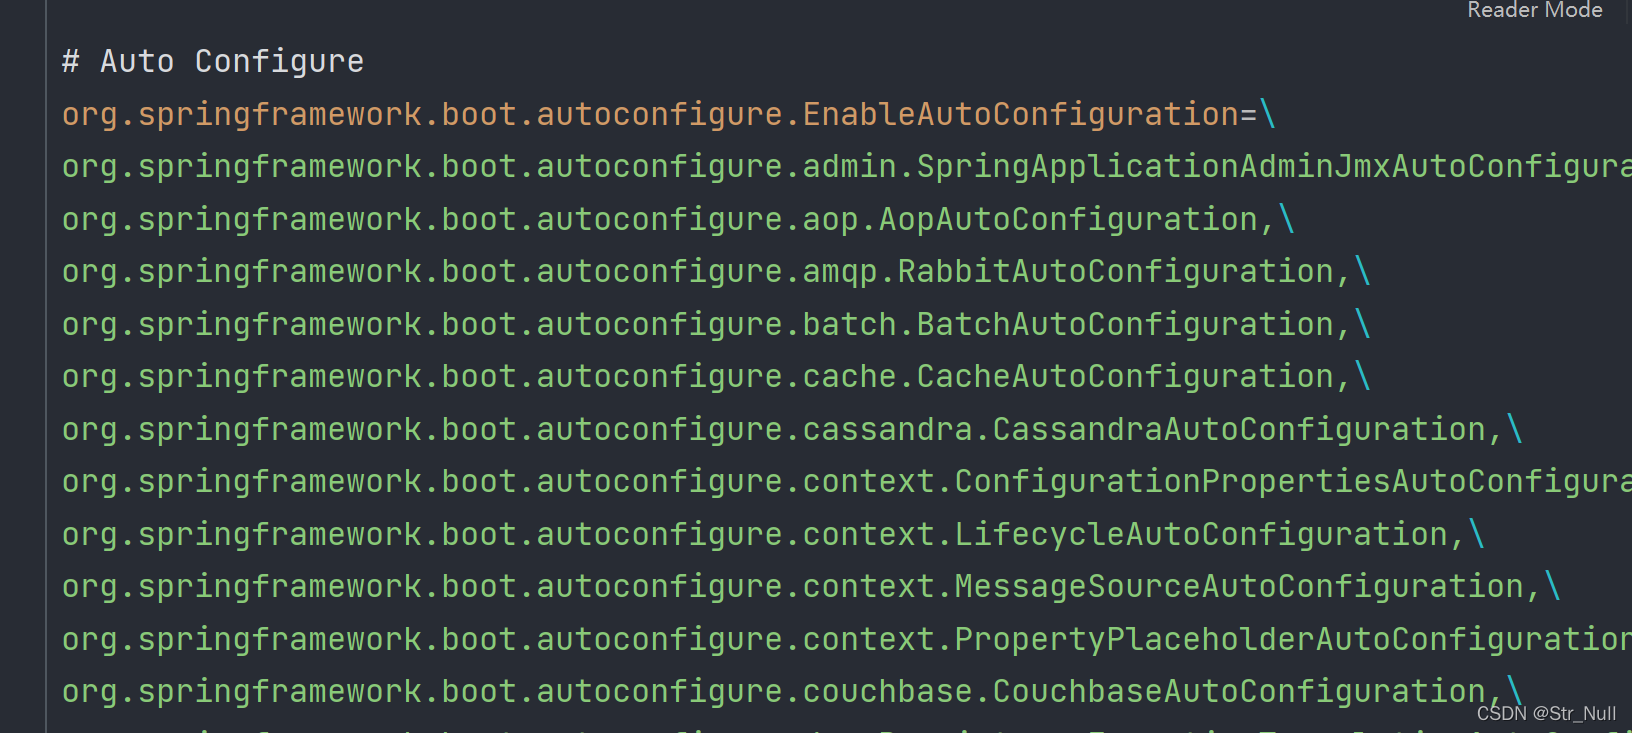
这就是上面我们加载的127个配置类
文件里面写死了springboot已启动要加载的127个配置类
这些配置类几乎覆盖了springboot的所有应用场景
我们在启动类里面看看到底加载了几个


加载了127个再加上我们自己加入的肯定不止129个 也就是说有一部分并没有进入到容器中
EnableAutoConfiguration : 我都干了什么啊?
- 加载组件
- 从配置文件中读取配置的信息并设置(指读取下面这个配置文件)

那127个配置都会全部加载但是会根据条件装配规则来按需分配
我们随便进入一个看看
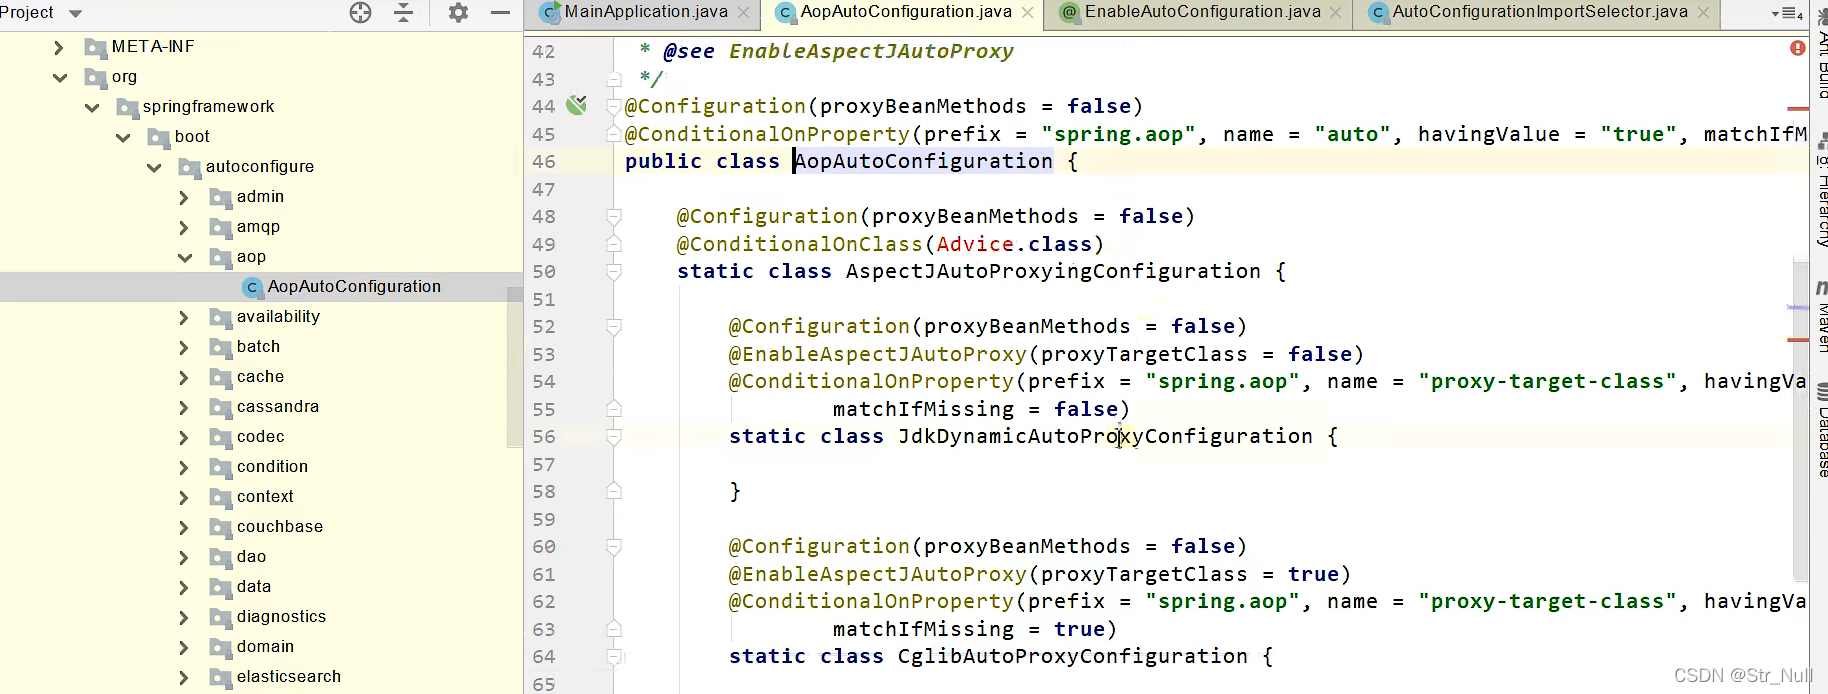
我们可以看到这个注解


我们前面提到过 这个是条件注解
也就是说这个AOP只有在导入Advice这个包的前提之下才会加入容器中
一些注解
给容器添加组件的一些注解
- @Bean 给容器添加一个普通组件
- @Component 代表一个组件
- @Controller 代表控制器
- @Service 代表业务逻辑组件
- @Repository 代表数据库组件
- @Impot 给容器导入很多的注解
一些常用注解 - @ComponentScan 包扫描注解
未完待续…
后续的学习笔记都在我的spring boot专栏里面
点击进入专栏捏


 4万+
4万+


 被折叠的 条评论
为什么被折叠?
被折叠的 条评论
为什么被折叠?
 到【灌水乐园】发言


