


唠唠叨叨
	感觉京城的冬天余韵也太长了,一天比一天冷,而且风还超大,混杂着沙土、落叶。
	到公司的第一件事是把自己从沙土中拯救出来,咱的厚棉外套啥时候能脱呀TvT。好想穿轻便的衣服!
	去看了《铃芽之旅》,感觉非常不错,阿里嘎多,新海诚桑!(此段编辑于4.1,私密马赛!拖更的我红豆泥叩咩!)
	高价买了《塞尔达传说·王国之泪》,五、六、七月份的周末都在高强度塞中,我太爱这个游戏了呜呜呜,什么究极手,什么倒转乾坤,我玩爆!生造高达(x(此段编辑于8月)
	去看了《封神第一部朝歌风云》,连看了几个星期的周末,当起了自来水,感觉很棒的神幻大片!就是好多故事都看了没讲全的感觉,真希望能放完整版的TVT(此段编辑于10月)

	续:现在都已经六月份了,直接跳过一个月是怎么回事啊喂!
	又续:等等,现在竟然12月份了,我有罪啊!!
	then:等等,现在已经12.29了,我大大的罪过啊!!
	明年见大家!(bushi

事发背景
	上回书说到(bushi
	X6篇(一)主要梳理的是我如何在vue项目中用到X6以及如何创建画布、节点、连线;以及在画布中配置节点画流程图、
	链接桩的输入输出等,这次俺们主要讲我们如何获取画布配好的节点数据,通过点击通过id获取数据回显
	并且由此实现执行运行的动态效果。
实现效果
初始完成效果:
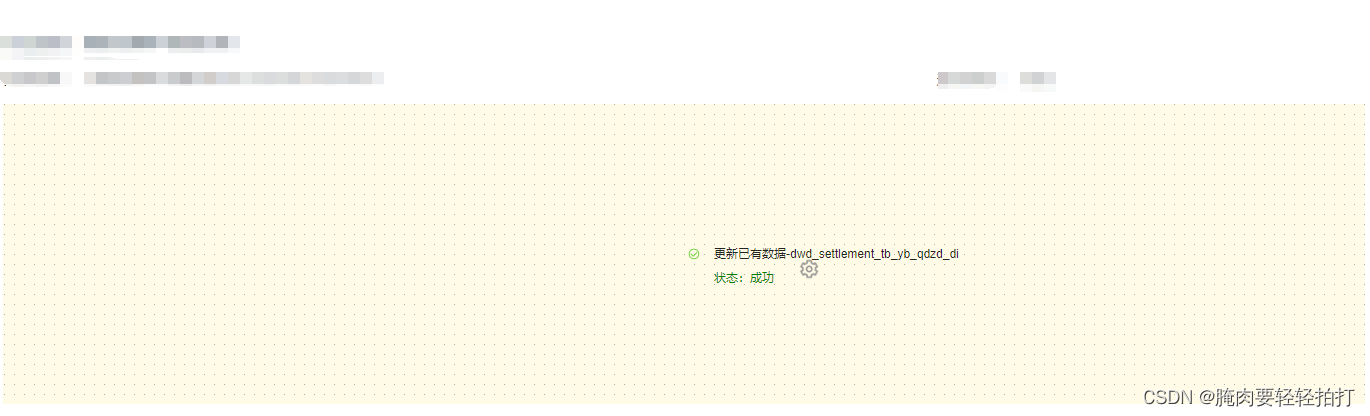
(我知道很简陋啦)

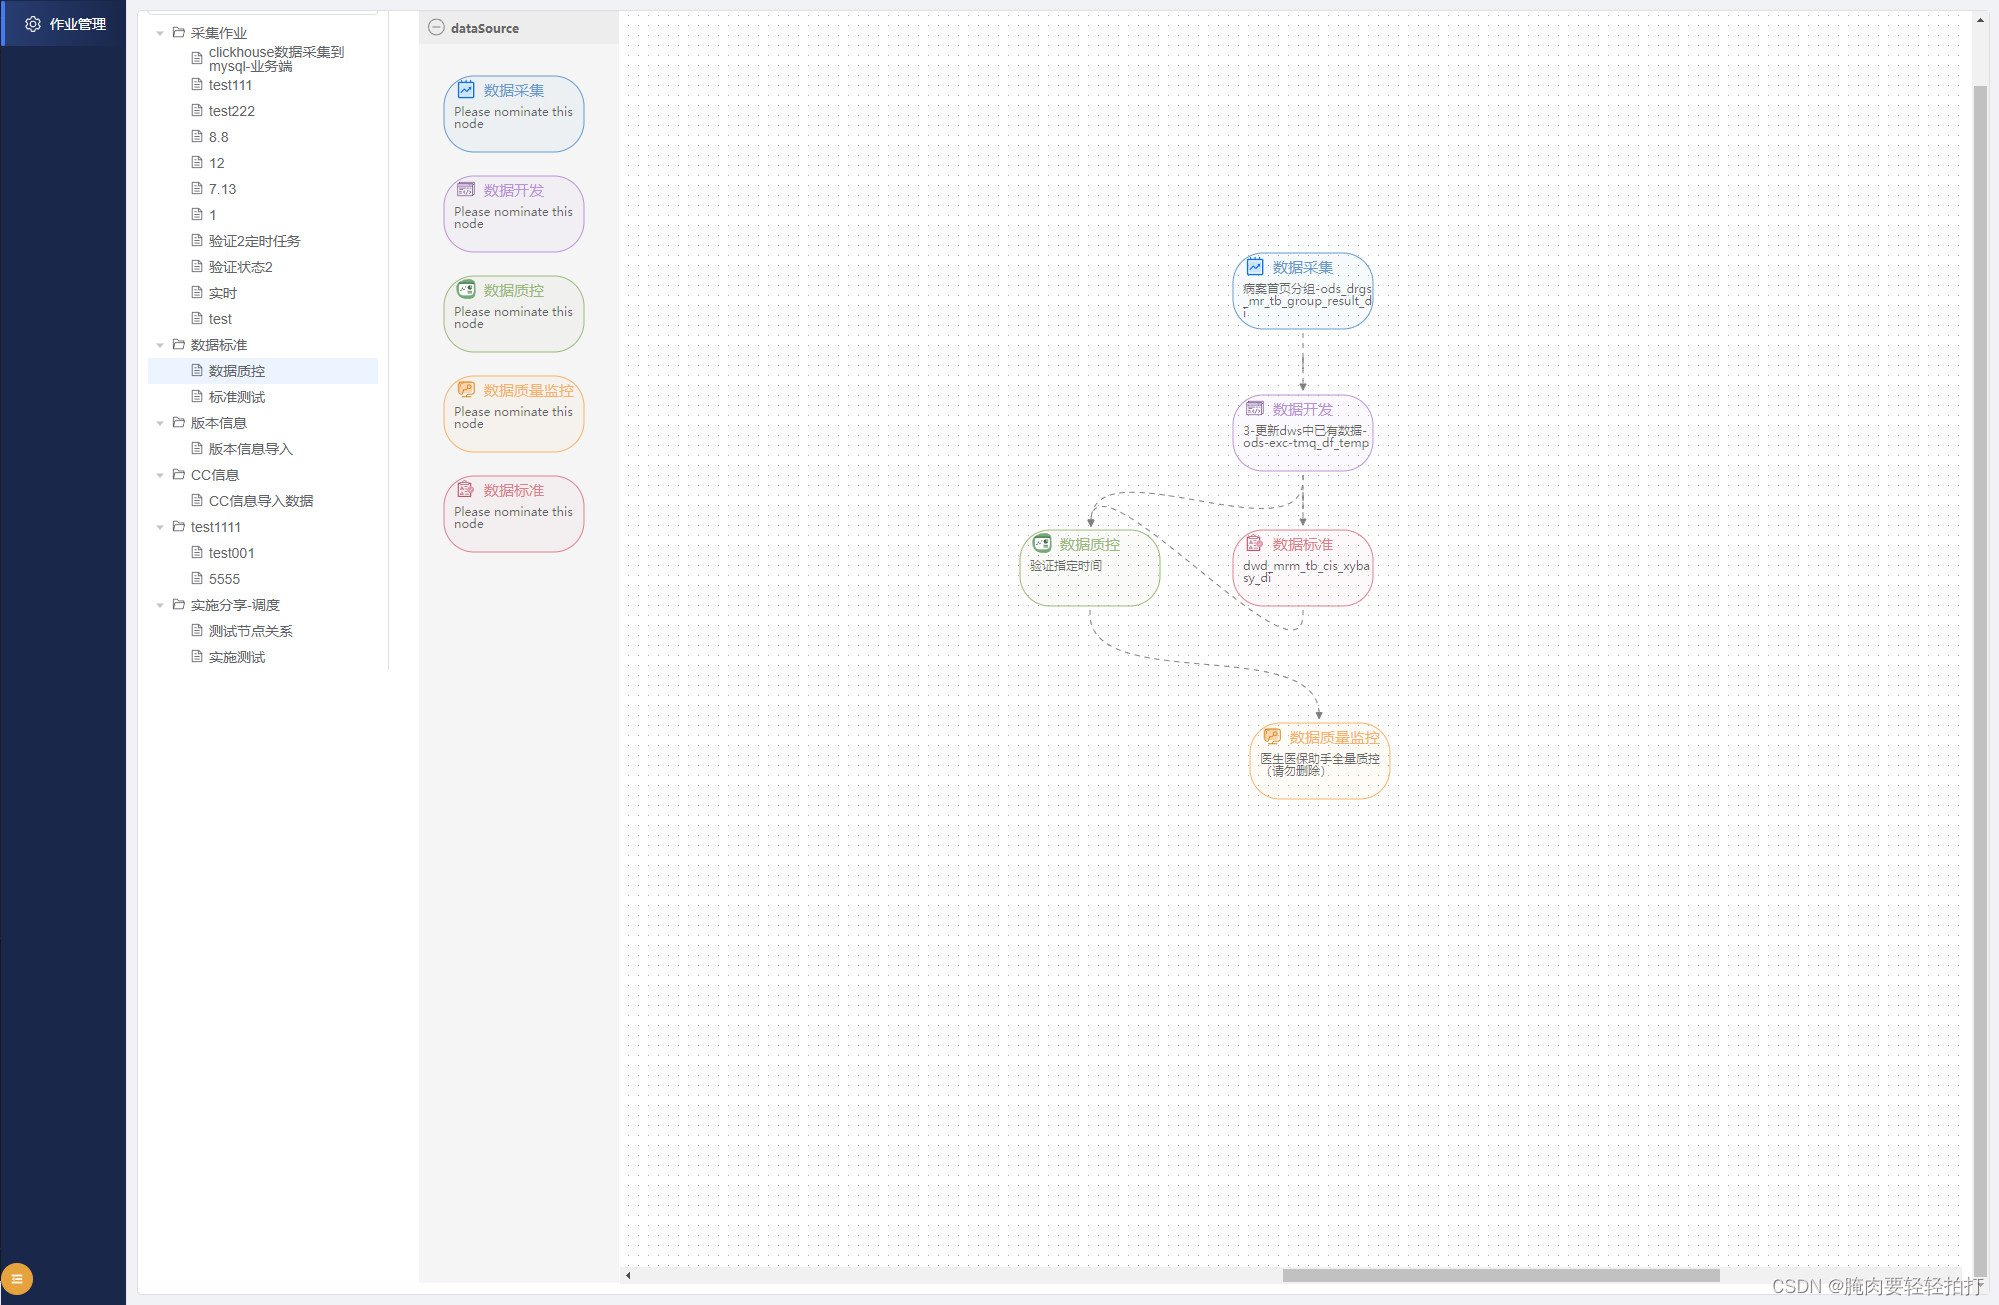
调整后完成效果(跟篇(一)一样其实就是……):
安装和引入
防止有些友友没看过(一),再介绍一次(才不是水字数)

AntV X6 是 AntV 旗下的图编辑引擎,提供了一系列开箱即用的交互组件和简单易用的节点定制能力,方便我们快速搭建流程图、DAG 图、ER 图等图应用。
在项目文件安装AntV X6,通过 npm 或 yarn 命令安装 X6。
# npm
$ npm install @antv/x6 --save

# yarn
$ yarn add @antv/x6
实现思路
- 流程节点回显
在画布子组件中编写如下方法:
const reSet = (data) => {
  console.log(data);
  // proxy.$axios.get(`xxxx/process-definition/taskTree/${state.code}? code=${state.code}&projectCode=${state.projectCode}`)
  // .then(({ data }) => { //这个是调用的接口,咱们文章把它去掉了,不需要
  if (data) {
    if(data.taskDefinition !== null){
      // state.code = data.processPagingQueryVO.code //这是在真正的业务使用时用于做节点作业唯一性的代码
      // state.projectCode = data.processPagingQueryVO.projectCode //这是在真正的业务使用时用于做节点作业唯一性的代码
      state.name = data.processPagingQueryVO.name
      state.params = data.data
      let locations = JSON.parse(data.processPagingQueryVO.locations) //格式化坐标数据
      let definition = data.taskDefinition //节点作业数据
      let relation = data.taskRelation //节点依赖关系
      let label = definition.map(x => x.name) //节点标签
      let taskType = definition.map(x => x.taskType) 节点类型
      let msg = definition.map(x => x) //节点数据
      state.nodeDtos = locations.map(x => ({ //坐标数据
        x: Number(x.x), //x坐标
        y: Number(x.y), //y坐标
        id: x.taskCode, //作业id
        data: definition[locations.indexOf(x)], //节点作业data
        relation: relation[locations.indexOf(x)], //节点关系
        attrs: { //节点样式数据
          body: { //节点主体背景
            fill: taskType[locations.indexOf(x)] === "COLLECT" ? "rgba(102, 153, 204, 0.05)" : (taskType[locations.indexOf(x)] === "DMDM" ? 'rgba(219, 127, 142, 0.05)' : (taskType[locations.indexOf(x)] === "DLINK" ? 'rgba(185, 147, 214, 0.05)' : (taskType[locations.indexOf(x)] === "MONITOR" ? 'rgba(247, 178, 103, 0.05)' : 'rgba(154, 184, 122, 0.05)' ) )), //根据数据回显背景颜色
            stroke: taskType[locations.indexOf(x)] === "COLLECT" ? 'rgb(102, 153, 204)' : (taskType[locations.indexOf(x)] === "DMDM" ? 'rgb(219, 127, 142)' : (taskType[locations.indexOf(x)] === "DLINK" ? 'rgb(185, 147, 214)' : (taskType[locations.indexOf(x)] === "MONITOR" ? 'rgb(247, 178, 103)' : 'rgb(154, 184, 122)' ) )), //根据数据回显边框线颜色
            strokeWidth: 1, //边框线宽度
          },
          label: { //节点标签
            id: x.taskCode,
            text: label[locations.indexOf(x)], //标签文本1
            data: msg.filter((item) => x.taskCode === String(item.code))[0]
          },
          text: {  //标签文本2
            text: taskType[locations.indexOf(x)] === "COLLECT" ? "数据采集" : (taskType[locations.indexOf(x)] === "DMDM" ? "数据标准" : (taskType[locations.indexOf(x)] === "DLINK" ? "数据开发" : (taskType[locations.indexOf(x)] === "MONITOR" ? "数据质量监控" : "数据质控" ) )),
            fill: taskType[locations.indexOf(x)] === "COLLECT" ? 'rgb(102, 153, 204)' : (taskType[locations.indexOf(x)] === "DMDM" ? 'rgb(219, 127, 142)' : (taskType[locations.indexOf(x)] === "DLINK" ? 'rgb(185, 147, 214)' : (taskType[locations.indexOf(x)] === "MONITOR" ? 'rgb(247, 178, 103)' : 'rgb(154, 184, 122)' ) )), //标签颜色
          },
          image: {'xlink:href': taskType[locations.indexOf(x)] === "COLLECT" ? imageShapes[0].image : (taskType[locations.indexOf(x)] === "DLINK"?imageShapes[1].image: (taskType[locations.indexOf(x)] === "DQUALITY"?imageShapes[2].image: (taskType[locations.indexOf(x)] === "MONITOR"?imageShapes[3].image: imageShapes[4].image)))}
        }, //小图标
        shape: 'custom-node', //节点形状
        ports: { //链接桩样式
          groups: {
            in: {
              position: 'top',
              attrs: {
                circle: {
                  r: 4,
                  magnet: true,
                  stroke: '#108ee9',
                  strokeWidth: 2,
                  fill: '#fff'
                }
              }
            },
            out: {
              position: 'bottom',
              attrs: {
                circle: {
                  r: 4,
                  magnet: true,
                  stroke: '#31d0c6',
                  strokeWidth: 2,
                  fill: '#fff'
                }
              }
            }
          },
          items: [
            {
              id: x.taskCode + '_in',
              group: 'in',
            },
            {
              id: x.taskCode + '_out',
              group: 'out',
            },
          ],
        }
      }))
      let edges = data.taskRelation //边
      for (let index = edges.length-1; index >= 0; index--) {
        const element = edges[index];
        if (edges[index].preTaskCode === 0) {
          edges.splice(element,1)
        }
      }
      state.linkDtos = edges.map(x => ({ //链接桩连接关系
        source: { cell: x.preTaskCode, port: x.preTaskCode + '_out' },
        target: { cell: x.postTaskCode, port: x.postTaskCode + '_in' },
        attrs: {
          line: {
            strokeDasharray: '5 5',
            stroke: '#808080',
            strokeWidth: 1,
            targetMarker: {
              name: 'block',
              args: {
                size: '6',
              },
            },
          },
        },
        shape: 'edge',
      }))
      nodeData.nodes = state.nodeDtos;
      nodeData.edges = state.linkDtos
      graph.fromJSON(nodeData)
      state.workState = data.processPagingQueryVO.releaseState
      emit("giveState", state.workState)
    }else{
      nodeData.nodes = null
      graph.fromJSON([])
      ElMessage.warning('当前画布为空')
    }
  }else{
  }
  // })
}
在编写一个调用它的向外暴露的方法:
const getJsonData = () => {
  let workData = JsonData.COMMON_WORK_DATA //保存于jsonData/index.js 的节点作业假数据
  workData.map(item => {
    if (state.code == item.processPagingQueryVO.code && state.projectCode == item.processPagingQueryVO.projectCode) {
      reSet(item) //调用rest方法
    }
  })
}

defineExpose({ //暴露getJsonData方法
  getJsonData,
  //save 该方法是用于保存节点的,这个比较复杂,下次再发(水)一篇文来讲
});
- 节点树的nodeClick方法
//点击目录
    const onTreeClick = (data,node) => { //点击节点方法
      state.defaultShowNodes.push(data.id) //放入节点id
      state.code = data.code //给放入code
      if (data.children===null) { //判断是否子节点给值
        state.currentNodeName = data.label
        state.projectCode = node.parent.data.code
      } else {
        state.projectCode = 0 //projectCode为父节点作业的唯一code当本身为父作业时给它个0值
        state.motif = data.label
      }
      emit("giveCode", state.code, state.projectCode, state.currentNodeName, state.motif); //调用父组件的获取code方法
    }
- 然后在父组件里挂载子组件tree和graph:
<doc-tree ref="mychild" @give-code="getCode" @on-edit="getWorkEdit" :edit-name="state.workMonitorName"/><-- 这是树 -->
<filiation-graph :code="state.code" :project-code="state.projectCode" :work-name="state.workName" @give-state="getState" ref="filiateGraph"/><-- 这是画布 -->
把它们的方法串联起来:
//获取节点树节点编码,作业名、主题名
const getCode = (e,i,j,k) => {
  state.code = e;
  state.projectCode = i;
  state.workName = j;
  state.motif = k;
  proxy.$nextTick(() => {
    proxy.$refs.filiateGraph.getJsonData()
  })
}

//获取当前选中节点作业状态
const getState = (i) => {
  state.releaseState = i
}

onMounted(() => { //需要一进来获取一下咱们这个节点作业选中状态的就把这玩意写上
  getState()
})
- 数据定义文档index.js
export const JsonData = {
  COMMON_DOC_TREE: [ // 节点树数据,这是一个例子数据
  	{
      id: 107,
      label: "实施分享-调度",
      code: 878880959774976,
      children: [
        {
          id: 280,
          label: "测试节点关系",
          code: 890061928055040,
          children: null
        },
        {
          id: 279,
          label: "实施测试",
          code: 887161544818944,
          children: null
        }
      ]
    },],
  COMMON_WORK_DATA: [//画布作业数据,这个数据咱们自己定义就好了,参数名和里面的结构根据自己的项目来哈,我放了一个少的作业做展示,这里我就不粘完整的过来了,我的有两千多行呢
  	{
      processPagingQueryVO: {
        id: 284,
        code: 887161544818944,
        name: "测试1",
        releaseState: "OFFLINE",
        releaseStateCN: "下线",
        projectCode: 878880959774976,
        description: "",
        createTime: "2022-11-23 18:33:22",
        updateTime: "2022-11-24 09:32:03",
        locations: "[{\"x\":-270,\"y\":-120,\"taskCode\":\"979260953231616\"},{\"x\":-460,\"y\":60,\"taskCode\":\"979273720905984\"}]"
      },
      taskDefinition: [
        {
          id: 756,
          code: 979260953231616,
          name: "5-耐药运营统计",
          version: 1,
          description: "",
          projectCode: 878880959774976,
          userId: 1,
          taskType: "DLINK",
          taskParams: {
            id: 43,
            code: 43,
            name: "5-耐药运营统计",
            note: null,
            port: 6379,
            type: "",
            alias: "5-耐药运营统计",
            jarId: null,
            mqUrl: "192.168.128.103",
            state: 0,
            config: null,
            dialect: "FlinkSql",
            enabled: true,
            fragment: true,
            password: "",
            username: "",
            clusterId: 276,
            statement: null,
            checkPoint: 0,
            createTime: "2021-12-07 17:40:36",
            databaseId: null,
            httpMethod: "POST",
            httpParams: [
              {prop: "id", value: "43", httpParametersType: "PARAMETER"},
              {prop: "code", value: 43, httpParametersType: "PARAMETER"},
              {prop: "projectCode", value: "111", httpParametersType: "PARAMETER"}
            ],
            savepoints: null,
            updateTime: "2022-06-09 19:44:35",
            clusterName: null,
            parallelism: 1,
            projectCode: "111",
            statementSet: false,
            savePointPath: null,
            connectTimeout: 0,
            incrementConfig: null,
            savePointStrategy: null,
            clusterConfigurationId: null
          },
          flag: "YES",
          taskPriority: "MEDIUM",
          workerGroup: "default",
          environmentCode: -1,
          failRetryTimes: 0,
          failRetryInterval: 0,
          timeoutFlag: "CLOSE",
          timeoutNotifyStrategy: null,
          timeout: 0,
          delayTime: 0,
          resourceIds: "",
          createTime: "2022-11-23 18:35:53",
          updateTime: "2022-11-23 18:35:53",
          callTaskId: 43,
          dependence: ""
        },
        {
          id: 757,
          code: 979273720905984,
          name: "病案首页任务1",
          version: 1,
          description: "",
          projectCode: 878880959774976,
          userId: 1,
          taskType: "MONITOR",
          taskParams: {
            jobId: 22,
            jobTheme: "病案首页",
            jobName: "病案首页任务1",
            strategy: "全量",
            httpMethod: "GET",
            connectTimeout: 0,
            port: 6379,
            mqUrl: "192.168.128.103",
            username: "",
            password: "",
            httpParams: []
          },
          flag: "YES",
          taskPriority: "MEDIUM",
          workerGroup: "default",
          environmentCode: -1,
          failRetryTimes: 0,
          failRetryInterval: 0,
          timeoutFlag: "CLOSE",
          timeoutNotifyStrategy: null,
          timeout: 0,
          delayTime: 0,
          resourceIds: "",
          createTime: "2022-11-23 18:48:52",
          updateTime: "2022-11-23 18:48:52",
          callTaskId: 22,
          dependence: ""
        },
      ],
      taskRelation: [
        {
          id: 1018,
          name: "",
          processDefinitionVersion: 4,
          projectCode: 878880959774976,
          processDefinitionCode: 887161544818944,
          preTaskCode: 0,
          preTaskVersion: 0,
          postTaskCode: 979260953231616,
          postTaskVersion: 1,
          conditionType: "NONE",
          conditionParams: {},
          createTime: "2022-11-24 09:32:03",
          updateTime: "2022-11-24 09:32:03"
        },
        {
          id: 1019,
          name: "",
          processDefinitionVersion: 4,
          projectCode: 878880959774976,
          processDefinitionCode: 887161544818944,
          preTaskCode: 979260953231616,
          preTaskVersion: 0,
          postTaskCode: 979273720905984,
          postTaskVersion: 1,
          conditionType: "NONE",
          conditionParams: {},
          createTime: "2022-11-24 09:32:03",
          updateTime: "2022-11-24 09:32:03"
        },
      ]
    },
  ],
}
然后在js文档外再挂一个文档,把咱的数据向外暴露,方便组件调取
import { JsonData } from './JsonData';
export {
  JsonData,
}
- 参数定义
咱们的参数都在state中定义了,就不细讲了,直接贴上,可以做参考
const state = reactive({
  dataId: '', // 判断节点配置是否为编辑状态
  cell: '',
  view: false,
  code: '',
  projectCode: '',
  dialogVisible: false,
  flinkVisible: false,
  standVisible: false,
  controlVisible: false,
  monitorVisible: false,
  name: '',// 工作流作业名
  codeList: [],// 后端接口返回节点id数组
  taskCode: '',// 后端接口返回节点id字符串
  nodeDtos: [], //回显的节点数据
  linkDtos: [], //回显的边数据
  currentCode: '',// 当前节点id
  sysCode: '', //接口给予的当前节点id
  nodeId: '',// 当前节点id(传入表单)
  arrList:[],// 节点id数组(原)
  taskDefinition: [],// 节点配置表单信息
  taskRelation: [],// 节点关系
  postTaskCode: '',// 总是指向自己的节点id,用于匹配次级节点的pretaskcode
  preTaskCode: 0,//发出edge的节点id(若节点无输入桩的链接,则该id为0,即该节点为初始节点)
  postTaskVersion: 1,//指向的节点版本(指向1(指向自己))
  preTaskVersion: 1,//父节点为0,子节点为1
  workState: '',
  collectLabel: '数据采集',
  flinkLabel: '数据开发',
  standerLabel: '数据标准',
  controlLabel: '数据质控',
  monitorLabel: '数据质量监控',
  params: {},
  //监听获取的数据存储
  watchCode: null,
  watchDefinition: [],
  currentDefinition: {
    name: '',
    description: '',
    timeoutFlag: "",
    taskWork: '',
    originTable: '',
    targetTable: '',
    taskParams: '',
    taskType: "",
    projectCode: '',
    code: '',
    callTaskId: '',
    nodeId: '',
  },//当前节点的配置表单数据
})
6.项目地址
我的项目代码上传在github中,如果对大家有帮助还请给我点个星星,非常感谢!爱你们!
地址在此!|web-scheduler ANTV-X6流程图在Vue3的应用


 573
573


 被折叠的 条评论
为什么被折叠?
被折叠的 条评论
为什么被折叠?
 到【灌水乐园】发言


