


Xshell 7+WinSCP部署nginx网页
1.申请云服务器
在下面两个网站完成实名认证后,可以申请云服务器体验或者可以直接购买。
阿里云:https://free.aliyun.com/?spm=a2c6h.13066369.0.0.894740d1z70tDF
腾讯云:https://cloud.tencent.com/act/free?from=11649
贴一个参考配置。
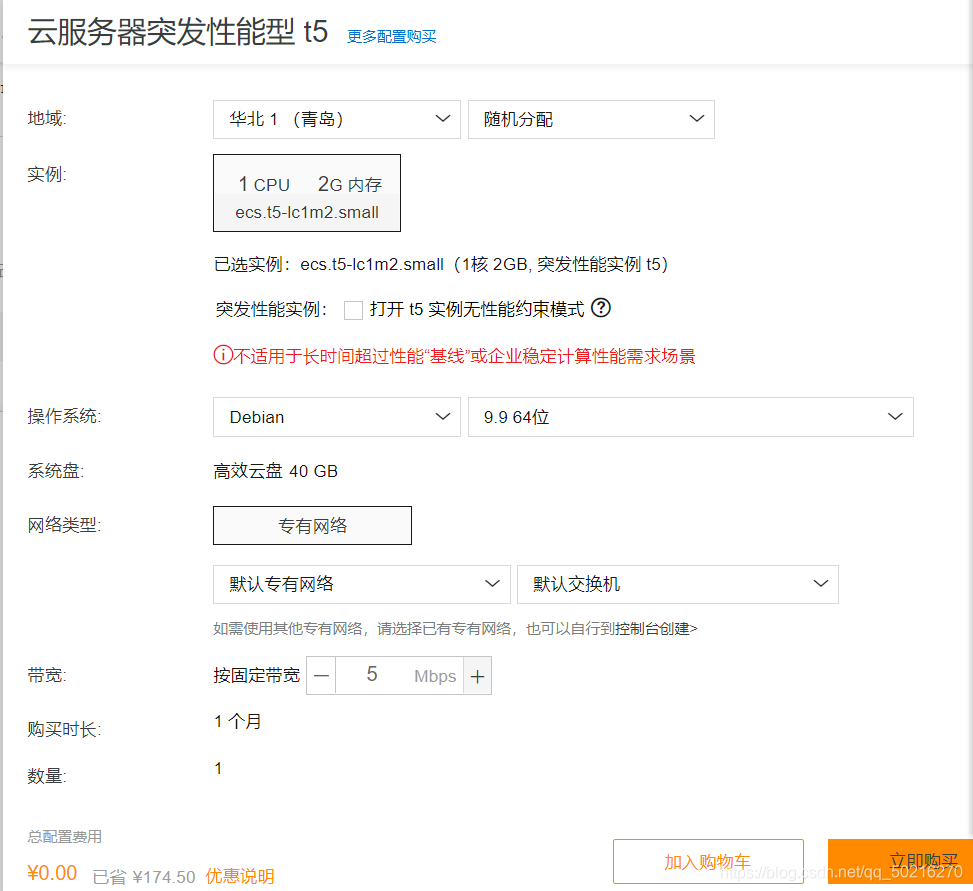
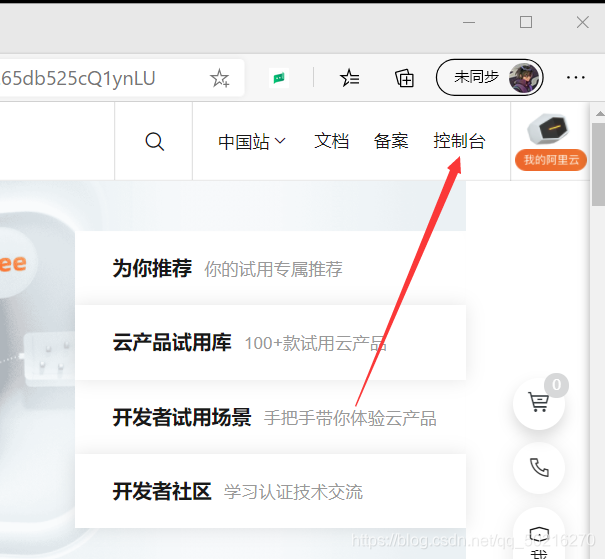
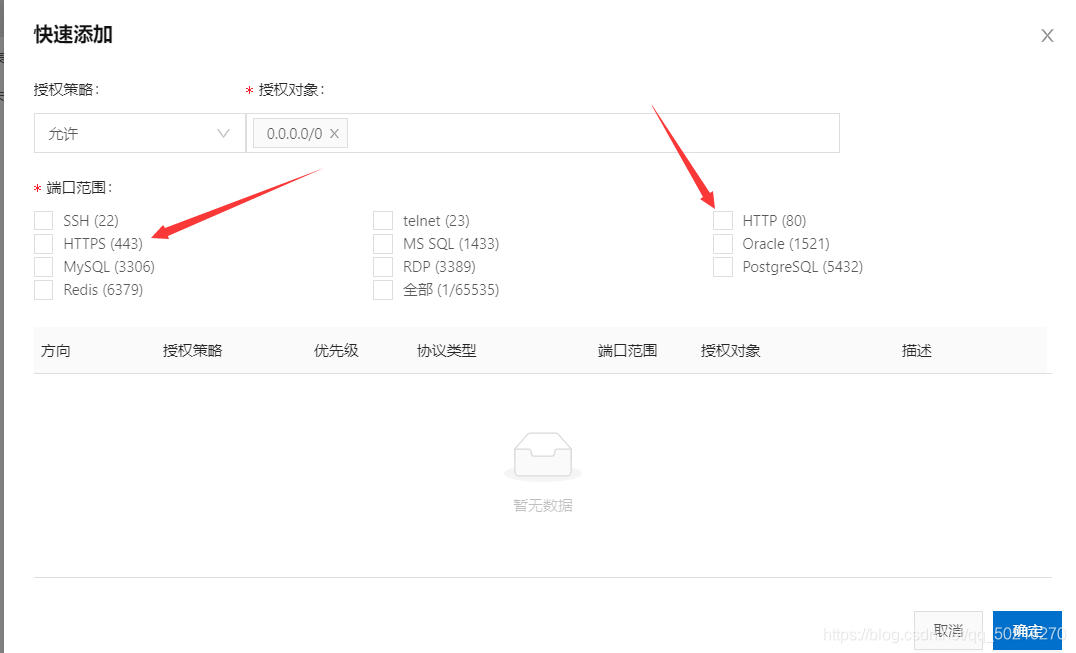
配置完成后需要获取自己的IP地址,设置密码,打开80端口(http)和443端口(https),在右上角进入控制台。
进入云服务器
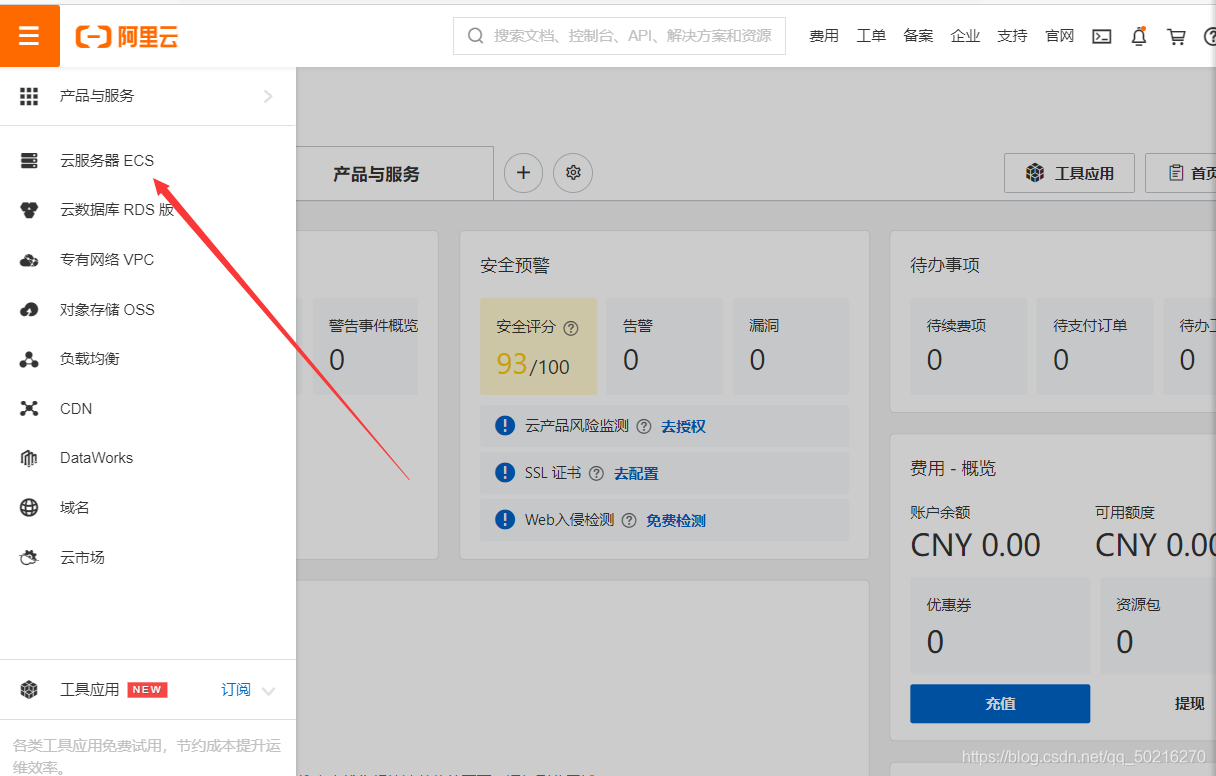 进入服务器。
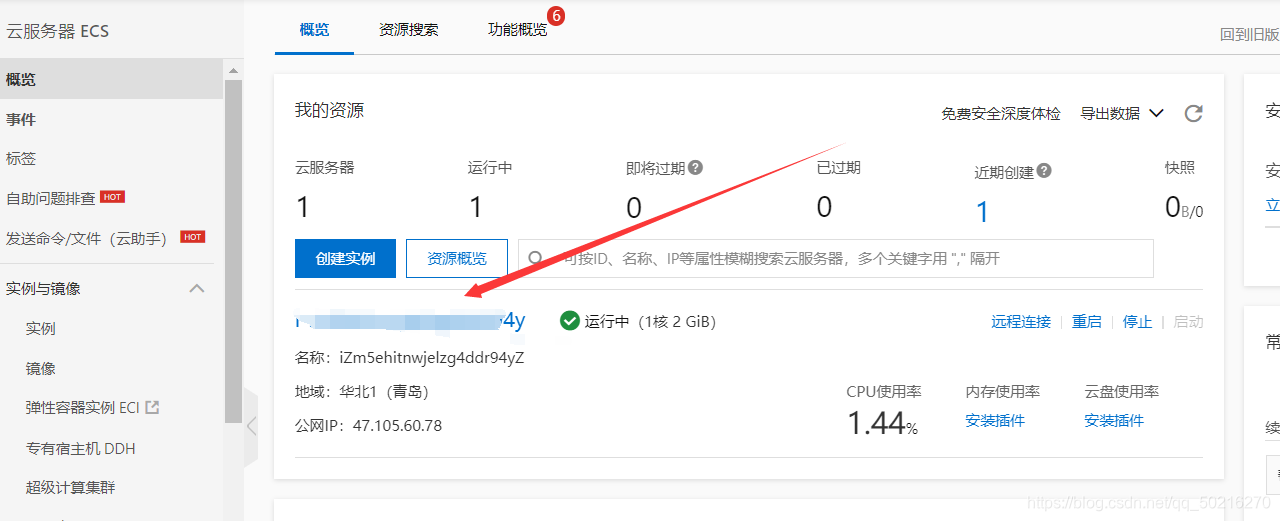
停止主机后,在全部操作里面重置密码,这里可以记下自己在公网上面的IP地址,在绑定域名之前访问时候会显示IP地址。
 重置密码。
重置密码。
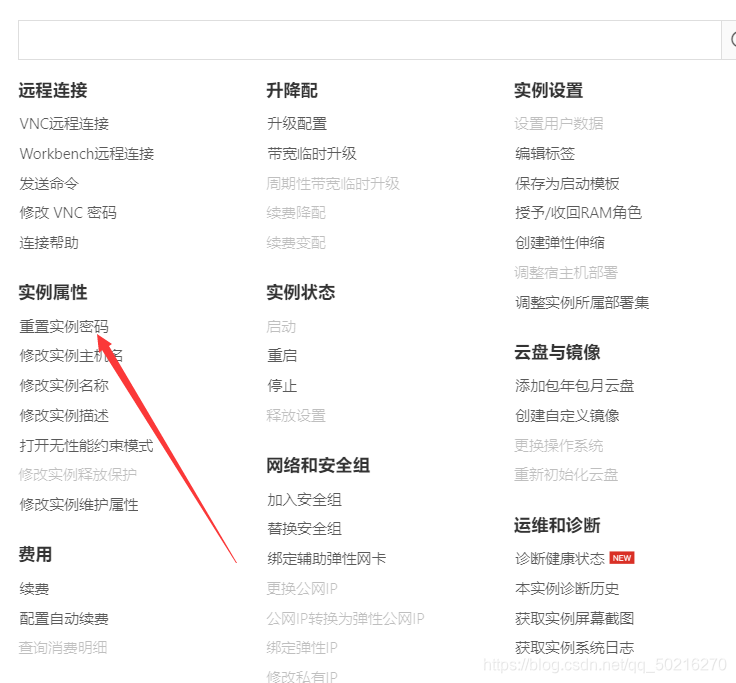
进入安全组,打开80端口和443端口。

 到这里,服务器的配置基本完成,你需要记下IP地址和密码即可。
这里推荐使用Xshell进行ssh远程连接,使用WinSCP进行文件传输,文件已经上传至博主资源,找到下载即可。
2.建立连接
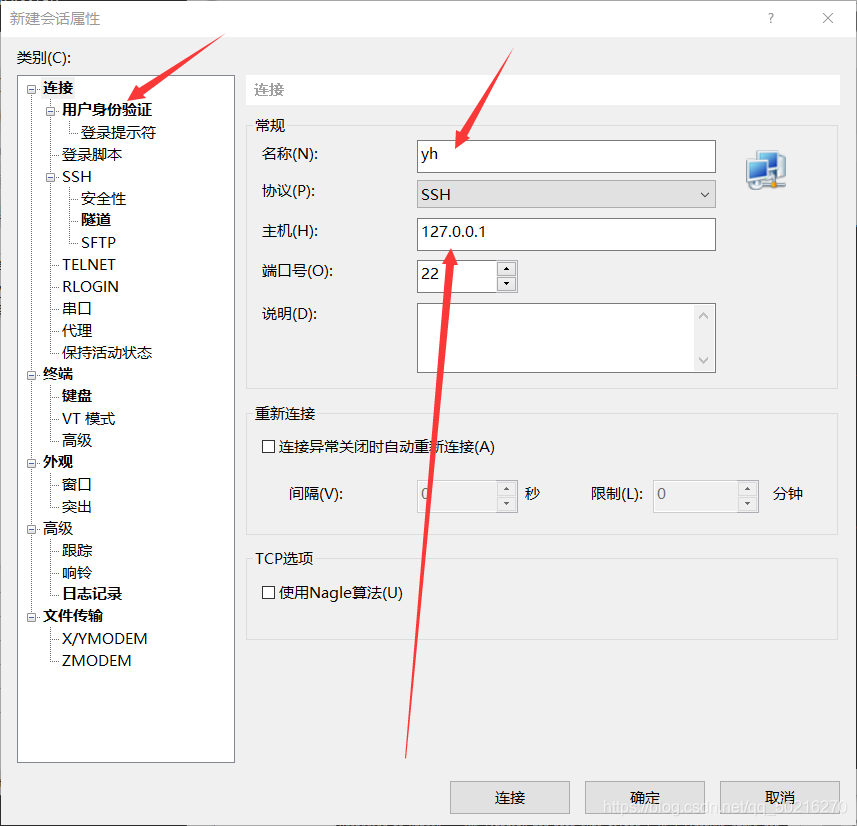
新建会话
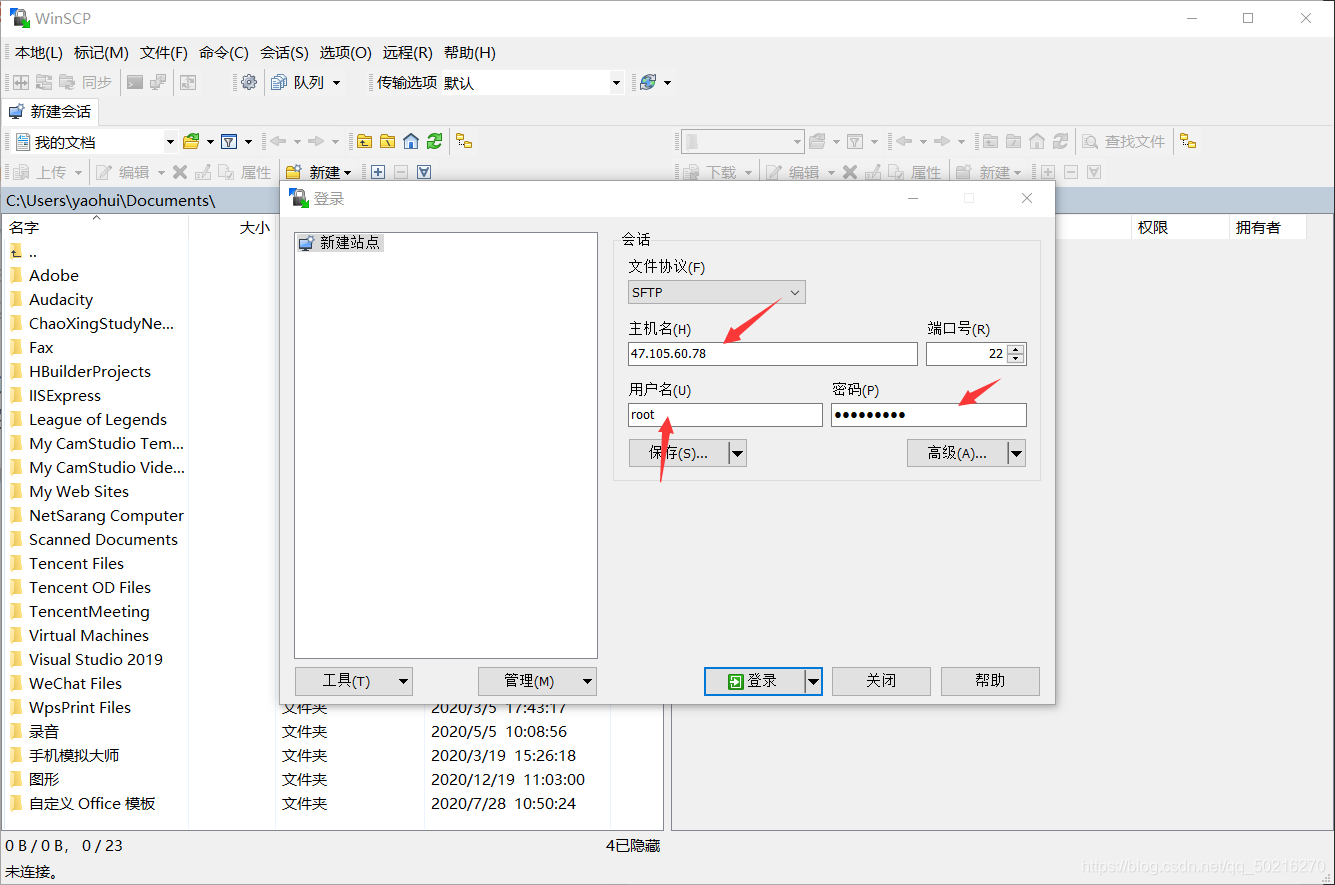
 名称随便取,主机输入刚刚申请的服务器ID,点击用户身份验证。
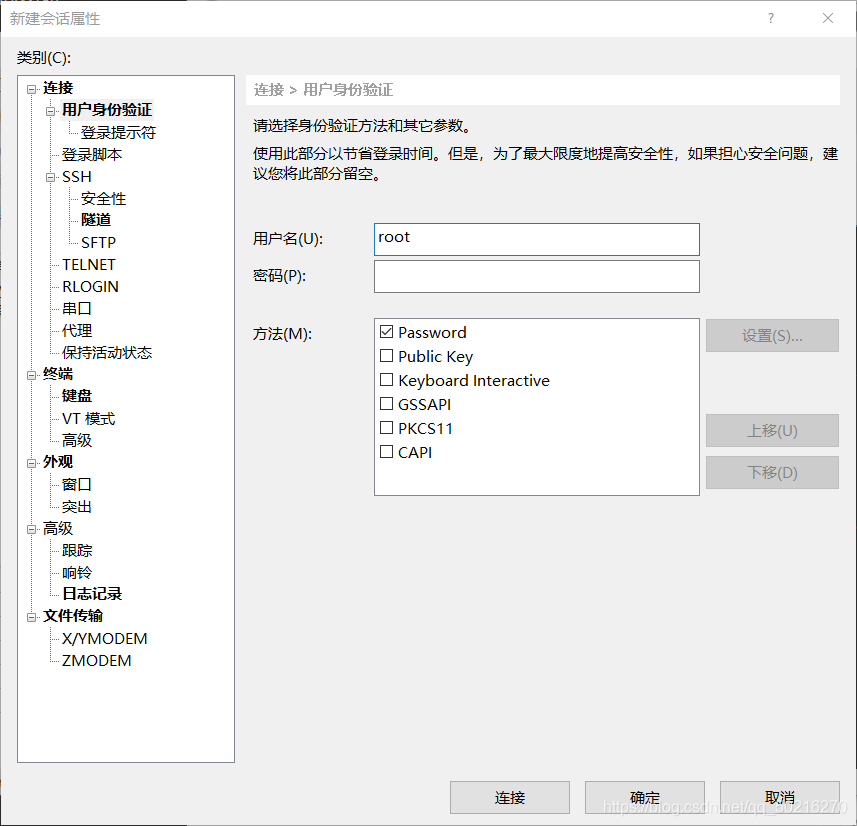
 输入用户名和密码,因为我们配置的服务器是Linux环境下的,所以用户名一般为root,密码是刚刚设置的密码。
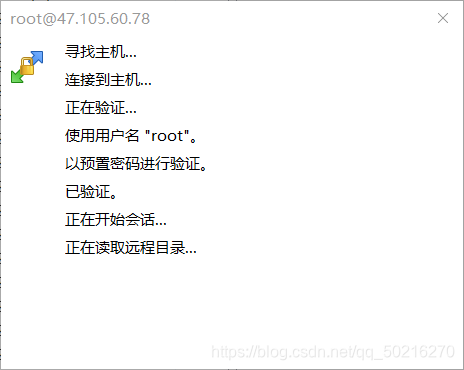
 登录成功
登录成功
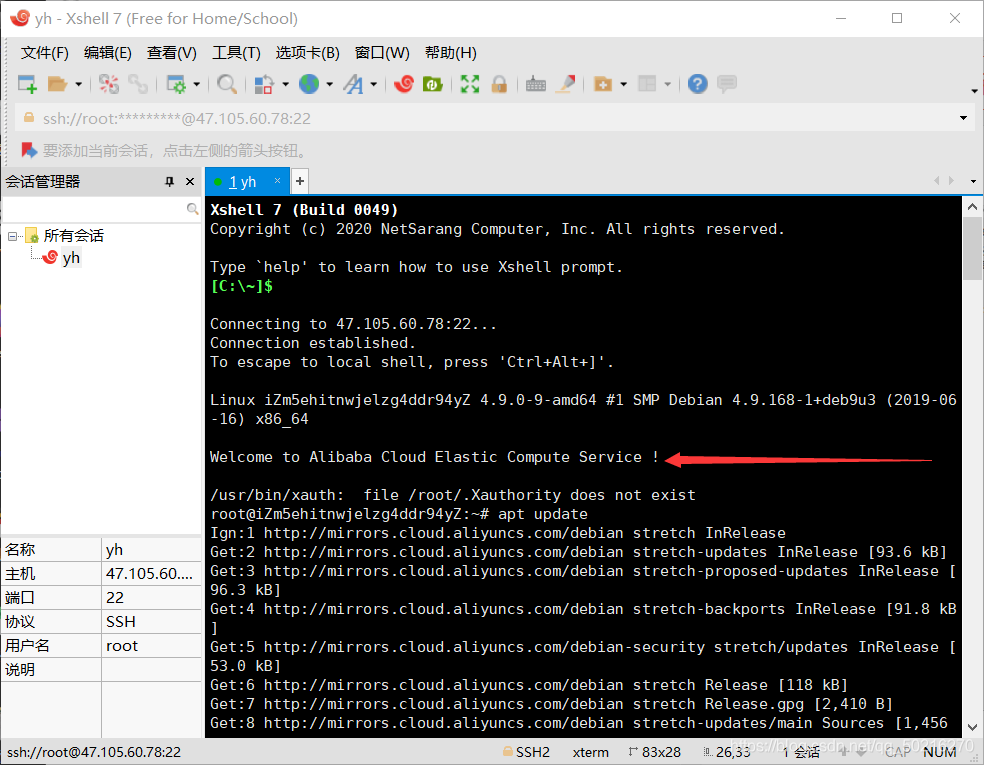 输入命令行,更新软件商店
apt update
输入命令行,下载nginx
apt install nginx
成功截图如下:
 这时候你可以试着访问一下你的IP地址,已经有一个nginx的初始界面了。
3.传输文件演示
打开WinSCP,建立站点,输入相应的信息即可。
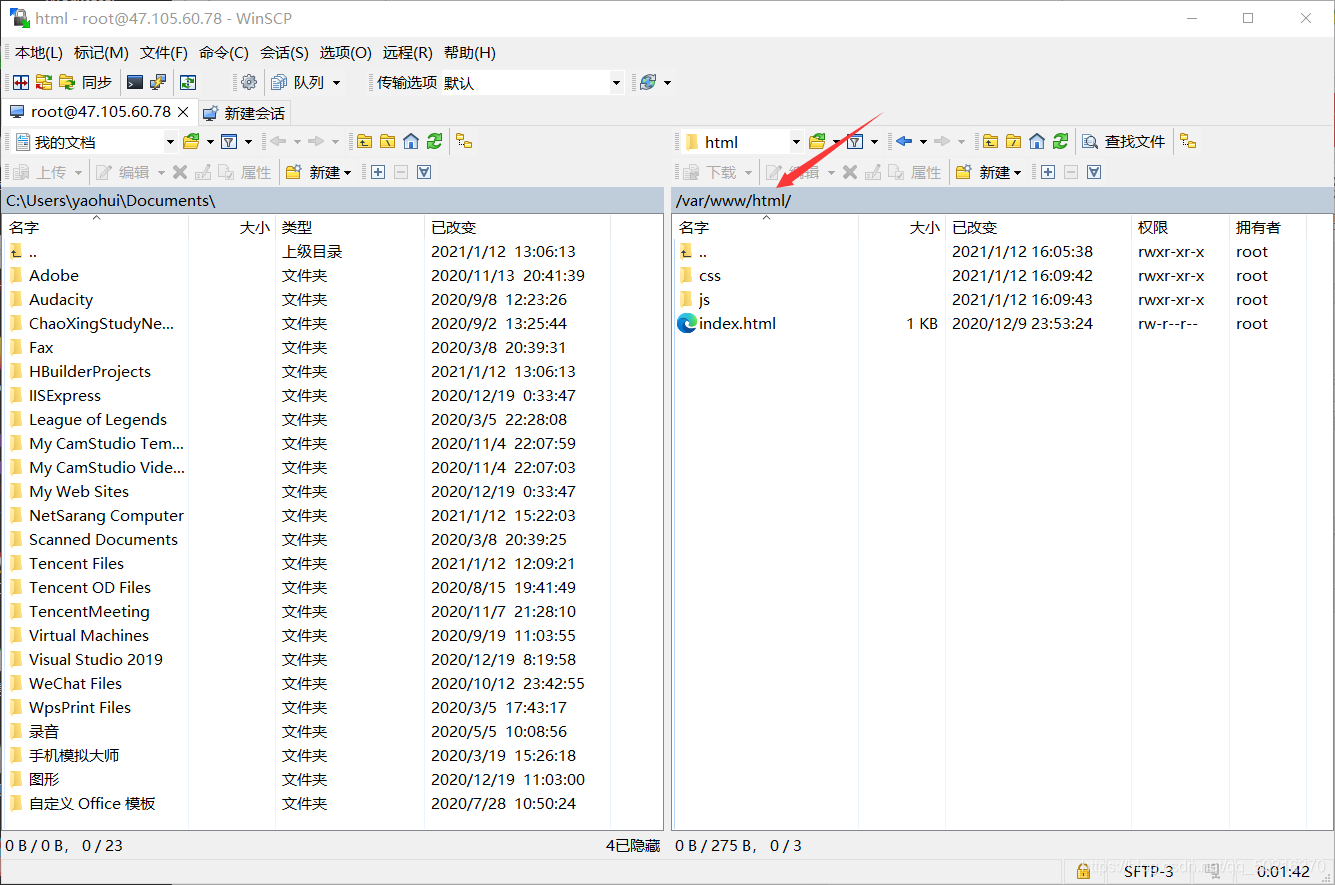
找到默认网页根目录/var/www/html,把左边的本地内容拖入右边即可。
 演示这里传的是一个大佬写的流心爱心,结果如图。
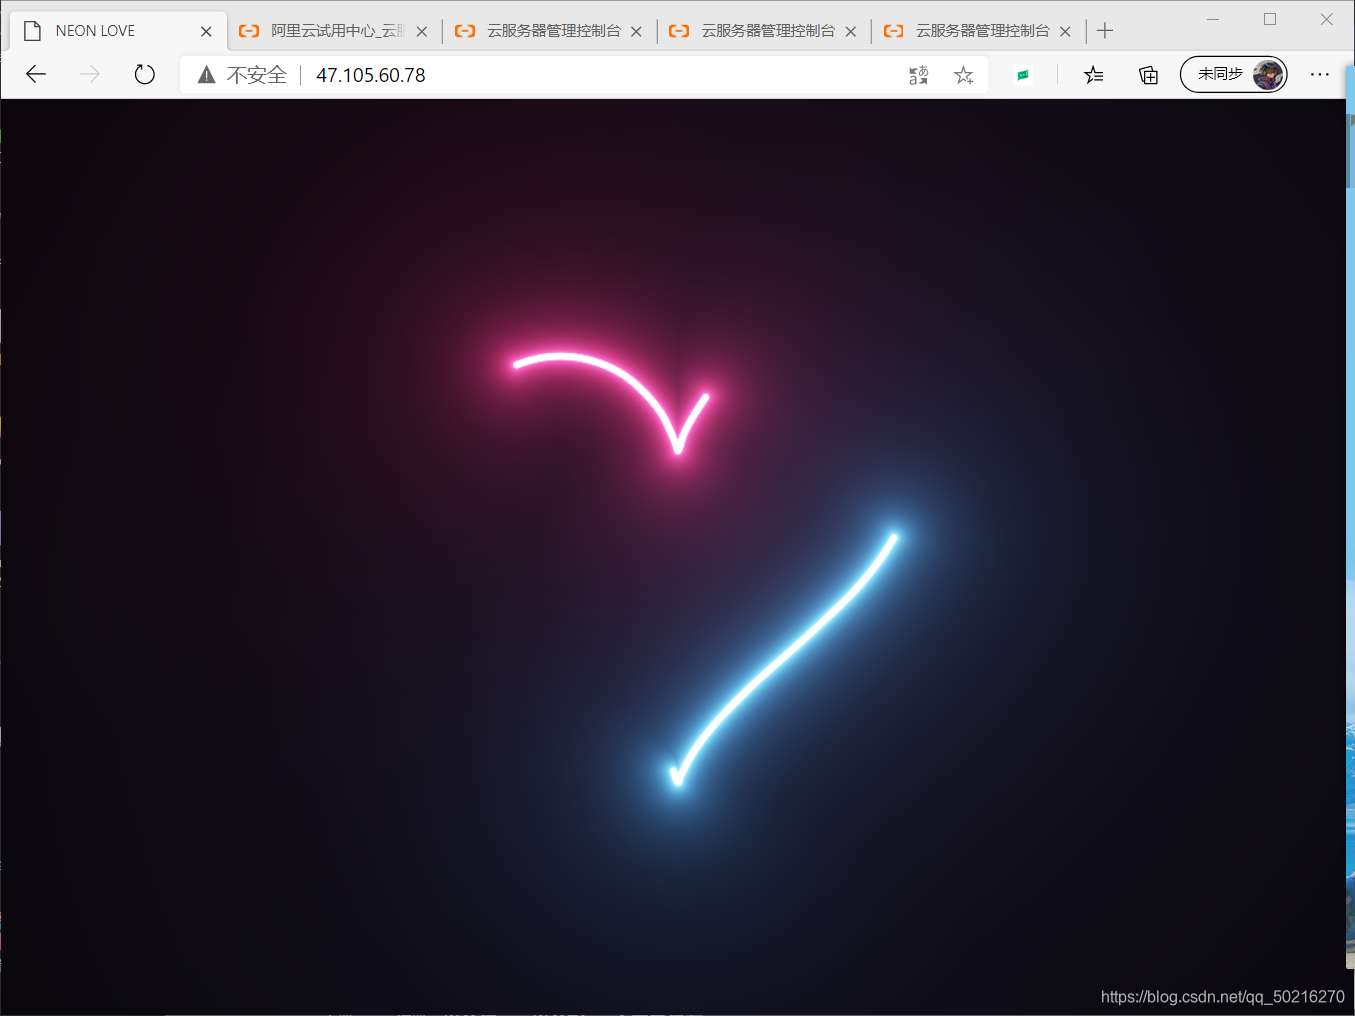 到这里,一个简单的静态网页就部署完成啦。
附上流心爱心源码:
.css
body {
  background-color: #000;
  margin: 0;
  overflow: hidden;
  background-repeat: no-repeat;
}
.js
var canvas = document.getElementById("canvas");

canvas.width = window.innerWidth;
canvas.height = window.innerHeight;

// Initialize the GL context
var gl = canvas.getContext('webgl');
if(!gl){
  console.error("Unable to initialize WebGL.");
}

//Time step
var dt = 0.015;
//Time
var time = 0.0;

//************** Shader sources **************

var vertexSource = `
attribute vec2 position;
void main() {
	gl_Position = vec4(position, 0.0, 1.0);
}
`;

var fragmentSource = `
precision highp float;

uniform float width;
uniform float height;
vec2 resolution = vec2(width, height);

uniform float time;

#define POINT_COUNT 8

vec2 points[POINT_COUNT];
const float speed = -0.5;
const float len = 0.25;
float intensity = 0.9;
float radius = 0.015;

//https://www.shadertoy.com/view/MlKcDD
//Signed distance to a quadratic bezier
float sdBezier(vec2 pos, vec2 A, vec2 B, vec2 C){
	vec2 a = B - A;
	vec2 b = A - 2.0*B + C;
	vec2 c = a * 2.0;
	vec2 d = A - pos;

	float kk = 1.0 / dot(b,b);
	float kx = kk * dot(a,b);
	float ky = kk * (2.0*dot(a,a)+dot(d,b)) / 3.0;
	float kz = kk * dot(d,a);

	float res = 0.0;

	float p = ky - kx*kx;
	float p3 = p*p*p;
	float q = kx*(2.0*kx*kx - 3.0*ky) + kz;
	float h = q*q + 4.0*p3;

	if(h >= 0.0){
		h = sqrt(h);
		vec2 x = (vec2(h, -h) - q) / 2.0;
		vec2 uv = sign(x)*pow(abs(x), vec2(1.0/3.0));
		float t = uv.x + uv.y - kx;
		t = clamp( t, 0.0, 1.0 );

		// 1 root
		vec2 qos = d + (c + b*t)*t;
		res = length(qos);
	}else{
		float z = sqrt(-p);
		float v = acos( q/(p*z*2.0) ) / 3.0;
		float m = cos(v);
		float n = sin(v)*1.732050808;
		vec3 t = vec3(m + m, -n - m, n - m) * z - kx;
		t = clamp( t, 0.0, 1.0 );

		// 3 roots
		vec2 qos = d + (c + b*t.x)*t.x;
		float dis = dot(qos,qos);

		res = dis;

		qos = d + (c + b*t.y)*t.y;
		dis = dot(qos,qos);
		res = min(res,dis);

		qos = d + (c + b*t.z)*t.z;
		dis = dot(qos,qos);
		res = min(res,dis);

		res = sqrt( res );
	}

	return res;
}


//http://mathworld.wolfram.com/HeartCurve.html
vec2 getHeartPosition(float t){
	return vec2(16.0 * sin(t) * sin(t) * sin(t),
							-(13.0 * cos(t) - 5.0 * cos(2.0*t)
							- 2.0 * cos(3.0*t) - cos(4.0*t)));
}

//https://www.shadertoy.com/view/3s3GDn
float getGlow(float dist, float radius, float intensity){
	return pow(radius/dist, intensity);
}

float getSegment(float t, vec2 pos, float offset, float scale){
	for(int i = 0; i < POINT_COUNT; i++){
		points[i] = getHeartPosition(offset + float(i)*len + fract(speed * t) * 6.28);
	}

	vec2 c = (points[0] + points[1]) / 2.0;
	vec2 c_prev;
	float dist = 10000.0;

	for(int i = 0; i < POINT_COUNT-1; i++){
		//https://tinyurl.com/y2htbwkm
		c_prev = c;
		c = (points[i] + points[i+1]) / 2.0;
		dist = min(dist, sdBezier(pos, scale * c_prev, scale * points[i], scale * c));
	}
	return max(0.0, dist);
}

void main(){
	vec2 uv = gl_FragCoord.xy/resolution.xy;
	float widthHeightRatio = resolution.x/resolution.y;
	vec2 centre = vec2(0.5, 0.5);
	vec2 pos = centre - uv;
	pos.y /= widthHeightRatio;
	//Shift upwards to centre heart
	pos.y += 0.02;
	float scale = 0.000015 * height;

	float t = time;

	//Get first segment
	float dist = getSegment(t, pos, 0.0, scale);
	float glow = getGlow(dist, radius, intensity);

	vec3 col = vec3(0.0);

	//White core
	col += 10.0*vec3(smoothstep(0.003, 0.001, dist));
	//Pink glow
	col += glow * vec3(0.94,0.14,0.4);

	//Get second segment
	dist = getSegment(t, pos, 3.4, scale);
	glow = getGlow(dist, radius, intensity);

	//White core
	col += 10.0*vec3(smoothstep(0.003, 0.001, dist));
	//Blue glow
	col += glow * vec3(0.2,0.6,1.0);

	//Tone mapping
	col = 1.0 - exp(-col);

	//Output to screen
 	gl_FragColor = vec4(col,1.0);
}
`;

//************** Utility functions **************

window.addEventListener('resize', onWindowResize, false);

function onWindowResize(){
  canvas.width  = window.innerWidth;
  canvas.height = window.innerHeight;
	gl.viewport(0, 0, canvas.width, canvas.height);
  gl.uniform1f(widthHandle, window.innerWidth);
  gl.uniform1f(heightHandle, window.innerHeight);
}


//Compile shader and combine with source
function compileShader(shaderSource, shaderType){
  var shader = gl.createShader(shaderType);
  gl.shaderSource(shader, shaderSource);
  gl.compileShader(shader);
  if(!gl.getShaderParameter(shader, gl.COMPILE_STATUS)){
  	throw "Shader compile failed with: " + gl.getShaderInfoLog(shader);
  }
  return shader;
}

//From https://codepen.io/jlfwong/pen/GqmroZ
//Utility to complain loudly if we fail to find the attribute/uniform
function getAttribLocation(program, name) {
  var attributeLocation = gl.getAttribLocation(program, name);
  if (attributeLocation === -1) {
  	throw 'Cannot find attribute ' + name + '.';
  }
  return attributeLocation;
}

function getUniformLocation(program, name) {
  var attributeLocation = gl.getUniformLocation(program, name);
  if (attributeLocation === -1) {
  	throw 'Cannot find uniform ' + name + '.';
  }
  return attributeLocation;
}

//************** Create shaders **************

//Create vertex and fragment shaders
var vertexShader = compileShader(vertexSource, gl.VERTEX_SHADER);
var fragmentShader = compileShader(fragmentSource, gl.FRAGMENT_SHADER);

//Create shader programs
var program = gl.createProgram();
gl.attachShader(program, vertexShader);
gl.attachShader(program, fragmentShader);
gl.linkProgram(program);

gl.useProgram(program);

//Set up rectangle covering entire canvas
var vertexData = new Float32Array([
  -1.0,  1.0, 	// top left
  -1.0, -1.0, 	// bottom left
   1.0,  1.0, 	// top right
   1.0, -1.0, 	// bottom right
]);

//Create vertex buffer
var vertexDataBuffer = gl.createBuffer();
gl.bindBuffer(gl.ARRAY_BUFFER, vertexDataBuffer);
gl.bufferData(gl.ARRAY_BUFFER, vertexData, gl.STATIC_DRAW);

// Layout of our data in the vertex buffer
var positionHandle = getAttribLocation(program, 'position');

gl.enableVertexAttribArray(positionHandle);
gl.vertexAttribPointer(positionHandle,
  2, 				// position is a vec2 (2 values per component)
  gl.FLOAT, // each component is a float
  false, 		// don't normalize values
  2 * 4, 		// two 4 byte float components per vertex (32 bit float is 4 bytes)
  0 				// how many bytes inside the buffer to start from
  );

//Set uniform handle
var timeHandle = getUniformLocation(program, 'time');
var widthHandle = getUniformLocation(program, 'width');
var heightHandle = getUniformLocation(program, 'height');

gl.uniform1f(widthHandle, window.innerWidth);
gl.uniform1f(heightHandle, window.innerHeight);

function draw(){
  //Update time
  time += dt;

	//Send uniforms to program
  gl.uniform1f(timeHandle, time);
  //Draw a triangle strip connecting vertices 0-4
  gl.drawArrays(gl.TRIANGLE_STRIP, 0, 4);

  requestAnimationFrame(draw);
}

draw();
.html
<!DOCTYPE html>
<html lang="en" >
<head>
<meta charset="UTF-8">
<title>NEON LOVE</title>
<link rel="stylesheet" href="css/style.css">
</head>
<body>

<canvas id="canvas" width="1400" height="600"></canvas>

<script  src="js/script.js"></script>

</body>
</html>
LNMP
LNMP是指一组通常一起使用来运行动态网站或者服务器的自由软件名称首字母缩写。L指Linux,N指Nginx,M一般指MySQL,也可以指MariaDB,P一般指PHP,也可以指Perl或Python。
下面配置MySQL和php
安装mysql和php
apt install mysql-server mysql-client    #安装mysql(MariaDB)
mysql   #默认无密码,直接进入mysql命令行
UPDATE mysql.user SET authentication_string = PASSWORD('你的密码'), plugin = 'mysql_native_password' WHERE User = 'root' AND Host = 'localhost';
FLUSH PRIVILEGES;
exit    #退出mysql
service mysql restart   #重启mysql

# 因为Debian的阿里仓库里只有php7.0,下面添加sury软件源
# 四个命令
apt -y install software-properties-common apt-transport-https lsb-release ca-certificates
wget -O /etc/apt/trusted.gpg.d/php.gpg https://mirror.xtom.com.hk/sury/php/apt.gpg
sh -c 'echo "deb https://mirror.xtom.com.hk/sury/php/ $(lsb_release -sc) main" > /etc/apt/sources.list.d/php.list'
apt-get update #更新软件源缓存
# 下面安装php7.3
apt install php7.3-fpm php7.3-mysql php7.3-curl php7.3-gd php7.3-mbstring php7.3-xml php7.3-xmlrpc php7.3-zip php7.3-opcache -y
sed -i 's/;cgi.fix_pathinfo=1/cgi.fix_pathinfo=0/' /etc/php/7.3/fpm/php.ini  #出于安全考虑
配置nginx
注释掉默认的服务器配置,添加自定义内容。
server {
        listen       80 default_server;
        listen       [::]:80 default_server;
        # 这里是本机IP,也可以写你绑定的域名
        server_name  localhost;

        # 定义网站根目录
        root         /var/www;

        # Load configuration files for the default server block.
        include /etc/nginx/default.d/*.conf;

        location / {
            # 定义首页索引文件的名称
            index index.php index.html index.htm;
        }

        error_page 404 /404.html;
            location = /40x.html {
        }

        error_page 500 502 503 504 /50x.html;
            location = /50x.html {
        }

        # PHP 脚本请求全部转发到 FastCGI处理. 使用FastCGI协议默认配置.
        # Fastcgi服务器和程序(PHP,Python)沟通的协议.
        location ~ \.php$ {
            # 设置监听端口
            fastcgi_pass   127.0.0.1:9000;
            # 设置脚本文件请求的路径
            fastcgi_param  SCRIPT_FILENAME  $document_root$fastcgi_script_name;
            # 引入fastcgi的配置文件
            include        fastcgi_params;
        }
    }
上面设置好了fastcgi去监听9000端口的php内容,下面修改php的配置文件:
编辑/etc/php/7.3/fpm/pool.d目录下的www.conf文件
将listen = balabala 换成 listen = 127.0.0.1:9000
然后重新加载nginx配置文件:
nginx -s reload
重新启动php-fpm:
service php7.3-fpm restart
下面测试一下:
在nginx设置好的根目录/var/www下,新建一个php文件,内容是:
<?php phpinfo(); ?>`
到浏览器访问一下
这样LNMP环境就搭建好了


 1084
1084


 被折叠的 条评论
为什么被折叠?
被折叠的 条评论
为什么被折叠?
 到【灌水乐园】发言


