


提示:文章写完后,目录可以自动生成,如何生成可参考右边的帮助文档
文章目录
前言
普普通通的qt学习,只学到了一些小控键
一、QT基础
1.1第一个工程
三种基类
	Qwidget			控件,所有gui的基类(我们一般开始先玩这个)
	QMain Window	主窗口类
	QDialog			对话框类
····
文件组成
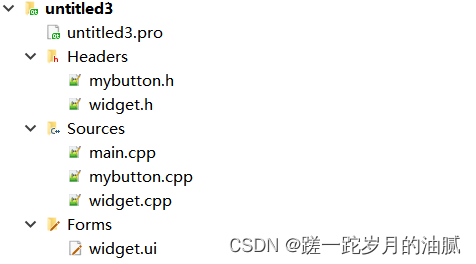
	工程文件
		后缀.pro
		包含编写的软件版本信息、工程包含的模块、可执行文件名称、工程中各类文件
		一般不需要更改,也可以在里面更改可执行文件的名称,以及添加模块。

	头文件组
		widget.h
		控件等头文件均在这里添加,完成,对象声明、槽函数声明等等,在这写好函数声明可直接转到widget.cpp添加定义,省去很多编写时间。

	源文件组
		widget.cpp
		主要的代码主要在这里完成,70%的代码都在这里,相反mian.cpp文件并不需要做太多更改
		main.cpp
		执行程序
	ui文件组
		后缀.ui
		可视化的ui界面,完成一个用户界面布局的最快方法,就是在ui文件中拖拽控件,也可以“转到槽”让我们不需要查找部件的消息。
	外部资源组
		图片,音乐等
qt快捷键
ctrl+i快速缩进
ctrl+/注释|取消注释
fn+f4头文件/源文件转换
f1打开对应的帮助文档
1.2信号与槽
		信号signal:		对象因为某种事件,发出信号
        槽slot:			信号的接受者,处理信号的对象
信号和槽是每天都遇到的东西可以说这俩就是一个通信接口
connect()函数连接信号和槽的函数
他的三种定义方式
static QMetaObject::Connection connect(const QObject *sender, const char *signal,
                    const QObject *receiver, const char *member, Qt::ConnectionType = Qt::AutoConnection);

static QMetaObject::Connection connect(const QObject *sender, const QMetaMethod &signal,
                    const QObject *receiver, const QMetaMethod &method,
                    Qt::ConnectionType type = Qt::AutoConnection);

inline QMetaObject::Connection connect(const QObject *sender, const char *signal,
                    const char *member, Qt::ConnectionType type = Qt::AutoConnection) const;
最常用的方法
connect(发送者,SIGNAL(信号),接收者,SLOT(槽函数));
二、控件
2.1小控键
按钮(普通、单选、多选)
普通按钮: QPushButton
常用信号 clicked();//按键按起来,触发
pressed();//按键按下去,触发
操作:显示文字、位置大小、修改显色、显示图片
单选按钮:
多选按钮:
输入框(单行、多行)
单行文本:QLineEdit
操作:
密文显示 .setEchoMode(QLineEdit::Password);
限制输入长度.setMaxLength(12);
设置占坑提示.setPlaceholderText(“请输入密码”);
获取输入字符串.text(); //返回一个字符串
多行文本: QTextEdit
微调框、进度条、滑块
这几个操作类似
ui->spinBoxNum->setValue(4);//初始值
ui->spinBoxNum->setMaximum(1000);//最大值
ui->spinBoxNum->setMinimum(25);//最小值
ui->spinBoxNum->setSuffix(" KG");//后缀
ui->spinBoxNum->setPrefix("# "); //前缀
下拉框、列表
2.2对话框
消息对话框
消息对话框又分为
about() information() critical() question() warning()
其实就只是对话框显示的图标不一样,让人觉得消息的严重程度不同,基本上会用一两个就可以了。
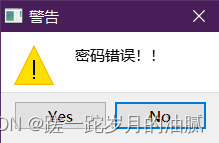
我们拿warning对话框举例
						父对象						标题
static int warning(QWidget *parent, const QString &title,
					显示提示内容
                   const QString& text,
                   按键0
                   const QString& button0Text,
                   按键1
                   const QString& button1Text = QString(),
                   按键2
                   const QString& button2Text = QString(),
                   默认选项
                   int defaultButtonNumber = 0,
                   int escapeButtonNumber = -1);
   QMessageBox::warning(this,"警告","密码错误!!",QMessageBox::Yes|QMessageBox::No,QMessageBox::No );
这几个都是差不多的
QMessageBox::about()
QMessageBox:: information()
QMessageBox::critical()
QMessageBox::question()
QMessageBox::warning()
选定(父对象、标题、提示、按钮、默认按钮)
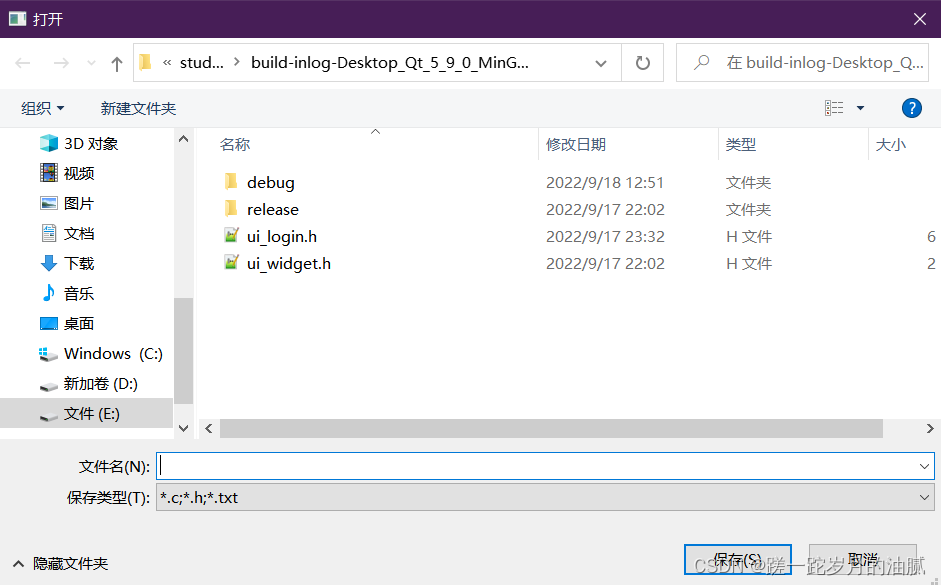
文件对话框
打开、保存、指定路径
以打开对话框为例子
 返回文件名									父对象
 static QStringList getOpenFileNames(QWidget *parent = Q_NULLPTR,
 									标题名
                                    const QString &caption = QString(),
                                    默认路径
                                    const QString &dir = QString(),
                                    过滤器
                                    const QString &filter = QString(),
                                    默认选项,可以不写
                                    QString *selectedFilter = Q_NULLPTR,
                                    Options options = Options());
QFileDialog::getSaveFileName(this,"打开","./", "*.c;*.h;*.txt");
三者几乎差不多
保存:QFileDialog::getSaveFileName
打开:QFileDialog::getOpenFileName
路径:QFileDialog::getExistingDirectory
选定(父对象、标题、默认路径)
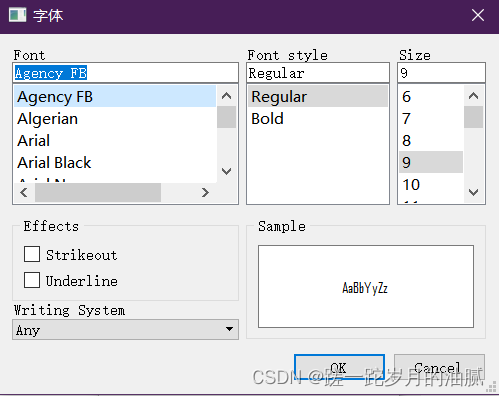
字体对话框
bool ok;
QFont font;
font = QFontDialog::getFont(&ok, font,this,"字体" );
    /*  按钮选择,点击ok,使得ok=true,反正ok=false     默认字体
static QFont getFont(bool *ok, const QFont &initial,
    父对象                         标题
    QWidget *parent = Q_NULLPTR, const QString &title = QString(),
    FontDialogOptions options = FontDialogOptions());
     */
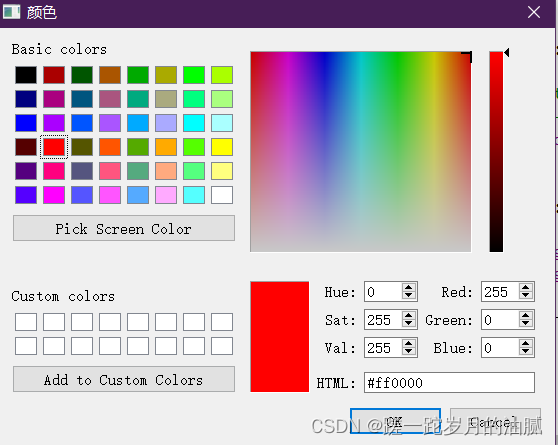
颜色对话框
原型
	返回颜色的选择(rgb值)				默认颜色
static QColor getColor(const QColor &initial = Qt::white,
						父对象
                       QWidget *parent = Q_NULLPTR,
                       标题
                       const QString &title = QString(),
                       可以不写
                       ColorDialogOptions options = ColorDialogOptions());
      QColorDialog::getColor(Qt::red,this, "颜色" );
控件常用设置
	设置可变大小:resize(widget,hight);
	设置固定大小:setFixedSize(widget,hight);
	设置空间信息(位置、大小):setGeometry(x,y,widget,hight);
	设置显示文本内容:setText(Qstring &);
三、综合项目练习
一个简易登入界面,登入成功之后实现一个简单的文本编辑器(文件的打开,字体颜色的设计)
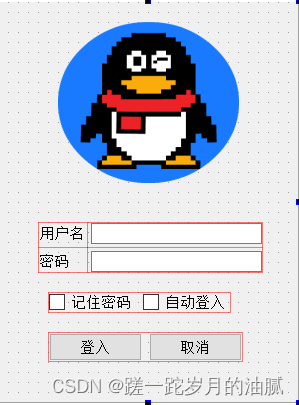
登入界面
login.cpp
#include "login.h"
#include "ui_login.h"
#include <QMessageBox>
#include <QFileDialog>
#include <QColorDialog>
#include <QFontDialog>

Login::Login(QWidget *parent) :
    QDialog(parent),
    ui(new Ui::Login)
{
    ui->setupUi(this);
    this->setWindowTitle("登入");
    this->setGeometry(400,400,300,400);
    ui->let_user->setPlaceholderText("8位字符");
    ui->let_passwd->setPlaceholderText("6位字符");
    ui->let_passwd->setEchoMode(QLineEdit::Password);
    ui->let_user->setMaxLength(8);
    ui->let_passwd->setMaxLength(6);

    connect(ui->btn_exit,SIGNAL(clicked()),this,SLOT(btnExitClickedSlotFun()));
    connect(ui->btn_log,SIGNAL(clicked()),this,SLOT(btnLogClickedSlotFun()));
}

Login::~Login()
{
    delete ui;
}

void Login::btnExitClickedSlotFun()
{
    this->close();
}

void Login::btnLogClickedSlotFun()
{
    QString passwd="123456";
    QString user="zhangsan";

    if (ui->let_user->text() == user&&ui->let_passwd->text() == passwd)
    {
        accept();
    }
    else
    {
        QMessageBox::warning(this,"警告","密码错误!!",QMessageBox::Yes|QMessageBox::No,QMessageBox::No );
    }
}
主窗口,文本编辑器
widget.cpp
#include "widget.h"
#include "ui_widget.h"
#include <QDebug>
#include <QMessageBox>
#include <QFileDialog>
#include <QColorDialog>
#include <QFontDialog>
#include <QFile>

Widget::Widget(QWidget *parent) :
    QWidget(parent),
    ui(new Ui::Widget)
{
    ui->setupUi(this);

    connect(ui->btn_Open,SIGNAL(clicked()),this,SLOT(btn_open_slotfun()));
    connect(ui->btn_Save,SIGNAL(clicked()),this,SLOT(btn_save_slotfun()));
    connect(ui->btn_Font,SIGNAL(clicked()),this,SLOT(btn_font_slotfun()));
    connect(ui->btn_Color,SIGNAL(clicked()),this,SLOT(btn_color_slotfun()));
}

Widget::~Widget()
{
    delete ui;
}

void Widget::btn_open_slotfun()
{
      QString fn =QFileDialog::getOpenFileName(this,"打开","./", "*.c;*.h;*.txt");//路径
      if(fn.isEmpty())//空
      {
          QMessageBox::warning(this,"警告","重新选择文件",QMessageBox::Yes|QMessageBox::No,QMessageBox::No );
      }
      else
      {
          qDebug()<<fn<<endl;//打印文件路径
          QFile wj(fn);
          wj.open(QIODevice::ReadOnly );
          //QByteArray
         // wj.readAll();//读取
          ui->textEdit->setText(wj.readAll());
      }
}

void Widget::btn_save_slotfun()
{
     QFileDialog::getSaveFileName(this,"保存","./", "*.c;*.h;*.txt");
}

void Widget::btn_font_slotfun()
{
    bool ok;
    QFont font;
    font = QFontDialog::getFont(&ok, font,this,"字体" );
    ui->textEdit->setFont(font);
}

void Widget::btn_color_slotfun()
{
    QColor clr = QColorDialog::getColor(Qt::red,this, "颜色" );
    ui->textEdit->setTextColor(clr);
}
main.cpp
负责登入界面跳转到编辑器界面
#include "widget.h"
#include "login.h"
#include <QApplication>

int main(int argc, char *argv[])
{
    QApplication a(argc, argv);
    Widget w;
    Login my;
    if(my.exec() == QDialog::Accepted)//显示登入,登入成功跳转
        {
           w.show();
           return a.exec();
        }
     else return 0;
}
登入界面的ui,初始化用户名和密码:zhangsan+123456
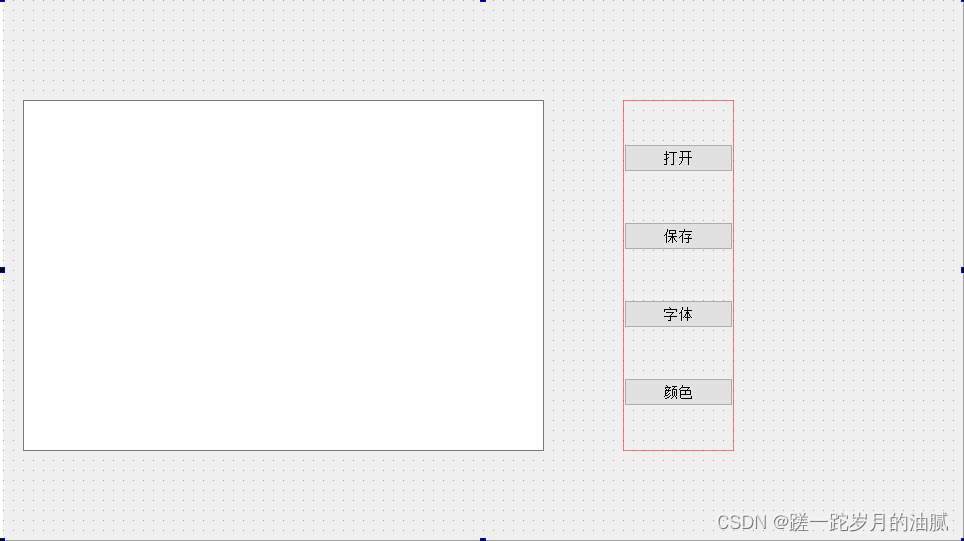
文本编辑器ui
四、总结
还没写完啊。。。。。。


 4308
4308


 被折叠的 条评论
为什么被折叠?
被折叠的 条评论
为什么被折叠?
 到【灌水乐园】发言


