


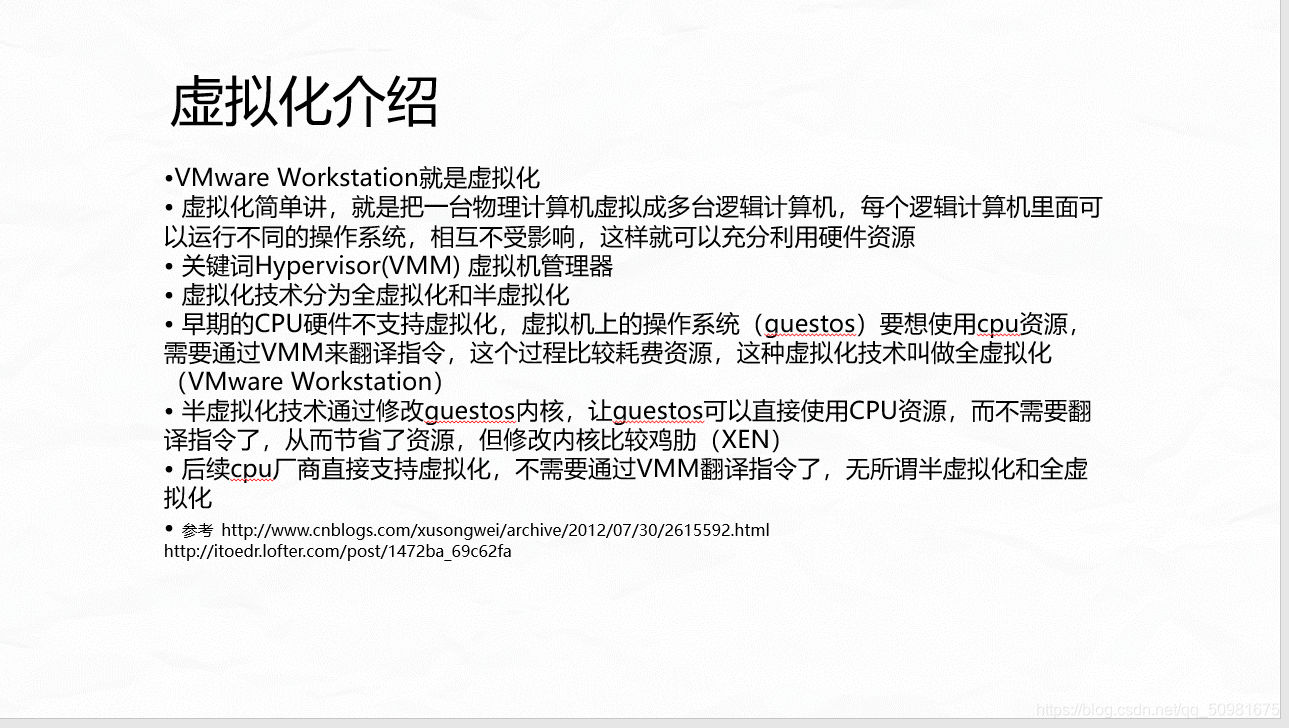
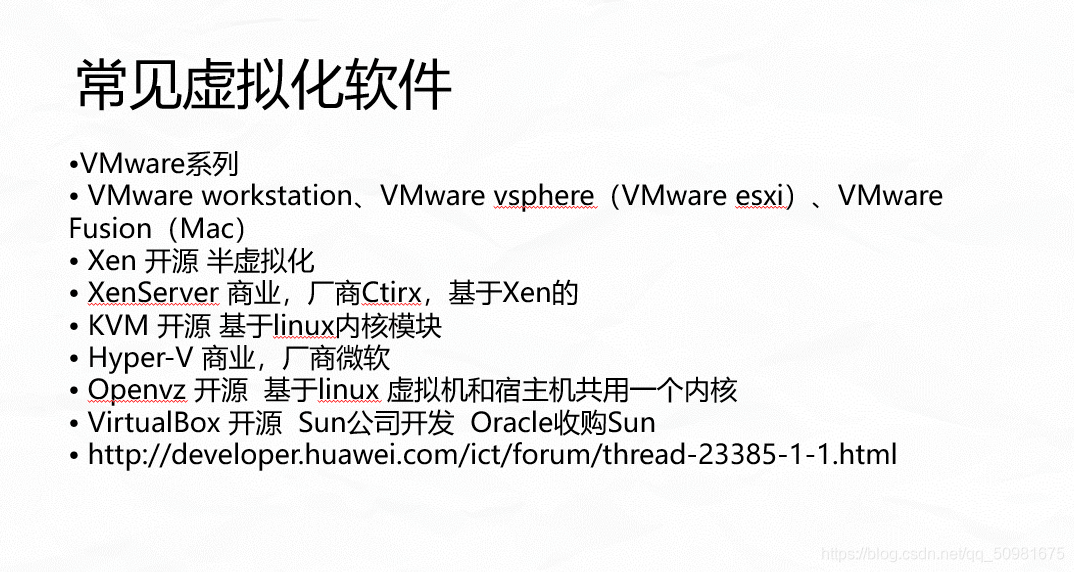
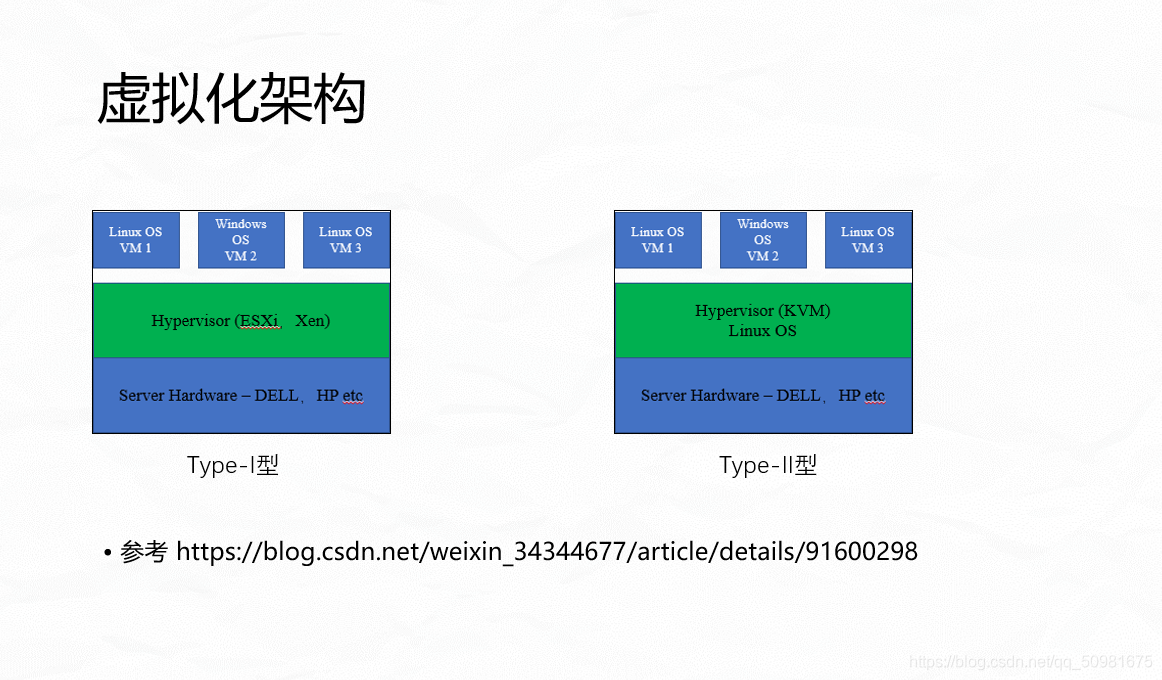
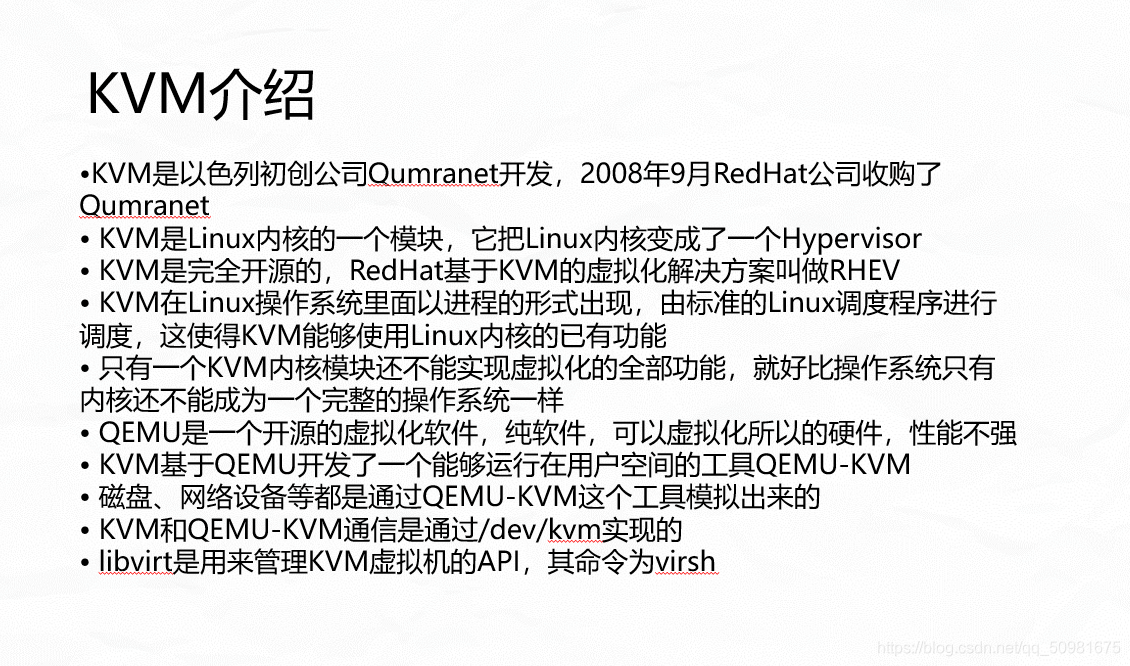
关于虚拟化的介绍

centos7安装kvm
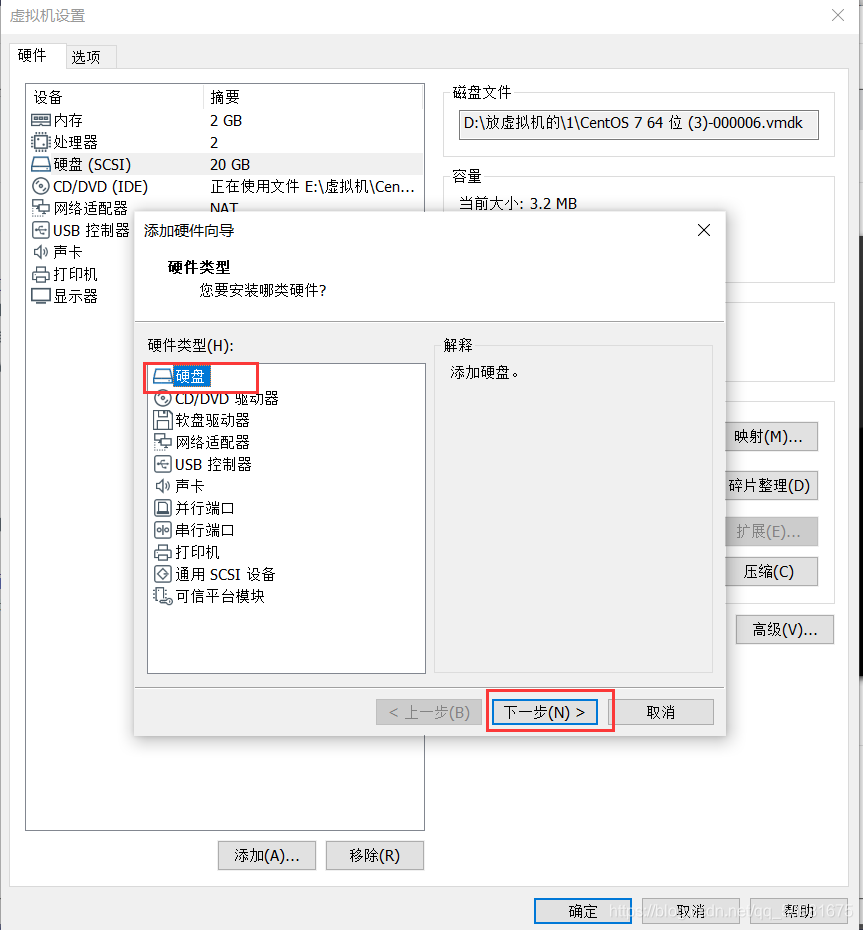
一、修改虚拟机设置
1、cup支持虚拟化
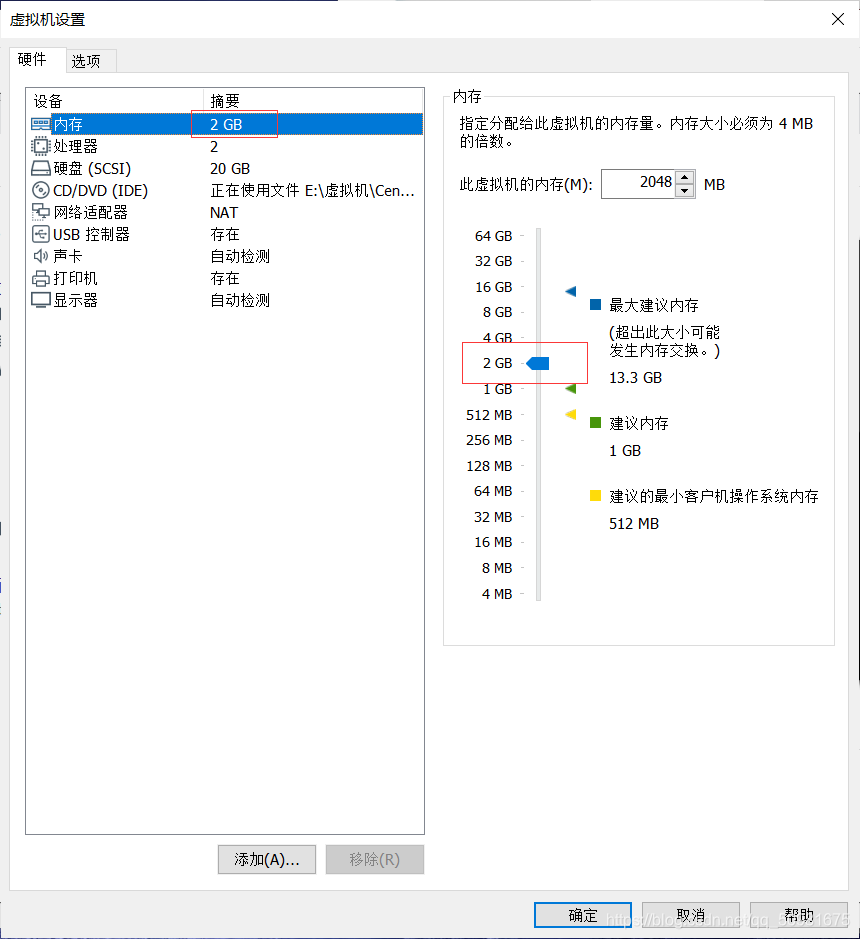
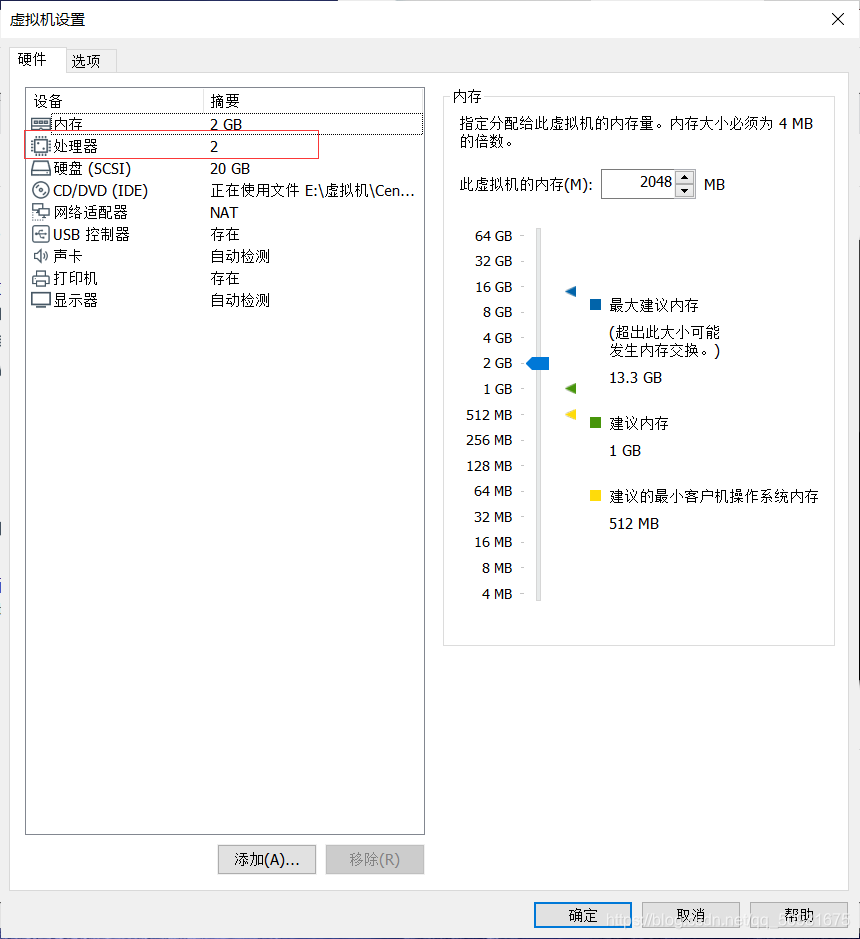
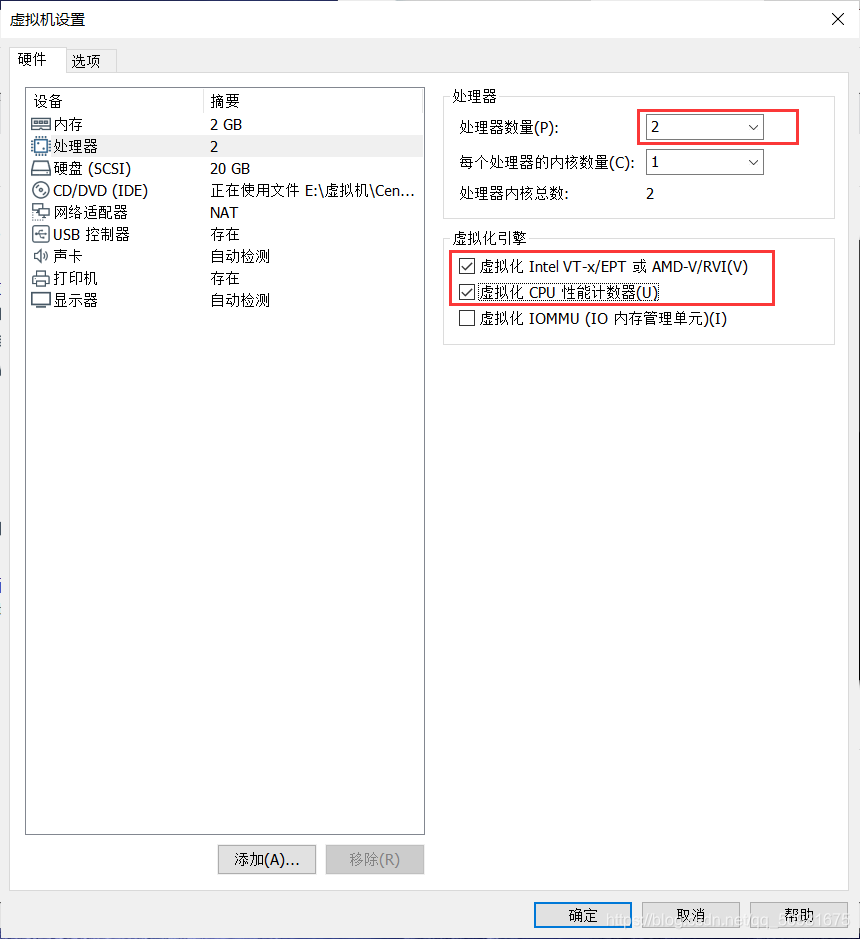
2、把虚拟机关机然后编辑虚拟机设置,设置内存至少2G,处理器2核,虚拟化引擎两个关于虚拟化的选项打上勾。
把内存设置至少2G
点击处理器
设置为2核,并狗勾选虚拟化引擎的选项
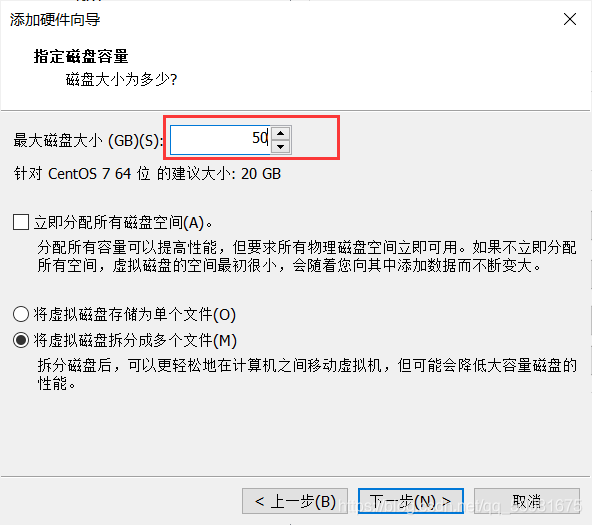
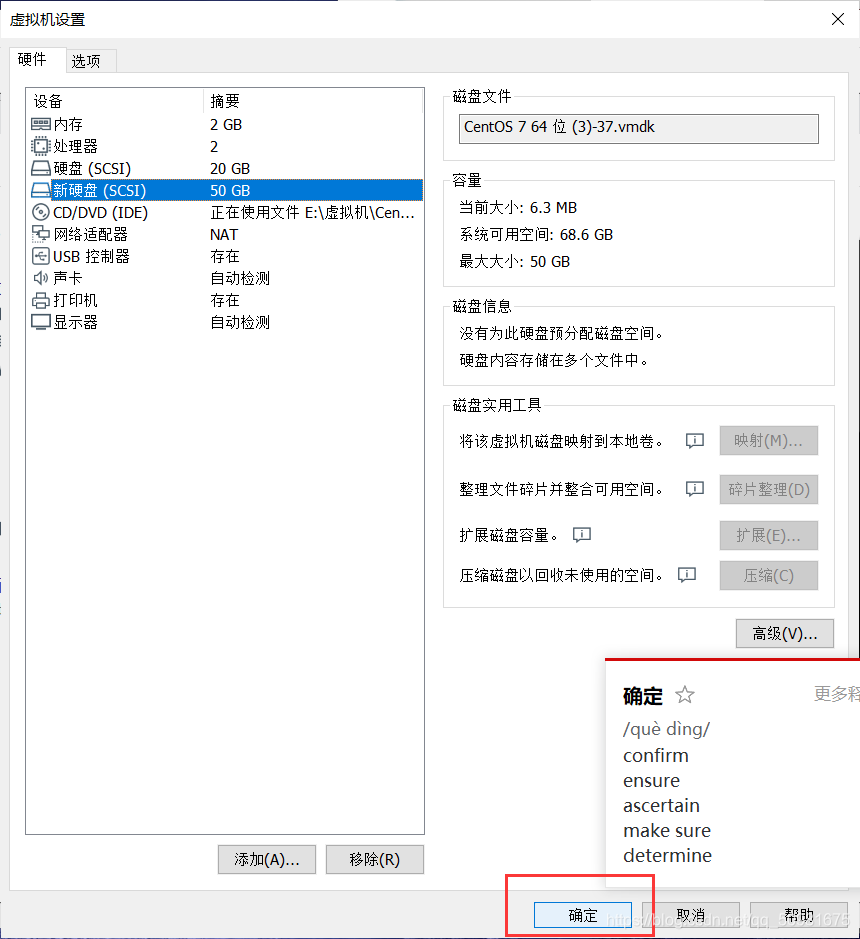
添加50G的硬盘
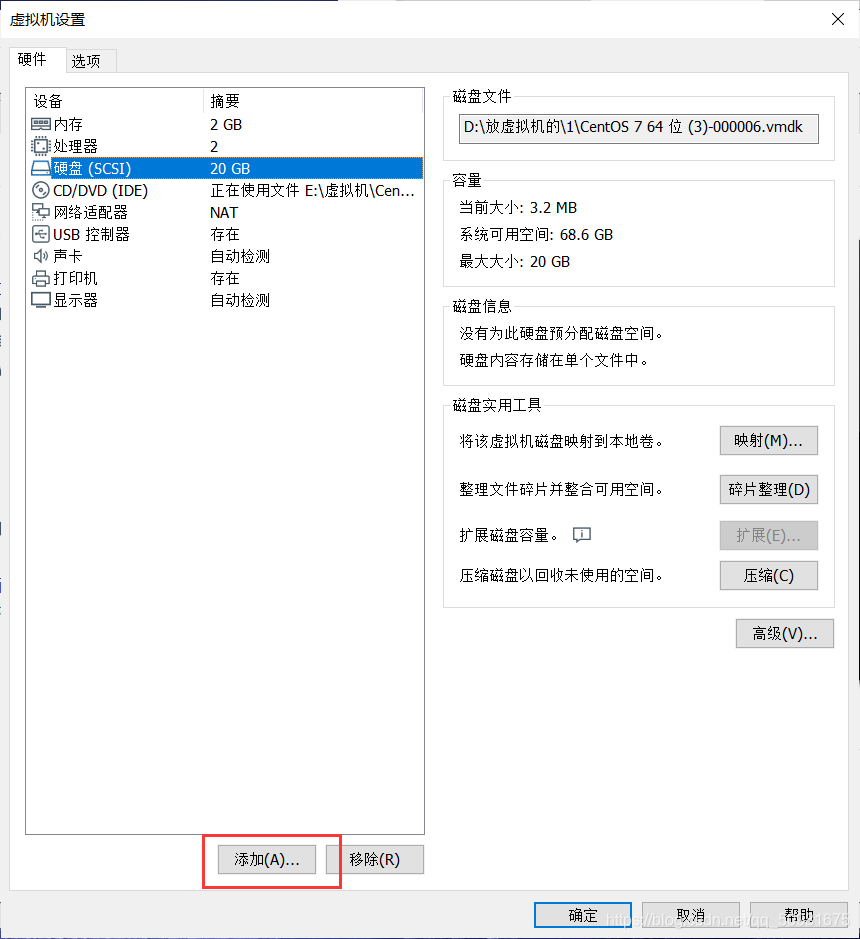
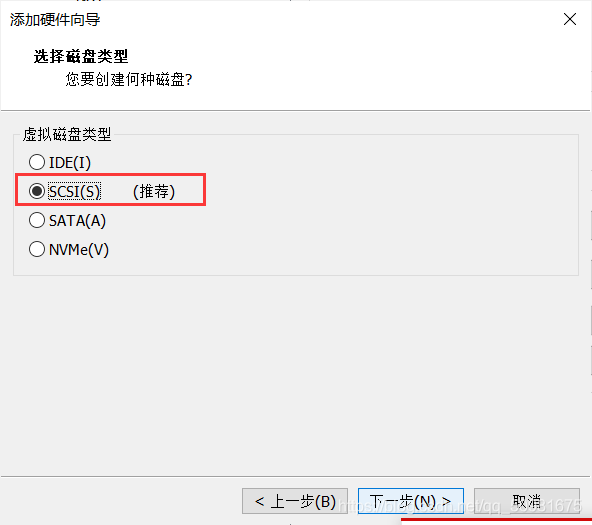
一直下一步后,到这里添加50,在下一步
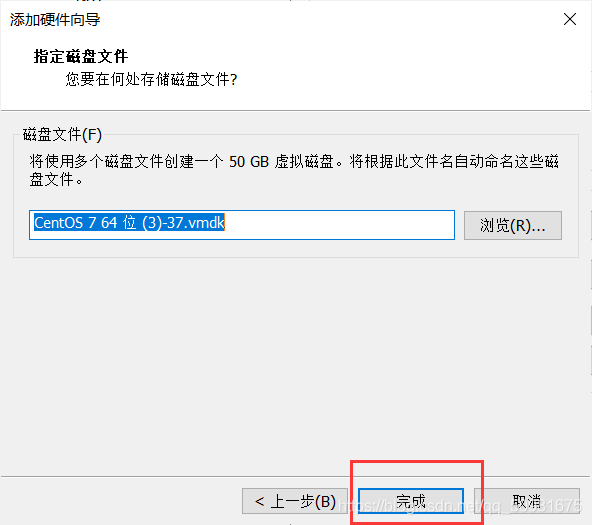
点击完成
点击确定
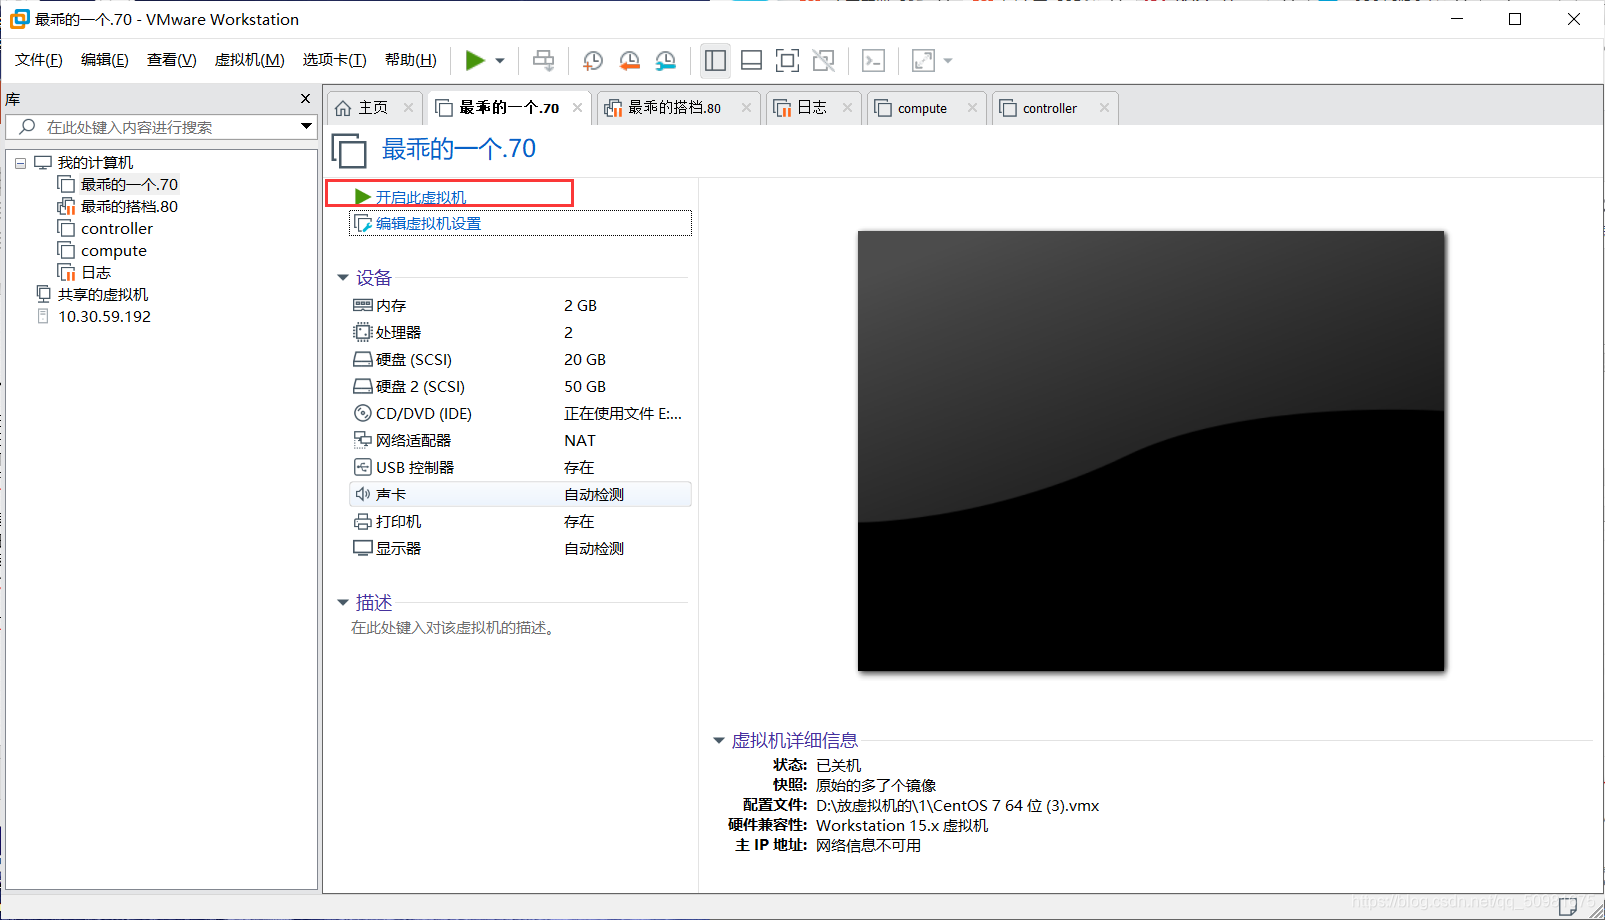
开启虚拟机
二,配置环境并安装kvm
1、改一下主机名
[root@localhost ~]# hostnamectl set-hoatname kvm
Unknown operation set-hoatname
[root@localhost ~]# hostnamectl set-hostname kvm
[root@localhost ~]# bash
[root@kvm ~]#
2、首先关闭iptables 或者firewalld ,关闭selinux
[root@kvm ~]# vi /etc/selinux/config

# This file controls the state of SELinux on the system.
# SELINUX= can take one of these three values:
#     enforcing - SELinux security policy is enforced.
#     permissive - SELinux prints warnings instead of enforcing.
#     disabled - No SELinux policy is loaded.
SELINUX=disabled
# SELINUXTYPE= can take one of three two values:
#     targeted - Targeted processes are protected,
#     minimum - Modification of targeted policy. Only selected processes are protected.
#     mls - Multi Level Security protection.
SELINUXTYPE=targeted


~
~
~
~
"/etc/selinux/config" 14L, 546C written
[root@kvm ~]# systemctl stop firewalld
[root@kvm ~]# systemctl disable firewalld
Removed symlink /etc/systemd/system/dbus-org.fedoraproject.FirewallD1.service.
Removed symlink /etc/systemd/system/basic.target.wants/firewalld.service.
[root@kvm ~]# reboot      ## 重启使规则生效
PolicyKit daemon disconnected from the bus.
We are no longer a registered authentication agent.

Last login: Wed Mar 10 17:28:57 2021 from 192.168.200.1
[root@kvm ~]# getenforce
Disabled
[root@kvm ~]#
3、格式化新磁盘,挂载到/kvm_data
[root@kvm ~]# lsblk
NAME            MAJ:MIN RM  SIZE RO TYPE MOUNTPOINT
sda               8:0    0   20G  0 disk
├─sda1            8:1    0  500M  0 part /boot
└─sda2            8:2    0 19.5G  0 part
  ├─centos-root 253:0    0 17.5G  0 lvm  /
  └─centos-swap 253:1    0    2G  0 lvm  [SWAP]
sdb               8:16   0   50G  0 disk
sr0              11:0    1    4G  0 rom
[root@kvm ~]# mkfs.ext4 /dev/sdb
mke2fs 1.42.9 (28-Dec-2013)
/dev/sdb is entire device, not just one partition!
Proceed anyway? (y,n) y
Filesystem label=
OS type: Linux
Block size=4096 (log=2)
Fragment size=4096 (log=2)
Stride=0 blocks, Stripe width=0 blocks
3276800 inodes, 13107200 blocks
655360 blocks (5.00%) reserved for the super user
First data block=0
Maximum filesystem blocks=2162163712
400 block groups
32768 blocks per group, 32768 fragments per group
8192 inodes per group
Superblock backups stored on blocks:
        32768, 98304, 163840, 229376, 294912, 819200, 884736, 1605632, 2654208,
        4096000, 7962624, 11239424

Allocating group tables: done
Writing inode tables: done
Creating journal (32768 blocks): done
Writing superblocks and filesystem accounting information: done

[root@kvm ~]# mkdir /kvm_data
[root@kvm ~]# mount /dev/sdb /kvm_data
[root@kvm ~]#
4、安装kvm
下载centos7,并且移到/tmp下
[root@kvm ~]# ll
total 4228100
-rw-------. 1 root root       1390 Nov  6 16:14 anaconda-ks.cfg
-rw-r--r--. 1 root root 4329570304 Jun  7  2019 CentOS-7-x86_64-DVD-1511.iso
[root@kvm ~]# mv CentOS-7-x86_64-DVD-1511.iso /tmp/
[root@kvm ~]# ll
total 4
-rw-------. 1 root root 1390 Nov  6 16:14 anaconda-ks.cfg
查看CPU是否支持虚拟化,只要有vmx 或者svm就表示可以
[root@kvm ~]# grep -Ei 'vmx|svm' /proc/cpuinfo
flags           : fpu vme de pse tsc msr pae mce cx8 apic sep mtrr pge mca cmov pat pse36 clflush mmx fxsr sse sse2 ss syscall nx pdpe1gb rdtscp lm constant_tsc arch_perfmon nopl xtopology tsc_reliable nonstop_tsc eagerfpu pni pclmulqdq vmx ssse3 fma cx16 pcid sse4_1 sse4_2 x2apic movbe popcnt tsc_deadline_timer aes xsave avx f16c rdrand hypervisor lahf_lm abm 3dnowprefetch arat tpr_shadow vnmi ept vpid fsgsbase tsc_adjust bmi1 avx2 smep bmi2 invpcid avx512f rdseed adx smap clflushopt avx512cd xsaveopt xsavec xsaves
flags           : fpu vme de pse tsc msr pae mce cx8 apic sep mtrr pge mca cmov pat pse36 clflush mmx fxsr sse sse2 ss syscall nx pdpe1gb rdtscp lm constant_tsc arch_perfmon nopl xtopology tsc_reliable nonstop_tsc eagerfpu pni pclmulqdq vmx ssse3 fma cx16 pcid sse4_1 sse4_2 x2apic movbe popcnt tsc_deadline_timer aes xsave avx f16c rdrand hypervisor lahf_lm abm 3dnowprefetch arat tpr_shadow vnmi ept vpid fsgsbase tsc_adjust bmi1 avx2 smep bmi2 invpcid avx512f rdseed adx smap clflushopt avx512cd xsaveopt xsavec xsaves
[root@kvm ~]# yum install -y  virt-*  libvirt  bridge-utils qemu-img
......
Replaced:
  pygobject3-base.x86_64 0:3.14.0-3.el7   rdma.noarch 0:7.2_4.1_rc6-1.el7

Complete!
三、配置网卡安装centos7
1、配置网卡
复制一份网卡文件,作为桥接网卡
[root@kvm ~]# cd /etc/sysconfig/network-scripts/
[root@kvm network-scripts]# ll
total 232
-rw-r--r--. 1 root root   352 Nov  6 16:20 ifcfg-eno16777736
-rw-r--r--. 1 root root   254 Sep 16  2015 ifcfg-lo
lrwxrwxrwx. 1 root root    24 Nov  6 16:08 ifdown -> ../../../usr/sbin/ifdown
-rwxr-xr-x. 1 root root   627 Sep 16  2015 ifdown-bnep
-rwxr-xr-x. 1 root root  5817 Sep 16  2015 ifdown-eth
-rwxr-xr-x  1 root root  6190 Oct 14 00:03 ifdown-ib
-rwxr-xr-x. 1 root root   781 Sep 16  2015 ifdown-ippp
-rwxr-xr-x. 1 root root  4201 Sep 16  2015 ifdown-ipv6
lrwxrwxrwx. 1 root root    11 Nov  6 16:08 ifdown-isdn -> ifdown-ippp
-rwxr-xr-x. 1 root root  1642 Sep 16  2015 ifdown-post
-rwxr-xr-x. 1 root root  1068 Sep 16  2015 ifdown-ppp
-rwxr-xr-x. 1 root root   837 Sep 16  2015 ifdown-routes
-rwxr-xr-x. 1 root root  1444 Sep 16  2015 ifdown-sit
-rwxr-xr-x. 1 root root  1599 Apr  2  2015 ifdown-Team
-rwxr-xr-x. 1 root root  1556 Apr  2  2015 ifdown-TeamPort
-rwxr-xr-x. 1 root root  1462 Sep 16  2015 ifdown-tunnel
lrwxrwxrwx. 1 root root    22 Nov  6 16:08 ifup -> ../../../usr/sbin/ifup
-rwxr-xr-x. 1 root root 12631 Sep 16  2015 ifup-aliases
-rwxr-xr-x. 1 root root   859 Sep 16  2015 ifup-bnep
-rwxr-xr-x. 1 root root 11721 Sep 16  2015 ifup-eth
-rwxr-xr-x  1 root root 10357 Oct 14 00:03 ifup-ib
-rwxr-xr-x. 1 root root 12039 Sep 16  2015 ifup-ippp
-rwxr-xr-x. 1 root root 10430 Sep 16  2015 ifup-ipv6
lrwxrwxrwx. 1 root root     9 Nov  6 16:08 ifup-isdn -> ifup-ippp
-rwxr-xr-x. 1 root root   642 Sep 16  2015 ifup-plip
-rwxr-xr-x. 1 root root  1043 Sep 16  2015 ifup-plusb
-rwxr-xr-x. 1 root root  2609 Sep 16  2015 ifup-post
-rwxr-xr-x. 1 root root  4154 Sep 16  2015 ifup-ppp
-rwxr-xr-x. 1 root root  1925 Sep 16  2015 ifup-routes
-rwxr-xr-x. 1 root root  3263 Sep 16  2015 ifup-sit
-rwxr-xr-x. 1 root root  1755 Apr  2  2015 ifup-Team
-rwxr-xr-x. 1 root root  1876 Apr  2  2015 ifup-TeamPort
-rwxr-xr-x. 1 root root  2682 Sep 16  2015 ifup-tunnel
-rwxr-xr-x. 1 root root  1740 Sep 16  2015 ifup-wireless
-rwxr-xr-x. 1 root root  4623 Sep 16  2015 init.ipv6-global
-rw-r--r--. 1 root root 15322 Sep 16  2015 network-functions
-rw-r--r--. 1 root root 26134 Sep 16  2015 network-functions-ipv6
[root@kvm network-scripts]# cp ifcfg-eno16777736 ifcfg-br0
编辑网卡文件
[root@kvm network-scripts]# cat ifcfg-br0
TYPE=bridge
BOOTPROTO=none
NAME=br0
DEVICE=br0
ONBOOT=yes
IPADDR=192.168.200.70
PREFIX=24
GATEWAY=192.168.200.2
DNS1=114.114.114.114
DNS2=8.8.8.8
[root@kvm network-scripts]# cat ifcfg-eno16777736
TYPE=Ethernet
BOOTPROTO=none
NAME=eno16777736
DEVICE=eno16777736
ONBOOT=yes
BRIDGE=br0
重启网络,查看可以看到网卡ifcfg-br0地址有了,而ifcfg-eno16777736没有
[root@kvm network-scripts]# systemctl restart network
[root@kvm network-scripts]# ip a
1: lo: <LOOPBACK,UP,LOWER_UP> mtu 65536 qdisc noqueue state UNKNOWN
    link/loopback 00:00:00:00:00:00 brd 00:00:00:00:00:00
    inet 127.0.0.1/8 scope host lo
       valid_lft forever preferred_lft forever
    inet6 ::1/128 scope host
       valid_lft forever preferred_lft forever
2: eno16777736: <BROADCAST,MULTICAST,UP,LOWER_UP> mtu 1500 qdisc pfifo_fast master br0 state UP qlen 1000
    link/ether 00:0c:29:a8:a1:51 brd ff:ff:ff:ff:ff:ff
3: br0: <BROADCAST,MULTICAST,UP,LOWER_UP> mtu 1500 qdisc noqueue state UP
    link/ether 00:0c:29:a8:a1:51 brd ff:ff:ff:ff:ff:ff
    inet 192.168.200.70/24 brd 192.168.200.255 scope global br0
       valid_lft forever preferred_lft forever
    inet6 fe80::20c:29ff:fea8:a151/64 scope link
       valid_lft forever preferred_lft forever
可以查看有两个网卡br0和virbr0
[root@kvm ~]# brctl show
bridge name     bridge id               STP enabled     interfaces
br0             8000.000c29a8a151       no              eno16777736
virbr0          8000.000000000000       yes
安装出错,根据博友https://blog.51cto.com/7308842/2395997?source=dra的博客提示,安装openssl后就可以了
[root@kvm ~]# virt-install --name=test --memory=512,maxmemory=1024 --vcpus=1,maxvcpus=2 --os-type=linux --os-variant=rhel7 --location=/tmp/CentOS-7-x86_64-DVD-1511.iso --disk path=/kvm_data/test.img,size=10 --bridge=br0 --graphics=none --console=pty,target_type=serial  --extra-args="console=tty0 console=ttyS0"
ERROR    Host does not support any virtualization options
[root@kvm ~]# yum install -y openssl
--name:指定虚拟机的名称。
--memory:指定分配给虚拟机的内存资源大小。
maxmemory:指定可调节的最大内存资源大小,因为KVM支持热调整虚拟机的资源。
--vcpus:指定分配给虚拟机的CPU核心数量。
maxvcpus:指定可调节的最大CPU核心数量。
--os-type:指定虚拟机安装的操作系统类型。
--os-variant:指定系统的发行版本。
--location:指定ISO镜像文件所在的路径,支持使用网络资源路径,也就是说可以使用URL。
--disk path:指定虚拟硬盘所存放的路径及名称,size则是指定该硬盘的可用大小,单位是G。
--bridge:指定使用哪一个桥接网卡,也就是说使用桥接的网络模式。
--graphics:指定是否开启图形。
--console:定义终端的属性,target_type 则是定义终端的类型。
--extra-args:定义终端额外的参数。
[root@kvm ~]# virt-install --name=test --memory=512,maxmemory=1024 --vcpus=1,maxvcpus=2 --os-type=linux --os-variant=rhel7 --location=/tmp/CentOS-7-x86_64-DVD-1511.iso --disk path=/kvm_data/test.img,size=10 --bridge=br0 --graphics=none --console=pty,target_type=serial  --extra-args="console=tty0 console=ttyS0"

Starting install...
Retrieving file .treeinfo...                           | 1.1 kB  00:00
Retrieving file vmlinuz...                             | 4.9 MB  00:00
Retrieving file initrd.img...                          |  37 MB  00:00
Allocating 'test.img'                                  |  10 GB  00:00
Connected to domain test
Escape character is ^]
[    0.000000] Initializing cgroup subsys cpuset
[    0.000000] Initializing cgroup subsys cpu
[    0.000000] Initializing cgroup subsys cpuacct
[    0.000000] Linux version 3.10.0-327.el7.x86_64 (builder@kbuilder.dev.centos.org) (gcc version 4.8.3 20140911 (Red Hat 4.8.3-9) (GCC) ) #1 SMP Thu Nov 19 22:10:57 UTC 2015
[    0.000000] Command line: console=tty0 console=ttyS0
[    0.000000] e820: BIOS-provided physical RAM map:
[    0.000000] BIOS-e820: [mem 0x0000000000000000-0x000000000009fbff] usable
[    0.000000] BIOS-e820: [mem 0x000000000009fc00-0x000000000009ffff] reserved
......
Starting installer, one moment...

anaconda 21.48.22.56-1 for CentOS 7 started.
 * installation log files are stored in /tmp during the installation
 * shell is available on TTY2
 * when reporting a bug add logs from /tmp as separate text/plain attachmen10:55:25 Not asking for VNC because we don't have a network
======================================================================================================================================================Installation

 1) [x] Language settings                 2) [!] Timezone settings
        (English (United States))                (Timezone is not set.)
 3) [!] Installation source               4) [!] Software selection
        (Processing...)                          (Processing...)
 5) [!] Installation Destination          6) [x] Kdump
        (No disks selected)                      (Kdump is enabled)
 7) [ ] Network configuration             8) [!] Root password
        (Not connected)                          (Password is not set.)
 9) [!] User creation
        (No user will be created)
  Please make your choice from above ['q' to quit | 'b' to begin installation |  1
  'r' to refresh]: 2:shell  3:log  4:storage-lo> Switch tab: Alt+Tab | Help: F1
     ## 选择1安装语言
     Language settings

Available languages
 1)  Afrikaans             25)  Hindi                 48)  Oriya
 2)  Amharic               26)  Croatian              49)  Punjabi
 3)  Arabic                27)  Hungarian             50)  Polish
 4)  Assamese              28)  Interlingua           51)  Portuguese
 5)  Asturian              29)  Indonesian            52)  Romanian
 6)  Belarusian            30)  Icelandic             53)  Russian
 7)  Bulgarian             31)  Italian               54)  Sinhala
 8)  Bengali               32)  Japanese              55)  Slovak
 9)  Bosnian               33)  Georgian              56)  Slovenian
10)  Catalan               34)  Kazakh                57)  Albanian
11)  Czech                 35)  Kannada               58)  Serbian
12)  Welsh                 36)  Korean                59)  Swedish
13)  Danish                37)  Lithuanian            60)  Tamil
14)  German                38)  Latvian               61)  Telugu
15)  Greek                 39)  Maithili              62)  Tajik
16)  English               40)  Macedonian            63)  Thai
17)  Spanish               41)  Malayalam             64)  Turkish
18)  Estonian              42)  Marathi               65)  Ukrainian
19)  Basque                43)  Malay                 66)  Urdu
20)  Persian               44)  Norwegian Bokmål      67)  Vietnamese
21)  Finnish               45)  Nepali                68)  Chinese
22)  French                46)  Dutch                 69)  Zulu
Press ENTER to continue
23)  Galician              47)  Northern Sotho
24)  Gujarati
Please select language support to install.
[b to return to language list, c to continue, q to quit]: 68
##中间需要回车一次让其他的都显示出来, 选择68安装 Chinese语言
Language settings

Available locales
 1)  Simplified Chinese     3)  Traditional Chinese    4)  Simplified Chinese
     (China)                     (Hong Kong)               (Singapore)
 2)  Traditional Chinese
      (Republic of China
     )
Please select language support to install.
[b to return to language list, c to continue, q to quit]: 1
: F1
### 选择1简体中文
Installation

 1) [x] Language settings                 2) [!] Timezone settings
        (Simplified Chinese (China))             (Timezone is not set.)
 3) [x] Installation source               4) [!] Software selection
        (Local media)                            (Minimal Install)
 5) [!] Installation Destination          6) [x] Kdump
        (No disks selected)                      (Kdump is enabled)
 7) [ ] Network configuration             8) [!] Root password
        (Not connected)                          (Password is not set.)
 9) [!] User creation
        (No user will be created)
  Please make your choice from above ['q' to quit | 'b' to begin installation |
  'r' to refresh]:  2
  ## 选择2设置时区
  Timezone settings

Available regions
 1)  Africa                 6)  Atlantic              10)  Pacific
 2)  America                7)  Australia             11)  US
 3)  Antarctica             8)  Europe                12)  Etc
 4)  Arctic                 9)  Indian
 5)  Asia
Please select the timezone.
Use numbers or type names directly [b to region list, q to quit]:
: F1
## 选择5亚洲
1)  Aden                  28)  Irkutsk               54)  Pyongyang
 2)  Almaty                29)  Jakarta               55)  Qatar
 3)  Amman                 30)  Jayapura              56)  Qyzylorda
 4)  Anadyr                31)  Jerusalem             57)  Rangoon
 5)  Aqtau                 32)  Kabul                 58)  Riyadh
 6)  Aqtobe                33)  Kamchatka             59)  Sakhalin
 7)  Ashgabat              34)  Karachi               60)  Samarkand
 8)  Baghdad               35)  Kathmandu             61)  Seoul
 9)  Bahrain               36)  Khandyga              62)  Shanghai
10)  Baku                  37)  Kolkata               63)  Singapore
11)  Bangkok               38)  Krasnoyarsk           64)  Srednekolymsk
12)  Beirut                39)  Kuala_Lumpur          65)  Taipei
13)  Bishkek               40)  Kuching               66)  Tashkent
14)  Brunei                41)  Kuwait                67)  Tbilisi
15)  Chita                 42)  Macau                 68)  Tehran
16)  Choibalsan            43)  Magadan               69)  Thimphu
17)  Colombo               44)  Makassar              70)  Tokyo
18)  Damascus              45)  Manila                71)  Ulaanbaatar
19)  Dhaka                 46)  Muscat                72)  Urumqi
20)  Dili                  47)  Nicosia               73)  Ust-Nera
21)  Dubai                 48)  Novokuznetsk          74)  Vientiane
22)  Dushanbe              49)  Novosibirsk           75)  Vladivostok
Press ENTER to continue
23)  Gaza                  50)  Omsk                  76)  Yakutsk
24)  Hebron                51)  Oral                  77)  Yekaterinburg
25)  Ho_Chi_Minh           52)  Phnom_Penh            78)  Yerevan
26)  Hong_Kong             53)  Pontianak
27)  Hovd
Please select the timezone.
Use numbers or type names directly [b to region list, q to quit]:  62
## 选择62上海
Installation

 1) [x] Language settings                 2) [x] Timezone settings
        (Simplified Chinese (China))             (Asia/Shanghai timezone)
 3) [x] Installation source               4) [x] Software selection
        (Local media)                            (Minimal Install)
 5) [!] Installation Destination          6) [x] Kdump
        (No disks selected)                      (Kdump is enabled)
 7) [ ] Network configuration             8) [!] Root password
        (Not connected)                          (Password is not set.)
 9) [!] User creation
        (No user will be created)
  Please make your choice from above ['q' to quit | 'b' to begin installation |
  'r' to refresh]: 5
  ## 选择5安装的目标
   Probing storage...
Installation Destination

[x] 1) : 10 GiB (vda)

1 disk selected; 10 GiB capacity; 10 GiB free ...

  Please make your choice from above ['q' to quit | 'c' to continue |
  'r' to refresh]: c    ## 选择c继续,
================================================================================
================================================================================
Autopartitioning Options

[ ] 1) Replace Existing Linux system(s)

[x] 2) Use All Space

[ ] 3) Use Free Space

Installation requires partitioning of your hard drive. Select what space to use
for the install target.

  Please make your choice from above ['q' to quit | 'c' to continue |
  'r' to refresh]: c  ## 继续
================================================================================
================================================================================
Partition Scheme Options

[ ] 1) Standard Partition

[ ] 2) Btrfs

[x] 3) LVM

[ ] 4) LVM Thin Provisioning

Select a partition scheme configuration.

  Please make your choice from above ['q' to quit | 'c' to continue |
  'r' to refresh]: 1  ## 标准分区
================================================================================
================================================================================
Partition Scheme Options

[x] 1) Standard Partition

[ ] 2) Btrfs

[ ] 3) LVM

[ ] 4) LVM Thin Provisioning

Select a partition scheme configuration.

  Please make your choice from above ['q' to quit | 'c' to continue |
  'r' to refresh]: c    ## 继续
Generating updated storage configuration
Checking storage configuration...
================================================================================
================================================================================
Installation

 1) [x] Language settings                 2) [x] Timezone settings
        (Simplified Chinese (China))             (Asia/Shanghai timezone)
 3) [x] Installation source               4) [x] Software selection
        (Local media)                            (Minimal Install)
 5) [x] Installation Destination          6) [x] Kdump
        (Automatic partitioning selecte          (Kdump is enabled)
        d)                                8) [!] Root password
 7) [ ] Network configuration                    (Password is not set.)
        (Not connected)
 9) [!] User creation
        (No user will be created)
  Please make your choice from above ['q' to quit | 'b' to begin installation |
  'r' to refresh]: 8   ## 超级用户的密码
================================================================================
================================================================================
Please select new root password. You will have to type it twice.

Password:                        ## 这里输入密码
Password (confirm):           ## 再次确认
===========================================================================
You have provided a weak password: The password fails the dictionary check is too simplistic/systematic
Would you like to use it anyway?

Please respond 'yes' or 'no': yes    ##  提示密码过于简单是否使用该密码
================================== ====================================================================================================================Installation

 1) [x] Language settings                 2) [x] Timezone settings
        (Simplified Chinese (China))             (Asia/Shanghai timezone)
 3) [x] Installation source               4) [x] Software selection
        (Local media)                            (Minimal Install)
 5) [x] Installation Destination          6) [x] Kdump
        (Automatic partitioning selecte          (Kdump is enabled)
        d)                                8) [x] Root password
 7) [ ] Network configuration                    (Password is set.)
        (Not connected)
 9) [ ] User creation
        (No user will be created)
  Please make your choice from above ['q' to quit | 'b' to begin installation |               b    ## 选择b安装
================================================================================
================================================================================
Progress
Setting up the installation environment
.
Creating disklabel on /dev/vda
.
Creating swap on /dev/vda2
.
Creating xfs on /dev/vda3
.
Creating xfs on /dev/vda1
.
Starting package installation process
Preparing transaction from installation source
Installing libgcc (1/291)
Installing centos-release (2/291)
Installing setup (3/291)
Installing filesystem (4/291)
Installing basesystem (5/291)
Installing kbd-misc (6/291)
  ......
Configuring addons
.
Generating initramfs
.
Running post-installation scripts
.
        Use of this product is subject to the license agreement found at /usr/share/centos-release/EULA

        Installation complete.  Press return to quit
//按回车
……………………
CentOS Linux 7 (Core)
Kernel 3.10.0-327.el7.x86_64 on an x86_64
localhost login: root
Password: 123456

[root@localhost ~]#
//按“Ctrl+]”键,退出终端,回到宿主机。
四、kvm的基本管理
1、查看磁盘是否被挂载 (最好设置自动挂载,)
[root@kvm ~]# df -h
Filesystem               Size  Used Avail Use% Mounted on
/dev/mapper/centos-root   18G  5.6G   12G  32% /
devtmpfs                 903M     0  903M   0% /dev
tmpfs                    913M     0  913M   0% /dev/shm
tmpfs                    913M  8.7M  904M   1% /run
tmpfs                    913M     0  913M   0% /sys/fs/cgroup
/dev/sda1                497M  126M  372M  26% /boot
tmpfs                    183M     0  183M   0% /run/user/0
/dev/sdb                  50G  1.2G   46G   3% /kvm_data   ## 挂载着的
2、查看虚拟磁盘 test.img
[root@kvm ~]# ls /kvm_data/
lost+found  test.img
3、列举出当前系统开启的虚拟机
[root@kvm ~]# virsh list
 Id    Name                           State
----------------------------------------------------
 2     test                           running
4、列举当前系统全部的虚拟机
[root@kvm ~]# virsh list --all
 Id    Name                           State
----------------------------------------------------
 2     test                           running
5、如果虚拟机状态没有显示running,而是显示shut off 则要开启
test是主机名
[root@kvm ~]# virsh start test
6、进入指定的虚拟机
[root@kvm ~]# virsh console test
Connected to domain test
Escape character is ^]

CentOS Linux 7 (Core)
Kernel 3.10.0-327.el7.x86_64 on an x86_64

localhost login: root
密码:
Login incorrect

localhost login: root
密码:
最后一次失败的登录:三 3月 10 20:25:41 CST 2021ttyS0 上
最有一次成功登录后有 1 次失败的登录尝试。
[root@localhost ~]#
进入虚拟机时可能出现一些别的原因
[root@kvm ~]# virsh console test
Connected to domain test
Escape character is ^]
error: operation failed: Active console session exists for this domain
解决方式,命令如下:
主要是杀死virsh console test 后再进入
[root@kvm ~]# ps -ef |grep console
root      11167  10987  0 01:55 tty1     00:00:00 virsh console test
root      16017  15750  0 10:01 pts/1    00:00:00 grep --color=auto console
[root@kvm ~]# kill -9 11167
7、进入后获取IP地址
没有获取前是没有地址,也不能联网的,需要自动获取IP
[root@localhost network-scripts]# ip a
1: lo: <LOOPBACK,UP,LOWER_UP> mtu 65536 qdisc noqueue state UNKNOWN
    link/loopback 00:00:00:00:00:00 brd 00:00:00:00:00:00
    inet 127.0.0.1/8 scope host lo
       valid_lft forever preferred_lft forever
    inet6 ::1/128 scope host
       valid_lft forever preferred_lft forever
2: eth0: <BROADCAST,MULTICAST,UP,LOWER_UP> mtu 1500 qdisc pfifo_fast state UP qlen 1000
    link/ether 52:54:00:38:cc:c2 brd ff:ff:ff:ff:ff:ff
[root@localhost ~]# ping baidu.com
ping: unknown host baidu.com
自动获取IP
[root@localhost network-scripts]# dhclient eth0
获取后有了地址,也可以ping通网络
[root@localhost network-scripts]# ip a
1: lo: <LOOPBACK,UP,LOWER_UP> mtu 65536 qdisc noqueue state UNKNOWN
    link/loopback 00:00:00:00:00:00 brd 00:00:00:00:00:00
    inet 127.0.0.1/8 scope host lo
       valid_lft forever preferred_lft forever
    inet6 ::1/128 scope host
       valid_lft forever preferred_lft forever
2: eth0: <BROADCAST,MULTICAST,UP,LOWER_UP> mtu 1500 qdisc pfifo_fast state UP qlen 1000
    link/ether 52:54:00:38:cc:c2 brd ff:ff:ff:ff:ff:ff
    inet 192.168.200.129/24 brd 192.168.200.255 scope global dynamic eth0
       valid_lft 1791sec preferred_lft 1791sec
    inet6 fe80::5054:ff:fe38:ccc2/64 scope link
       valid_lft forever preferred_lft forever
[root@localhost network-scripts]# ping baidu.com
PING baidu.com (220.181.38.148) 56(84) bytes of data.
64 bytes from 220.181.38.148: icmp_seq=1 ttl=128 time=51.6 ms
64 bytes from 220.181.38.148: icmp_seq=2 ttl=128 time=50.6 ms
8、查看有关虚拟机的一些信息
查看虚拟机的配置
[root@localhost ~]# free -m
              total        used        free      shared  buff/cache   available
Mem:            480         103         110           6         267         224
Swap:          1023           0        1023

查看CPU信息
[root@localhost ~]# cat /proc/cpuinfo
processor       : 0
vendor_id       : GenuineIntel
cpu family      : 6
model           : 61
model name      : Intel Core Processor (Broadwell, IBRS)
stepping        : 2
microcode       : 0x1
cpu MHz         : 1190.401
cache size      : 4096 KB
physical id     : 0
siblings        : 1
core id         : 0
cpu cores       : 1
apicid          : 0
initial apicid  : 0
fpu             : yes
fpu_exception   : yes
cpuid level     : 13
wp              : yes
flags           : fpu de pse tsc msr pae mce cx8 apic sep mtrr pge mca cmov pat pse36 clflush mmx fxsr sse sse2 syscall nx rdtscp lm constant_tsc rep_good nopl eagerfpu pni pclmulqdq ssse3 fma cx16 pcid sse4_1 sse4_2 x2apic movbe popcnt tsc_deadline_timer aes xsave avx hypervisor lahf_lm 3dnowprefetch fsgsbase bmi1 avx2 smep bmi2 invpcid rdseed adx smap xsaveopt
bogomips        : 2380.80
clflush size    : 64
cache_alignment : 64
address sizes   : 43 bits physical, 48 bits virtual
power management:
查看磁盘
[root@localhost ~]# df -T
文件系统       类型       1K-块   已用    可用 已用% 挂载点
/dev/vda3      xfs      8913920 944676 7969244   11% /
devtmpfs       devtmpfs  499072      0  499072    0% /dev
tmpfs          tmpfs     508368      0  508368    0% /dev/shm
tmpfs          tmpfs     508368   6672  501696    2% /run
tmpfs          tmpfs     508368      0  508368    0% /sys/fs/cgroup
/dev/vda1      xfs       508588 119892  388696   24% /boot
tmpfs          tmpfs      49248      0   49248    0% /run/user/0
查看磁盘
[root@localhost ~]# df -h
文件系统        容量  已用  可用 已用% 挂载点
/dev/vda3       8.6G  923M  7.7G   11% /
devtmpfs        488M     0  488M    0% /dev
tmpfs           497M     0  497M    0% /dev/shm
tmpfs           497M  6.6M  490M    2% /run
tmpfs           497M     0  497M    0% /sys/fs/cgroup
/dev/vda1       497M  118M  380M   24% /boot
tmpfs            49M     0   49M    0% /run/user/0
继续查看
[root@localhost ~]# lsblk
NAME   MAJ:MIN RM  SIZE RO TYPE MOUNTPOINT
sr0     11:0    1 1024M  0 rom
vda    253:0    0   10G  0 disk
├─vda1 253:1    0  500M  0 part /boot
├─vda2 253:2    0    1G  0 part [SWAP]
└─vda3 253:3    0  8.5G  0 part /
[root@localhost ~]#
9、有关管理虚拟机的一些命令
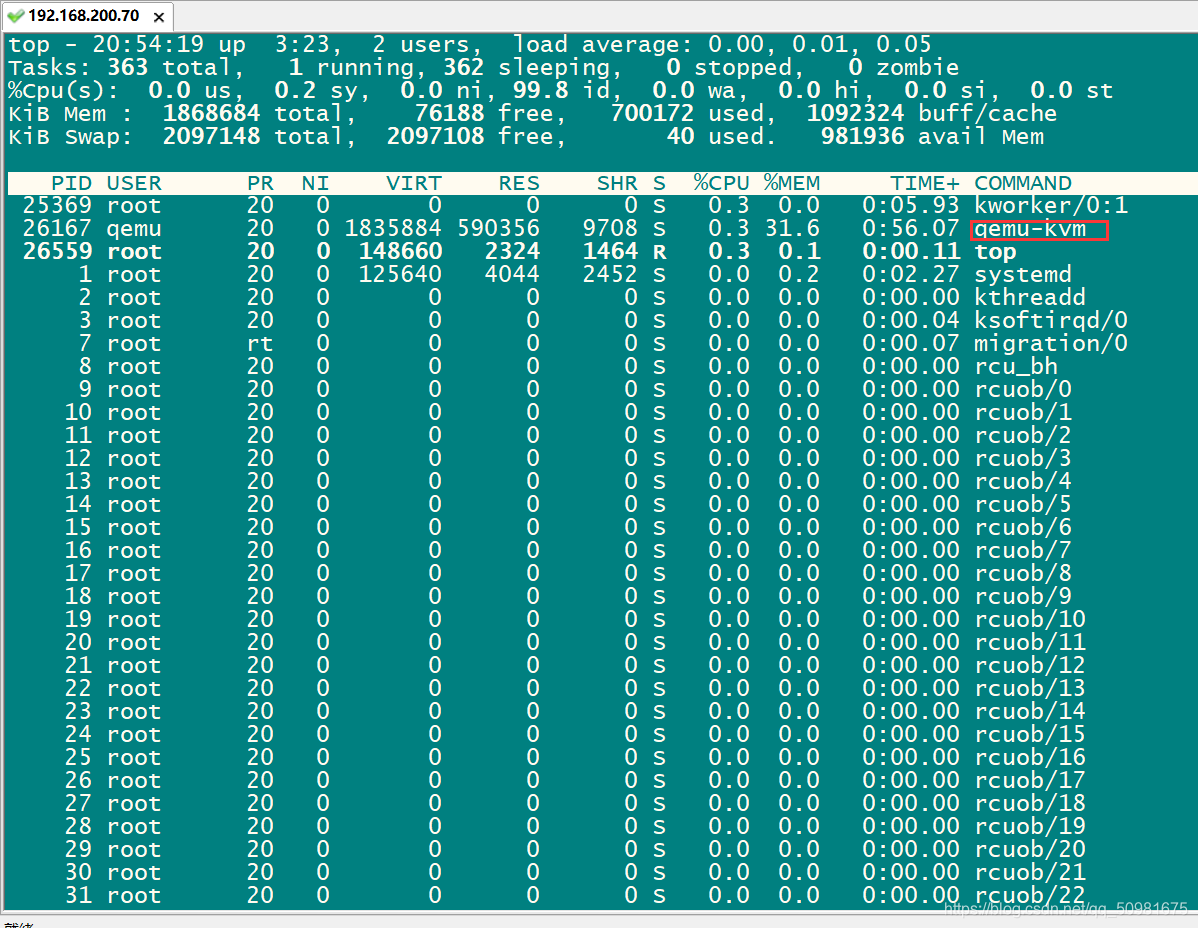
查看kvm的进程
命令top,他是动态显示的,可以查看是否有一个kvm的进程
查看开启的虚拟机列表
[root@kvm ~]# virsh list
 Id    Name                           State
----------------------------------------------------
 2     test                           running
查看所有的虚拟机
[root@kvm ~]# virsh list --all
 Id    Name                           State
----------------------------------------------------
 2     test                           running
进入已经开启的虚拟机
[root@kvm ~]# virsh console test
关闭虚拟机
[root@kvm ~]# virsh shutdown test
Domain test is being shutdown
开启虚拟机
[root@kvm ~]# virsh start test
Domain test started
强制停止
[root@kvm ~]# virsh destroy test
Domain test destroyed
查看虚拟机配置文件
[root@kvm ~]# ls /etc/libvirt/qemu
networks  test.xml
彻底销毁虚拟机,连配置文件都会被删除(谨慎删除)
[root@kvm ~]# virsh undefine test
Domain test has been undefined
[root@kvm ~]# ls /etc/libvirt/qemu
networks
设置宿主机开机后虚拟机自启,用这个之前保证磁盘自动挂载,不然虚拟机无法启动
[root@kvm ~]# virsh autostart test
Domain test marked as autostarted

[root@kvm ~]# reboot


Ô¶³ÌÖ÷»ú¾Ü¾
重启后查看开启的虚拟机的列表

Last login: Thu Mar 11 03:50:13 2021 from 192.168.200.1
[root@kvm ~]#
[root@kvm ~]# virsh list
 Id    Name                           State
----------------------------------------------------
 1     test                           running
取消开机自启
[root@kvm ~]# virsh autostart --disable test
Domain test unmarked as autostarted

[root@kvm ~]# reboot


Ô¶³ÌÖ÷»ú¾Ü¾

重启后,没有启动

Last login: Thu Mar 11 03:55:41 2021 from 192.168.200.1

[root@kvm ~]#
[root@kvm ~]# virsh list
 Id    Name                           State
----------------------------------------------------

[root@kvm ~]# virsh list --all
 Id    Name                           State
----------------------------------------------------
 -     test                           shut off

[root@kvm ~]#
挂起和取消挂起
挂起要确虚拟机在运行
[root@kvm ~]# virsh start test
Domain test started
然后挂起
[root@kvm ~]# virsh suspend test
Domain test suspended
查看状态为paused
[root@kvm ~]# virsh list
 Id    Name                           State
----------------------------------------------------
 1     test                           paused
取消挂起
[root@kvm ~]# virsh resume test
Domain test resumed
状态为 running
[root@kvm ~]# virsh list
 Id    Name                           State
----------------------------------------------------
 1     test                           running

[root@kvm ~]#


 4120
4120

 被折叠的 条评论
为什么被折叠?
被折叠的 条评论
为什么被折叠?
 到【灌水乐园】发言


