


前言
HttpClient主要用于客户端和服务端之间进行交互通信的,管理端网页版需要和小程序的用户端交互。微信小程序这块只简单介绍一下一些基本的使用,了解每个文件是干什么。
一、HttpClient
1. 概述
HttpClient 是Apache Jakarta Common 下的子项目,可以用来提供高效的、最新的、功能丰富的支持 HTTP 协议的客户端编程工具包,并且它支持 HTTP 协议最新的版本和建议。
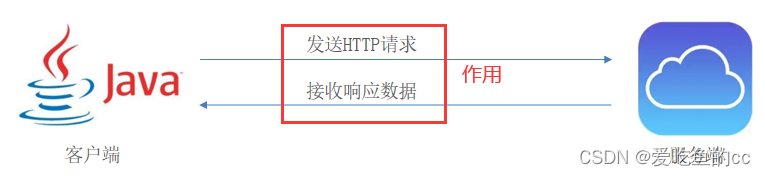
通过浏览器请求服务的步骤
1、构造请求地址和参数
2、发送请求
3、接收数据
2. 介绍
1、核心Api
- HttpClient
- HttpClients
- CloseableHttpClient
- HttpGet
- HttpPost
2、发送请求步骤:
创建HttpClient对象
创建Http请求对象
调用HttpClient的execute方法发送请求
3、导入依赖
<dependency>
    <groupId>org.apache.httpcomponents</groupId>
    <artifactId>httpclient</artifactId>
    <version>4.5.13</version>
</dependency>
3. 入门案例
3.1 GET方式请求
测试通过httpclient发送GET方式的请求
    public void testGet() throws IOException {
        //创建httpclient对象
        CloseableHttpClient httpClient = HttpClients.createDefault();
        //创建请求对象
        HttpGet httpGet = new HttpGet("http://localhost:8080/user/shop/status");
        //发送请求 接收响应结果
        CloseableHttpResponse response = httpClient.execute(httpGet);
        //获取服务端返回的状态码
        int statusCode = response.getStatusLine().getStatusCode();
        System.out.println("服务端返回的状态码为:"+statusCode);
        //获取服务端返回的响应体
        HttpEntity entity = response.getEntity();
        String body = EntityUtils.toString(entity);
        System.out.println("服务端返回的数据为:"+body);
        //关闭资源
        response.close();
        httpClient.close();
    }
3.2 POST方式请求
测试通过httpclient发送POST方式的请求
public void testPOST() throws Exception {
        //创建httpclient对象
        CloseableHttpClient httpClient = HttpClients.createDefault();
        //创建请求对象
        HttpPost httpPost = new  HttpPost("http://localhost:8080/admin/employee/login");
        //构造JSON数据
        JSONObject jsonObject = new JSONObject();
        jsonObject.put("username","admin");
        jsonObject.put("password","123456");
        //构造请求体
        StringEntity entity = new StringEntity(jsonObject.toString());
        //指定请求编码方式
        entity.setContentEncoding("utf-8");
        //设置数据类型
        entity.setContentType("application/json");
        //设置当前Post请求的请求体
        httpPost.setEntity(entity);
        //发送请求
        CloseableHttpResponse response = httpClient.execute(httpPost);
        //解析返回结果
        int statusCode = response.getStatusLine().getStatusCode();
        System.out.println("响应码为:"+statusCode);
        HttpEntity entity1 = response.getEntity();
        String body = EntityUtils.toString(entity1);
        System.out.println("响应数据为:"+body);
        //关闭资源
        httpClient.close();
        response.close();
    }
二、微信小程序开发
1. 准备工作
1、注册小程序
注册地址:https://mp.weixin.qq.com/wxopen/waregister?action=step1
2、登录小程序后台
登录地址:https://mp.weixin.qq.com/
3、完善小程序信息、小程序类目
4、查看小程序的 AppID,在开发管理那里
5、下载开发者工具
下载地址:https://developers.weixin.qq.com/miniprogram/dev/devtools/stable.html
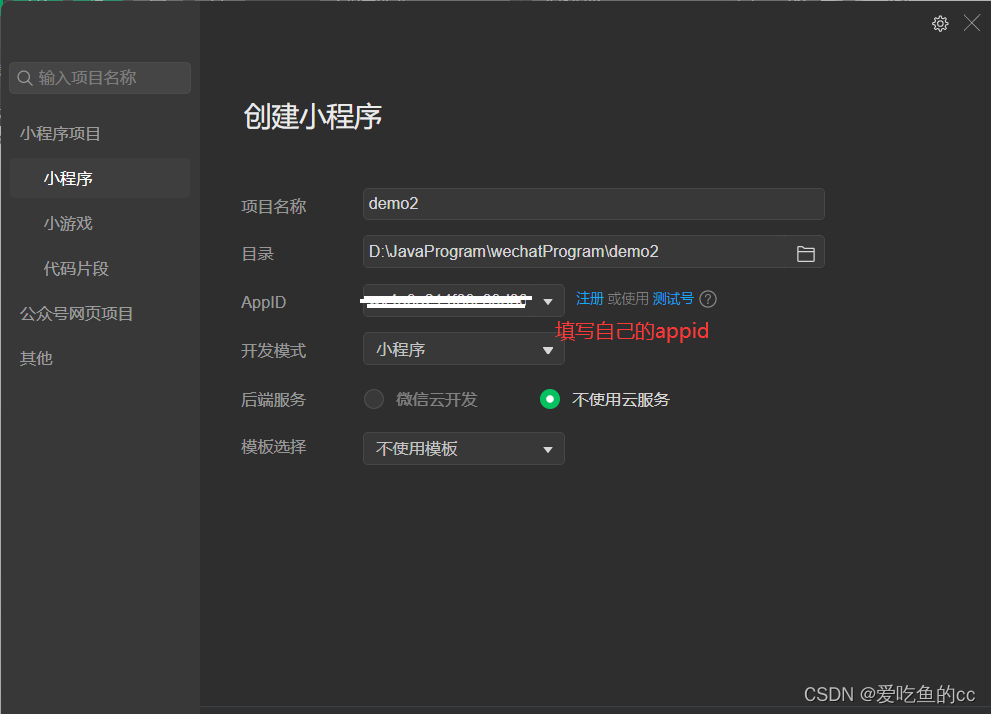
6、扫描登录开发者工具,并创建小程序项目
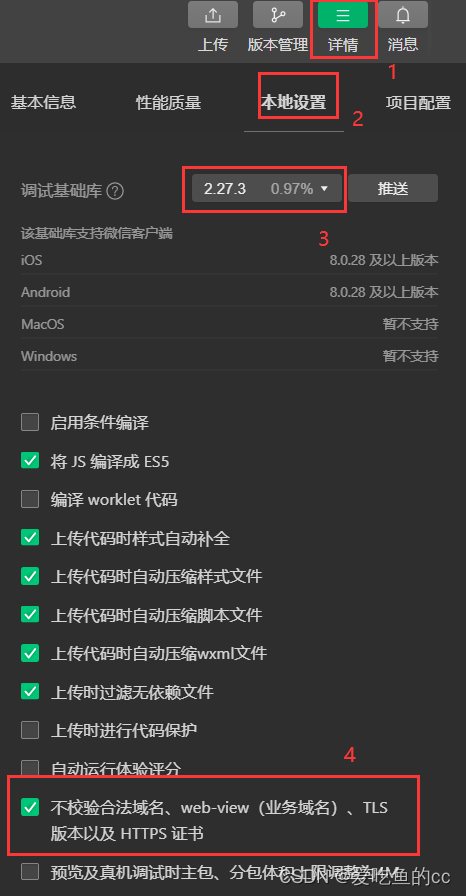
7、设置j基础库和不校验合法域名
2. 入门
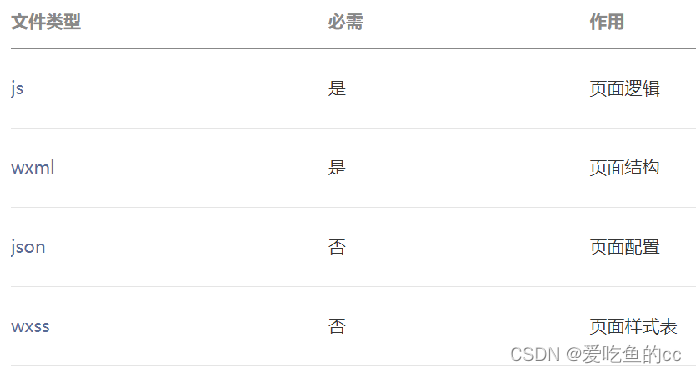
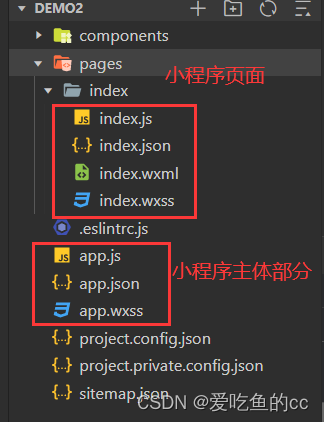
2.1 小程序目录结构
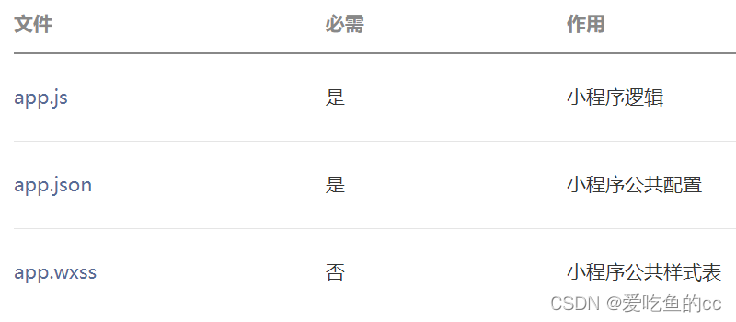
小程序包含一个描述整体程序的 app 和多个描述各自页面的 page。
一个小程序主体部分由三个文件组成,必须放在项目的根目录
一个小程序页面由四个文件组成
2.2 代码
index.wxml,相当于html文件,展示在页面中
<navigation-bar title="Weixin" back="{{false}}" color="black" background="#FFF"></navigation-bar>
<view class="container">
    <view> {{msg}}</view>
    <view>
        <button bindtap="getUserInfo" type="default">获取用户信息 </button>
        昵称: {{nickName}}
        <image src="{{url}}"></image>
    </view>
    <view>
        <button bindtap="wxLogin" type="warn">微信登录</button>
        授权码:{{code}}
    </view>
    <view>
        <button bindtap="sendRequest" type="default">发送请求</button>
    </view>
</view>
index.js
Page({
    data:{
        msg:'hello world',
        nickName: '',
        url: '',
        code: ''
    },
    //获取微信用户的头衔和昵称
    getUserInfo(){
        wx.getUserProfile({
          desc: '获取用户信息',
          success: (res)=>{
              console.log(res.userInfo)
              //为数据赋值
              this.setData({
                  nickName:res.userInfo.nickName,
                  url: res.userInfo.avatarUrl
                })
          }
        })
    },
    //微信登录 获取微信用户的授权码
    wxLogin(){
        wx.login({
          success: (res) => {
            console.log(res.code)
            this.setData({
                code: res.code
            })
          }
        })
    },
    //发送请求
    sendRequest(){
        wx.request({
          url:'http://localhost:8080/user/shop/status',
          method: 'GET',
          success:(res)=>{
              console.log(res.data)
          }
        })
    }
})


 253
253


 被折叠的 条评论
为什么被折叠?
被折叠的 条评论
为什么被折叠?
 到【灌水乐园】发言


