


Android基于百度LBS的定位
一、百度SDK使用流程
1. 注册开发者账号
百度搜索“百度地图开发者”,进入后选择登陆,如果没有百度开发者账号则选择注册,然后再选择登陆

- 注册开发者账号

- 创建应用

- 填写SHA1和包名

2. 获取SHA1和包名
①获取SHA1
打开Android Stdio,在控制台进入keytool所在路径下,输入
keytool -list -v -keystore C:\Users\dell.android \debug.keystore
C:\Android.android\debug.keystore是debug.keystore这个文件的路径,一般在c盘下的users里的电脑名下的.Android文件夹里。
回车后会要求输入密钥库口令,一般默认为android,出现以下情况则说明密钥生成成功,复制证书指纹中的SHA1

② 获取包名
打开AndroidStudio项目查看包名


二、AndroidStudio的配置
1. 下载SDK
- 下载SDK本地依赖:SDK下载-百度LBS开放平台
- 功能选择基础定位和基础地图

- 选择SDK功能与配置并下载jar包

- 将下载的SDK添加到本地项目中
- 解压文件夹并将libs文件夹放入项目的app目录下

- 右键BaiduLBS_Android.jar选择Add As Library
下图即显示项目依赖中已添加此包

2. 配置AndroidManifest.xml文件
- 在< application >中加入如下代码配置开发密钥(这个密钥就是之前申请的密钥)
<application>
    <meta-data
        android:name="com.baidu.lbsapi.API_KEY"
        android:value="开发者 key" />
</application>
- 在< application/ >外部添加如下权限声明
<!-- 访问网络,进行地图相关业务数据请求,包括地图数据,路线规划,POI检索等 -->
<uses-permission android:name="android.permission.INTERNET" />
<!-- 获取网络状态,根据网络状态切换进行数据请求网络转换 -->
<uses-permission android:name="android.permission.ACCESS_NETWORK_STATE" />

<!-- 读取外置存储。如果开发者使用了so动态加载功能并且把so文件放在了外置存储区域,则需要申请该权限,否则不需要 -->
<uses-permission android:name="android.permission.READ_EXTERNAL_STORAGE" />
<!-- 写外置存储。如果开发者使用了离线地图,并且数据写在外置存储区域,则需要申请该权限 -->
<uses-permission android:name="android.permission.WRITE_EXTERNAL_STORAGE" />
3. 配置定位环境
- 在AndroidManifest.xml加入如下权限使用声明
<!-- 这个权限用于进行网络定位 -->
<uses-permission android:name="android.permission.ACCESS_COARSE_LOCATION" />
<!-- 这个权限用于访问GPS定位 -->
<uses-permission android:name="android.permission.ACCESS_FINE_LOCATION" />
- 在Application标签中声明定位的service组件
<service android:name="com.baidu.location.f"
    android:enabled="true"
    android:process=":remote"/>
三、页面设计
- 帧布局
页面展示如下:

代码如下:
<FrameLayout xmlns:android="http://schemas.android.com/apk/res/android"
    android:layout_width="match_parent"
    android:layout_height="match_parent" >
    <!--百度地图控件-->
    <com.baidu.mapapi.map.MapView
        android:id="@+id/bmapView"
        android:layout_width="fill_parent"
        android:layout_height="fill_parent"
        android:clickable="true" />
    <!--位置文本布局的背景色代码的前2位代码为透明度-->
    <LinearLayout
        android:layout_width="fill_parent"
        android:layout_height="wrap_content"
        android:background="#e0000000"
        android:orientation="vertical" >
        <LinearLayout
            android:layout_width="wrap_content"
            android:layout_height="wrap_content"
            android:layout_marginLeft="12dp"
            android:layout_marginTop="20dp"
            android:orientation="horizontal" >
            <TextView
                android:layout_width="wrap_content"
                android:layout_height="wrap_content"
                android:text="纬度:"
                android:textColor="#ffffff"
                android:textSize="15dp" />
            <TextView
                android:id="@+id/tv_Lat"
                android:layout_width="wrap_content"
                android:layout_height="wrap_content"
                android:text=""
                android:textColor="#ffffff"
                android:textSize="15dp" />
        </LinearLayout>
        <LinearLayout
            android:layout_width="wrap_content"
            android:layout_height="wrap_content"
            android:layout_marginLeft="12dp"
            android:layout_marginTop="10dp"
            android:orientation="horizontal" >
            <TextView
                android:layout_width="wrap_content"
                android:layout_height="wrap_content"
                android:text="经度:"
                android:textColor="#ffffff"
                android:textSize="15dp" />
            <TextView
                android:id="@+id/tv_Lon"
                android:layout_width="wrap_content"
                android:layout_height="wrap_content"
                android:text=""
                android:textColor="#ffffff"
                android:textSize="15dp" />
        </LinearLayout>
        <LinearLayout
            android:layout_width="wrap_content"
            android:layout_height="wrap_content"
            android:layout_marginBottom="10dp"
            android:layout_marginLeft="12dp"
            android:layout_marginTop="10dp"
            android:orientation="horizontal" >
            <TextView
                android:layout_width="wrap_content"
                android:layout_height="wrap_content"
                android:text="地址:"
                android:textColor="#ffffff"
                android:textSize="15dp" />

            <TextView
                android:id="@+id/tv_Add"
                android:layout_width="wrap_content"
                android:layout_height="wrap_content"
                android:text=""
                android:textColor="#ffffff"
                android:textSize="15dp" />
        </LinearLayout>
    </LinearLayout>
</FrameLayout>
四、显示地图和定位
1. 编写Fragment.java文件
- Fragment中的变量
package com.example.baidumap;
public class MainActivity extends AppCompatActivity {
    LocationClient mLocationClient;  //定位客户端
    MapView mapView;  //Android Widget地图控件
    BaiduMap baiduMap;
    boolean isFirstLocate = true;

    TextView tv_Lat;  //纬度
    TextView tv_Lon;  //经度
    TextView tv_Add;  //地址
- 重写方法
    @Override
    protected void onCreate(Bundle savedInstanceState) {
        super.onCreate(savedInstanceState);
        //如果没有定位权限,动态请求用户允许使用该权限
        if (ActivityCompat.checkSelfPermission(this, Manifest.permission.ACCESS_FINE_LOCATION) != PackageManager.PERMISSION_GRANTED) {
            ActivityCompat.requestPermissions(this, new String[]{Manifest.permission.ACCESS_FINE_LOCATION}, 1);
        }else {
            requestLocation();
        }
    }
    @Override
    protected void onResume() {
        super.onResume();
        mapView.onResume();
    }
    @Override
    protected void onPause() {
        super.onPause();
        mapView.onResume();
    }
    @Override
    protected void onDestroy() {
        super.onDestroy();
        mLocationClient.stop();
        mapView.onDestroy();
    }
- 初始化requestLocation()和initLocation()
@Override
    public void onRequestPermissionsResult(int requestCode, @NonNull String[] permissions, @NonNull int[] grantResults) {
        switch (requestCode) {
            case 1:
                if (grantResults[0] != PackageManager.PERMISSION_GRANTED) {
                    Toast.makeText(this, "没有定位权限!", Toast.LENGTH_LONG).show();
                    finish();
                } else {
                    requestLocation();
                }
        }
    }
    private void requestLocation() {
        initLocation();
        mLocationClient.start();
    }
    private void initLocation() {  //初始化
        mLocationClient = new LocationClient(getApplicationContext());
        mLocationClient.registerLocationListener(new MyLocationListener());
        SDKInitializer.initialize(getApplicationContext());
        setContentView(R.layout.activity_main);

        mapView = findViewById(R.id.bmapView);
        baiduMap = mapView.getMap();
        tv_Lat = findViewById(R.id.tv_Lat);
        tv_Lon = findViewById(R.id.tv_Lon);
        tv_Add = findViewById(R.id.tv_Add);

        LocationClientOption option = new LocationClientOption();
        //设置扫描时间间隔
        option.setScanSpan(1000);
        //设置定位模式,三选一
        option.setLocationMode(LocationClientOption.LocationMode.Hight_Accuracy);
        /*option.setLocationMode(LocationClientOption.LocationMode.Battery_Saving);
        option.setLocationMode(LocationClientOption.LocationMode.Device_Sensors);*/
        //设置需要地址信息
        option.setIsNeedAddress(true);
        //保存定位参数
        mLocationClient.setLocOption(option);
    }
}
- 定义定位监听器 MyLocationListener
	//内部类,百度位置监听器
    private class MyLocationListener  implements BDLocationListener {
        @Override
        public void onReceiveLocation(BDLocation bdLocation) {
            tv_Lat.setText(bdLocation.getLatitude()+"");
            tv_Lon.setText(bdLocation.getLongitude()+"");
            tv_Add.setText(bdLocation.getAddrStr());
            if(bdLocation.getLocType()==BDLocation.TypeGpsLocation || bdLocation.getLocType()==BDLocation.TypeNetWorkLocation){
                navigateTo(bdLocation);
            }
        }
    }
- 处理第一次定位navigateTo()
	private void navigateTo(BDLocation bdLocation) {
        if(isFirstLocate){
            LatLng ll = new LatLng(bdLocation.getLatitude(),bdLocation.getLongitude());
            MapStatusUpdate update = MapStatusUpdateFactory.newLatLng(ll);
            baiduMap.animateMapStatus(update);
            isFirstLocate = false;
        }
    }
2.编写MyLocationListener.java文件
	public class MyLocationListener extends BDAbstractLocationListener {
    private MapView mMapView;
    private BaiduMap mBaiduMap;
    private boolean isFirstLocate = true;

    //构造方法用于传递地图控件
    public MyLocationListener(MapView mMapView,BaiduMap mBaiduMap) {
        this.mMapView = mMapView;
        this.mBaiduMap = mBaiduMap;
    }

    @Override
    public void onReceiveLocation(BDLocation location) {
        LatLng ll = new LatLng(location.getLatitude(), location.getLongitude());
        if (isFirstLocate) {

            isFirstLocate = false;
            //给地图设置状态
            mBaiduMap.animateMapStatus(MapStatusUpdateFactory.newLatLng(ll));
        }

        //mapView 销毁后不在处理新接收的位置
        if (location == null || mMapView == null){
            return;
        }
        MyLocationData locData = new MyLocationData.Builder()
                .accuracy(location.getRadius())
                // 此处设置开发者获取到的方向信息,顺时针0-360
                .direction(location.getDirection()).latitude(location.getLatitude())
                .longitude(location.getLongitude()).build();

        mBaiduMap.setMyLocationData(locData);
    }
五、真机效果展示
1. 进入开发者模式,开启USB调试

2. 使用数据线连接手机和电脑进行文件传输
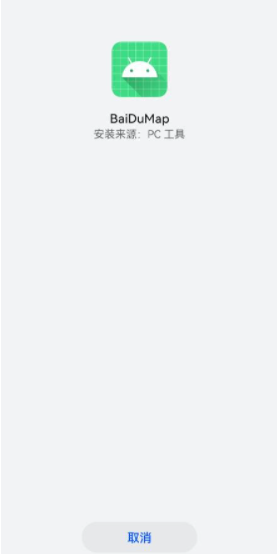
3. 在移动端显示位置


 2154
2154


 被折叠的 条评论
为什么被折叠?
被折叠的 条评论
为什么被折叠?
 到【灌水乐园】发言


