


1.实验要求
- 利用注解、反射和工厂模式设计一个简单的IoC容器
- 该IoC容器包含3个注解和一个IoC容器类(AnnotationConfigApplicationContext),其定义如下:
注解:
| 注解 | 含义 |
|---|---|
| @Component | 标注Bean |
| @Autowired | 标注需要被注入的对象 |
| @Configuration | 标注为配置类 |
| @ComponentScan | 注解扫描器 |
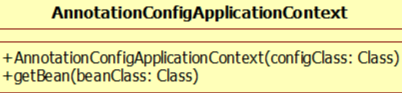
IoC容器类:
3.自定义两个业务类Group和User,创建一个测试类Test,对IoC容器进行测试:

2.实验思路
本实验要求我们通过反射和自定义注解的设计,模拟实现spring框架IoC容器类的基础功能,要实现的注解有@Component、@Autowired、@Configuration和@ComponentScan
首先我们需要明确这些注解在spring框架中本身的功能是什么:
- @Component:将实体类实例化到容器中
- @ComponentScan:配置包路径,到该路径下去寻找bean
- @Autowired:自动装配(定义一个变量接收注入的类)
- @Configuration:标识为配置类
所以在该实验中,我们需要将自定义四个注解,然后将Group和User类使用@Component注解,在User类中创建Group类的实例化对象并设置为自动装配,这样就能在User类中调用Group类的方法;
然后我们需要自己实现一个IoC容器类,处理自定义的注解的基本逻辑;
接下来在test类中实例化IoC容器,并从中取得bean,调用其方法
3.实验代码
pom文件依赖配置:
<dependencies>
  <dependency>
    <groupId>org.springframework</groupId>
    <artifactId>spring-context</artifactId>
    <version>5.2.10.RELEASE</version>
  </dependency>

  <dependency>
    <groupId>org.springframework</groupId>
    <artifactId>spring-webmvc</artifactId>
    <version>5.2.14.RELEASE</version>
  </dependency>

  <dependency>
    <groupId>junit</groupId>
    <artifactId>junit</artifactId>
    <version>4.12</version>
    <scope>test</scope>
  </dependency>
jdk版本:1.8
开发工具:IDEA
3.1自定义注解
@Autowired:
//自定义注解:标注需要被注入的对象
@Target(ElementType.FIELD)
@Retention(RetentionPolicy.RUNTIME)
public @interface Autowired {
}
@Component:
//自定义注解:标注Bean
@Target({ElementType.TYPE,ElementType.FIELD})
@Retention(RetentionPolicy.RUNTIME)
public @interface Component {
    String value() default "";
}
@ComponentScan:
//自定义注解 注解扫描器
@Target(ElementType.TYPE)
@Retention(RetentionPolicy.RUNTIME)
public @interface ComponentScan {
    String value() default "";
}
@Configuration:
//自定义注解 标注为配置类
@Target(ElementType.TYPE)
@Retention(RetentionPolicy.RUNTIME)
public @interface Configuration {
}
3.2 定义实体类
Group:
@Component
public class Group {
    public String getBeanName()
    {
        return this.getClass().getSimpleName();
    }
}
User:
@Component
public class User {
    @Autowired
    private Group group;

    public void print()
    {
        System.out.println("group name as follow:");
        System.out.println(group.getBeanName());
    }

}
3.3 定义配置类
MyConfig:
@Configuration
@ComponentScan("org.example")
public class MyConfig {
}
3.4 定义IoC容器类
接口:ApplicationContext
public interface ApplicationContext {
    Object getBean(Class clazz);
}
实现类:AnnotationApplicationContext
public class AnnotationApplicationContext implements ApplicationContext {

    //定义Map,用于存放bean对象
    private Map<String, Object> beanFactory = new HashMap<>();

    //创建IOC容器类时执行的方法
    public AnnotationApplicationContext(Class configClass) throws InstantiationException, IllegalAccessException {
        //处理@Configuration的逻辑(没有实质性的内容,只是要求必须有配置类)
        try {
            //获取@Configuration类型的对象
            Configuration configuration = (Configuration) configClass.getAnnotation(Configuration.class);
            //如果对象为空,则引发异常
            if (configuration.annotationType().toGenericString().equals("")) {
                //没有具体逻辑
            }
        } catch (Exception e) {
            System.out.println("找不到配置类");
            System.exit(-1);
        }

        //处理@ComponentScan的逻辑
        /*
        总的来说,就是扫描某一路径下的所有类,如果有的类被Component注解,则创建其实例(一个bean),加入beanFactory中
        如果有的类中的对象(一个Field类型的数据)被@Autowired注解标注,则用beanFactory中同类型的bean替代该对象
        */
        try {
            ComponentScan componentScan = (ComponentScan) configClass.getAnnotation(ComponentScan.class);

            //根据componentScanValue的值来获取要扫描的路径(默认值处理的不是很好)
            String componentScanValue = componentScan.value().toString();
            String path = "";
            if (!componentScanValue.equals(""))
            {
                String[] splitValue = componentScanValue.split("\\.");
                for (int i = 0; i < splitValue.length; i++) {
                    path += splitValue[i] + "/";
                }
                path = "classpath*:" + path + "**/*.class";
            }
            else {
                path = "classpath*:org/example/**/*.class";
            }
            //扫描路径,获取所有的class
            PathMatchingResourcePatternResolver resolver = new PathMatchingResourcePatternResolver();
            Resource[] resources = resolver.getResources(path);
            for (Resource res : resources) {
                //获取类名
                String clsName = new SimpleMetadataReaderFactory().getMetadataReader(res).getClassMetadata().getClassName();
                //获取类对象
                Class thisClass = Class.forName(clsName);

                //判断当前类是否被Component注解标注
                Component component = (Component) thisClass.getAnnotation(Component.class);
                if (component != null) //说明该类被Component注解标注
                {
                    Constructor c = thisClass.getConstructor();
                    Object o = c.newInstance(); //创建该类的实例
                    beanFactory.put(o.getClass().getSimpleName(), o);//加入beanFactory中
                }

                //处理@Autowired注解
                for (Object bean : beanFactory.values()) { //查看beanFactory中所有的bean
                    Class beanClass = bean.getClass();
                    Field[] beanFields = beanClass.getDeclaredFields(); //获取bean的fields
                    for (Field field : beanFields) {
                        if (field.isAnnotationPresent(Autowired.class)) { //如果被Autowired注解标注
                            Object beanD = beanFactory.get(field.getType().getSimpleName()); //获取beanFactory中的bean
                            field.setAccessible(true); //关闭安全检查
                            field.set(bean, beanD); //用beanFactory中的bean来代替当前bean
                        }
                    }
                }
            }
        } catch (Exception e) {
            e.printStackTrace();
            System.out.println("没有ComponentScan注解");
            System.exit(-1);
        }
    }

    //getBean方法,获取某个bean(通过class)
    @Override
    public Object getBean(Class beanClass) {
        return beanFactory.get(beanClass.getSimpleName());
    }

}
3.5 测试类
public class test {
    public static void main(String[] args) throws InstantiationException, IllegalAccessException {
        //创建IOC容器,传入的参数是当前的配置类
        //因此可以根据@Configuration和@ComponentScan("org.example")来走接下来的逻辑
        AnnotationApplicationContext context = new AnnotationApplicationContext(MyConfig.class);
        //从容器中获得user对象
        User user = (User) context.getBean(User.class);
        //执行对象方法
        //可以看到通过user对象执行了group类的方法getBeanName()
        //但user类中,我们并没有实例化group对象,可以看到是通过注解来实现的
        user.print();
    }
}
4.实验结果

成功在user类中调用了group类的方法;
5.源码
上面的代码是完整的,下附工程文件:


 508
508


 被折叠的 条评论
为什么被折叠?
被折叠的 条评论
为什么被折叠?
 到【灌水乐园】发言


