


前置知识:
Flume 自定义组件
自定义 Interceptor
需求分析:使用 Flume 采集服务器本地日志,需要按照日志类型的不同,将不同种类的日志发往不同的分析系统
需要使用Flume 拓扑结构中的 Multiplexing 结构,Multiplexing的原理是,根据 event 中 Header 的某个 key 的值,将不同的 event 发送到不同的 Channel中,所以我们需要自定义一个 Interceptor,为不同类型的 event 的 Header 中的 key 赋予不同的值
实现流程:
代码
导入依赖:
<dependencies>
  <dependency>
    <groupId>org.apache.flume</groupId>
    <artifactId>flume-ng-core</artifactId>
    <version>1.9.0</version>
  </dependency>
</dependencies>
自定义拦截器的代码:
package com.why.interceptor;

import org.apache.flume.Context;
import org.apache.flume.Event;
import org.apache.flume.interceptor.Interceptor;

import java.util.ArrayList;
import java.util.List;
import java.util.Map;

public class TypeInterceptor implements Interceptor {

    //存放事件的集合
    private List<Event> addHeaderEvents;

    @Override
    public void initialize() {
        //初始化集合
        addHeaderEvents = new ArrayList<>();
    }

    //单个事件拦截
    @Override
    public Event intercept(Event event) {
        //获取头信息
        Map<String, String> headers = event.getHeaders();
        //获取body信息
        String body = new String(event.getBody());

        //根据数据中是否包含”why“来分组
        if(body.contains("why"))
        {
            headers.put("type","first");
        }else {
            headers.put("type","second");
        }
        return event;
    }

    //批量事件拦截
    @Override
    public List<Event> intercept(List<Event> events) {
        //清空集合
        addHeaderEvents.clear();

        //遍历events
        for(Event event : events)
        {
            //给每一个事件添加头信息
            addHeaderEvents.add(intercept(event));
        }
        return addHeaderEvents;
    }

    @Override
    public void close() {

    }

    //构建生成器
    public static class TypeBuilder implements Interceptor.Builder{

        @Override
        public Interceptor build() {
            return new TypeInterceptor();
        }

        @Override
        public void configure(Context context) {

        }
    }

}
将代码打包放入flume安装路径下的lib文件夹中
配置文件
在job文件夹下创建group4目录,添加配置文件;
为 hadoop102 上的 Flume1 配置 1 个 netcat source,1 个 sink group(2 个 avro sink),并配置相应的 ChannelSelector 和 interceptor
# Name the components on this agent
a1.sources = r1
a1.sinks = k1 k2
a1.channels = c1 c2

# Describe/configure the source
a1.sources.r1.type = netcat
a1.sources.r1.bind = localhost
a1.sources.r1.port = 44444
a1.sources.r1.interceptors = i1
a1.sources.r1.interceptors.i1.type = com.why.interceptor.TypeInterceptor$TypeBuilder
a1.sources.r1.selector.type = multiplexing
a1.sources.r1.selector.header = type
a1.sources.r1.selector.mapping.first = c1
a1.sources.r1.selector.mapping.second = c2

# Describe the sink
a1.sinks.k1.type = avro
a1.sinks.k1.hostname = hadoop103
a1.sinks.k1.port = 4141
a1.sinks.k2.type=avro
a1.sinks.k2.hostname = hadoop104
a1.sinks.k2.port = 4242

# Use a channel which buffers events in memory
a1.channels.c1.type = memory
a1.channels.c1.capacity = 1000
a1.channels.c1.transactionCapacity = 100
# Use a channel which buffers events in memory
a1.channels.c2.type = memory
a1.channels.c2.capacity = 1000
a1.channels.c2.transactionCapacity = 100

# Bind the source and sink to the channel
a1.sources.r1.channels = c1 c2
a1.sinks.k1.channel = c1
a1.sinks.k2.channel = c2
hadoop103:配置一个 avro source 和一个 logger sink
a1.sources = r1
a1.sinks = k1
a1.channels = c1
a1.sources.r1.type = avro
a1.sources.r1.bind = hadoop103
a1.sources.r1.port = 4141
a1.sinks.k1.type = logger
a1.channels.c1.type = memory
a1.channels.c1.capacity = 1000
a1.channels.c1.transactionCapacity = 100
a1.sinks.k1.channel = c1
a1.sources.r1.channels = c1
hadoop104:配置一个 avro source 和一个 logger sink
a1.sources = r1
a1.sinks = k1
a1.channels = c1
a1.sources.r1.type = avro
a1.sources.r1.bind = hadoop104
a1.sources.r1.port = 4242
a1.sinks.k1.type = logger
a1.channels.c1.type = memory
a1.channels.c1.capacity = 1000
a1.channels.c1.transactionCapacity = 100
a1.sinks.k1.channel = c1
a1.sources.r1.channels = c1
执行指令
hadoop102:bin/flume-ng agent --conf conf/ --name a1 --conf-file job/group4/flume-interceptor-flume.conf
hadoop103:bin/flume-ng agent --conf conf/ --name a1 --conf-file job/group4/flume1-flume-logger.conf -Dflume.root.logger=INFO,console
hadoop104:bin/flume-ng agent --conf conf/ --name a1 --conf-file job/group4/flume2-flume-logger.conf -Dflume.root.logger=INFO,console
然后hadoop102通过nc连接44444端口,发送数据:
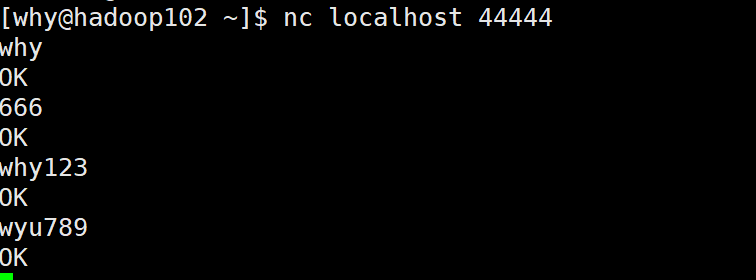
在hadoop103和104上分别接收到:


自定义 Source
官方提供的文档:Flume 1.11.0 Developer Guide — Apache Flume
给出的示例代码如下:
public class MySource extends AbstractSource implements Configurable, PollableSource {
  private String myProp;

  @Override
  public void configure(Context context) {
    String myProp = context.getString("myProp", "defaultValue");

    // Process the myProp value (e.g. validation, convert to another type, ...)

    // Store myProp for later retrieval by process() method
    this.myProp = myProp;
  }

  @Override
  public void start() {
    // Initialize the connection to the external client
  }

  @Override
  public void stop () {
    // Disconnect from external client and do any additional cleanup
    // (e.g. releasing resources or nulling-out field values) ..
  }

  @Override
  public Status process() throws EventDeliveryException {
    Status status = null;

    try {
      // This try clause includes whatever Channel/Event operations you want to do

      // Receive new data
      Event e = getSomeData();

      // Store the Event into this Source's associated Channel(s)
      getChannelProcessor().processEvent(e);

      status = Status.READY;
    } catch (Throwable t) {
      // Log exception, handle individual exceptions as needed

      status = Status.BACKOFF;

      // re-throw all Errors
      if (t instanceof Error) {
        throw (Error)t;
      }
    } finally {
      txn.close();
    }
    return status;
  }
}
需要继承AbstractSource,实现Configurable, PollableSource
实战需求分析
使用 flume 接收数据,并给每条数据添加前缀,输出到控制台。前缀可从 flume 配置文件中配置
代码
package com.why.source;

import org.apache.flume.Context;
import org.apache.flume.EventDeliveryException;
import org.apache.flume.PollableSource;
import org.apache.flume.conf.Configurable;
import org.apache.flume.event.SimpleEvent;
import org.apache.flume.source.AbstractSource;

import java.util.HashMap;
import java.util.concurrent.ConcurrentMap;

public class MySource extends AbstractSource implements PollableSource, Configurable {

    //定义配置文件将来要读取的字段
    private Long delay;
    private String field;

    //获取数据封装成 event 并写入 channel,这个方法将被循环调用
    @Override
    public Status process() throws EventDeliveryException {
        try {
            //事件头信息
            HashMap<String,String> headerMap = new HashMap<>();
            //创建事件
            SimpleEvent event = new SimpleEvent();
            //循环封装事件
            for (int i = 0; i < 5; i++) {
                //设置头信息
                event.setHeaders(headerMap);
                //设置事件内容
                event.setBody((field + i).getBytes());
                //将事件写入Channel
                getChannelProcessor().processEvent(event);
                Thread.sleep(delay);
            }

        }catch (InterruptedException e) {
            throw new RuntimeException(e);
        }
        return Status.READY;
    }

    //backoff 步长
    @Override
    public long getBackOffSleepIncrement() {
        return 0;
    }

    //backoff 最长时间
    @Override
    public long getMaxBackOffSleepInterval() {
        return 0;
    }

    //初始化 context(读取配置文件内容)
    @Override
    public void configure(Context context) {
        delay = context.getLong("delay");
        field = context.getString("field","Hello");
    }

}
打包放到flume安装路径下的lib文件夹中;
配置文件
# Name the components on this agent
a1.sources = r1
a1.sinks = k1
a1.channels = c1

# Describe/configure the source
a1.sources.r1.type = com.why.source.MySource
a1.sources.r1.delay = 1000
a1.sources.r1.field = why

# Describe the sink
a1.sinks.k1.type = logger

# Use a channel which buffers events in memory
a1.channels.c1.type = memory
a1.channels.c1.capacity = 1000
a1.channels.c1.transactionCapacity = 100

# Bind the source and sink to the channel
a1.sources.r1.channels = c1
a1.sinks.k1.channel = c1
执行指令
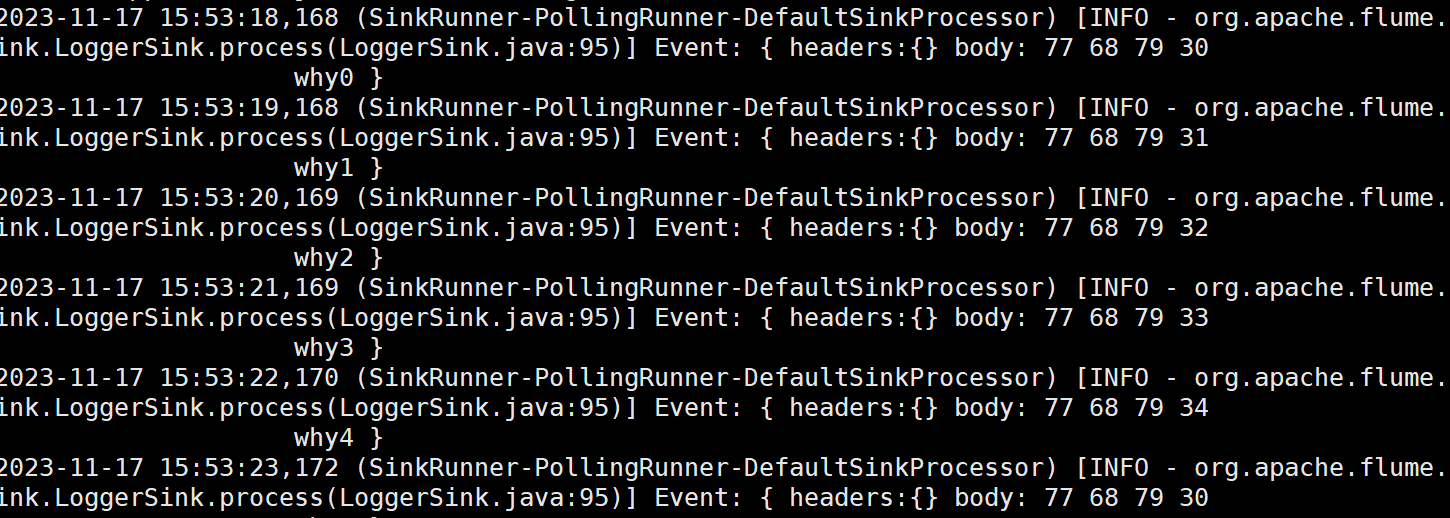
hadoop102上:bin/flume-ng agent --conf conf/ --name a1 --conf-file job/group5/mysource.conf -Dflume.root.logger=INFO,console
结果如下:
自定义 Sink
Sink 不断地轮询 Channel 中的事件且批量地移除它们,并将这些事件批量写入到存储或索引系统、或者被发送到另一个 Flume Agent。
Sink 是完全事务性的。在从 Channel 批量删除数据之前,每个 Sink 用 Channel 启动一个事务。批量事件一旦成功写出到存储系统或下一个 Flume Agent,Sink 就利用 Channel 提交事务。事务一旦被提交,该 Channel 从自己的内部缓冲区删除事件
官方文档:Flume 1.11.0 Developer Guide — Apache Flume
接口实例:
public class MySink extends AbstractSink implements Configurable {
    private String myProp;

    @Override
    public void configure(Context context) {
        String myProp = context.getString("myProp", "defaultValue");

        // Process the myProp value (e.g. validation)

        // Store myProp for later retrieval by process() method
        this.myProp = myProp;
    }

    @Override
    public void start() {
        // Initialize the connection to the external repository (e.g. HDFS) that
        // this Sink will forward Events to ..
    }

    @Override
    public void stop () {
        // Disconnect from the external respository and do any
        // additional cleanup (e.g. releasing resources or nulling-out
        // field values) ..
    }

    @Override
    public Status process() throws EventDeliveryException {
        Status status = null;

        // Start transaction
        Channel ch = getChannel();
        Transaction txn = ch.getTransaction();
        txn.begin();
        try {
            // This try clause includes whatever Channel operations you want to do

            Event event = ch.take();

            // Send the Event to the external repository.
            // storeSomeData(e);

            txn.commit();
            status = Status.READY;
        } catch (Throwable t) {
            txn.rollback();

            // Log exception, handle individual exceptions as needed

            status = Status.BACKOFF;

            // re-throw all Errors
            if (t instanceof Error) {
                throw (Error)t;
            }
        }
        return status;
    }
}
自定义MySink 需要继承 AbstractSink 类并实现 Configurable 接口
实战需求分析
使用 flume 接收数据,并在 Sink 端给每条数据添加前缀和后缀,输出到控制台。前后缀可在 flume 任务配置文件中配置
代码
package com.why.sink;

import org.apache.flume.*;
import org.apache.flume.conf.Configurable;
import org.apache.flume.sink.AbstractSink;

import org.slf4j.Logger;
import org.slf4j.LoggerFactory;

public class MySink extends AbstractSink implements Configurable {

    //创建 Logger 对象
    private static final Logger LOG = LoggerFactory.getLogger(AbstractSink.class);
    //前后缀
    private String prefix;
    private String suffix;

    @Override
    public Status process() throws EventDeliveryException {
        //声明返回值状态信息
        Status status;
        //获取当前 Sink 绑定的 Channel
        Channel ch = getChannel();
        //获取事务
        Transaction txn = ch.getTransaction();
        //声明事件
        Event event;
        //开启事务
        txn.begin();
        //读取 Channel 中的事件,直到读取到事件结束循环
        while (true) {
            event = ch.take();
            if (event != null) {
                break;
            }
        }
        try {
            //处理事件(打印)
            LOG.info(prefix + new String(event.getBody()) + suffix);
            //事务提交
            txn.commit();
            status = Status.READY;
        } catch (Exception e) {
            //遇到异常,事务回滚
            txn.rollback();
            status = Status.BACKOFF;
        } finally {
            //关闭事务
            txn.close();
        }
        return status;
    }

    @Override
    public void configure(Context context) {
        prefix = context.getString("prefix", "hello");
        suffix = context.getString("suffix");
    }
}
打包放到flume安装路径下的lib文件夹中;
配置文件
# Name the components on this agent
a1.sources = r1
a1.sinks = k1
a1.channels = c1

# Describe/configure the source
a1.sources.r1.type = netcat
a1.sources.r1.bind = localhost
a1.sources.r1.port = 44444

# Describe the sink
a1.sinks.k1.type = com.why.sink.MySink
a1.sinks.k1.prefix = why:
a1.sinks.k1.suffix = :why

# Use a channel which buffers events in memory
a1.channels.c1.type = memory
a1.channels.c1.capacity = 1000
a1.channels.c1.transactionCapacity = 100

# Bind the source and sink to the channel
a1.sources.r1.channels = c1
a1.sinks.k1.channel = c1
执行指令
hadoop102上:bin/flume-ng agent --conf conf/ --name a1 --conf-file job/group6/mysink.conf -Dflume.root.logger=INFO,console
结果如下:


 被折叠的 条评论
为什么被折叠?
被折叠的 条评论
为什么被折叠?
 到【灌水乐园】发言


