


-
链表使用结构为:
const int max = 10;
	struct tag_Stu
	{
		int nAge;
		struct tag_Stu* next;//4字节
	};
typedef struct tag_Stu stu;-
头插法:
- 注意点:
输入开始时就创建了末尾空指针,因此,创建过程中不必再考虑出现野指针的问题。但需要注意,输入元素与实际创建链表顺序相反。然而,也因此可以用来解决链表反转等问题。
示意图:

循环主要代码:
- 代码:(以输入为例)
//头插法
	stu* CreateLinker()
	{
		stu* pH = new stu();
		stu* Pf = pH;
		pH->next = NULL;
		for (int i = 0; i < max; i++)
		{
			stu* Pfre = new stu();
			Pfre->next = pH->next;
			std::cout << "Enter the number :\n";
			std::cin >> Pfre->nAge;
			if (!std::cin)
			{
				std::cin.clear();
				while (std::cin.get() != '\n')
					continue;//继续循环,消除错误输入
				std::cout << "Enter end.\n";
				delete Pfre;
				break;
			}
			pH->next = Pfre;
		}
		return Pf;
}-
尾插法:
-
注意点:
尾插法更加容易理解,插入顺序与创建顺序相同,使用方便,但在确保强健性时,需要额外设置保障指针。
示意图:
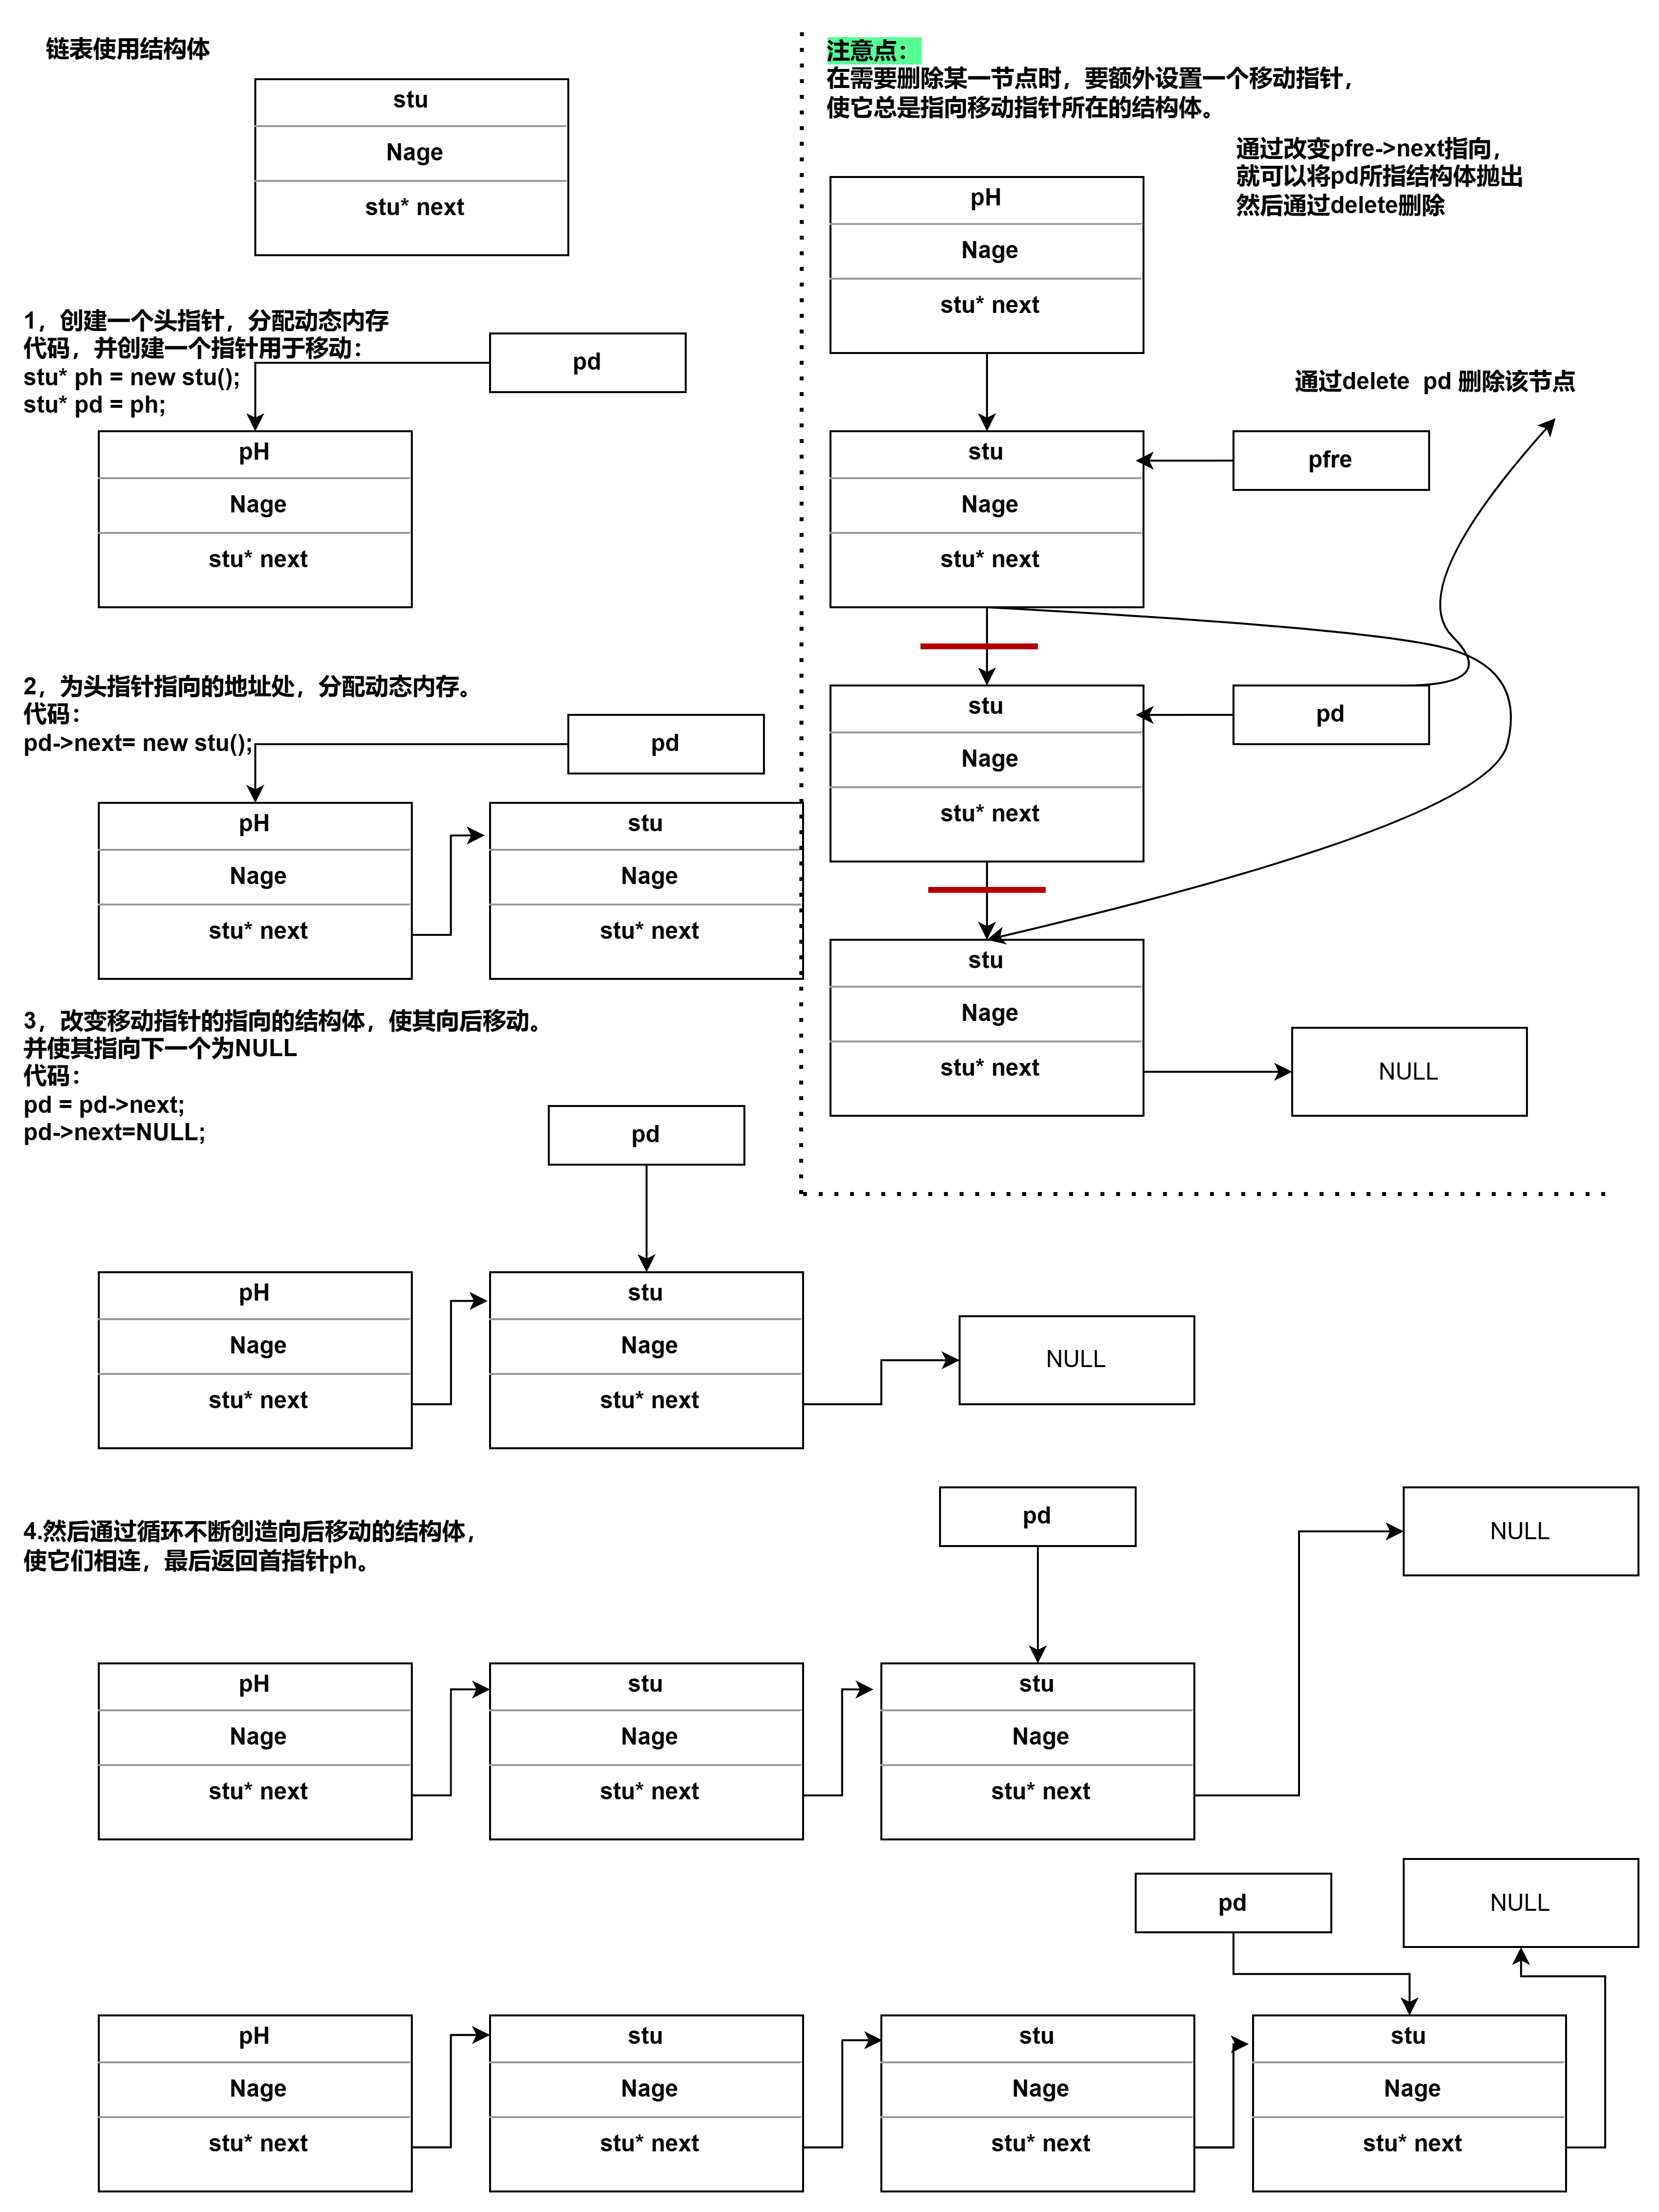
循环主要代码:
- 代码:(以输入为例)
stu* CreateLinker_E()
	{
		using std::cout;
		using std::endl;
		using std::cin;
		stu* ph = new stu();
		stu* pd = ph;
		stu* pf = pd->next;
		for (int i = 0; i < max; i++)
		{
			pd->next= new stu();
			pf = pd->next;
			//
			//输入
			cout << "Enter a number :\n";
			cin >> pf->nAge;
			if (!cin)
			{
				cin.clear();
				while (cin.get() != '\n')
					continue;
				cout << "Enter end.\n";
				delete pf;
				pd->next = NULL;
				break;
			}
			//
			//向下循环
			pd = pf;
			pd->next = NULL;
		}
		return ph;
	}


 1万+
1万+


 被折叠的 条评论
为什么被折叠?
被折叠的 条评论
为什么被折叠?
 到【灌水乐园】发言


