


themleaf依赖
<dependency>
            <groupId>org.thymeleaf</groupId>
            <artifactId>thymeleaf-spring5</artifactId>
        </dependency>
        <dependency>
            <groupId>org.thymeleaf.extras</groupId>
            <artifactId>thymeleaf-extras-java8time</artifactId>
        </dependency>
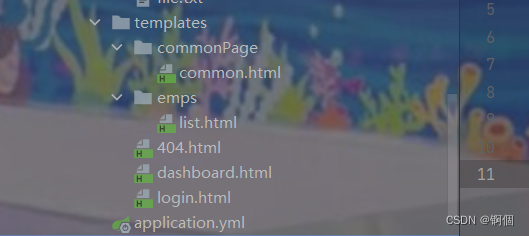
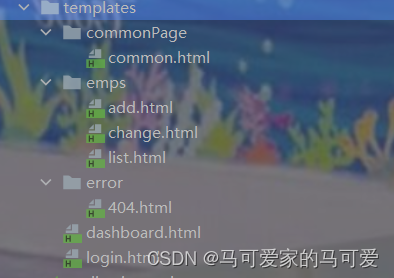
1、首先有如下项目目录
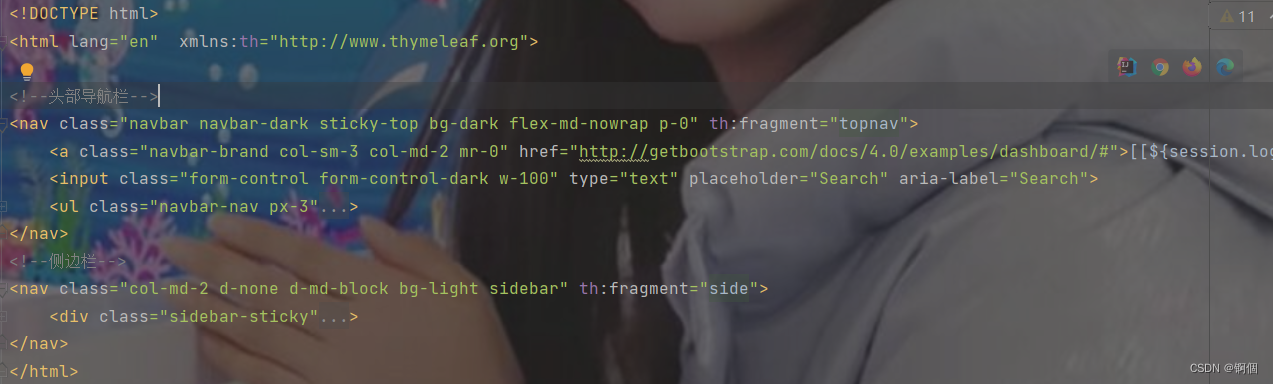
2、建立抽取公共common.html页面文件
将dashbord.html和emps下的list.html重复的导航栏和侧边栏代码抽取到common下的common.html文件中
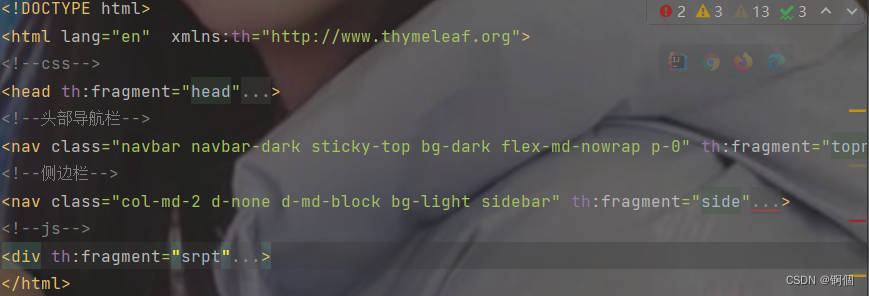
使用th:fragment="topnav"为公共片段命名(导航栏)
th:fragment=“side”(侧边栏)
3、从common.html中找取需要的片段
th:include和 th:replace的区别
th:include:引入子模块的children,依然保留父模块的tag。 加载模板的内容: 读取加载节点的内容(不含节点名称),替换div内容
th:replace:引入子模块的所有,不保留父模块的tag。 替换当前标签为模板中的标签,加载的节点会整个替换掉加载他的div
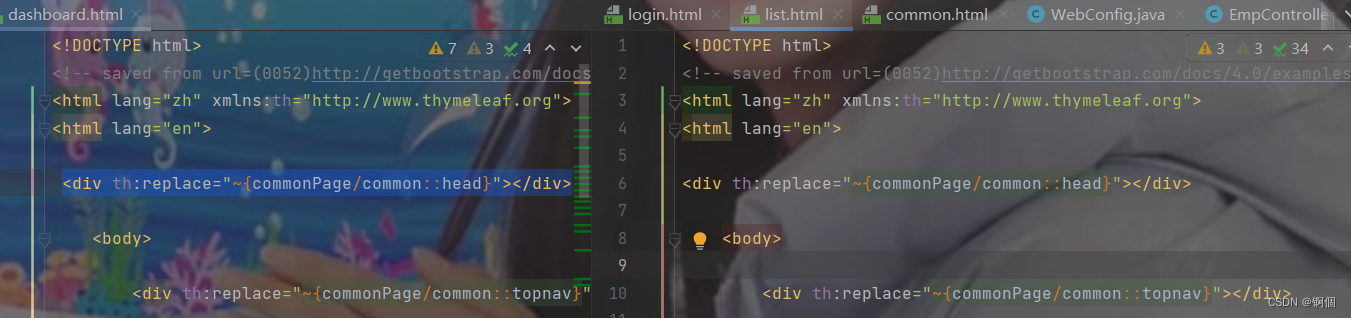
在dashbord.html中使用
<div th:include="~{commonPage/common::topnav}"></div>引入头部导航栏;
使用<div th:include="~{commonPage/common::side}"></div>引入侧边栏
同样在emps下的list.html中执行同样的操作!最好和dashbord.html中使用一样的方法引入头部导航栏和侧边栏
<div th:include="~{commonPage/common::topnav}"></div>
<div th:include="~{commonPage/common::side}"></div>
即可做到代码重用,类似于vue中的组件!
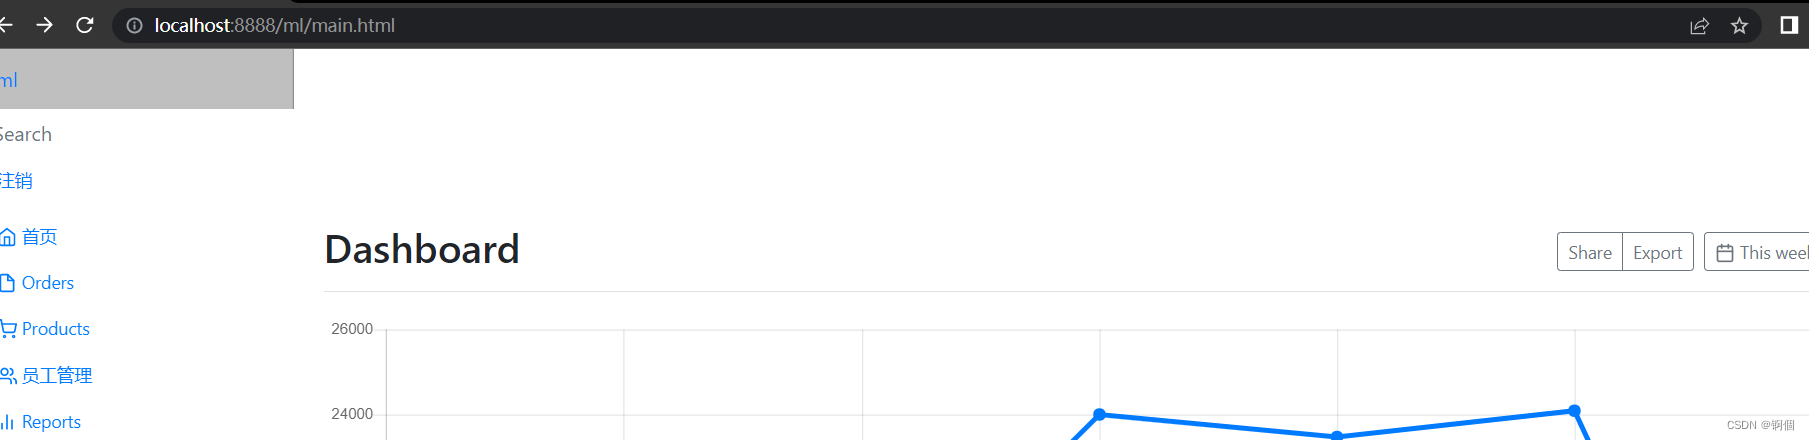
但是上面都使用<div th:include="~{commonPage/common::topnav}"></div>和<div th:include="~{commonPage/common::side}"></div>引入头部导航栏和侧边栏之后,无论是首页还是员工管理页面都会变形
但是若都在dashbord.html和list.html中都使用下面的代码
<div th:replace="~{commonPage/common::topnav}"></div>
<div th:replace="~{commonPage/common::side}"></div>
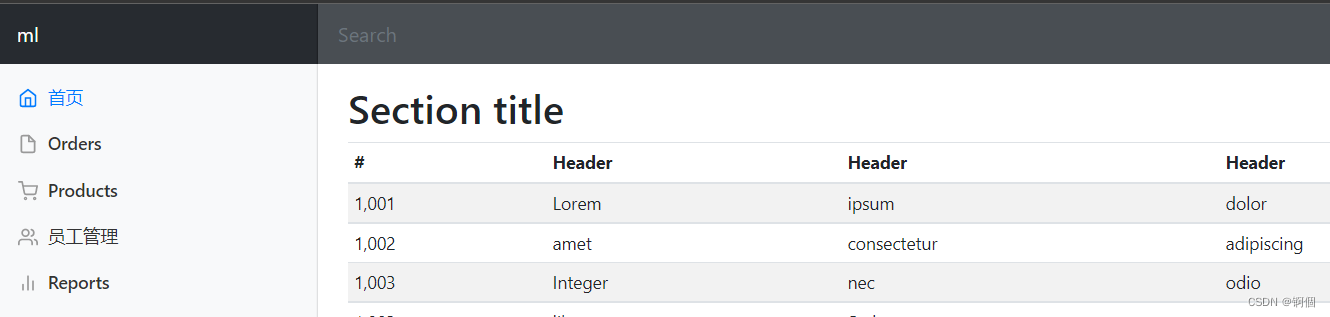
则不会使登陆访问的首页和员工管理页面变形
然后就可以在抽取的公共页面做在dashbord.html和list.html中相同的操作!
实际上也可以将多个页面中重复的style、js代码抽取到公共页面中
将list.html和dashboard.html中的公共css代码抽取到公共页面common.html中,并为公共的css命名为th:fragment="head"
<head th:fragment="head">
    <meta http-equiv="Content-Type" content="text/html; charset=UTF-8">
    <meta name="viewport" content="width=device-width, initial-scale=1, shrink-to-fit=no">
    <meta name="description" content="">
    <meta name="author" content="">

    <title>Dashboard Template for Bootstrap</title>
    <!-- Bootstrap core CSS -->
    <link th:href="@{/css/bootstrap.min.css}" rel="stylesheet">

    <!-- Custom styles for this template -->
    <link th:href="@{/css/dashboard.css}" rel="stylesheet">
    <style type="text/css">
        /* Chart.js */

        @-webkit-keyframes chartjs-render-animation {
            from {
                opacity: 0.99
            }
            to {
                opacity: 1
            }
        }

        @keyframes chartjs-render-animation {
            from {
                opacity: 0.99
            }
            to {
                opacity: 1
            }
        }

        .chartjs-render-monitor {
            -webkit-animation: chartjs-render-animation 0.001s;
            animation: chartjs-render-animation 0.001s;
        }
    </style>
</head>
然后分别在dashboard.html和list.html中引入css片段
启动项目,登陆访问正常!

将list.html和dashboard.html中的公共js代码抽取到公共页面common.html中,并为公共的css命名为th:fragment="stpt"
<div th:fragment="srpt">
    <script type="text/javascript" th:src="@{/js/jquery-3.2.1.slim.min.js}" ></script>
    <script type="text/javascript" th:src="@{/js/popper.min.js}" ></script>
    <script type="text/javascript" th:src="@{/js/bootstrap.min.js}" ></script>

    <!-- Icons -->
    <script type="text/javascript" th:src="@{/js/feather.min.js}" ></script>
    <script>
        feather.replace()
    </script>

    <!-- Graphs -->
    <script type="text/javascript" th:src="@{/js/Chart.min.js}" ></script>
    <script>
        var ctx = document.getElementById("myChart");
        var myChart = new Chart(ctx, {
            type: 'line',
            data: {
                labels: ["Sunday", "Monday", "Tuesday", "Wednesday", "Thursday", "Friday", "Saturday"],
                datasets: [{
                    data: [15339, 21345, 18483, 24003, 23489, 24092, 12034],
                    lineTension: 0,
                    backgroundColor: 'transparent',
                    borderColor: '#007bff',
                    borderWidth: 4,
                    pointBackgroundColor: '#007bff'
                }]
            },
            options: {
                scales: {
                    yAxes: [{
                        ticks: {
                            beginAtZero: false
                        }
                    }]
                },
                legend: {
                    display: false,
                }
            }
        });
    </script>
</div>
然后分别在dashboard.html和list.html中引入js片段
启动项目,登陆访问正常!
至此所有关于抽取公共页面的操作到此结束!抽取的公共页面如下
这里记录一个自己的体会
当项目中涉及大量的页面跳转,我们可以使用addViewControllers方法实现无业务逻辑跳转,从而减少控制器代码的编写。
addViewControllers方法可以实现将一个请求直接映射为视图,不需要编写控制器来实现,从而简化了页面跳转
@Configuration
public class WebConfig implements WebMvcConfigurer {
    @Override
    public void addViewControllers(ViewControllerRegistry registry) {
        registry.addViewController("/").setViewName("login");
        registry.addViewController("/login.html").setViewName("login");
        registry.addViewController("/main.html").setViewName("dashboard");
        registry.addViewController("/listEmp").setViewName("emps/list");
    }
    @Bean   //注册到容器中
    public LocaleResolver localeResolver(){
        return  new MyLocalResolver();
    }

    @Override
    public void addInterceptors(InterceptorRegistry registry) {
        registry.addInterceptor(new LoginHandlerInterceptor())
                .addPathPatterns("/**")
                .excludePathPatterns("/","/login.html","/index","/css/**","/js/**","/img/**");
    }

}
registry.addViewController("/").setViewName("login");用于登陆后台的时候自动跳转到登陆页面。setViewName(“login”)中的参数是要返回视图的名字,相当于控制器中的return的视图名;而addViewController(“/”)中是请求路径!
registry.addViewController("/login.html").setViewName("login");这个是用于定制国际化操作时实现无业务逻辑跳转,th:href="@{/login.html(l='en_US')}" 中的login.html是registry.addViewController("/login.html")中的login.html,需要访问的页面是setViewName("login");中templates目录下的login页面前端代码如下
<a class="btn btn-sm" th:href="@{/login.html(l='zh_CN')}">中文</a>  <!--thymeleaf中不用?这种方式取路径变量@{/login.html?l='zh_CN'}-->
<a class="btn btn-sm" th:href="@{/login.html(l='en_US')}">English</a>
不用写后台控制器就可以实现跳转!
registry.addViewController("/main.html").setViewName("dashboard");是登陆login页面登陆之后需要访问的首页。/main.html是请求路径,dashboard是templates目录下的html文件!
@Controller
public class Admin {
    @PostMapping("/index")
    public String index(@RequestParam("username") String username, @RequestParam("password") String password, Model model, HttpSession session){
        if(!StringUtils.isEmpty(username)&& "mmmm".equals(username) &&!StringUtils.isEmpty(password)&& "123".equals(password)){
            session.setAttribute("loginUser",username);
            return "redirect:/main.html";  //使用redirect:/main.html是为了重定向到到虚拟的视图,如果跳转到template下的dashboard会在搜索框显示账号密码
        }
        else{
            model.addAttribute("msg","账号或者密码有误!请重新登陆!");
            return "login";
        }
    }
}
注意要想在控制器中使用addViewControllers方法实现无业务逻辑跳转,必须使用重定向,如
return "redirect:/main.html";
而不能直接是return “main.html”;正如上面控制器中的return "login",它是返回的是templates目录下的名为login的html文件!若是直接使用addViewControllers方法中的return "login.html"或者return "/"都是错误的做法,访问页面的时候会访问不到,无法解析!
当然可以在html页面中直接使用addViewControllers方法实现无业务逻辑跳转,如在抽取的公共页面中写如下代码
<a class="nav-link active" th:href="@{/main.html}">
这样就可以直接实现在dashbord.html和list.html中点击链接,跳转到addViewControllers访问路径下的dashbord.html首页!
因为thymeleaf默认提供的视图解析器,映射到template目录下,如果要访问页面自定义的目录,就需要在application.yaml中配置了
假设要访问mm目录下的hello.html spring.thymeleaf.prefix=classpath:/mm/ spring.thymeleaf.suffix=.html
还有如下各种配置
server:
port: 8888
servlet:
context-path: /ml #配置虚拟访问路径
spring:
thymeleaf:
cache: false #关闭模板引擎的缓存
messages:
basename: i18n.login #访问国际化配置文件的真实路径
4、侧边栏点击产生对应高亮
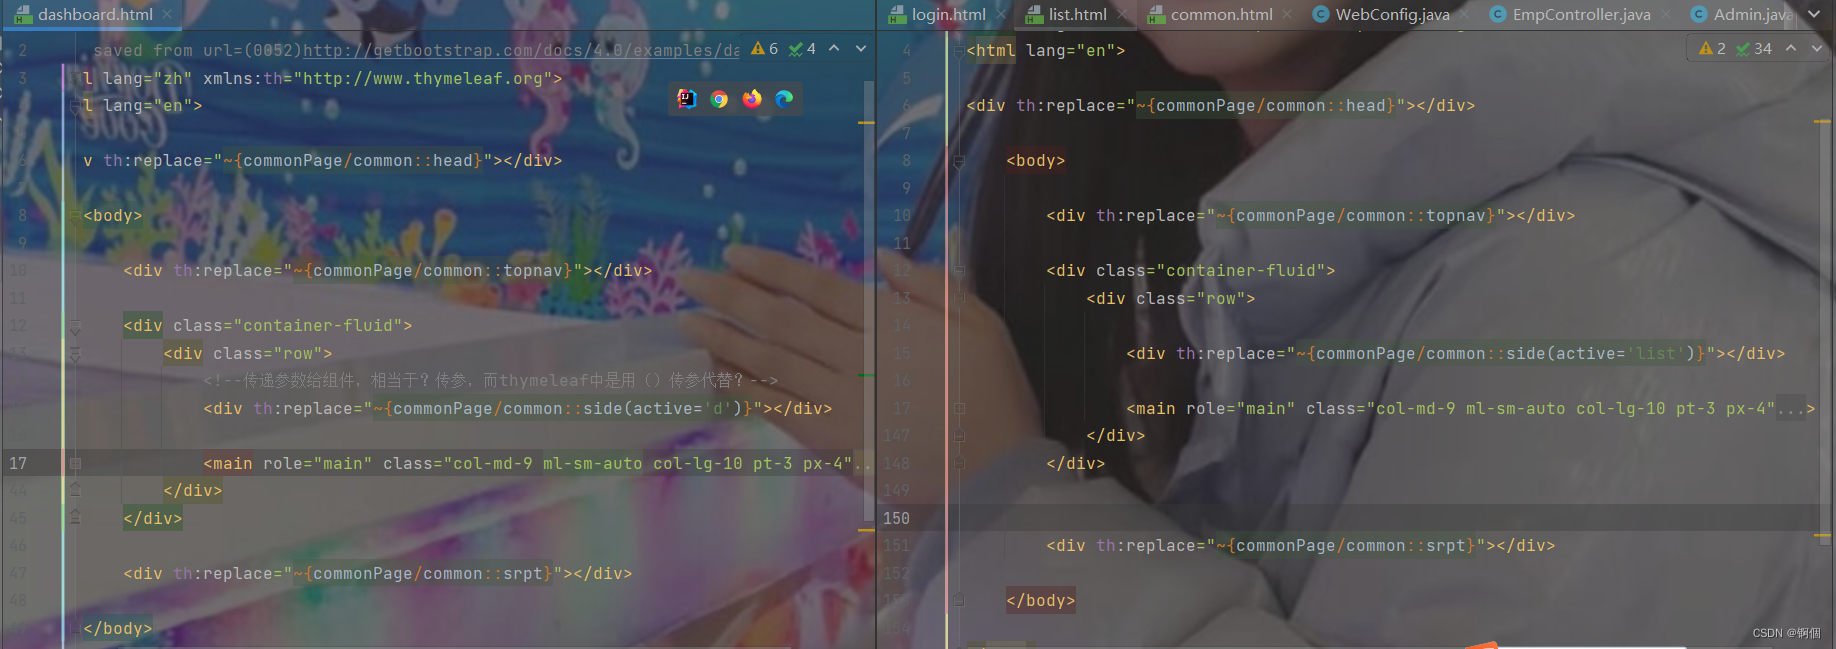
在dashboard.html引入common.html中侧边栏的片段中传递参数判断是否产生高亮,如下
<!--传递参数给组件,相当于?传参,而thymeleaf中是用()传参代替?-->
<div th:replace="~{commonPage/common::side(active='d')}"></div>
然后在common.html公共侧边栏中写入如下代码
<li class="nav-item">
    <a th:class="${active=='d'?'nav-link active':'nav-link'}" th:href="@{/main.html}">
    <svg xmlns="http://www.w3.org/2000/svg" width="24" height="24" viewBox="0 0 24 24" fill="none" stroke="currentColor" stroke-width="2" stroke-linecap="round" stroke-linejoin="round" class="feather feather-home">
    <path d="M3 9l9-7 9 7v11a2 2 0 0 1-2 2H5a2 2 0 0 1-2-2z"></path>
    <polyline points="9 22 9 12 15 12 15 22"></polyline>
    </svg>
    首页<span class="sr-only">(current)</span>
    </a>
</li>
其中<a th:class=“${active==‘d’?‘nav-link active’:‘nav-link’}” 用于判断当在其他页面中点击首页dashboard.html的时候,公共页面中就会判断是否传参为d,若是d则侧边栏中的“首页”两字就亮,并且跳转到首页dashboard.html!若不是则也会跳转到首页dashboard.html,但是不会在相应点击的位置产生高亮!
同理在list.html引入common.html中侧边栏的片段中传递参数判断是否产生高亮
<div th:replace="~{commonPage/common::side(active='list')}"></div>
 <li class="nav-item">
                <a th:class="${active=='list'?'nav-link active':'nav-link'}" th:href="@{/all}">
                    <svg xmlns="http://www.w3.org/2000/svg" width="24" height="24" viewBox="0 0 24 24" fill="none" stroke="currentColor" stroke-width="2" stroke-linecap="round" stroke-linejoin="round" class="feather feather-users">
                        <path d="M17 21v-2a4 4 0 0 0-4-4H5a4 4 0 0 0-4 4v2"></path>
                        <circle cx="9" cy="7" r="4"></circle>
                        <path d="M23 21v-2a4 4 0 0 0-3-3.87"></path>
                        <path d="M16 3.13a4 4 0 0 1 0 7.75"></path>
                    </svg>
                    员工管理
                </a>
 </li>
5、显示数据
(1)后端代码如下
@Controller
public class EmpController {
    @Autowired
    EmployeeDao employeeDao;
    @RequestMapping("/all")
    public String empList(Model model){
        Collection<Employee> employeeList = employeeDao.getAllEmployee();
        model.addAttribute("emps",employeeList);
        return "emps/list";
    }
}
(2)themleaf中的前端代码如下
<h2>员工管理</h2>
					<h6 style="margin-top: 15px"><a class="btn btn-sm btn-success" th:href="@{/emp}">添加员工</a></h6>
					<div class="table-responsive" style="margin-top: 20px">
						<table class="table table-bordered">
							<thead>
								<tr>
									<th>id</th>
									<th>lastName</th>
									<th>email</th>
									<th>gender</th>
									<th>department</th>
									<th>birth</th>
									<th>操作</th>
								</tr>
							</thead>
							<tbody>
								<tr th:each="emp:${emps}">
									<td th:text="${emp.getId()}"></td>
									<td th:text="${emp.getLastName()}"></td>
									<td th:text="${emp.getEmail()}"></td>
									<td th:text="${emp.getGender()==0?'男':'女'}"></td>
									<td th:text="${emp.getDepartment().getDepartmentName()}"></td>
									<td>[[${#dates.format(emp.getDate(), 'yyyy-MM-dd')}]]</td>
									<td>
										<button class="btn btn-sm btn-primary">编辑</button>
										<button class="btn btn-sm btn-danger">删除</button>
									</td>
								</tr>
							</tbody>
						</table>
					</div>
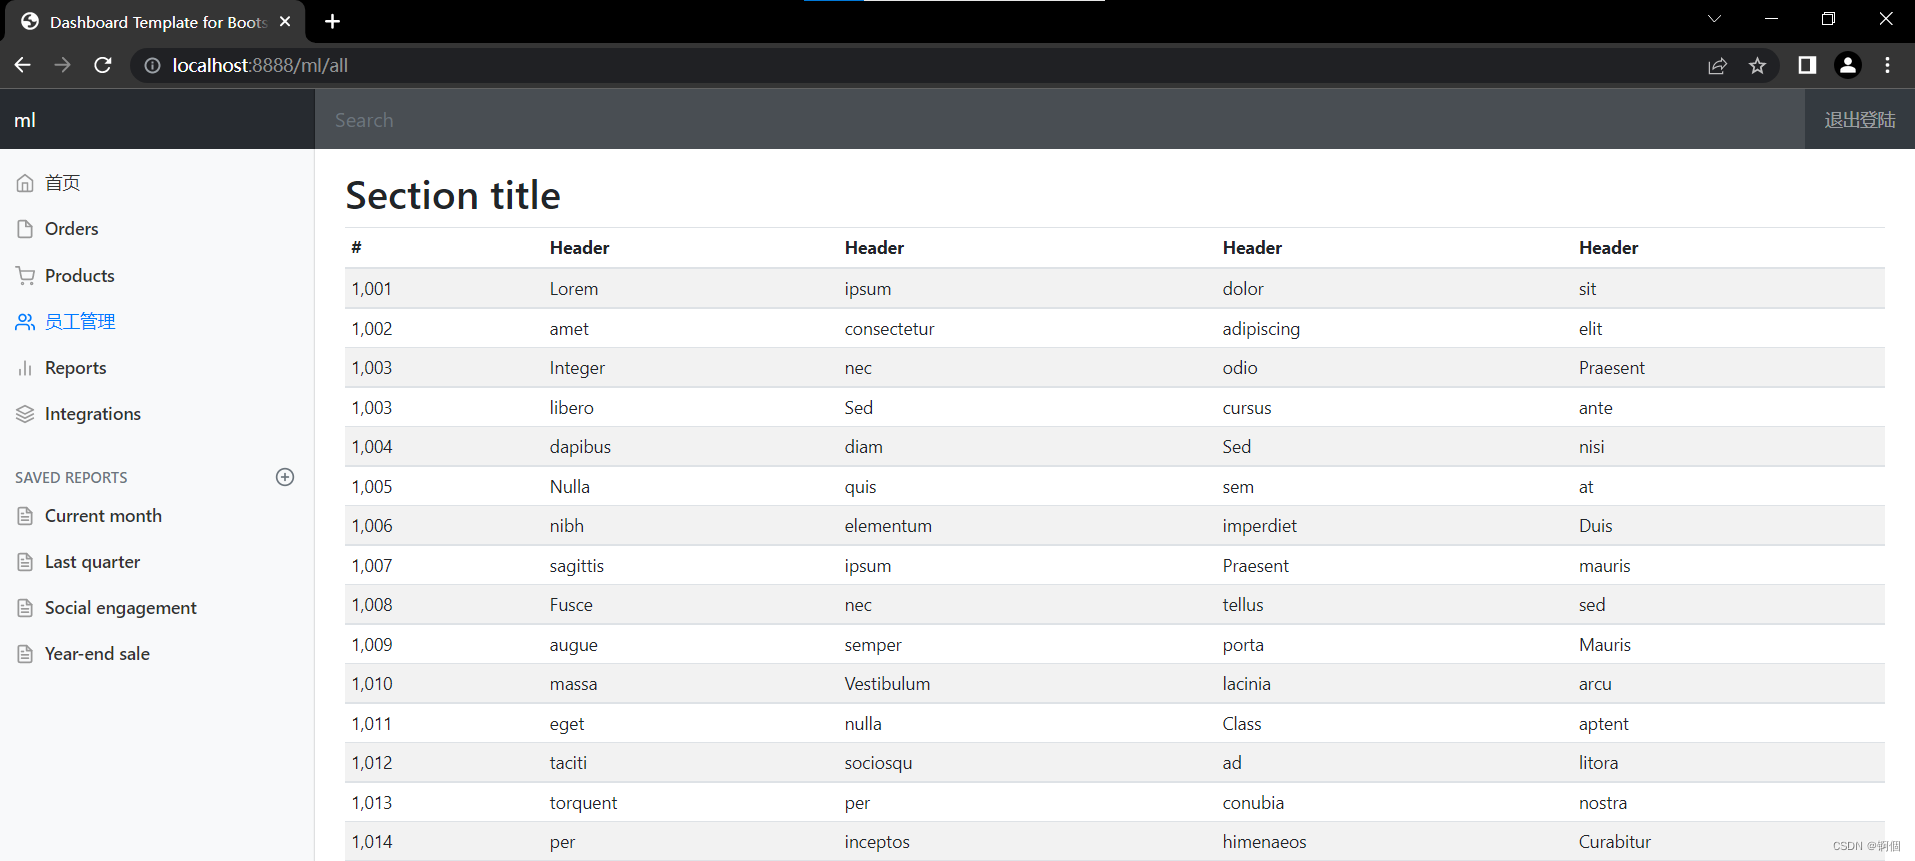
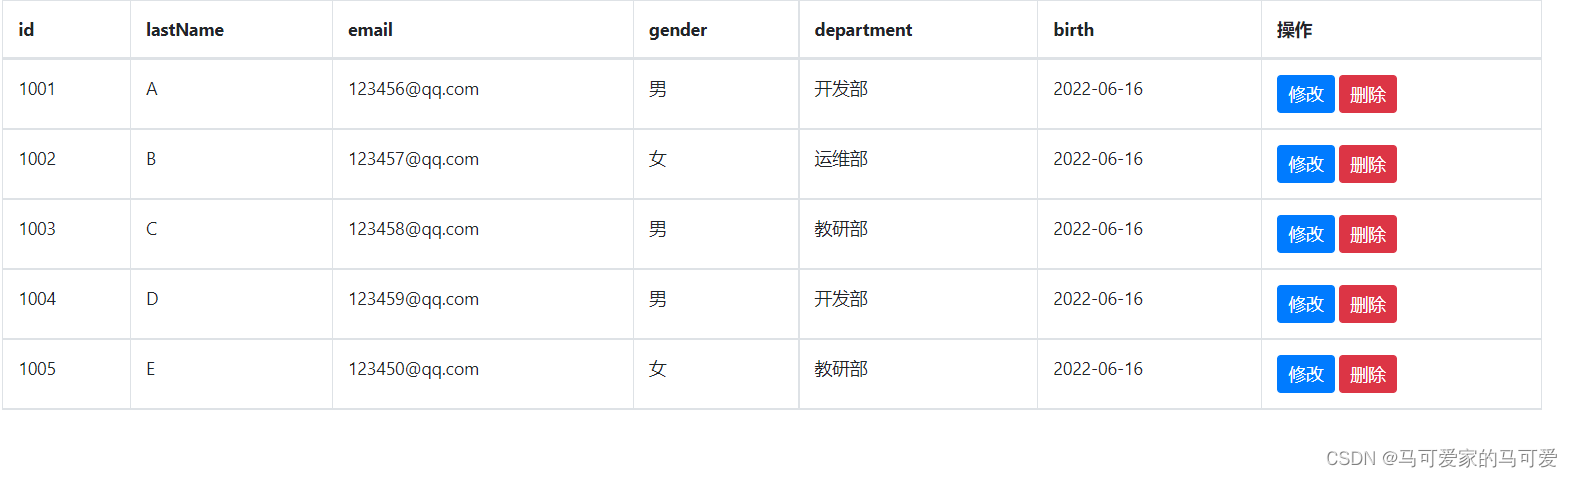
(3)运行结果显示
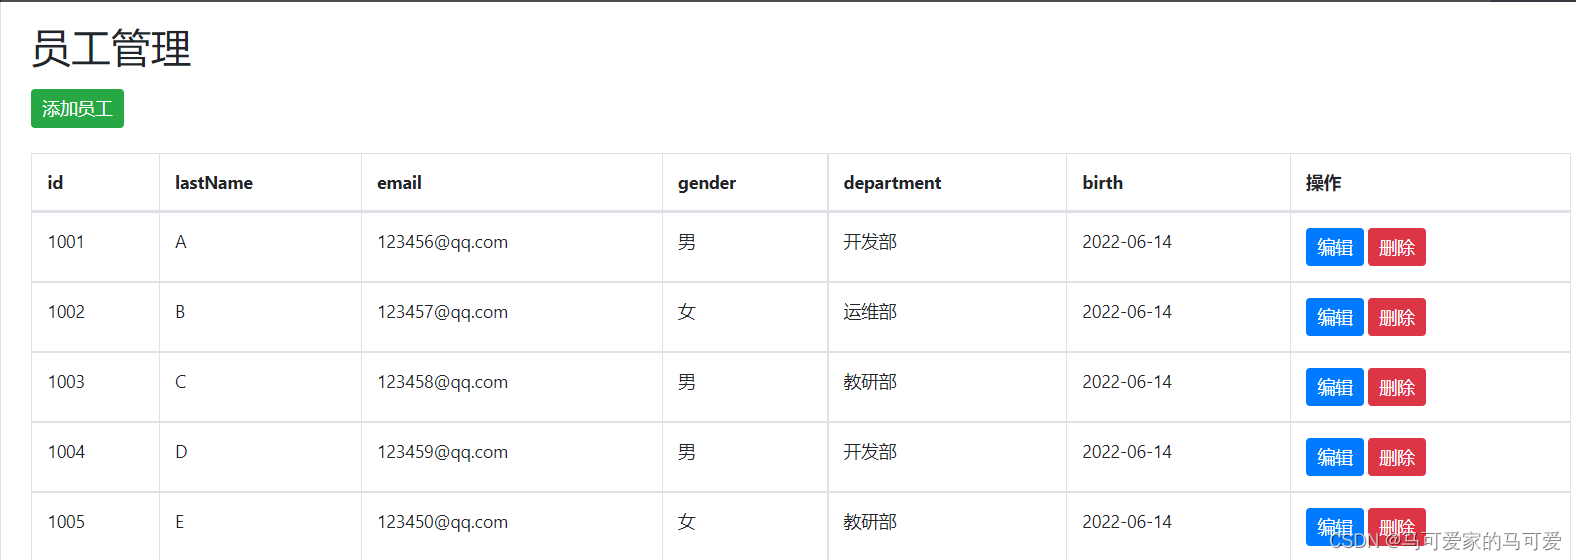
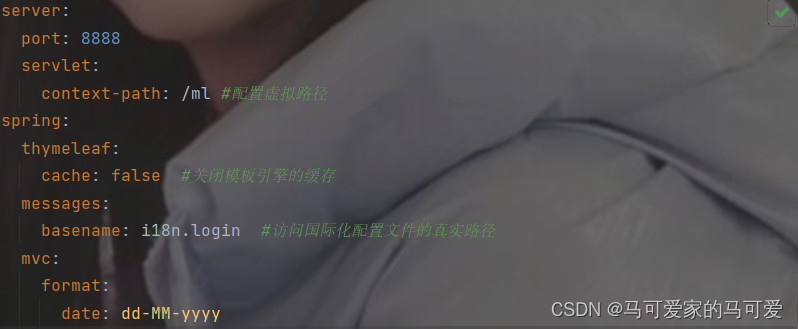
这里的显示数据要在application.yaml中提前配置好关于日期显示的格式,否则显示的是具体的年月日时分秒,如下
6、添加数据
(1)在上面的list.html员工管理页面添加“添加员工”按钮,链接如下
<h6 style="margin-top: 15px"><a class="btn btn-sm btn-success" th:href="@{/emp}">添加员工</a></h6>
(2)(1)中请求后端返回添加员工的页面,页面中需要返回部门信息,供添加员工信息的时候选择该员工属于哪个部门
@GetMapping("/emp")   //restful风格,相同的请求路径,但是使用不同的请求方式,这里是使用get方式
    public String addPage(Model model) {
        //查出所有的部门信息
        Collection<Department> departments = departmentDao.getAllDepartments();
        model.addAttribute("dps",departments);
        return "emps/add";
    }
(3)前端添加员工数据add.html页面中的form表单
<form method="post" th:action="@{/emp}">
						<div class="form-group">
							<label for="lN">lastName</label>
							<input type="text" class="form-control" name="lastName" id="lN" placeholder="ml">
						</div>
						<div class="form-group">
							<label for="em">email</label>
							<input type="email" class="form-control" name="email" id="em" placeholder="3518806826@qq.com">
						</div>
						<div class="form-group">
							<label>gender</label><br/>
							<div class="form-check form-check-inline">
								<input class="form-check-input" type="radio" name="gender" value="1" checked>
								<label class="form-check-label">男</label>
							</div>
							<div class="form-check form-check-inline">
								<input class="form-check-input" type="radio" name="gender" value="0">
								<label class="form-check-label">女</label>
							</div>
						</div>
						<div class="form-group">
							<label>department</label>
							<select class="form-control" name="department.id">
								<option th:each="dept:${dps}" th:text="${dept.getDepartmentName()}" th:value="${dept.getId()}"></option>
							</select>
						</div>
						<div class="form-group">
							<label>birth</label>
							<input class="form-control" type="text" name="date" placeholder="1998-12-12">
						</div>
						<button type="submit" class="btn btn-primary">添加</button>
					</form>
其中对于添加员工的详细信息时还需要添加员工所在的部门,但是name="department.id"是向数据库中提交的该员工属于哪一个部门的id,而从遍历的部门数据中查找部门的id就需要使用th:value="${dept.getId()}",而供显示选择的是th:text="${dept.getDepartmentName()}。

这里可以这样理解,th:text="${dept.getDepartmentName()}供人选择,而每一个部门对应一个唯一的id,所以使用th:value="${dept.getId()}"将员工所属的id查找出来并使用name="department.id"上传至数据库!
<div class="form-group">
							<label>department</label>
							<select class="form-control" name="department.id">
								<option th:each="dept:${dps}" th:text="${dept.getDepartmentName()}" th:value="${dept.getId()}"></option>
							</select>
						</div>
(4)点击添加按钮直接提交数据,在后端重定向到list.html页面
@PostMapping("/emp") //使用restful风格,使用post方式提交数据
    public String addEmp(Employee employee) {
        //添加的操作
        employeeDao.insertEmployee(employee);
        return "redirect:/all";
    }
     @RequestMapping("/all")
    public String empList(Model model) {
        Collection<Employee> employeeList = employeeDao.getAllEmployee();
        model.addAttribute("emps", employeeList);
        return "emps/list";
    }
但是这里有一个问题需要注意一下,提交数据的时候会出现日期格式不匹配的问题,因为springboot中默认的是如下格式
 * Date format to use, for example 'dd/MM/yyyy'.
		 */
		private String date;

		/**
		 * Time format to use, for example 'HH:mm:ss'.
		 */
所以想要换成我们想要的格式首先就要在application.yaml中定义mvc: format: date: dd-MM-yyyy
如果是以上面传递实体的方式提交,然后只需要在Employee实体类下的date属性上添加@DateTimeFormat(pattern = "yyyy-MM-dd")注解,即可解决问题!

要是以HttpServletRequest request方式提交,就需要在控制器中将前端上传的字符串格式的日期转化为后端能够接受的日期格式,否则也会出现日期格式不匹配的错误!application.yaml中不需要定义mvc: format: date: dd-MM-yyyy
@RequestMapping(value = "/insert", method = RequestMethod.POST)
    public Object insertSinger(HttpServletRequest request) {
        JSONObject jsonObject = new JSONObject();
        String name = request.getParameter("name").trim();
        String sex = request.getParameter("sex").trim();
        String bornDate = request.getParameter("born").trim();
        String picture = request.getParameter("picture").trim();
        String location = request.getParameter("location").trim();
        String introduction = request.getParameter("introduction").trim();
        SimpleDateFormat simpleDateFormat = new SimpleDateFormat("yyyy-MM-dd");
        Date born = new Date();
        try {
            born = simpleDateFormat.parse(bornDate);
        } catch (ParseException e) {
            e.printStackTrace();
        }
        Singer singer = new Singer();
        singer.setName(name);
        singer.setSex(Integer.parseInt(sex));
        singer.setBorn(born);
        singer.setPicture(picture);
        singer.setLocation(location);
        singer.setIntroduction(introduction);
        Boolean flag = singerService.insertSinger(singer);
        if (flag) {
            jsonObject.put(Consts.CODE, 1);
            jsonObject.put(Consts.MSG, "添加歌手成功!");
            return jsonObject;
        }
        jsonObject.put(Consts.CODE, 0);
        jsonObject.put(Consts.MSG, "添加歌手失败");
        return jsonObject;
    }
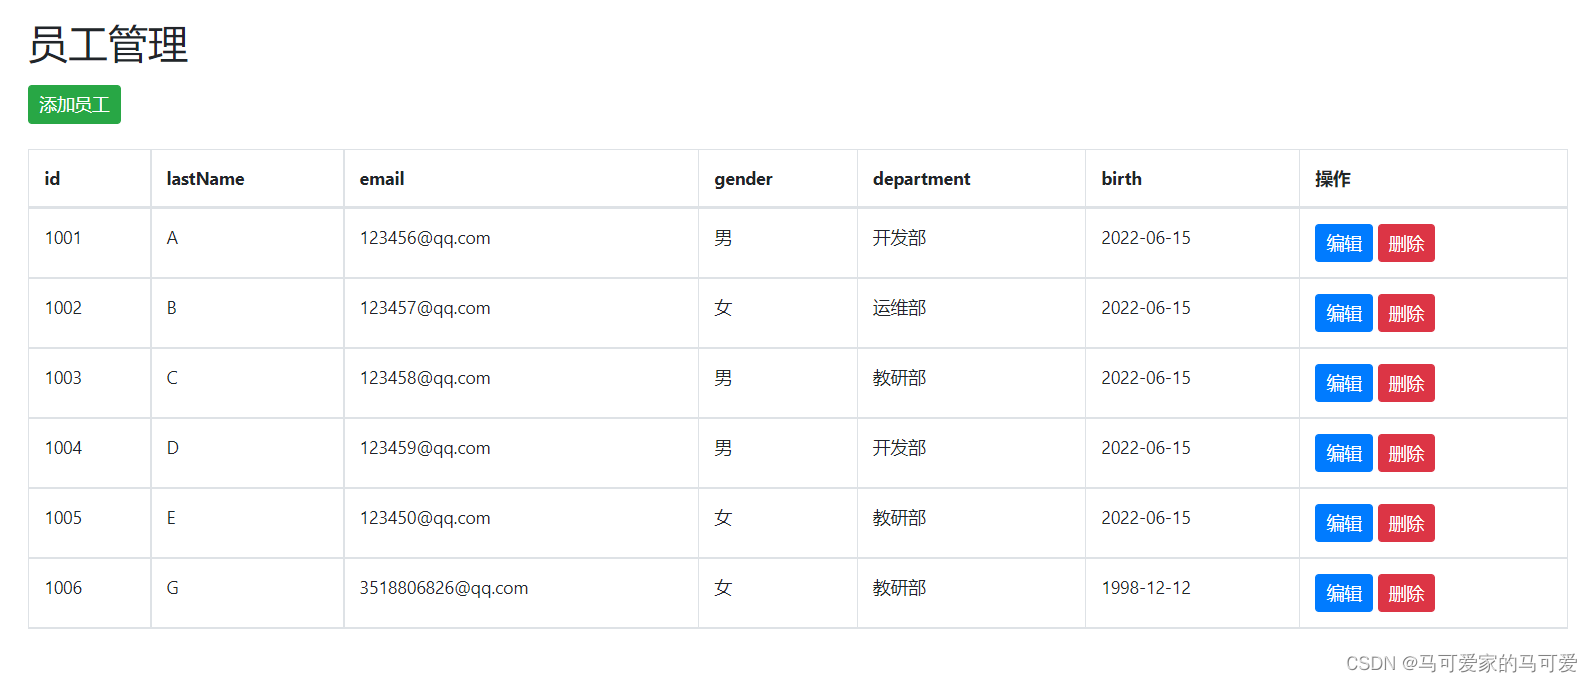
(5)、运行结果显示
7、修改员工
(1)在上面的list.html员工管理页面添加“修改”或“编辑”按钮,链接如下
<a class="btn btn-sm btn-primary" th:href="@{/emp/}+${emp.getId()}">修改</a>
(2)(1)中请求后端返回修改员工的页面,页面中需要回显给客户端员工信息、部门信息,供客户端修改员工、以及员工的部门信息
@GetMapping("/emp/{empId}")    //restful风格,相同的get方式,但是这个请求;路径中有参数,restful风格中使用{}而不是传统的使用?
    public String changePage(@PathVariable("empId") Integer empId,Model model){
        //根据id查询对应的员工,并且查询所有的部门便于修改
        Collection<Department> departments = departmentDao.getAllDepartments();
        model.addAttribute("dps", departments);
        Employee employee = employeeDao.getEmployeeById(empId);
        model.addAttribute("employee",employee);
        return "emps/change";
    }
(3)前端修改员工数据change.html页面中的form表单
<form method="post" th:action="@{/emp}">
						<input type="hidden" name="id" th:value="${employee.getId()}">
						<div class="form-group">
							<label for="lN">lastName</label>
							<input th:value="${employee.getLastName()}" type="text" class="form-control" name="lastName" id="lN" placeholder="ml">
						</div>
						<div class="form-group">
							<label for="em">email</label>
							<input th:value="${employee.getEmail()}" type="email" class="form-control" name="email" id="em" placeholder="3518806826@qq.com">
						</div>
						<div class="form-group">
							<label>gender</label><br/>
							<div class="form-check form-check-inline">
								<input th:checked="${employee.getGender()==1}" class="form-check-input" type="radio" name="gender" value="1" checked>
								<label class="form-check-label">男</label>
							</div>
							<div class="form-check form-check-inline">
								<input th:checked="${employee.getGender()==0}" class="form-check-input" type="radio" name="gender" value="0">
								<label class="form-check-label">女</label>
							</div>
						</div>
						<div class="form-group">
							<label>department</label>
							<select class="form-control" name="department.id">
								<option th:each="dept:${dps}" th:text="${dept.getDepartmentName()}" th:value="${dept.getId()}" th:selected="${employee.getDepartment().getId()==dept.getId()}" ></option>
							</select>
						</div>
						<div class="form-group">
							<label>birth</label>
							<input th:value="${#dates.format(employee.getDate(),'yyyy-MM-dd')}" class="form-control" type="text" name="date" placeholder="1998-12-12">
						</div>
						<button type="submit" class="btn btn-primary">修改</button>
					</form>
(4)点击添加按钮直接提交数据,在后端重定向到list.html页面
@PutMapping("/emp")  //使用restful风格进行数据更新
    public String changeEmp(Employee employee){
        //添加更新的操作
        employeeDao.insertEmployee(employee);
        return "redirect:/all";
    }
(5)运行结果显示
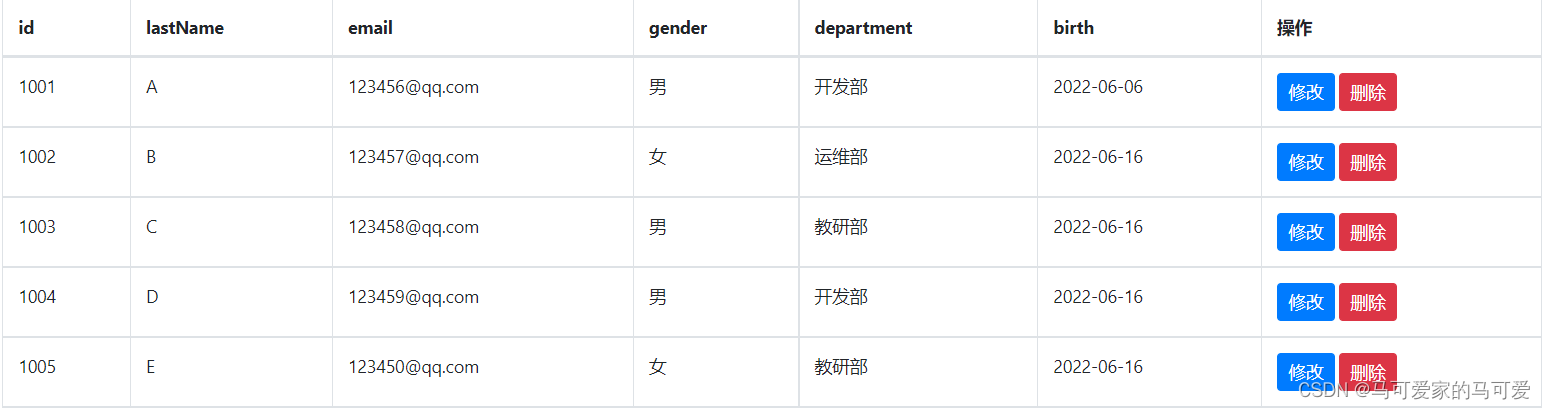
将图中的第五行数据中的员工姓名修改为H,修改成功!

7、删除员工
(1)在list.html页面中添加“删除员工”的操作按钮
<a class="btn btn-sm btn-danger" th:href="@{/deEmp/}+${emp.getId()}">删除</a>
(2)后台删除操作如下
 @GetMapping("/deEmp/{empId}")  //使用restful风格进行数据删除
    public String deleteEmp(@PathVariable("empId") Integer empId){
        //执行删除操作
        employeeDao.deleteById(empId);
        return "redirect:/all";
    }
(3)结果显示
删除编号为1005的员工
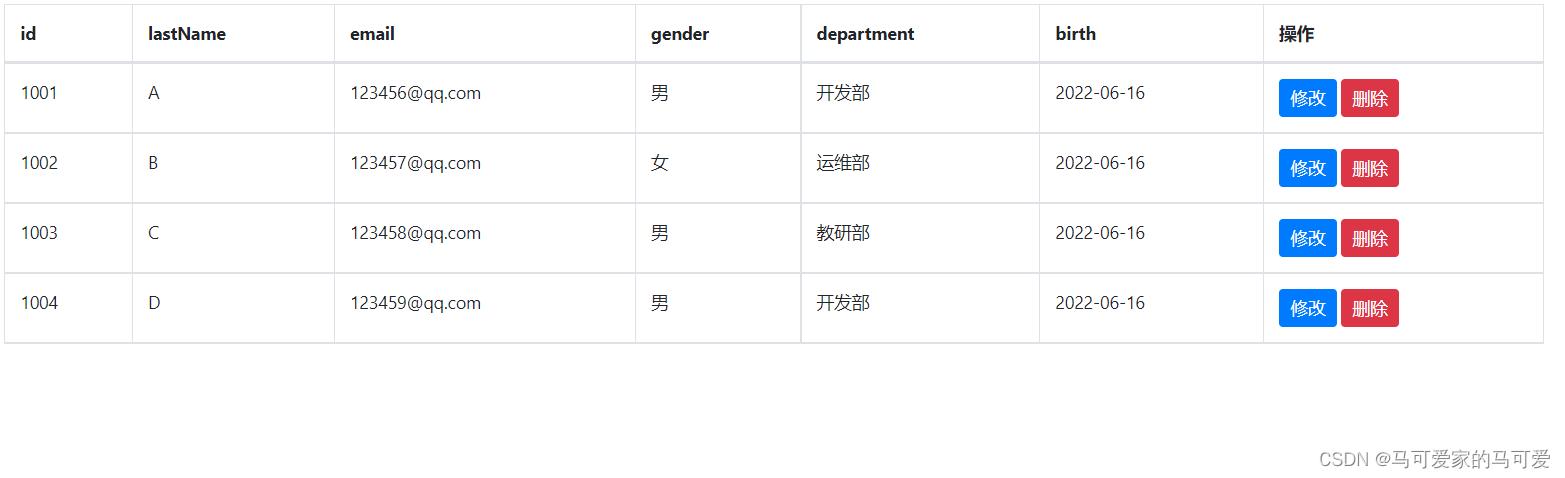
删除成功!
但是我有一个问题,就是使用restful风格的时候,若使用@DeleteMapping ("/deEmp/{empId}")为啥会删除不了,出现请求方式不支持的问题!所以我就使用了@GetMapping("/deEmp/{empId}") //使用restful风格进行数据删除成功删除数据!
8、404、500错误的解决
在templates下建立一个error文件夹,里面定义各种错误文件,若是发生404或者500之类的错误,则会自动去找error文件夹下对应的各种html文件
9、注销登陆
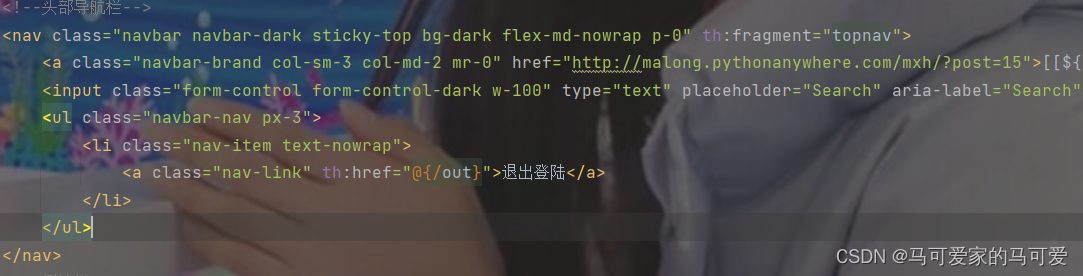
在common.html中的头部导航栏“退出登陆”的链接中写入上面的路由!然后在Admin的controller中写入注销登陆逻辑,并且重定向到登陆页面
/**
 * 后台登陆
 */
//在templates下的所有页面只有能通过controller来实现跳转访问,但是前提是先要将templyef的依赖,否则还是访问不了
@Controller
public class Admin {
    @PostMapping("/index")
    public String index(@RequestParam("username") String username, @RequestParam("password") String password, Model model, HttpSession session){
        if(!StringUtils.isEmpty(username)&& "ml".equals(username) &&!StringUtils.isEmpty(password)&& "123".equals(password)){
            session.setAttribute("loginUser",username);
            return "redirect:/main.html";  //使用redirect:/main.html是为了重定向到到虚拟的视图,如果跳转到template下的dashboard会在搜索框显示账号密码
        }
        else{
            model.addAttribute("msg","账号或者密码有误!请重新登陆!");
            return "login";
        }
    }
    @PostMapping("/out")
    public String outLogin(HttpSession session){
        session.invalidate(); //使登陆时的session失效
        return "redirect:index";
    }
}
成功!!!!!!!!!!!!!!!!!!!!!!!!
10、总结
(1)首先对于一个增删查改的问题都是首先从一个查找页面开始的 ,上面的案例就是从list.html员工管理页面开始的!因为员工管理页面list.html页面中有员工的各种信息!可以以这些为切入点进行增、删、改、查!
(2)总结一下bootstarp以及themleaf中的一些用法
<tr th:each="emp:${emps}">
	<td th:text="${emp.getId()}"></td>
th:each用来遍历对象,th:text用来将遍历出对象的属性显示给客户端(从后台查找所有的数据显示在客户端)!所以th:text用来查找显示数据。如第5个是显示数据操作
在第6个添加数据的操作中,与后台交互就要使用name="lastName等(从前台输入数据保存到后台中),而placeholder="3518806826@qq.com"是用来在输入文本中提示的,但是这个提示数据只是显示给客户端的提示,要想正真正给后台提交数据就要手动输入"

th:value是用来将后台数据查找出来并回显给客户端的,但是回显之后可以进行修改操作!而th:text只是显示给客户端,但是它不能对这些显示的数据进行修改。所以th:value就使用在第6个添加数据中对员工所属部门的选择,在第7个修改操作中将数据回显给客户端并进行修改操作!
在第7个数据修改操作中,修改是根据所选的员工的id来修改提交数据的,所以使用隐藏层来提交修改数据
<input type="hidden" name="id" th:value="${employee.getId()}">
而后端直接是和增加数据的操作是一样的,只是使用restful风格进行而已,我也是第一次见这种操作
@PutMapping("/emp")  //使用restful风格进行数据更新
    public String changeEmp(Employee employee){
        //添加更新的操作
        employeeDao.insertEmployee(employee);
        return "redirect:/all";
    }
但是一般我们见到的数据修改都是前端传递当前需要修改数据的id到后端,而后端根据id直接修改数据!但是上面的就比较神奇,可能bootstarp底层对于传递的id进行了封装,我们可以在后端直接使用和增加数据一样的方法进行操作!
(1)th:checked="${employee.getGender()==0}" 通过th:checked将后端中的数据回显给客户端,并使用if语句employee.getGender()==0显示当前需要修改的员工原本=在数据库中的记录是男还是女!th:checked在单选按钮中使用 (2)selected="${employee.getDepartment().getId()==dept.getId()}" 在下拉列表中使用if语句employee.getDepartment().getId()==dept.getId()将当前的员工属于哪个部门回显给客户端进行操作!
(3)对于restful风格的api中一定要使用@PathVariable("empId") Integer empId来接收路径变量中的参数,若不使用@PathVariable("empId") 而直接是Integer empId就会出错!

11、转载了别人关于themleaf中的各种知识点记录
完结!!!!!!!!!!!!!!!!!!!!!!!!!!!!!!!!!


 629
629


 被折叠的 条评论
为什么被折叠?
被折叠的 条评论
为什么被折叠?
 到【灌水乐园】发言


