


9.1 pojo、dao 设计和首页(Web前奏)
- 导入静态资源
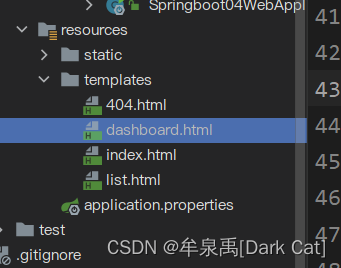
- 设计 Pojo 实体类 和 Dao 层
部门表
package top.muquanyu.pojo;

import lombok.AllArgsConstructor;
import lombok.Data;
import lombok.NoArgsConstructor;
import lombok.ToString;

// 部门表
@Data
@AllArgsConstructor
@NoArgsConstructor
public class Department {
    private Integer id;
    private String departmentName;
}
SpringContextUtil:有些时候我们还是要用原生态的一些方式 去 使用 Spring 全家桶的。
package top.muquanyu.utils;

import org.springframework.beans.BeansException;
import org.springframework.beans.factory.config.BeanFactoryPostProcessor;
import org.springframework.beans.factory.config.ConfigurableListableBeanFactory;
import org.springframework.stereotype.Component;

@Component
public class SpringContextUtil implements BeanFactoryPostProcessor {
    /** Spring应用上下文环境 */
    private static ConfigurableListableBeanFactory beanFactory;

    @Override
    public void postProcessBeanFactory(ConfigurableListableBeanFactory configurableListableBeanFactory) throws BeansException {

        SpringContextUtil.beanFactory = configurableListableBeanFactory;
    }

    /**
     * 获取对象
     *
     * @param clazz
     * @return Object 一个以所给名字注册的bean的实例
     * @throws org.springframework.beans.BeansException
     *
     */
    @SuppressWarnings("unchecked")
    public static <T> T getBean(Class clazz) throws BeansException
    {
        return (T) beanFactory.getBean(clazz.getName());
    }
}
员工表
package top.muquanyu.dao;

import org.springframework.beans.factory.annotation.Autowired;
import org.springframework.stereotype.Repository;
import top.muquanyu.pojo.Employee;
import top.muquanyu.utils.SpringContextUtil;

import java.util.Collection;
import java.util.HashMap;
import java.util.Map;

// 员工 Dao
@Repository
public class EmployeeDao {

    private static Map<Integer, Employee> employees = null;
    // 员工所属的部门

    // 静态块优先级 太高了, 我们必须要手动的提前把这个 Department注入!
    private static DepartmentDao departmentDao =  (DepartmentDao) SpringContextUtil.getBean(DepartmentDao.class);

//    下面是 目前 SpringBoot 比较推崇的 注入方式 set 注入!
//    private static DepartmentDao departmentDao;
//    @Autowired
//    public void setDepartmentDao(DepartmentDao departmentDao){
//        EmployeeDao.departmentDao = departmentDao;
//        System.out.println(departmentDao);
//    }

    static {
        employees = new HashMap<>();
        employees.put(1001,new Employee(1001,"AA","A99565687@qq.com",1,departmentDao.getDepartmentByID(101)));
        employees.put(1002,new Employee(1002,"BB","B99565687@qq.com",0,departmentDao.getDepartmentByID(102)));
        employees.put(1003,new Employee(1003,"CC","C99565687@qq.com",1,departmentDao.getDepartmentByID(103)));
        employees.put(1004,new Employee(1004,"DD","D99565687@qq.com",0,departmentDao.getDepartmentByID(104)));
        employees.put(1005,new Employee(1005,"EE","E99565687@qq.com",1,departmentDao.getDepartmentByID(105)));
    }

    // 模拟主键自增
    private static Integer initID = 1006;

    // 增加一个员工
    public void addEmployee(Employee employee){
        if(employee.getId() == null){
            employee.setId(initID++);
        }
        employee.setDepartment(departmentDao.getDepartmentByID(employee.getDepartment().getId()));
        employees.put(employee.getId(),employee);
    }

    public Collection<Employee> getAll(){
        return employees.values();
    }

    public Employee getEmployeeByID(Integer id){
        return employees.get(id);
    }

    // 删除员工通过 id
    public Employee deleteEmployeeByID(Integer id){
        return employees.remove(id);
    }

}
部门 Dao
package top.muquanyu.dao;

import org.springframework.stereotype.Repository;
import top.muquanyu.pojo.Department;

import java.util.Collection;
import java.util.HashMap;
import java.util.Map;

// 部门的 Dao
@Repository // 被 Spring 托管
public class DepartmentDao {

    // 模拟数据库中的 数据
    private static Map<Integer, Department> departments = null;

    static {
        departments = new HashMap<>();
        departments.put(101,new Department(101,"教学部"));
        departments.put(102,new Department(102,"市场部"));
        departments.put(103,new Department(103,"教研部"));
        departments.put(104,new Department(104,"运营部"));
        departments.put(105,new Department(105,"后勤部"));
    }

    // 获取所有部门的信息
    public Collection<Department> getDepartments(){
        return departments.values();
    }

    // 通过 id 得到相关部门
    public Department getDepartmentByID(Integer id){
        return departments.get(id);
    }
}
员工 Dao
package top.muquanyu.dao;

import org.springframework.beans.factory.annotation.Autowired;
import org.springframework.stereotype.Repository;
import top.muquanyu.pojo.Department;
import top.muquanyu.pojo.Employee;

import java.util.Collection;
import java.util.HashMap;
import java.util.Map;

// 员工 Dao
@Repository
public class EmployeeDao {

    private static Map<Integer, Employee> employees = null;
    // 员工所属的部门
    @Autowired
    private static DepartmentDao departmentDao;
    static {
        employees = new HashMap<>();
        employees.put(1001,new Employee(1001,"AA","A99565687@qq.com",1,departmentDao.getDepartmentByID(101)));
        employees.put(1001,new Employee(1002,"BB","B99565687@qq.com",0,departmentDao.getDepartmentByID(102)));
        employees.put(1001,new Employee(1003,"CC","C99565687@qq.com",1,departmentDao.getDepartmentByID(103)));
        employees.put(1001,new Employee(1004,"DD","D99565687@qq.com",0,departmentDao.getDepartmentByID(104)));
        employees.put(1001,new Employee(1005,"EE","E99565687@qq.com",1,departmentDao.getDepartmentByID(105)));
    }

    // 模拟主键自增
    private static Integer initID = 1006;

    // 增加一个员工
    public void addEmployee(Employee employee){
        if(employee.getId() == null){
            employee.setId(initID++);
        }
        employee.setDepartment(departmentDao.getDepartmentByID(employee.getDepartment().getId()));
        employees.put(employee.getId(),employee);
    }

    public Collection<Employee> getAll(){
        return employees.values();
    }

    public Employee getEmployeeByID(Integer id){
        return employees.get(id);
    }

    // 删除员工通过 id
    public Employee deleteEmployeeByID(Integer id){
        return employees.remove(id);
    }

}
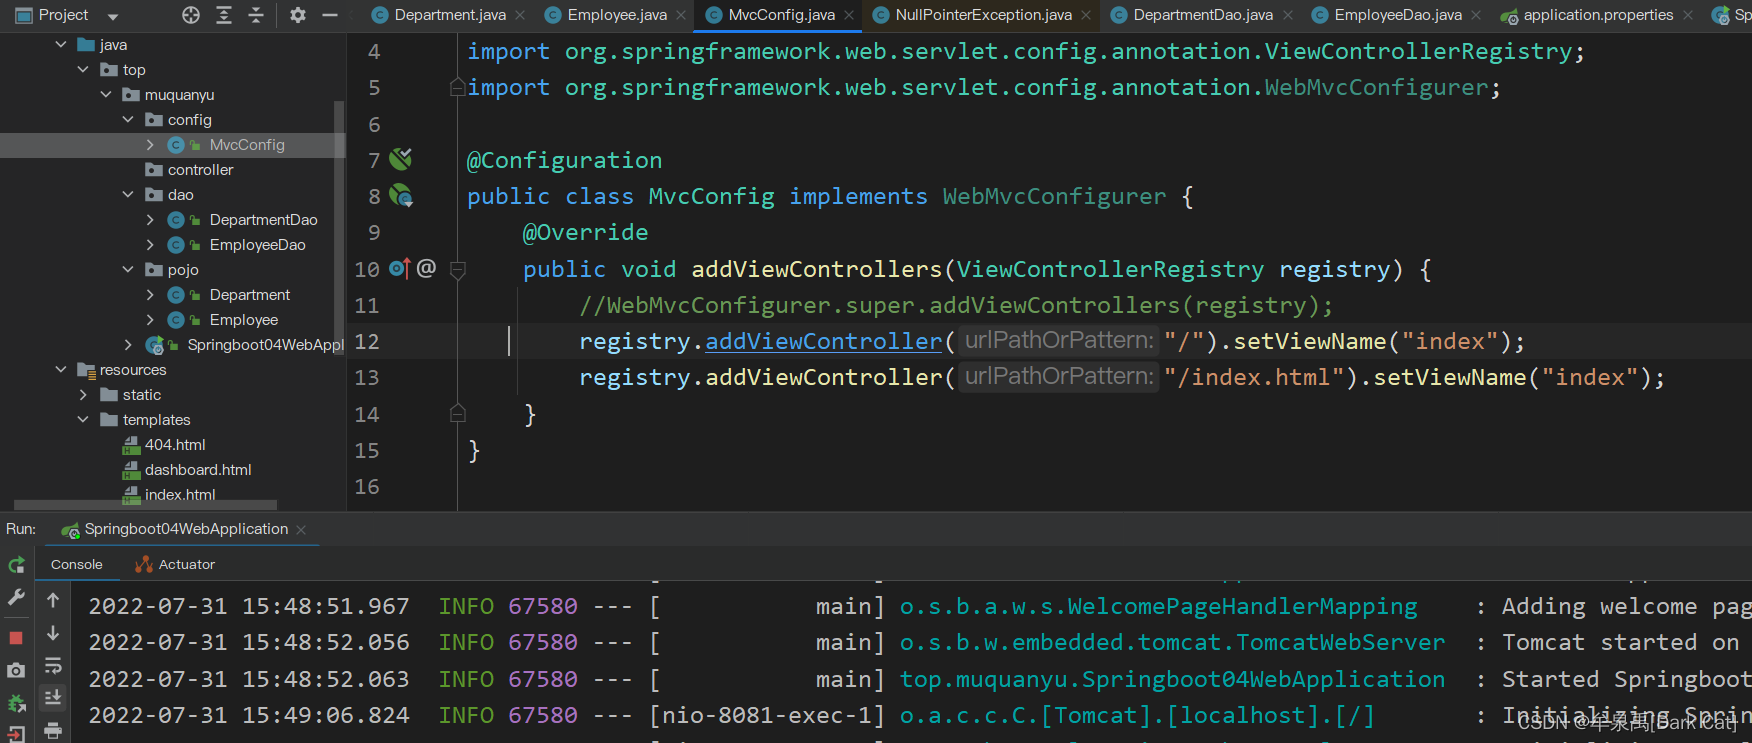
- 首页的实现
- 直接在 MvcConfig 里面 扩展下 配置就行了。
package top.muquanyu.config;

import org.springframework.context.annotation.Configuration;
import org.springframework.web.servlet.config.annotation.ViewControllerRegistry;
import org.springframework.web.servlet.config.annotation.WebMvcConfigurer;

@Configuration
public class MvcConfig implements WebMvcConfigurer {
    @Override
    public void addViewControllers(ViewControllerRegistry registry) {
        //WebMvcConfigurer.super.addViewControllers(registry);
        registry.addViewController("/").setViewName("index");
        registry.addViewController("/index.html").setViewName("index");
    }
}
写一个 thymeleaf 的 index.html 首页
<!DOCTYPE html>
<html lang="en" xmlns:th="http://www.thymeleaf.org">
<head>
<meta http-equiv="Content-Type" content="text/html; charset=UTF-8">
<meta name="viewport" content="width=device-width, initial-scale=1, shrink-to-fit=no">
<meta name="description" content="">
<meta name="author" content="">
<title>Signin Template for Bootstrap</title>
<!-- Bootstrap core CSS -->
<link th:href="@{/css/bootstrap.min.css}" rel="stylesheet">
<!-- Custom styles for this template -->
<link th:href="@{/css/signin.css}" rel="stylesheet">
</head>
<body class="text-center">
<form class="form-signin" th:action="@{/user/login}" method="post">
<img class="mb-4" th:src="@{/img/bootstrap-solid.svg}" alt="" width="72" height="72">
<h1 class="h3 mb-3 font-weight-normal" th:text="#{login.tip}">Please sign in</h1>
<p style="color: red" th:text="${msg}"></p>
<input type="text" class="form-control" name="username" th:placeholder="#{login.username}" required="" autofocus="">
<input type="password" class="form-control" name="password" th:placeholder="#{login.password}" required="">
<div class="checkbox mb-3">
<label>
<input type="checkbox" value="remember-me" > [[#{login.remember}]]
</label>
</div>
<button class="btn btn-lg btn-primary btn-block" type="submit">[[#{login.btn}]]</button>
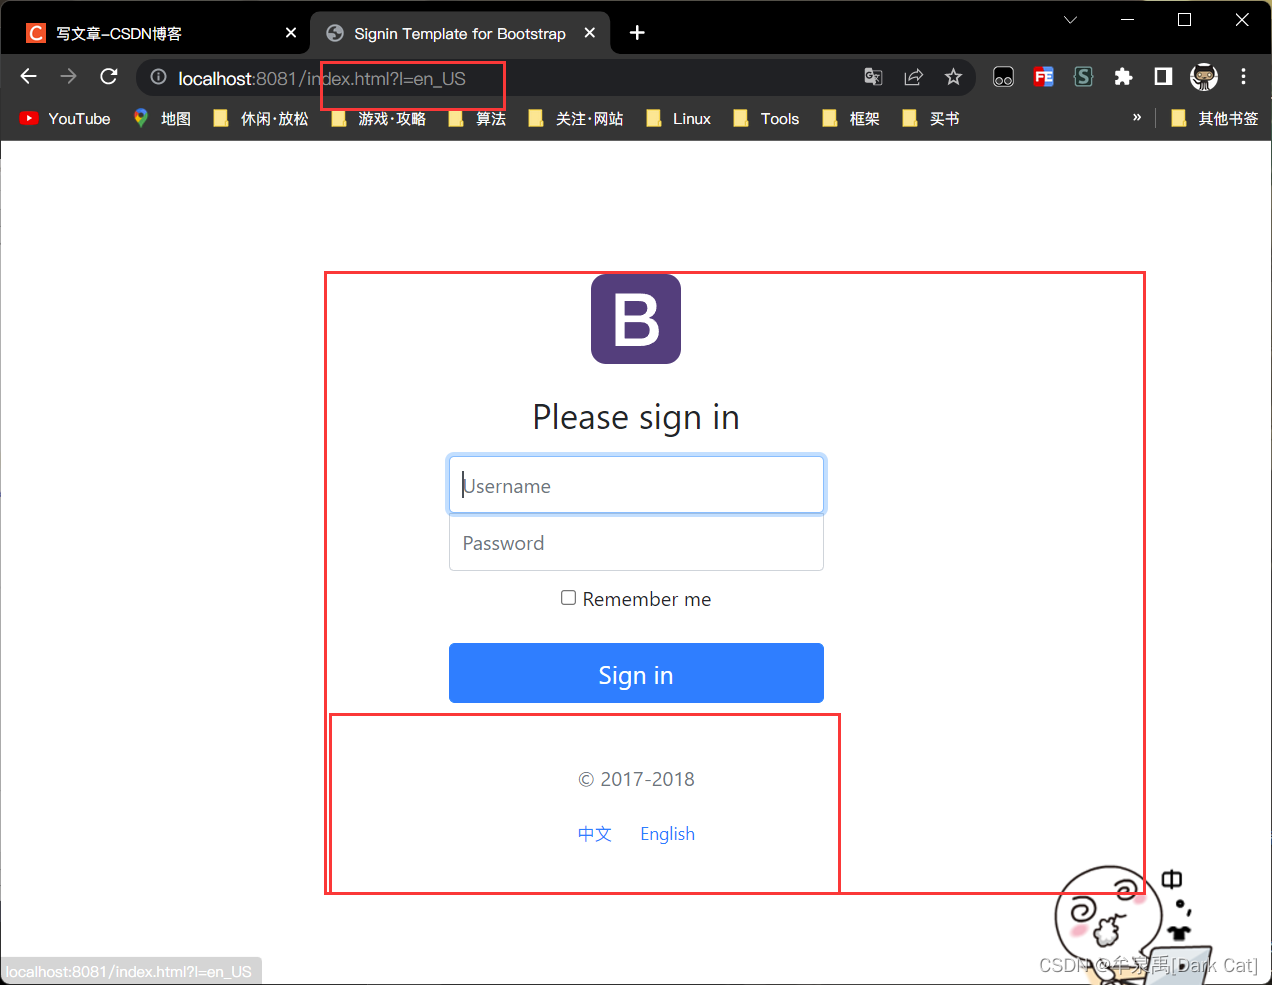
<p class="mt-5 mb-3 text-muted">© 2017-2018</p>
<a class="btn btn-sm" th:href="@{/index.html(l='zh_cn')}">中文</a>
<a class="btn btn-sm" th:href="@{/index.html(l='en_US')}">English</a>
</form>
</body>
</html>
关闭 thymeleaf 的缓存:spring.thymeleaf.cache=false 2.2 之后的版本 可能不需要关。就可以 显示 正常。

9.2 国际化
国际化:就是页面的 语言切换。那么 SpringBoot 如何适配国际化呢。其实很多 显示的 文本,都可以 是 从 properties 文件中的取值。
很简单,我们 在 resources 目录下 新建 i18n 目录,然后 新建两个 文件。login.properties 和 login_zh_CN.properties
初识国际化
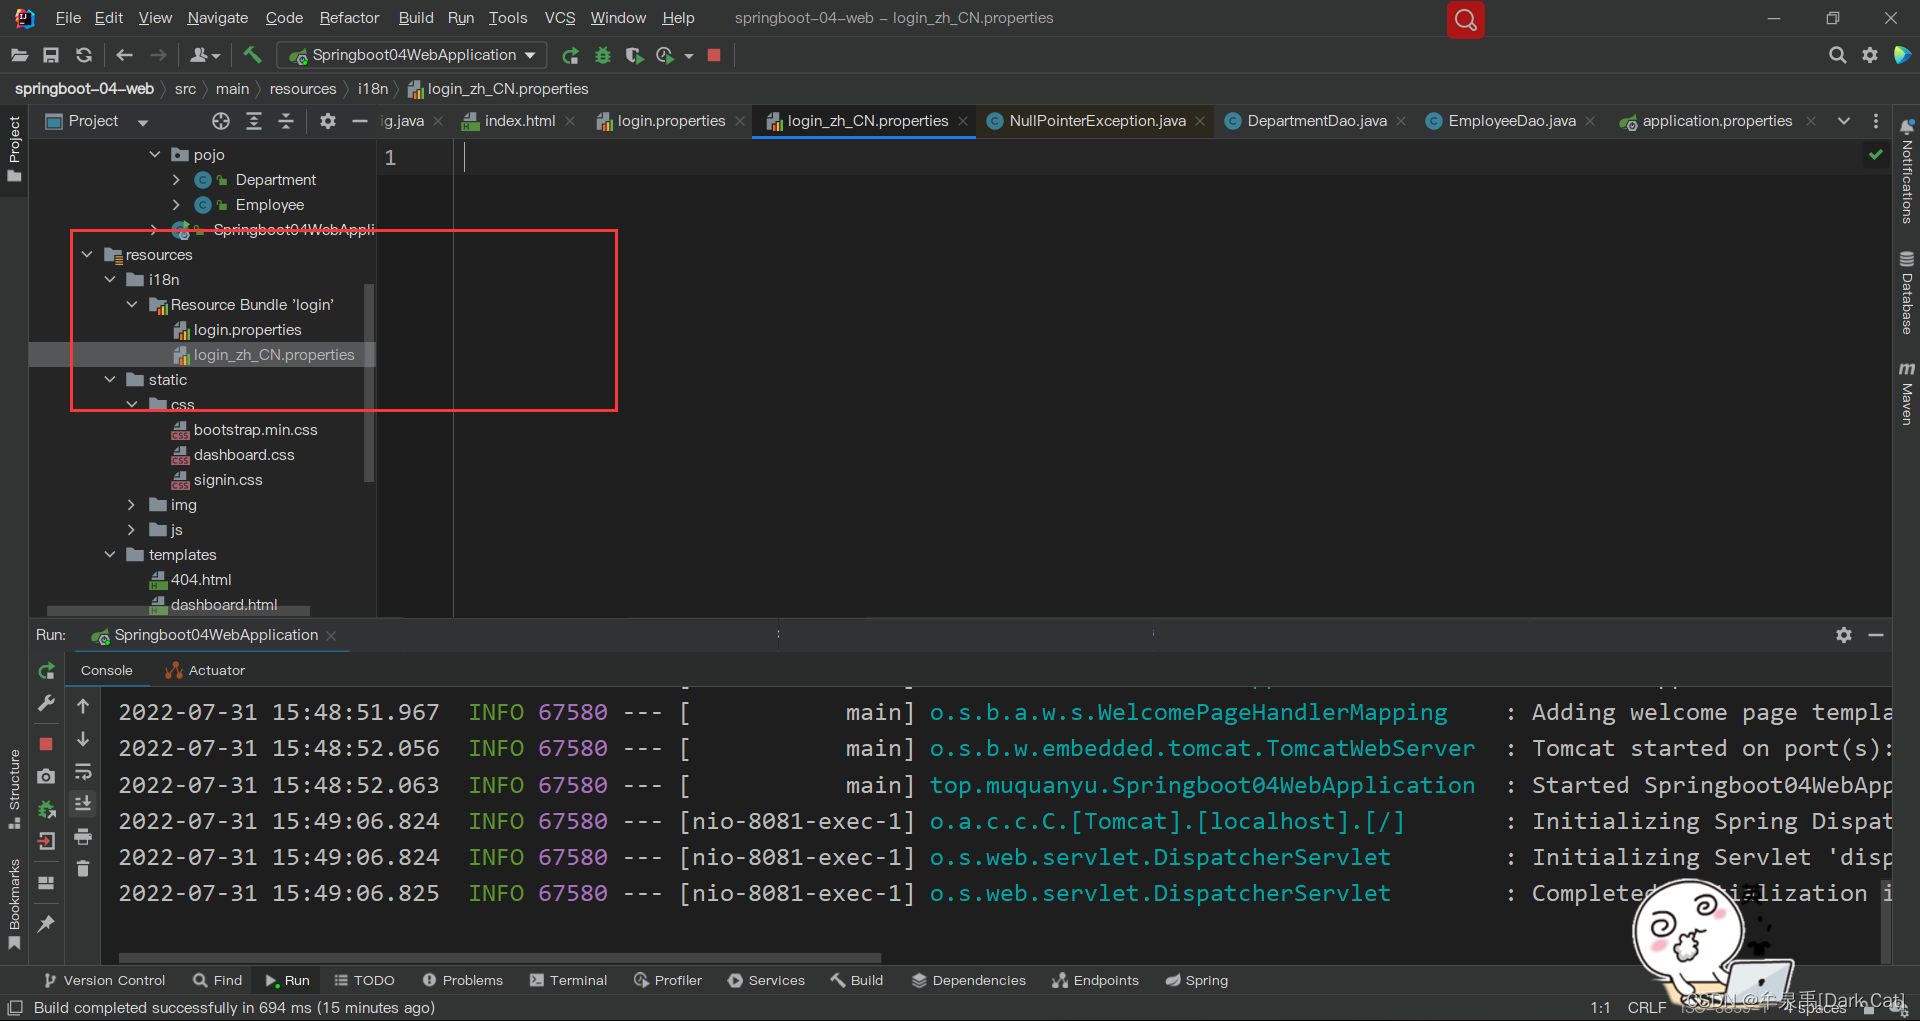 然后 你就发现 两个文件 就被 自动 合并到 一个 目录下了。然后 你右键 这个 目录,就发现 可以 新建 语言文件了。
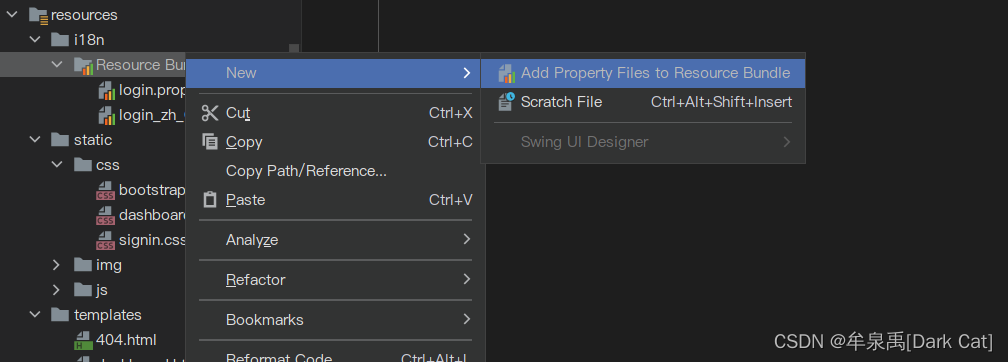
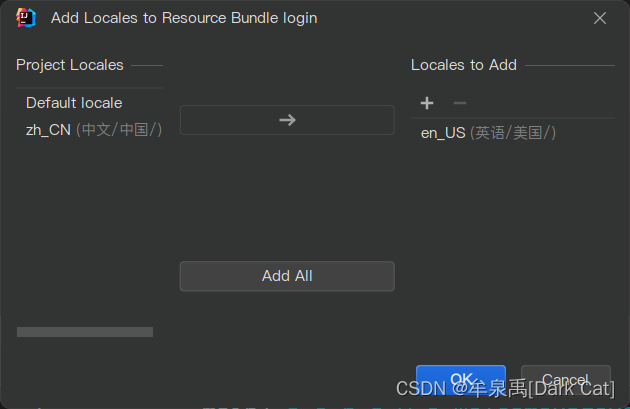
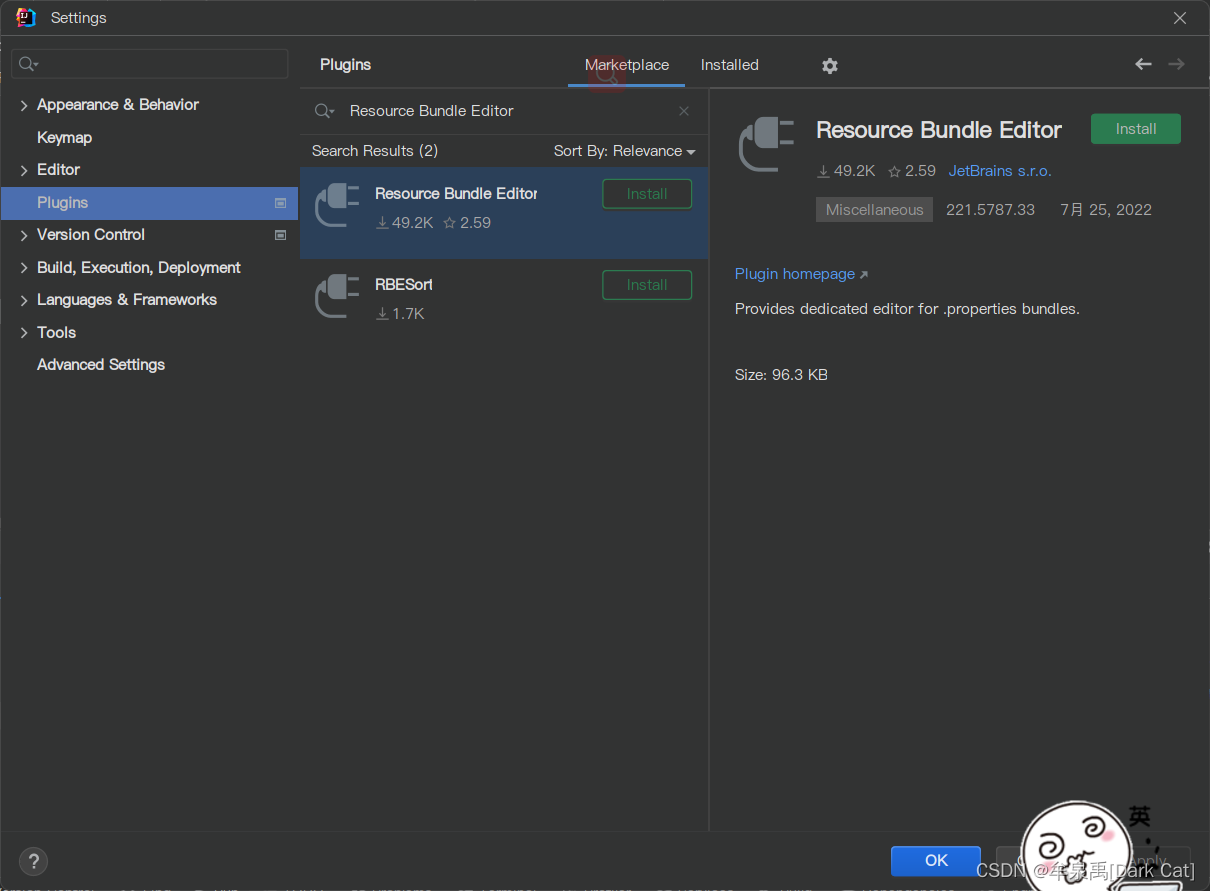
安装 Resource Bundle Editor 就可以 可视化的编辑了。
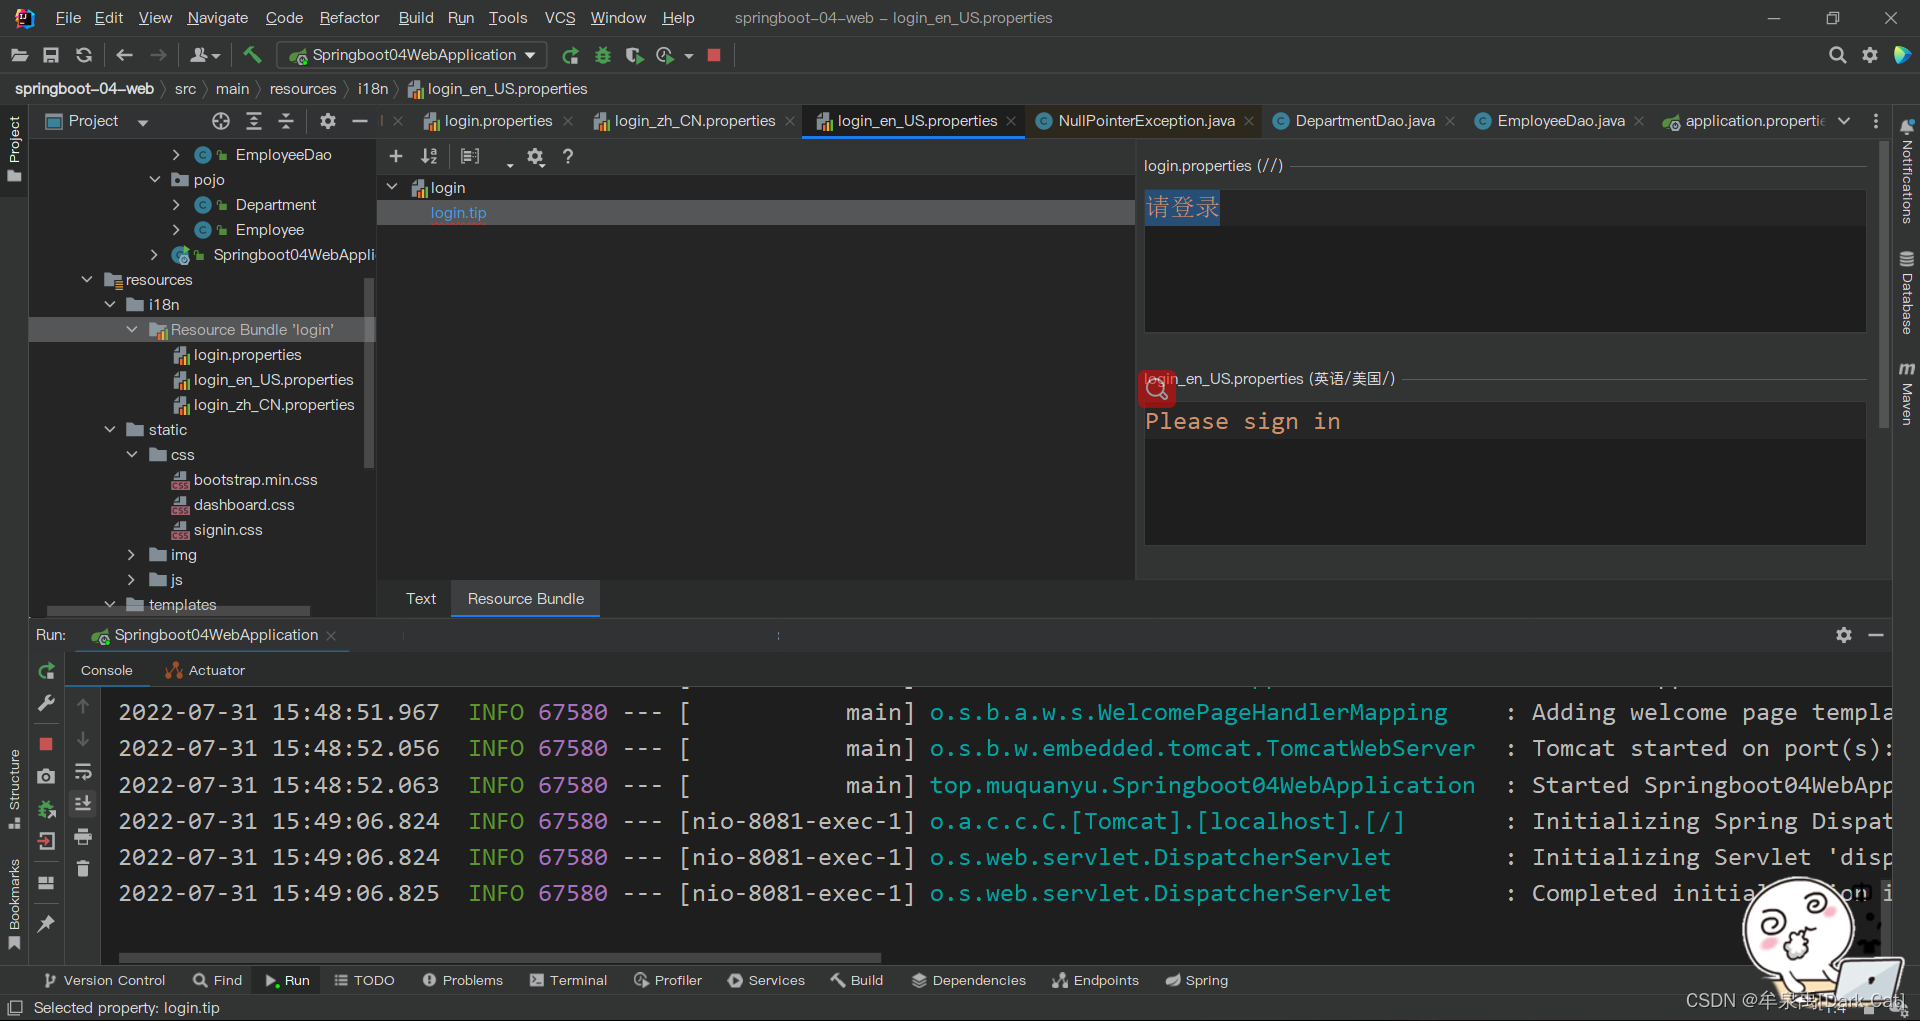
配置好 所有需要的 属性值
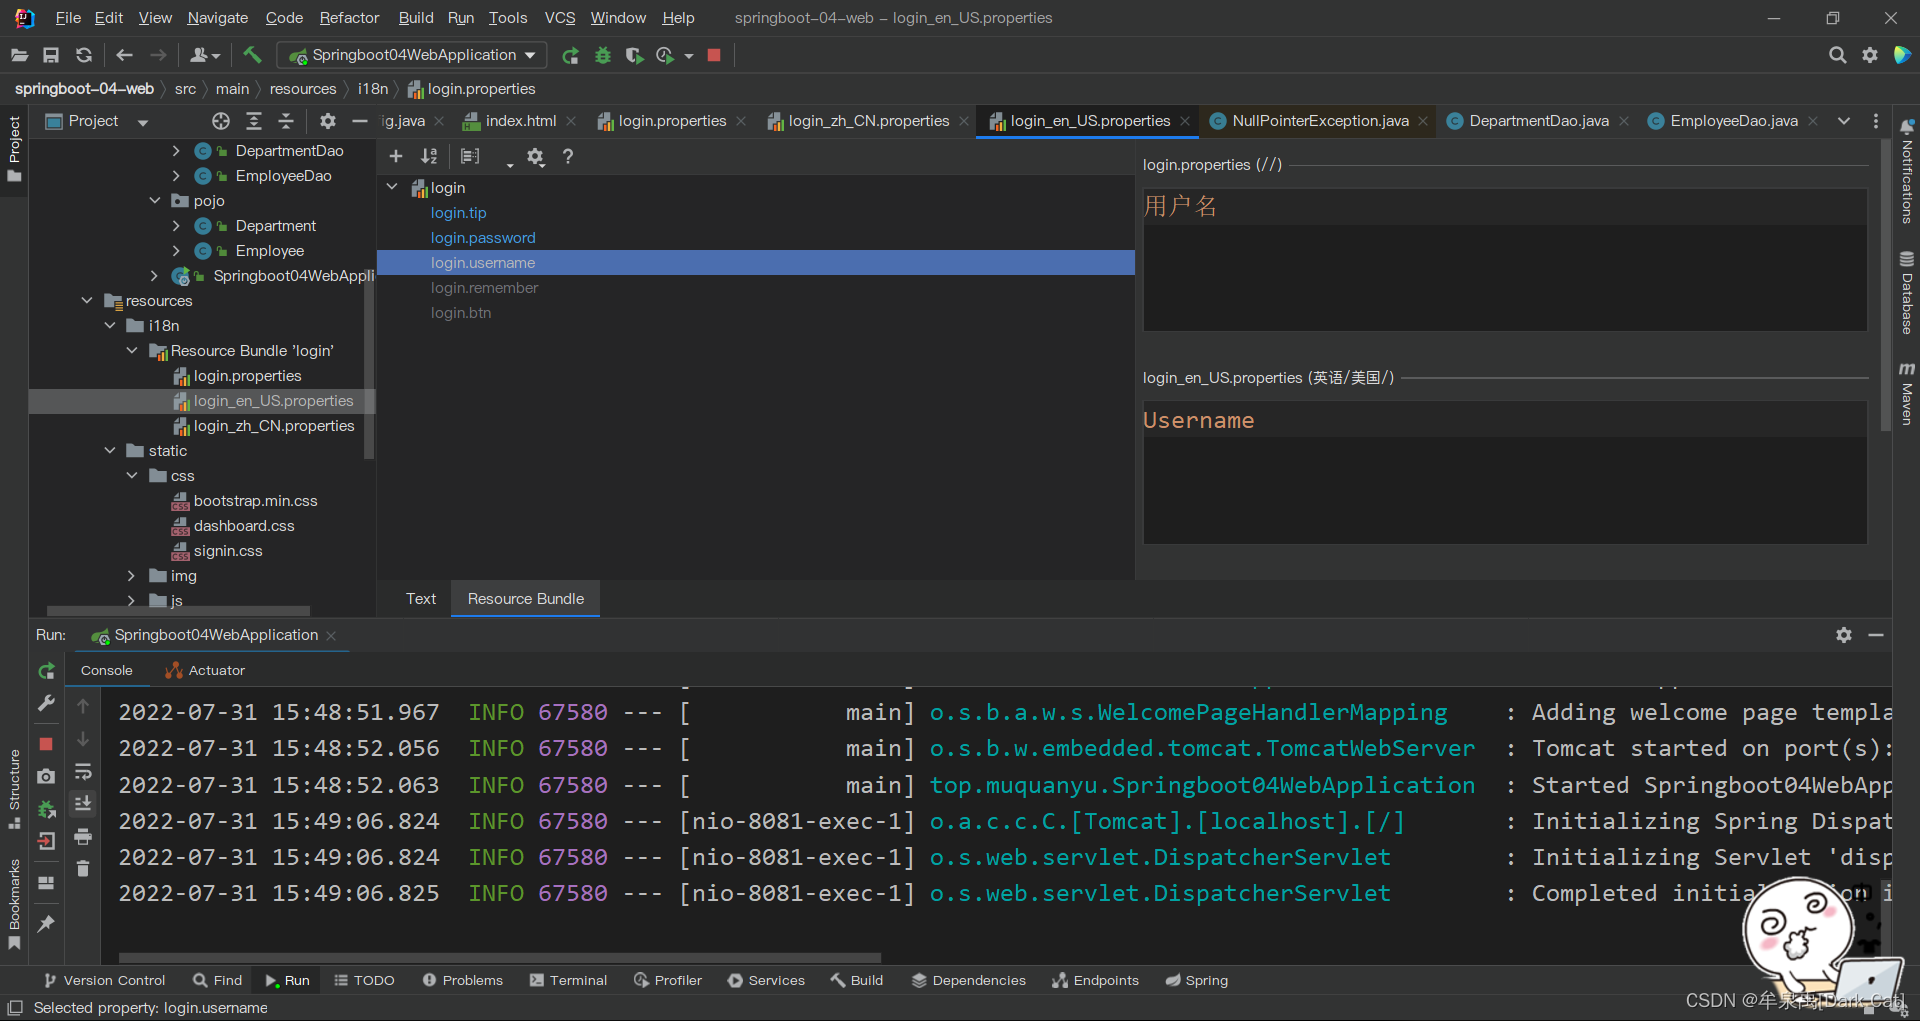
然后 thymeleaf 直接 可以 通过 #{...} 取到 国际化的内容。
但是在此 之前,你必须 先去 配置一下,这个国际化的 文件的 地址在哪。
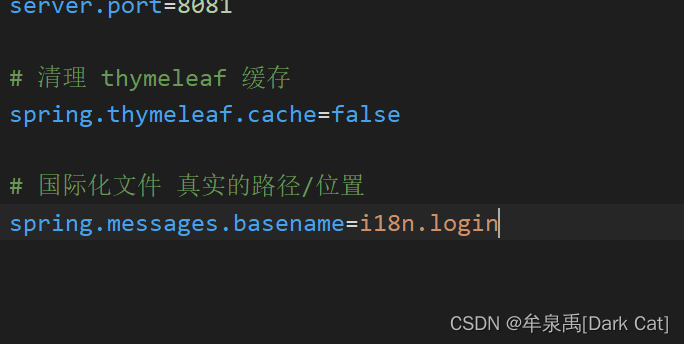
# 我们的配置文件 的真实位置/路径
spring.messages.basename=i18n.login
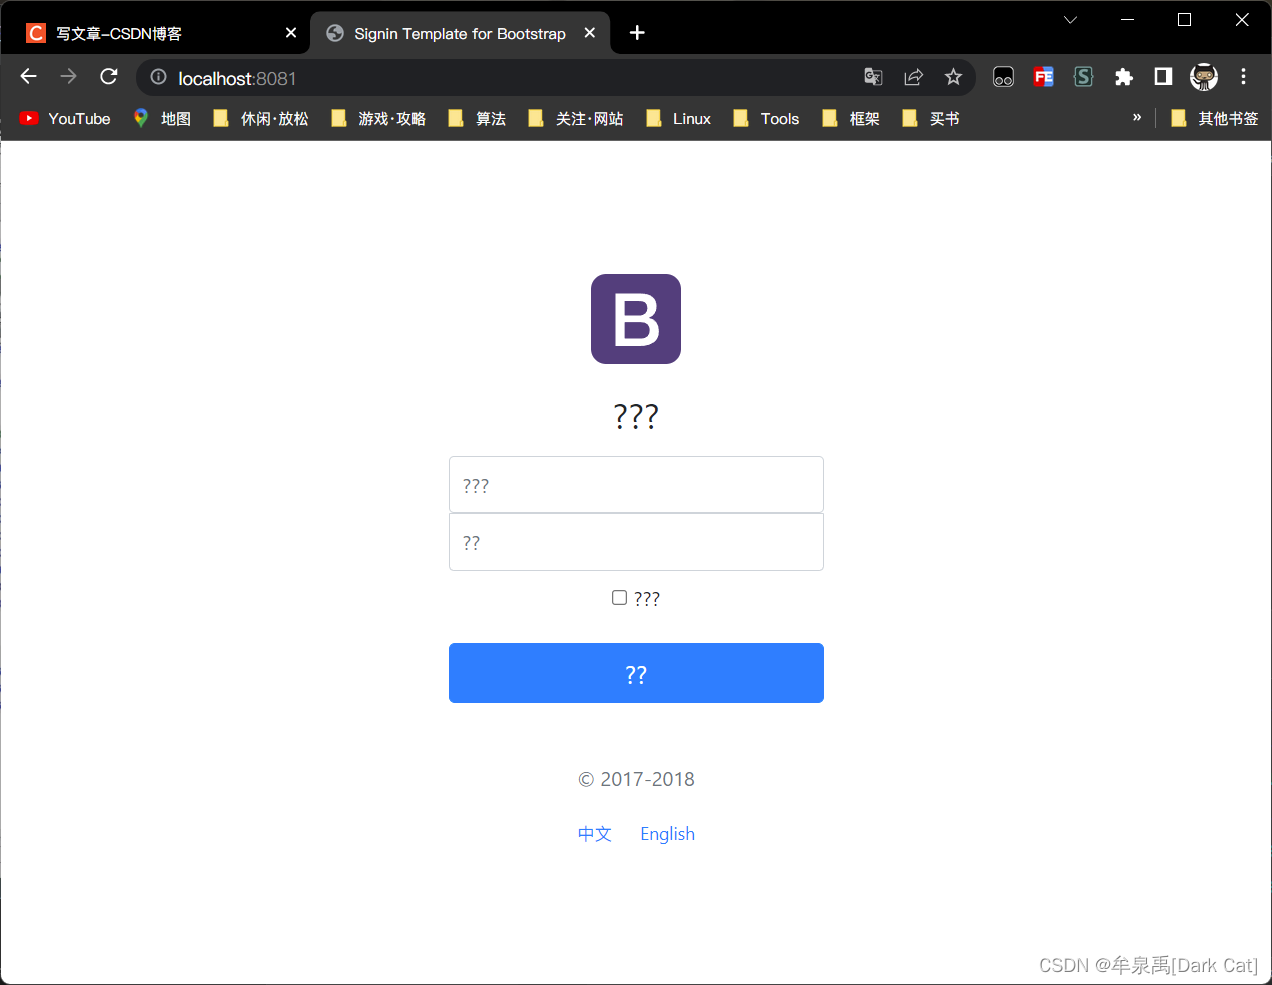
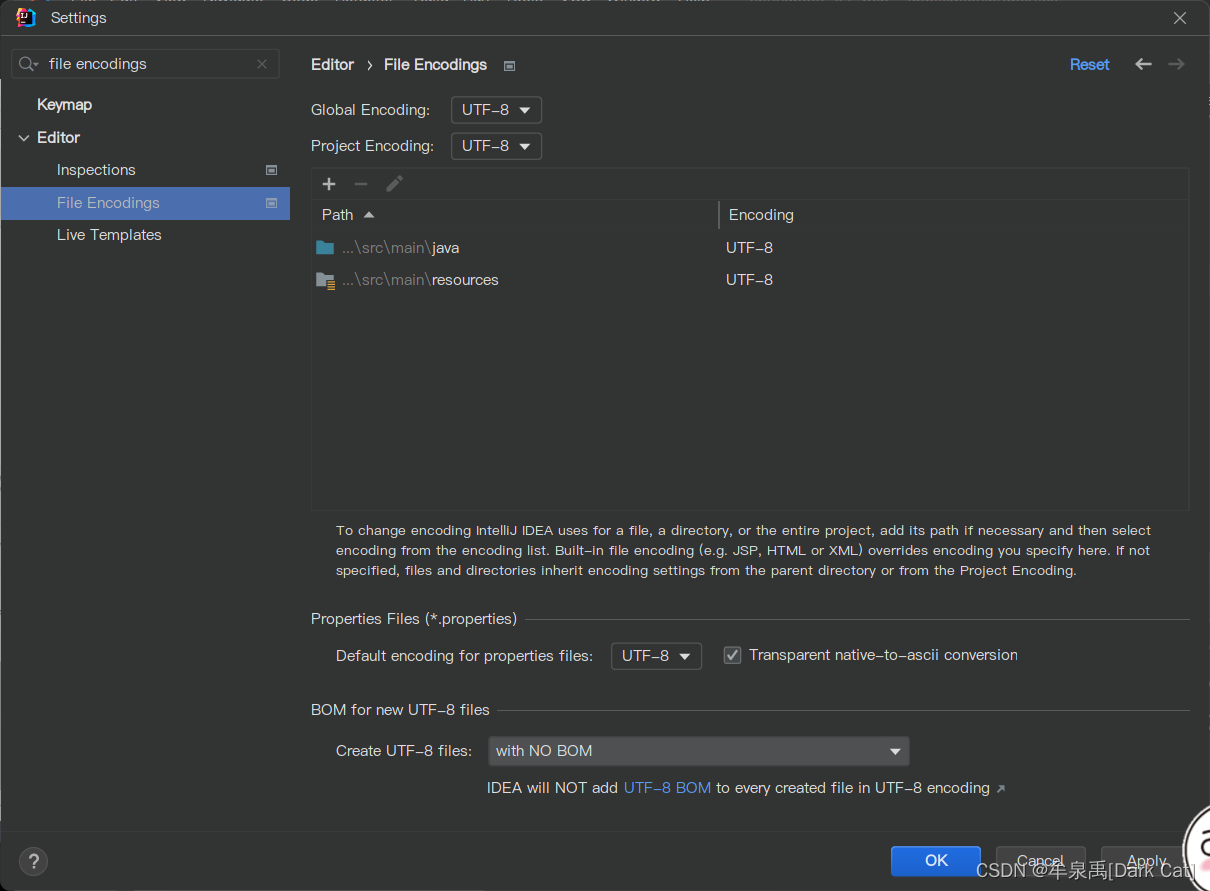
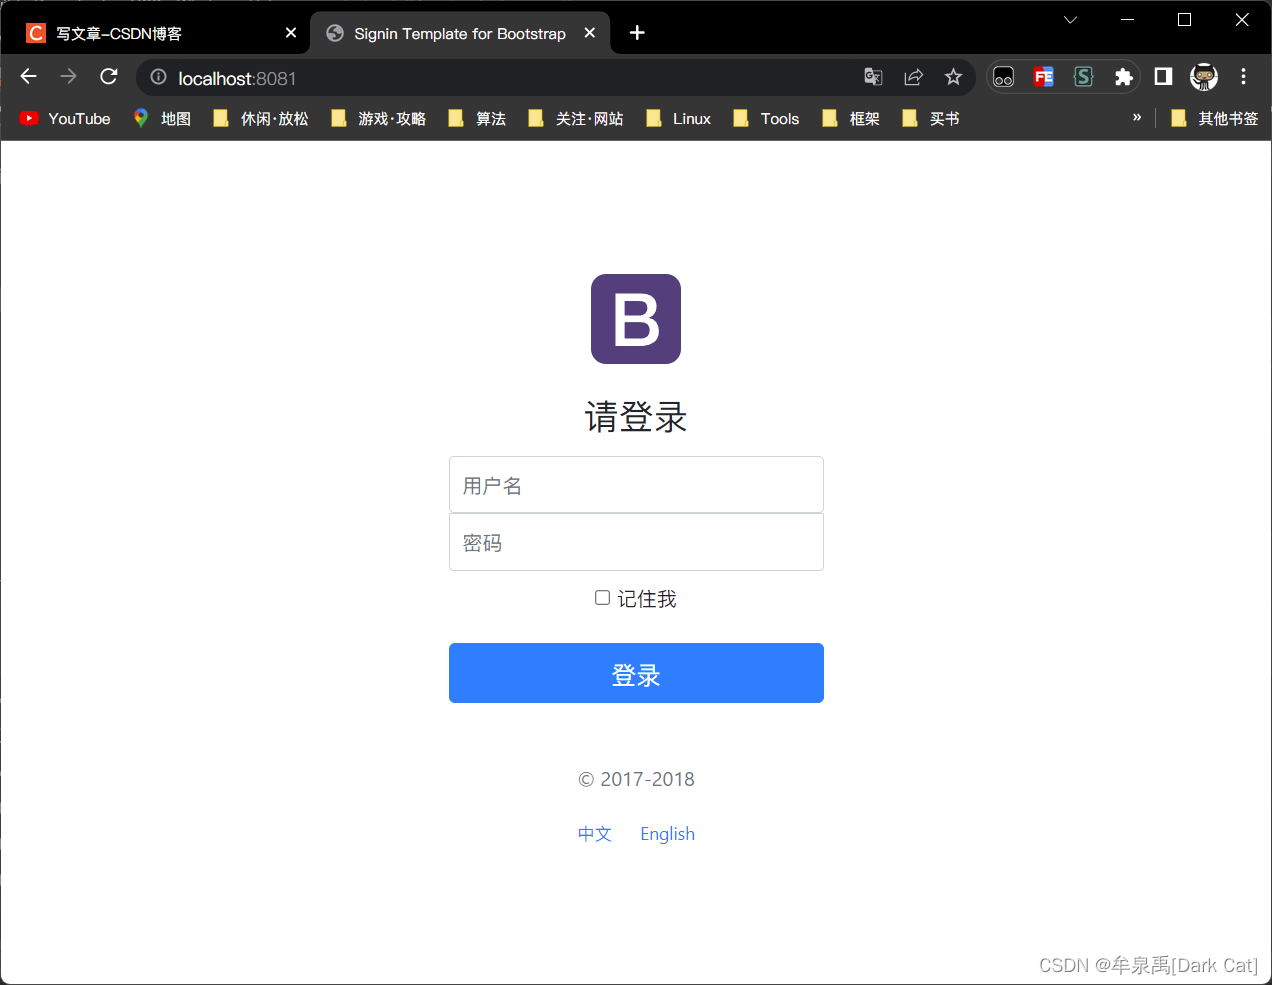
如果出现问号,那么恭喜你。必须得去 配置 一下 编码了。
实现 国际化的切换
- 分析源码
AcceptHeaderLocaleResolver
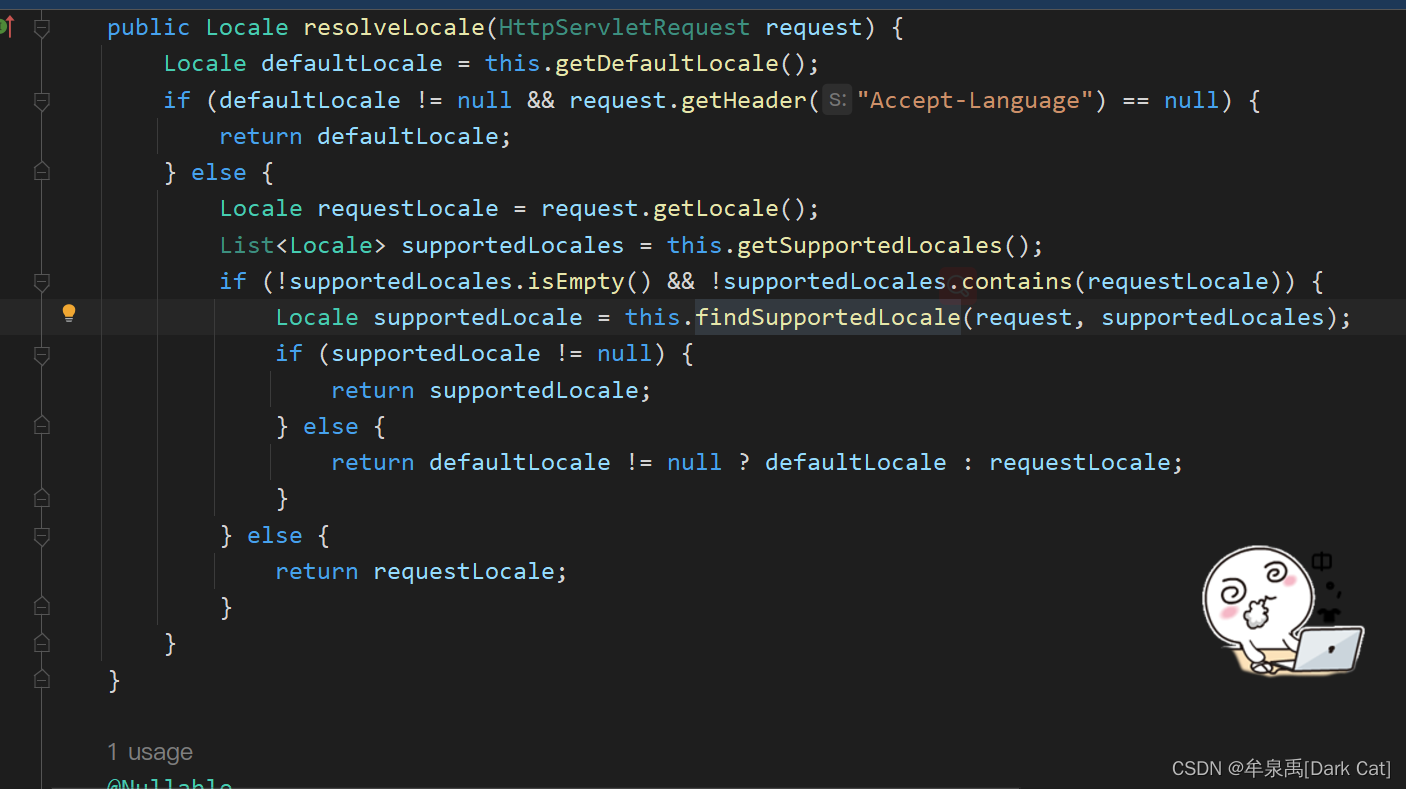
从这段代码可以看出,我们 解析Locale 是返回了 一个 Locale。我们再去看看 自动装配。
这段代码就比较有趣了,它说的意思是 我们 获取 这些解析器。然后看一下 是否存在 用户配置的解析器。如果有的话,走用户的。如果没有的话,走默认的。那这不就是 告诉我们 要自己 写一个 解析器嘛。。。
- 新建一个 实现 LocaleResolver 接口的 类。
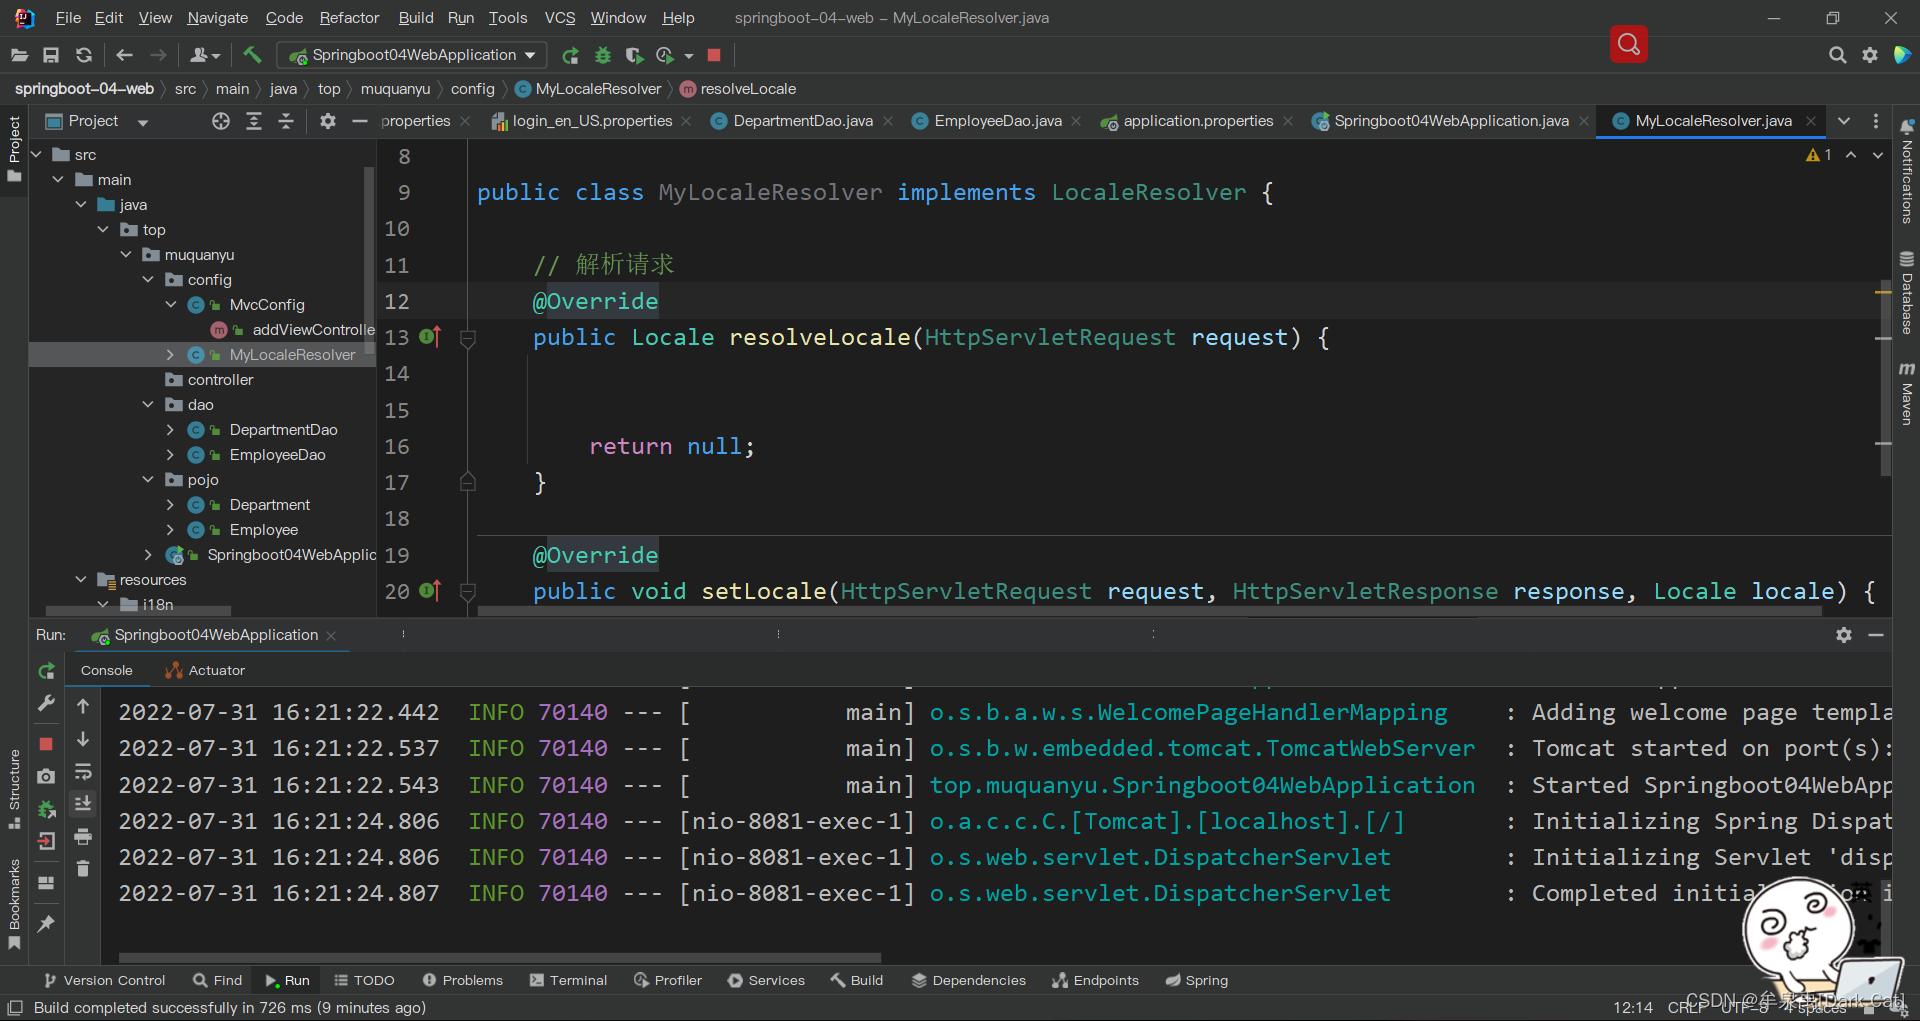
你会发现 有两个方法,其中 第一个 方法 比较显著。是要去 解析一个 请求。那么 我们的 按钮 是不是 就可以 是 一个 请求呢,如果它是一个请求,并且携带关键参数,就可以判断到底 使用那个 国际化文件了。

@{/url(参数名=默认参数值)} :这种 url 请求的 传参方式 是 thymeleaf 独有的。
- 分析 Locale 到底是个啥。

这一下子就明白了,这玩意 就是一个 二元组呀。就是 提供一个 语言,再提供一个 国家。然后 给你封装 成一个 对象。Locale,合着这玩意 就是 国际化的标识呗??根据这种标识,我们 使用的 对应国际化的文件。
我们可以 大胆的尝试一下。
package top.muquanyu.config;

import org.springframework.context.annotation.Bean;
import org.springframework.context.annotation.Configuration;
import org.springframework.web.servlet.LocaleResolver;
import org.thymeleaf.util.StringUtils;

import javax.servlet.http.HttpServletRequest;
import javax.servlet.http.HttpServletResponse;
import java.util.Locale;

@Configuration
public class MyLocaleResolver implements LocaleResolver {

    // 解析请求
    @Override
    public Locale resolveLocale(HttpServletRequest request) {

        String language = request.getParameter("l");
        Locale locale = Locale.getDefault(); // 如果没有这个参数 就用 默认呗
        if(!StringUtils.isEmpty(language)){
            String[] s = language.split("_");
            // 国家_地区
            locale = new Locale(s[0], s[1]);
        }
        return locale;
    }

    @Override
    public void setLocale(HttpServletRequest request, HttpServletResponse response, Locale locale) {

    }
}
给这个 用户自定义的 LocaleResolver 注册到 IOC 容器中。
    // 自定义 的 国际化 组件 就 生效了
    @Bean
    public LocaleResolver localeResolver(){
        return new MyLocaleResolver();
    }


 1612
1612


 被折叠的 条评论
为什么被折叠?
被折叠的 条评论
为什么被折叠?
 到【灌水乐园】发言


