


微信的门户页面框架设计
一、项目整体说明
设计目标
此项目需要完成基本的微信页面布局设计,包括顶部显示栏、底部导航栏和4个table页面,点击相应的导航键,能简单实现table页面之间的切换,相应的图标也发生变化。
使用技术
布局(layout)和分段(fragment),对控件进行点击监听,同时用activity完善门户页面的框架设计
运行环境
计算机型号:小新 15IIL 2020
处理器:Intel® Core™ i7-1065G7 CPU @ 1.30GHz 1.50 GHz
机带RAM:8.00 GB (7.78 GB 可用)
操作系统:Windows 10 家庭中文版
编译器:Android Studio 2021.2.0.0
二、功能说明及代码解析
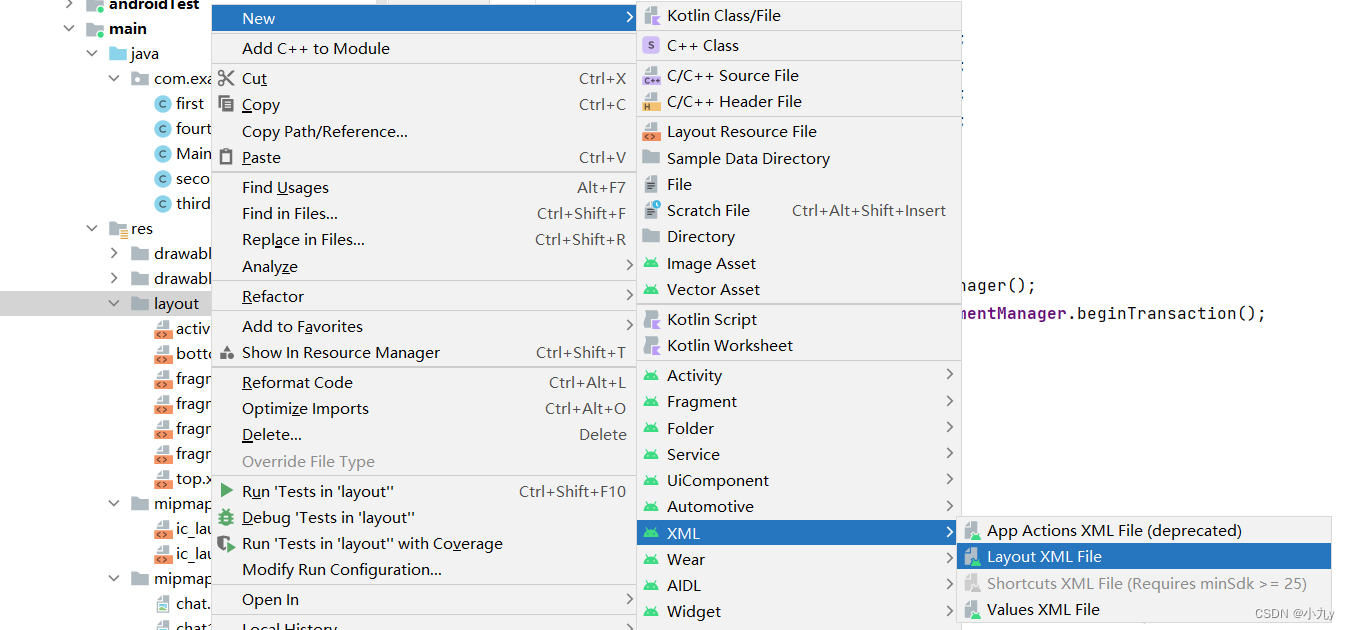
1.各页面设计(layout)
顶部导航栏(top.xml)
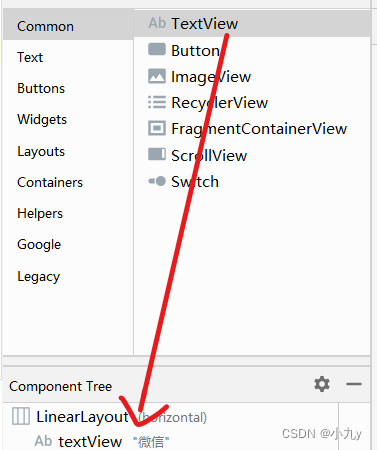
在layout文件中新建一个.xml文件,命名为top.xml,布局(RootTag)设置为LinearLayout,创建完成后拖入一个TextView空间至LinearLayout下
在code界面设置字体大小、颜色及背景颜色等

<?xml version="1.0" encoding="utf-8"?>
<LinearLayout xmlns:android="http://schemas.android.com/apk/res/android"
    android:layout_width="match_parent"
    android:layout_height="wrap_content">

    <TextView
        android:id="@+id/textView"
        android:layout_width="0dp"
        android:layout_height="60dp"
        android:layout_weight="1"
        android:background="@color/teal_200"
        android:gravity="center"
        android:text="微信"
        android:textColor="#546E7A"
        android:textSize="30sp" />
</LinearLayout>
代码解析
android:id="@+id/textView",为组件设置一个资源id,在java文件中可以通过findViewById(id)找到该组件。
android:layout_width=“match_parent”,布局的宽度,match_parent(填满父容器)
android:layout_height=“wrap_content”,布局的高度,wrap_content(组件实际大小)
android:layout_weight=“1”,等比例划分区域。
android:background="@color/teal_200",为组件设置一个背景图片,或者直接用颜色覆盖。
android:gravity=“center”,表示textView中的文字相对于TextView的对齐方式。
android:text=“微信”,要显示的文字。
android:textColor="#546E7A",设置文字的颜色。
android:textSize=“30sp” />,设置文字的大小。
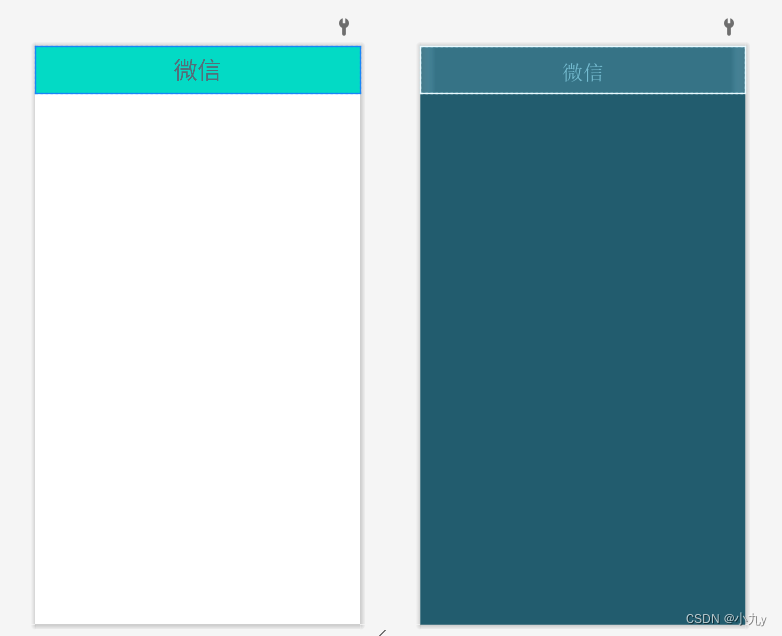
设置完成后效果图如下
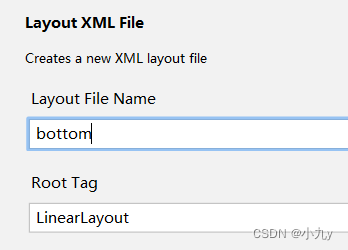
底部导航栏(bottom.xml)
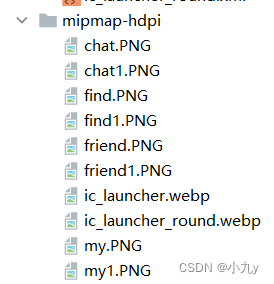
将需要的八个微信图标(微信,通讯录,发现,我的及其点击后的图标)拖入mipmap-hdpi中做准备
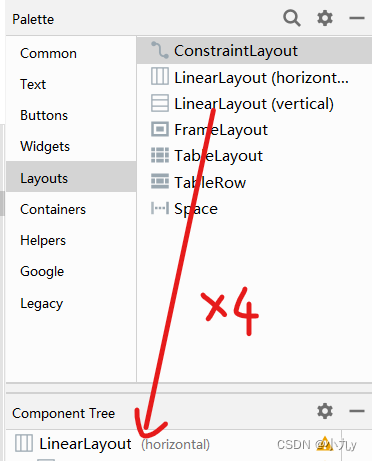
在layout文件中新建另一个.xml文件,命名为bottom.xml,布局(RootTag)设置为LinearLayout,创建完成后,在LinearLayout之下拖入四个纵向排列的LinearLayout,每个LinearLayout中分别加入选择好的ImageView和TextView

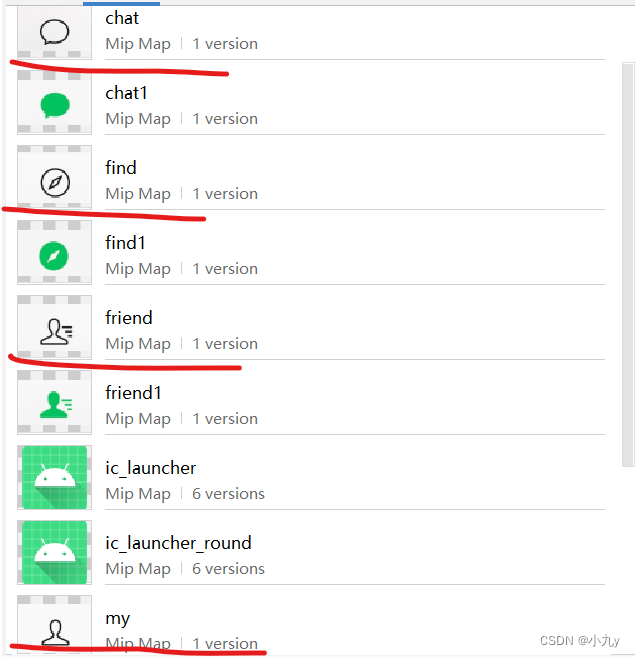
imageView选择如下
在code页面设置字体和相对布局等
<?xml version="1.0" encoding="utf-8"?>
<LinearLayout xmlns:android="http://schemas.android.com/apk/res/android"
    xmlns:app="http://schemas.android.com/apk/res-auto"
    android:layout_width="match_parent"
    android:layout_height="wrap_content"
    android:backgroundTint="@android:color/darker_gray">

    <LinearLayout
        android:id="@+id/first"
        android:layout_width="wrap_content"
        android:layout_height="wrap_content"
        android:layout_weight="1"
        android:orientation="vertical">

        <ImageView
            android:id="@+id/imageView"
            android:layout_width="match_parent"
            android:layout_height="50dp"
            android:src="@mipmap/chat"
            app:srcCompat="@mipmap/chat" />

        <TextView
            android:id="@+id/textView3"
            android:layout_width="match_parent"
            android:layout_height="wrap_content"
            android:gravity="center"
            android:text="微信"
            android:textSize="18sp" />

    </LinearLayout>

    <LinearLayout
        android:id="@+id/second"
        android:layout_width="wrap_content"
        android:layout_height="wrap_content"
        android:layout_weight="1"
        android:orientation="vertical">

        <ImageView
            android:id="@+id/imageView2"
            android:layout_width="match_parent"
            android:layout_height="50dp"
            android:src="@mipmap/friend"
            app:srcCompat="@mipmap/friend" />

        <TextView
            android:id="@+id/textView4"
            android:layout_width="match_parent"
            android:layout_height="wrap_content"
            android:gravity="center"
            android:text="通讯录"
            android:textSize="18sp" />
    </LinearLayout>

    <LinearLayout
        android:id="@+id/third"
        android:layout_width="wrap_content"
        android:layout_height="wrap_content"
        android:layout_weight="1"
        android:orientation="vertical">

        <ImageView
            android:id="@+id/imageView3"
            android:layout_width="match_parent"
            android:layout_height="50dp"
            android:src="@mipmap/find"
            app:srcCompat="@mipmap/find" />

        <TextView
            android:id="@+id/textView5"
            android:layout_width="match_parent"
            android:layout_height="wrap_content"
            android:gravity="center"
            android:text="发现"
            android:textSize="18sp" />
    </LinearLayout>

    <LinearLayout
        android:id="@+id/forth"
        android:layout_width="wrap_content"
        android:layout_height="wrap_content"
        android:layout_weight="1"
        android:orientation="vertical">

        <ImageView
            android:id="@+id/imageView4"
            android:layout_width="match_parent"
            android:layout_height="50dp"
            android:src="@mipmap/my"
            app:srcCompat="@mipmap/my" />

        <TextView
            android:id="@+id/textView6"
            android:layout_width="match_parent"
            android:layout_height="wrap_content"
            android:gravity="center"
            android:text="我的"
            android:textSize="18sp" />

    </LinearLayout>
</LinearLayout>
代码解析
LinearLayout:android:orientation="horizontal",布局中组件的排列方式,有horizontal(水平)和vertical(垂直)两种方式
ImageView:app:srcCompat="@mipmap/my",用于运行中图片的显示
设置完成后效果图如下
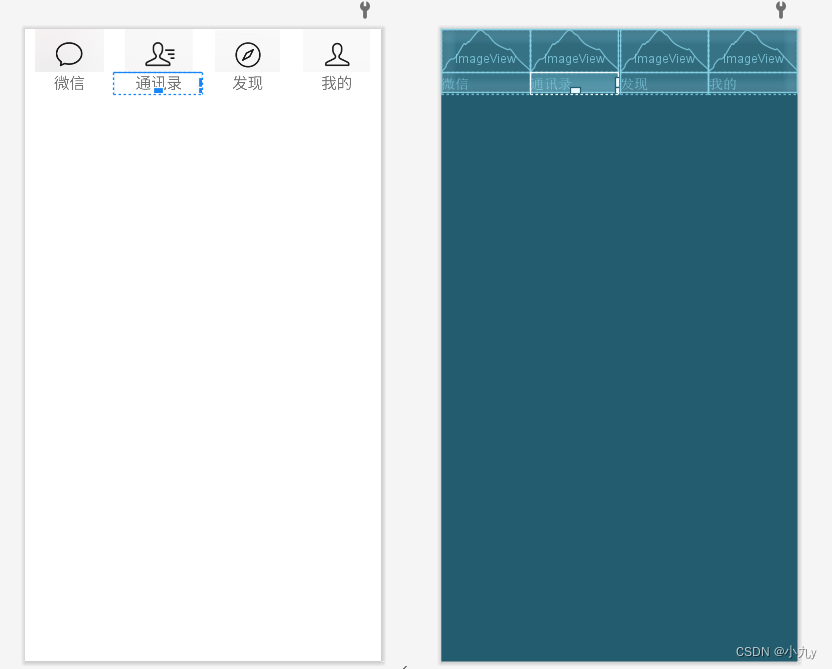
主题界面(activity_main.xml)
主题界面布局仍为LinearLayout,但布局组件排列方式为vertical(垂直)

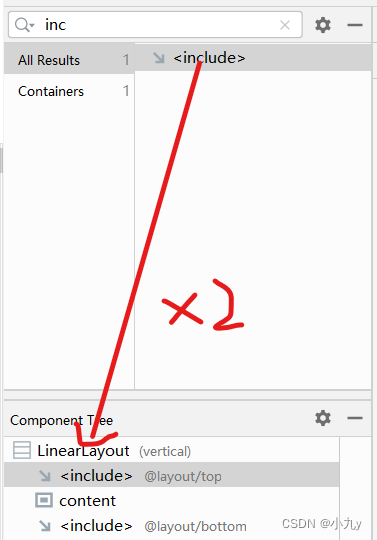
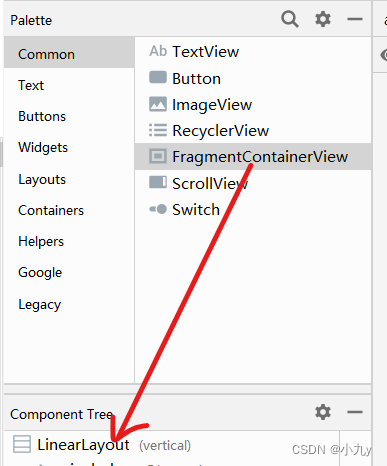
在控件搜索栏中搜索include,拖两个进入LinearLayout中,并分别选择top,bottom界面引入,之后向LinearLayout中拖入FragmentContainerView用于页面内容显示

在code页面代码设置如下
<?xml version="1.0" encoding="utf-8"?>
<LinearLayout xmlns:android="http://schemas.android.com/apk/res/android"
    xmlns:app="http://schemas.android.com/apk/res-auto"
    xmlns:tools="http://schemas.android.com/tools"
    android:layout_width="match_parent"
    android:layout_height="match_parent"
    android:orientation="vertical"
    tools:context=".MainActivity">

    <include layout="@layout/top"></include>

    <FrameLayout
        android:id="@+id/content"
        android:layout_width="match_parent"
        android:layout_height="0dp"
        android:layout_weight="1"/>

    <include layout="@layout/bottom"></include>

</LinearLayout>
代码解析
include layout="@layout/top"在布局中导入另一个布局
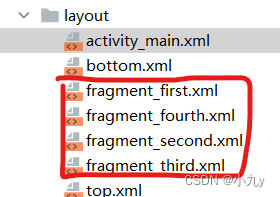
4个Fragment页面设计
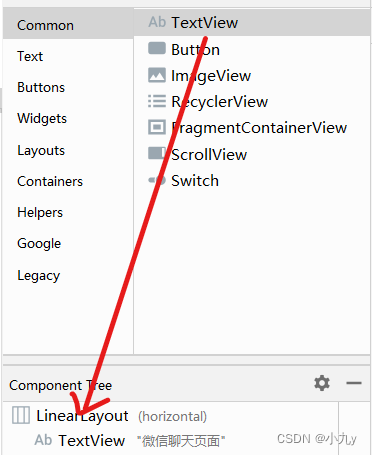
在layout中新建四个.xml文件命名分别为fragment_first到fragment_forth,布局Root Tag均为LinearLayout
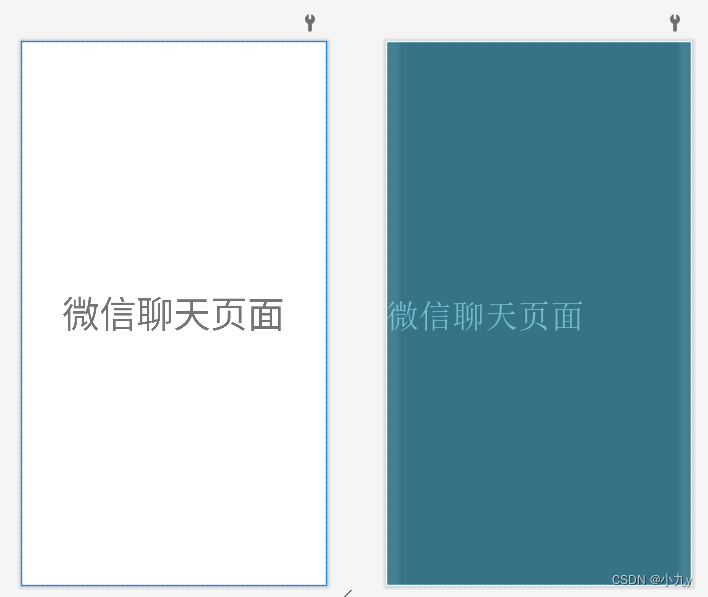
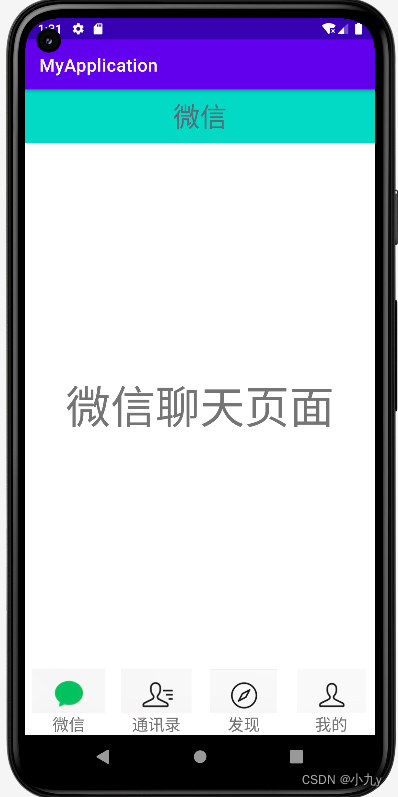
fragment_first.xml(微信聊天)页面设计
在linearlayout中拖入一个TextView作为展示内容
代码配置
<?xml version="1.0" encoding="utf-8"?>
<LinearLayout xmlns:android="http://schemas.android.com/apk/res/android"
    xmlns:tools="http://schemas.android.com/tools"
    android:layout_width="match_parent"
    android:layout_height="match_parent"
    tools:context=".first">

    <!-- TODO: Update blank fragment layout -->
    <TextView
        android:layout_width="match_parent"
        android:layout_height="match_parent"
        android:gravity="center"
        android:text="微信聊天页面"
        android:textSize="50sp" />

</LinearLayout>
代码解析
tools:context=".first",这句相当于被注释了,编译后不起任何作用
完成后效果图展示
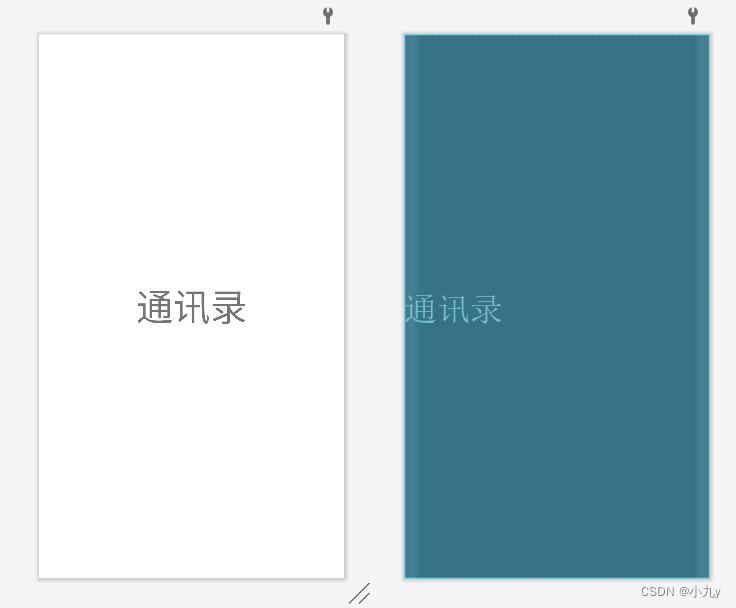
fragment_second.xml(通讯录)页面设计
在linearlayout中拖入一个TextView作为展示内容

代码配置
<?xml version="1.0" encoding="utf-8"?>
<LinearLayout xmlns:android="http://schemas.android.com/apk/res/android"
    xmlns:tools="http://schemas.android.com/tools"
    android:layout_width="match_parent"
    android:layout_height="match_parent"
    tools:context=".second">

    <!-- TODO: Update blank fragment layout -->
    <TextView
        android:layout_width="match_parent"
        android:layout_height="match_parent"
        android:gravity="center"
        android:text="通讯录"
        android:textSize="50sp" />

</LinearLayout>
代码解析
重复内容同上
完成后效果图展示
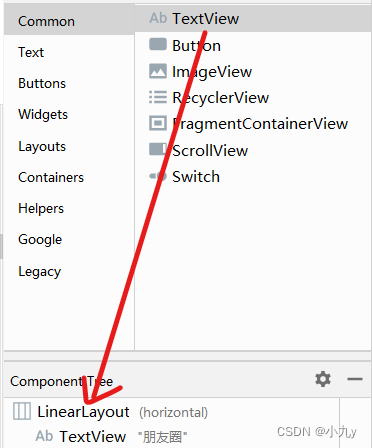
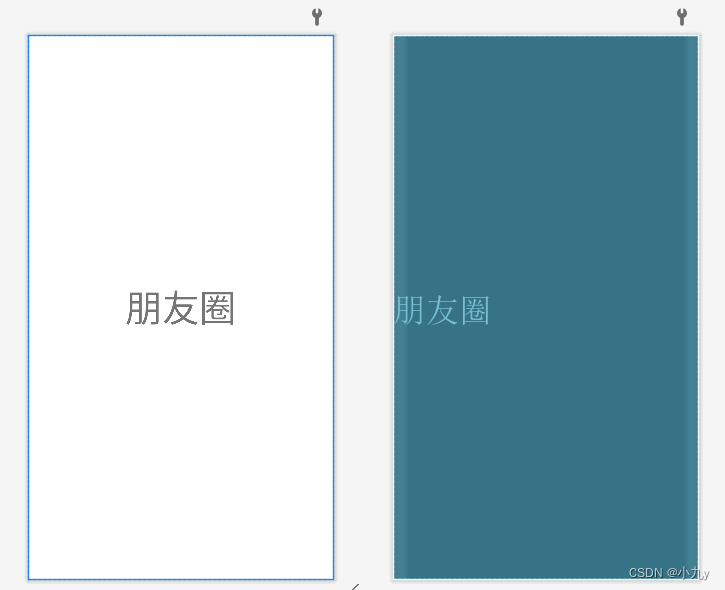
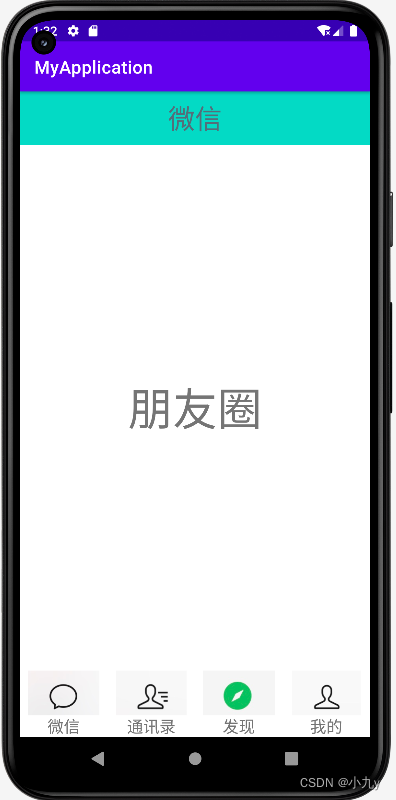
fragment_third.xml(发现/朋友圈)页面设计
在linearlayout中拖入一个TextView作为展示内容
代码配置
<?xml version="1.0" encoding="utf-8"?>
<LinearLayout xmlns:android="http://schemas.android.com/apk/res/android"
    xmlns:tools="http://schemas.android.com/tools"
    android:layout_width="match_parent"
    android:layout_height="match_parent"
    tools:context=".third">

    <!-- TODO: Update blank fragment layout -->
    <TextView
        android:layout_width="match_parent"
        android:layout_height="match_parent"
        android:gravity="center"
        android:text="朋友圈"
        android:textSize="50sp" />

</LinearLayout>
代码解析
重复内容同上
完成后效果图展示
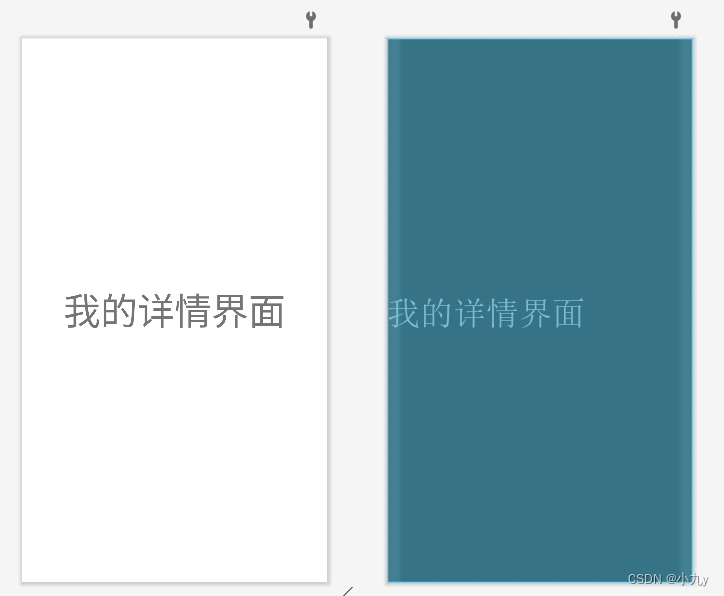
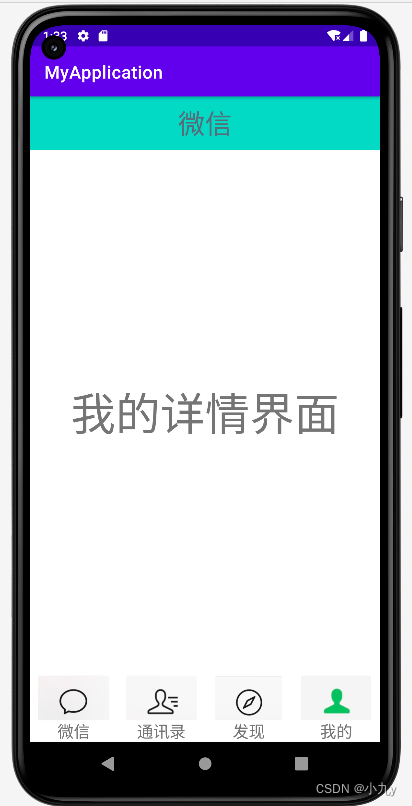
fragment_forth.xml(我的)页面设计
在linearlayout中拖入一个TextView作为展示内容

代码配置
<?xml version="1.0" encoding="utf-8"?>
<LinearLayout xmlns:android="http://schemas.android.com/apk/res/android"
    xmlns:tools="http://schemas.android.com/tools"
    android:layout_width="match_parent"
    android:layout_height="match_parent"
    tools:context=".fourth">

    <!-- TODO: Update blank fragment layout -->
    <TextView
        android:layout_width="match_parent"
        android:layout_height="match_parent"
        android:gravity="center"
        android:text="我的详情界面"
        android:textSize="50sp" />

</LinearLayout>
代码解析
重复内容同上
完成后效果图展示
2.相关Java文件配置
点击按钮绑定点击切换的方法
跳转页面的实现需要将布局按钮与事件相结合,当点击按钮时触发监听事件,实现跳转,此时就每个linearLayout都需要与java类绑定,在java文件中写方法实现跳转,所以先新建四个java文件分别与bottom里的每个linearLayout绑定

微信聊天java代码
package com.example.myapplication;
import android.os.Bundle;

import androidx.fragment.app.Fragment;

import android.view.LayoutInflater;
import android.view.View;
import android.view.ViewGroup;

public class first extends Fragment {

    public first() {
        // Required empty public constructor
    }

    @Override
    public View onCreateView(LayoutInflater inflater, ViewGroup container,
                             Bundle savedInstanceState) {
        // Inflate the layout for this fragment
        return inflater.inflate(R.layout.fragment_first, container, false);
    }
}
通讯录Java代码
package com.example.myapplication;

import android.os.Bundle;
import android.view.LayoutInflater;
import android.view.View;
import android.view.ViewGroup;

import androidx.fragment.app.Fragment;


public class second extends Fragment {

    public second() {
        // Required empty public constructor
    }

    @Override
    public View onCreateView(LayoutInflater inflater, ViewGroup container,
                             Bundle savedInstanceState) {
        // Inflate the layout for this fragment
        return inflater.inflate(R.layout.fragment_second, container, false);
    }
}
发现/朋友圈Java代码
package com.example.myapplication;
import android.os.Bundle;
import android.view.LayoutInflater;
import android.view.View;
import android.view.ViewGroup;

import androidx.fragment.app.Fragment;


public class third extends Fragment {

    public third() {
        // Required empty public constructor
    }

    @Override
    public View onCreateView(LayoutInflater inflater, ViewGroup container,
                             Bundle savedInstanceState) {
        // Inflate the layout for this fragment
        return inflater.inflate(R.layout.fragment_third, container, false);
    }
}
我的Java代码
package com.example.myapplication;
import android.os.Bundle;
import android.view.LayoutInflater;
import android.view.View;
import android.view.ViewGroup;

import androidx.fragment.app.Fragment;


public class fourth extends Fragment {

    public fourth() {
        // Required empty public constructor
    }

    @Override
    public View onCreateView(LayoutInflater inflater, ViewGroup container,
                             Bundle savedInstanceState) {
        // Inflate the layout for this fragment
        return inflater.inflate(R.layout.fragment_fourth, container, false);
    }
}
主函数MainActivity及代码解析
新建四个Fragment对象,并使用FragmentManager来管理
    private Fragment first = new first();
    private Fragment second = new second();
    private Fragment third = new third();
    private Fragment fourth = new fourth();

    private FragmentManager fragmentManager;
创建四个linearLayout对象,并绑定点击的监听事件
   private LinearLayout linearLayout1;
    private LinearLayout linearLayout2;
    private LinearLayout linearLayout3;
    private LinearLayout linearLayout4;
    @Override
    protected void onCreate(Bundle savedInstanceState) {
        super.onCreate(savedInstanceState);
        setContentView(R.layout.activity_main);

        linearLayout1 = findViewById(R.id.first);
        linearLayout2 = findViewById(R.id.second);
        linearLayout3 = findViewById(R.id.third);
        linearLayout4 = findViewById(R.id.forth);

        linearLayout1.setOnClickListener(this);
        linearLayout2.setOnClickListener(this);
        linearLayout3.setOnClickListener(this);
        linearLayout4.setOnClickListener(this);

        initFragment();
    }
初始化fragment
   protected void initFragment() {
        fragmentManager = getSupportFragmentManager();
        FragmentTransaction transaction = fragmentManager.beginTransaction();
        transaction.add(R.id.content,first);
        transaction.add(R.id.content,second);
        transaction.add(R.id.content,third);
        transaction.add(R.id.content,fourth);
        hideFragment(transaction);
        transaction.show(second);
        transaction.commit();
    }
在点击另一个导航键的时候需要隐藏其余的几个页面,因此要编写隐藏fragment的代码
    protected void hideFragment(FragmentTransaction transaction){
        transaction.hide(first);
        transaction.hide(second);
        transaction.hide(third);
        transaction.hide(fourth);
    }
采用switch编写点击触发的事件(页面跳转)
    @Override
    public void onClick(View v) {
        switch (v.getId()){
            case R.id.first:
                showFragment(1);
                break;
            case R.id.second:
                showFragment(2);
                break;
            case R.id.third:
                showFragment(3);
                break;
            case R.id.forth:
                showFragment(4);
                break;
            default:
                break;
        }
    }
用switch编写展示当前fragment的方法
    private void showFragment(int i) {
        FragmentTransaction transaction = fragmentManager.beginTransaction();
        hideFragment(transaction);
        switch (i){
            case 1:
                transaction.show(first);
                break;
            case 2:
                transaction.show(second);
                break;
            case 3:
                transaction.show(third);
                break;
            case 4:
                transaction.show(fourth);
                break;
            default:
                break;
        }
        transaction.commit();
    }
}
MainActivity总体代码
package com.example.myapplication;

import androidx.appcompat.app.AppCompatActivity;
import androidx.fragment.app.Fragment;
import androidx.fragment.app.FragmentManager;
import androidx.fragment.app.FragmentTransaction;

import android.os.Bundle;
import android.view.View;
import android.widget.LinearLayout;

public class MainActivity extends AppCompatActivity implements View.OnClickListener{


    private Fragment first = new first();
    private Fragment second = new second();
    private Fragment third = new third();
    private Fragment fourth = new fourth();

    private FragmentManager fragmentManager;

    private LinearLayout linearLayout1;
    private LinearLayout linearLayout2;
    private LinearLayout linearLayout3;
    private LinearLayout linearLayout4;


    @Override
    protected void onCreate(Bundle savedInstanceState) {
        super.onCreate(savedInstanceState);
        setContentView(R.layout.activity_main);

        linearLayout1 = findViewById(R.id.first);
        linearLayout2 = findViewById(R.id.second);
        linearLayout3 = findViewById(R.id.third);
        linearLayout4 = findViewById(R.id.forth);

        linearLayout1.setOnClickListener(this);
        linearLayout2.setOnClickListener(this);
        linearLayout3.setOnClickListener(this);
        linearLayout4.setOnClickListener(this);

        initFragment();
    }

    protected void initFragment() {
        fragmentManager = getSupportFragmentManager();
        FragmentTransaction transaction = fragmentManager.beginTransaction();
        transaction.add(R.id.content,first);
        transaction.add(R.id.content,second);
        transaction.add(R.id.content,third);
        transaction.add(R.id.content,fourth);
        hideFragment(transaction);
        transaction.show(second);
        transaction.commit();
    }

    protected void hideFragment(FragmentTransaction transaction){
        transaction.hide(first);
        transaction.hide(second);
        transaction.hide(third);
        transaction.hide(fourth);
    }

    @Override
    public void onClick(View v) {
        switch (v.getId()){
            case R.id.first:
                showFragment(1);
                break;
            case R.id.second:
                showFragment(2);
                break;
            case R.id.third:
                showFragment(3);
                break;
            case R.id.forth:
                showFragment(4);
                break;
            default:
                break;
        }
    }

    private void showFragment(int i) {
        FragmentTransaction transaction = fragmentManager.beginTransaction();
        hideFragment(transaction);
        switch (i){
            case 1:
                transaction.show(first);
                break;
            case 2:
                transaction.show(second);
                break;
            case 3:
                transaction.show(third);
                break;
            case 4:
                transaction.show(fourth);
                break;
            default:
                break;
        }
        transaction.commit();
    }
}
三、遇到的问题及解决方法
1.图片插入mipmap-anydpi-v26之后预览页面显示图片,运行后不显示图片

解决方法:把图片从mipmap-anydpi-v26里面挪到mipmap-hdpi里面
四、运行结果展示

五、clone地址
gitee地址无效请直接搜索https://gitee.com/waiaiy/android.git


 595
595


 被折叠的 条评论
为什么被折叠?
被折叠的 条评论
为什么被折叠?
 到【灌水乐园】发言


