


Spring创建对象(使用XML配置文件的方式)
在说spring注入属性之前,我们先说一下spring创建对象(使用XML配置文件的方式)
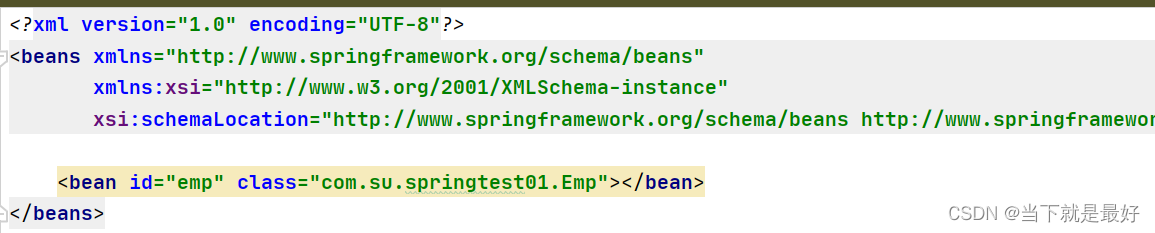
spring在创建对象时默认执行了无参构造器
演示如下:
1.有无参构造器时

2.无有参构造器时,此时会报错


Spring注入属性
(1)基于set方法进行属性注入
(1)创建一个类,定义类的属性与对应的set方法
(2)在spring配置文件中配置对象的属性,将属性注入
创建person类
package com.su.spring5;

/**
 * @author haustsusu
 * @create 2023-04-04-13:31
 */
public class person {
    private String name;
    private int age;

    public void setName(String name) {
        this.name = name;
    }

    public void setAge(int age) {
        this.age = age;
    }

    public void show(){
        System.out.println(name+"::"+age);
    }

}
在配置文件中注入属性
<?xml version="1.0" encoding="UTF-8"?>
<beans xmlns="http://www.springframework.org/schema/beans"
       xmlns:xsi="http://www.w3.org/2001/XMLSchema-instance"
       xsi:schemaLocation="http://www.springframework.org/schema/beans http://www.springframework.org/schema/beans/spring-beans.xsd">

    <bean id="oneperson" class="com.su.spring5.person">
        <property name="name" value="苏玖"></property>
        <property name="age" value="21"></property>
    </bean>
</beans>
调用对象以及方法
package com.su.spring5;

import org.springframework.beans.factory.BeanFactory;
import org.springframework.context.support.ClassPathXmlApplicationContext;

/**
 * @author haustsusu
 * @create 2023-04-04-13:57
 */
public class RunOneperson {
    public static void main(String[] args) {
        //加载spring配置文件
        BeanFactory applicationContext=new ClassPathXmlApplicationContext("bean1.xml");
        //获取配置文件中创建的对象
        person person = applicationContext.getBean("oneperson", person.class);
        //调用返回的对象的方法
        person.show();
    }
}
运行结果:
苏玖::21
set注入的另一种形式>>>P名称注入:
为什么要把p名称注入放在set注入的后面,个人认为p名称注入与set注入属于同一类,当把类的属性中的set方法注释后,p名称中的属性就会爆红
注释name属性的set方法后:(p:name爆红)

所以可以认为p名称注入是对set注入的一种简化形式,简化了写法
实现步骤:
1.导入p名称空间
xmlns:p="http://www.springframework.org/schema/p"
2.创建对应的对象,对象属性需要有set方法
3.配置文件使用p名称注入属性

(2)有参构造注入属性
创建order类
package com.su.spring5;

/**
 * @author haustsusu
 * @create 2023-04-05-21:23
 */
public class order {
    private String name;
    private String country;

    public order(String name,String country){
        this.name=name;
        this.country=country;
    }

    public void show(){
        System.out.println(name+"::"+country);
    }
}
在配置文件中使用<constructor-arg>标签注入属性
<?xml version="1.0" encoding="UTF-8"?>
<beans xmlns="http://www.springframework.org/schema/beans"
       xmlns:xsi="http://www.w3.org/2001/XMLSchema-instance"
       xsi:schemaLocation="http://www.springframework.org/schema/beans http://www.springframework.org/schema/beans/spring-beans.xsd">

    <bean id="order" class="com.su.spring5.order">
        <constructor-arg name="name" value="手机"></constructor-arg>
        <constructor-arg name="country" value="PRC"></constructor-arg>
    </bean>
</beans>
还可以使用<constructor-arg>标签中的index属性注入
<?xml version="1.0" encoding="UTF-8"?>
<beans xmlns="http://www.springframework.org/schema/beans"
       xmlns:xsi="http://www.w3.org/2001/XMLSchema-instance"
       xsi:schemaLocation="http://www.springframework.org/schema/beans http://www.springframework.org/schema/beans/spring-beans.xsd">

    <bean id="order" class="com.su.spring5.order">
        <constructor-arg index="0" value="电脑"></constructor-arg>
        <constructor-arg index="1" value="PRC"></constructor-arg>
    </bean>
</beans>
调用对象以及方法:
package com.su.spring5;

import org.springframework.beans.factory.BeanFactory;
import org.springframework.context.support.ClassPathXmlApplicationContext;

/**
 * @author haustsusu
 * @create 2023-04-05-21:25
 */
public class RunOneorder {
    public static void main(String[] args) {
        //加载spring配置文件
        BeanFactory applicationContext=new ClassPathXmlApplicationContext("bean.xml");
        //获取配置文件中创建的对象
        order order = applicationContext.getBean("order", order.class);
        //调用返回的对象的方法
        order.show();
    }
}
运行结果:
手机::PRC


 3772
3772


 被折叠的 条评论
为什么被折叠?
被折叠的 条评论
为什么被折叠?
 到【灌水乐园】发言


