


前端生成日历的算法(抽象版)
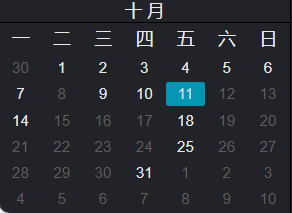
假设我们要实现一个类似于下面的这样一个日历(上面这个是windows自带的,下面这个是我们完成的基础版)

1.日历算法
每个日历是一个6*7的表格,我们定义一个 calendar 二维数组来存储,首先我们需要计算这个月的第一天是周几,用startDay标识,
比如 24年 9 月 startDay为6则表示为周日,表格第一行 第七列的位置。
24年9月的表格中包含上个月的末尾,那么calendar[0]这个数组可能是这样的[26,27,28,29,30,31,1]。其中1是本月的数据,26-31都是8月的数据。也就是说需要填充startDay-1 个上个月的数据,但是startDay可能会为0和1,所以这里加一个周期,需要填充 (startDay-1+7)%7个上个月的数据。并且如果是一月份的话调用的还是去年12月份的数据。
  // 获取上个月的天数
  const prevMonthDays = month === 0 ? new Date(year - 1, 12, 0).getDate() : new Date(year, month, 0).getDate();
  let prevMonthDay = prevMonthDays - (startDay + 6) % 7 + 1;
使用 (startDay + 6) % 7防止因为startDay为0的时候带来的报错。
然后顺序往下写这个月的日期,最后如果6*7表格没有填写完,那么就从1开始接着填知道填充完成为止。
1.1 高效的算法
简洁易懂 简直就是艺术
./createCalendar
export function createCalendar(year, month) {
    let calendar = new Array(6).fill(null).map(() => new Array(7).fill(null));
    let day = 1;
    const startDay = new Date(year, month, 1).getDay();
    console.log('月份开始第一天', startDay);
    const daysInMonth = new Date(year, month + 1, 0).getDate();
    console.log('daysInMonth', daysInMonth);

    // 获取上个月的天数
    const prevMonthDays = month === 0 ? new Date(year - 1, 12, 0).getDate() : new Date(year, month, 0).getDate();
    let prevMonthDay = prevMonthDays - (startDay + 6) % 7 + 1;

    for (let i = 0; i < 6; i++) {
      for (let j = 0; j < 7; j++) {
        // 填充上一个月的数据
        if (i === 0 && j < (startDay + 6) % 7) {
          calendar[i][j] = {
            originDate: month === 0 ? `${year - 1}-12-${prevMonthDay}` : `${year}-${month}-${prevMonthDay}`,
            isMonth: false,
            value: prevMonthDay,
            selected: false
          };
          prevMonthDay++;
          continue;
        }
        // 填充月份数据
        if (day <= daysInMonth) {
          calendar[i][j] = {
            originDate: `${year}-${month + 1}-${day}`,
            value: day,
            isMonth: true,
            selected: false
          };
          day++;
        } else {
          // 填充下一个月的数据
          calendar[i][j] = {
            originDate: '',
            isMonth: false,
            value: day - daysInMonth,
            selected: false
          };
          day++;
        }
      }
    }

    return calendar;
  }
2.月份组件设计
公司真实的代码需要保密,我这里只抽象出来一个最简单的设计 具体功能需要具体实现,
接收月份,年份 和width三个参数,如若后续扩展会对该组件设计更多的api。写了一套这个组件的less
MonthCalendar.jsx
import React, { useState, useEffect } from 'react';
import PropTypes from 'prop-types';
import { createCalendar } from './createCalendar';
import './index.less';

const MonthCalendar = ({ year, month, width = 100 }) => {
  const [calendar, setCalendar] = useState(createCalendar(year, month));
  const daysOfWeek = ['一', '二', '三', '四', '五', '六', '七'];

  const monthToChinese = (month) => {
    const months = ['一', '二', '三', '四', '五', '六', '七', '八', '九', '十', '十一', '十二'];
    return months[month];
  };

  const handleClick = (day) => {
    alert(day.originDate);
  };

  useEffect(() => {
    setCalendar(createCalendar(year, month));
  }, [year, month]);

return (
    <>
      <div className='month-container' style={{ width: `${width}%` }}>
        <h3 className='calendar-month-title'>
          {" "}
          {monthToChinese(month)} {intl("226870", "月")}
        </h3>
        <div className='calendar-table-container'>
          <table className='calendar-month-table'>
            <thead className='calendar-month-header'>
              <tr>
                {daysOfWeek.map((day, dayIndex) => (
                  <th key={dayIndex}>{day}</th>
                ))}
              </tr>
            </thead>
            <tbody className='calendar-month-body'>
              {calendar.map((week, weekIndex) => (
                <tr key={weekIndex}>
                  {week.map((day, dayIndex) => (
                    <td key={dayIndex} className={getClassName(day)} onClick={() => handleClick(day)}>
                      {day.value}
                    </td>
                  ))}
                </tr>
              ))}
            </tbody>
          </table>
        </div>
      </div>
    </>
  );
};

MonthCalendar.propTypes = {
  year: PropTypes.number.isRequired,
  month: PropTypes.number.isRequired,
};

export default MonthCalendar;
3.样式
./index.less
// 月份表格容器设置
.month-container{
	height: 24.1vh;
	display: flex;
	background-color: #212328;
	justify-content: center;
	align-items: center;
	flex-direction: column;
	// border-bottom: 1px solid black;
	// border-right: 1px solid black;

}
// 月份标题
.calendar-month-title{
	width: 100%;
	height: 2.82vh;
	text-align: center;
	color: #E8E8E8;
	border-bottom: 1px solid black;
	margin-bottom: 1px;
	font-weight: 400;
	font-size: 14px;
	font-family:  PingFangSC-Regular, Arial;
}

// 关于表格
.calendar-month-table {
	width: 100%;
	border-collapse: separate;
	// border:1px solid pink;
	td, th {
		border-right: 0.26vw solid transparent;
		border-left: 0.26vw solid transparent;
		// border-bottom: 1px solid transparent;
		// border-top: 1px solid transparent;

	  }
	//   td, th {
	// 	border-right: 0.26vw solid pink;
	// 	border-left: 0.26vw solid pink;

	//   }
}

.calendar-month-table>thead>tr>th,
.calendar-month-table>tbody>tr>.selectable {
	text-align: center;
	width: 2.1vw;
	height: 2.73vh;
	color: #E8E8E8;
	font-weight: 400;
	border-radius: 2px;
}
.calendar-month-table>tbody>tr>.selectable:hover{
	border-radius: 2px;
	background-color:  #0596B3;
	cursor:pointer
}
.calendar-month-table>tbody>tr>.selected{
	border-radius: 2px;

	text-align: center;
	background-color:  #0596B3;
	cursor: pointer;
}
.calendar-month-table>tbody>tr>.nodata{
	color:#5E5E5E;
	border-radius: 2px;
	text-align: center;
	background-color:  #0596B3;
	cursor: pointer;
	// box-shadow: 0 0 0 3px #0596B3; // 添加外框
}
.calendar-month-table>tbody>tr>.disselectable{
	border-radius: 2px;

	text-align: center;
	width: 2.1vw;
	height: 2.73vh;
	font-weight: 400;
	border-radius: 2px;
 	color:#5E5E5E;
	cursor: default;
}

.calendar-month-body {
	font-family:  PingFangSC-Regular, Arial;
	font-size: 0.80vw;
	color: #DDDDDD;
	font-weight: 400;
	background-color: #212328;
}


 8432
8432

 被折叠的 条评论
为什么被折叠?
被折叠的 条评论
为什么被折叠?
 到【灌水乐园】发言


