想学习一下屏幕捕获,不知道怎么下手,关于这部分的帖子比较少,也不完全
从这个老哥这里看见一个15年的帖子,改了下,不过还是在他的基础上
java捕获的效果图:

java代码:
import java.awt.*;
import java.awt.event.*;
import java.awt.image.*;

import javax.swing.*;

public class WindowCapture extends JFrame implements ActionListener {
    private ScreenCaptureUtil scrCaptureUtil = null;
    private PaintCanvas canvas = null;
    private int FpsNum = 30; // 刷新率,默认30fps
    //虽然但是,用截图捕获来做视频捕获不知道是好是坏,但是有远程软件就这么干过

//    private String windowName = "";
    //需要指定捕获的窗口名称           这个真不知道怎么搞
//

    public WindowCapture(){
        super("捕获");
        init();
        Thread captureThread = new Thread(new Runnable() {
            @Override
            public void run() {
                while (true) {
                    canvas.drawScreen();
                    try {
                        Thread.sleep(1000 / FpsNum); // 根据刷新率进行刷新
                    } catch (InterruptedException e) {
                        e.printStackTrace();
                    }
                }
            }
        });
        captureThread.start();
    }

    public void init(){

        scrCaptureUtil = new ScreenCaptureUtil();
        canvas = new PaintCanvas(scrCaptureUtil);
        Container c = this.getContentPane();
        //临时设置一个头部
        Panel head = new Panel();
        head.setLayout(new GridLayout());

        c.setLayout(new BorderLayout());
        c.add(canvas,BorderLayout.CENTER);

        JTextField fpsInput = new JTextField(FpsNum +" "); // 添加输入框,让用户输入刷新率
        JButton openfpsBt = new JButton("使用刷新率");


        c.add(head, BorderLayout.NORTH);
        //head放到北
        head.add(fpsInput);
        head.add(openfpsBt);
        openfpsBt.addActionListener(new ActionListener() {
            @Override
            public void actionPerformed(ActionEvent e) {
                //更改刷新率
                FpsNum = Integer.parseInt(fpsInput.getText());

            }
        });
        this.setSize(600, 400);
        this.setVisible(true);
        this.setDefaultCloseOperation(WindowConstants.EXIT_ON_CLOSE);

    }
    public void actionPerformed(ActionEvent e){
        canvas.drawScreen();
    }
    public static void main(String[] args){
        new WindowCapture();
    }
}

class ScreenCaptureUtil{
    private Robot robot = null;
    private Rectangle scrRect =null;

    public ScreenCaptureUtil(){
        try{
            robot = new Robot();
        }catch(Exception e){
            System.out.println(e.toString());
        }
        Dimension scrSize = Toolkit.getDefaultToolkit().getScreenSize();
        scrRect = new Rectangle(0,0,scrSize.width,scrSize.height);
    }
    public BufferedImage captureScreen(){
        BufferedImage scrImg = null;
        try{
            scrImg = robot.createScreenCapture(scrRect);
        }catch(Exception e){
            System.out.println(e.toString());
        }
        return scrImg;
    }
}

class PaintCanvas extends JPanel{
    private ScreenCaptureUtil scrCaptureUtil = null;
    private BufferedImage scrImg = null;

    public PaintCanvas(ScreenCaptureUtil scrCaptureUtil){
        this.scrCaptureUtil = scrCaptureUtil;
    }
    protected void paintComponent(Graphics g){
        if(scrImg !=null){
            int iWidth = this.getWidth();
            int iHeight = this.getHeight();
            g.drawImage(scrImg, 0, 0, iWidth, iHeight, 0,0,scrImg.getWidth(),scrImg.getHeight(),null);
        }
    }
    public void drawScreen(){
        Graphics g = this.getGraphics();
        scrImg=scrCaptureUtil.captureScreen();
        if(scrImg != null){
            this.paintComponent(g);
        }
        g.dispose();
    }
}
可是吧,我要的效果是直接截取窗口的内容而不是全屏,问了一下GPT(3.5),给出的答案要么就是报错,要么就是截取到的是窗口局部的图像
然后就想看看python怎么做吧
换语言就说明有障碍了,还是问GPT怎么写吧,我把我的要求发给GPT,然后得到了这个:
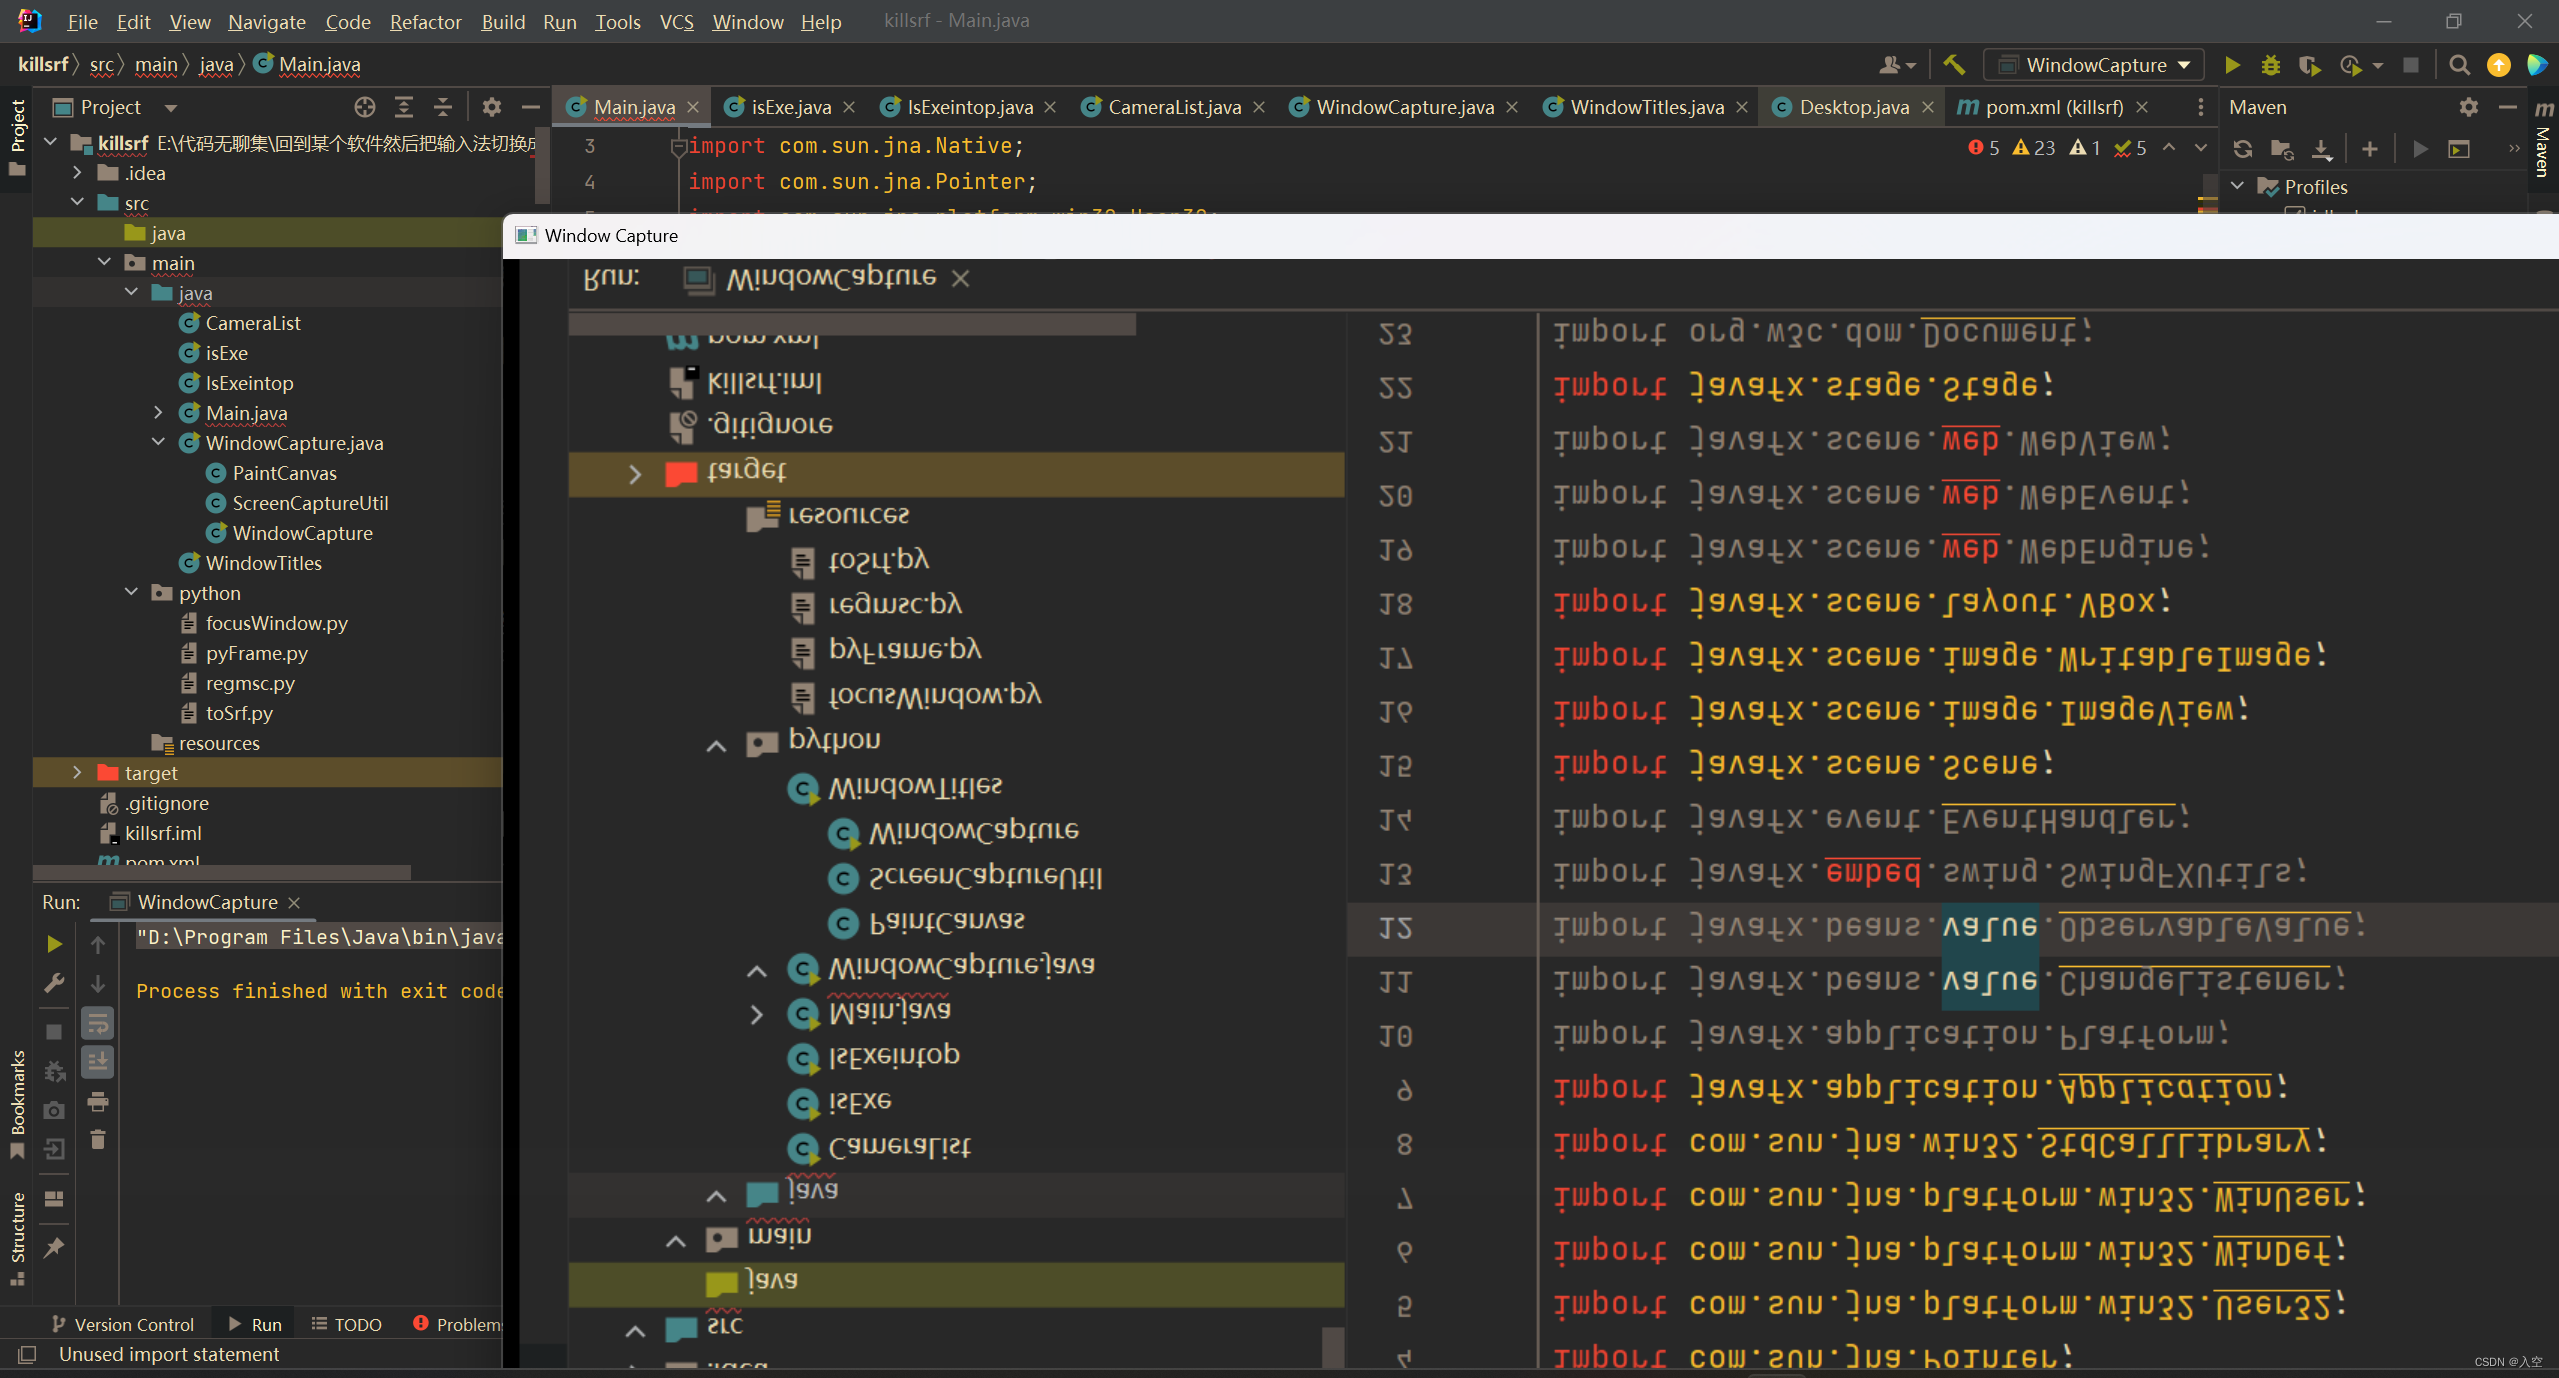
python窗口里的内容是倒过来的。。而且显示还不完全
然后我让GPT重写,然后一直报错,然后一怒之下怒了一下,决定自己看看什么毛病
后来没看出什么,然后我就拿GPT的代码去问文心

简单说就是使用窗口句柄获取程序托管在系统上的图像内容

了解到窗口句柄是个什么东西之后,就去找获取句柄的工具,在安装了Visual Studio之后在他的工具包里有一个spy++的软件,打开他,然后点击搜索-->查找窗口

如果安装了Vs(紫色这个)的话可以直接使用Everything去搜索spy,或者去他的安装目录下面找(推荐直接搜)


打开以后: 点击 -- 搜索-->查找窗口

出来这个窗口,然后把那个准星放到要查句柄的窗口上,他的句柄就会在下面显示

由于涉及到知识盲区了所以得让AI帮忙了
由于各个AI能力不同所以选了GPT3.5,文心3.5跟星火
让他们互相解决报错问题
python实现后效果图:

成了
在窗口句柄填写那里,在spy++获取的窗口句柄,复制开头这些0后面第一个不是0的字符到最后一个,假如句柄是00010ABC,那么填写在py代码里的句柄就是0x10ABC,把前面那些0浓缩成0x

py代码:注意装模块
import cv2
import numpy as np
import win32gui
import win32ui
import win32con
import time

# 窗口句柄,这里需要替换成你要捕获的窗口的实际句柄
hwnd = 0x2A086A # 填入你的窗口句柄

# 获取窗口的矩形区域
left, top, right, bottom = win32gui.GetWindowRect(hwnd)
width = right
height = bottom

# 创建与窗口区域大小相同的兼容DC和位图
hwndDC = win32gui.GetWindowDC(hwnd)
mfcDC = win32ui.CreateDCFromHandle(hwndDC)
saveDC = mfcDC.CreateCompatibleDC()
saveBitMap = win32ui.CreateBitmap()
saveBitMap.CreateCompatibleBitmap(mfcDC, width, height)
saveDC.SelectObject(saveBitMap)

# 创建窗口
cv2.namedWindow('Window Capture', cv2.WINDOW_NORMAL)  # 允许调整窗口大小

# 设置帧率和每秒捕获次数
capture_per_sec = 60  # 每秒捕获次数 (帧率)
interval = 1 / capture_per_sec  # 间隔时间
while True:
    # 将窗口内容复制到位图中
    result = win32gui.BitBlt(saveDC.GetSafeHdc(), 0, 0, width, height, hwndDC, 0, 0, win32con.SRCCOPY)
    # 获取位图句柄和位图信息
    bmp_info = saveBitMap.GetInfo()
    bmp_str = saveBitMap.GetBitmapBits(True)

    # 将位图数据转换为numpy数组
    img_array = np.frombuffer(bmp_str, dtype=np.uint8)
    img_array.shape = (bmp_info['bmHeight'], bmp_info['bmWidth'], 4)

    # OpenCV使用BGR顺序,但位图通常是BGRA,所以需要转换顺序
    img_array = cv2.cvtColor(img_array, cv2.COLOR_BGRA2BGR)
    # 缩放图像
    max_width = 800
    max_height = 500
    scale = min(max_width / width, max_height / height)
    width_scaled = int(width * scale)
    height_scaled = int(height * scale)
    dim = (width_scaled, height_scaled)
    img_scaled = cv2.resize(img_array, dim, interpolation=cv2.INTER_AREA)
    # 显示图像
    cv2.imshow('Window Capture', img_scaled)

    # 等待一定时间
    time.sleep(interval)

    # 按下 'q' 键退出循环
    if cv2.waitKey(1) & 0xFF == ord('q'):
        break

    left, top, right, bottom = win32gui.GetWindowRect(hwnd)
    # width = right
    # height = bottom


    print(left, top, width, height)

# 关闭窗口并清理资源
cv2.destroyAllWindows()
win32gui.ReleaseDC(hwnd, hwndDC)
saveDC.DeleteDC()
mfcDC.DeleteDC()
saveBitMap.Delete()


 2668
2668


 被折叠的 条评论
为什么被折叠?


