


 本文详细描述了在Windows10系统下安装GAMMA2023,包括加密狗驱动安装、MSYS2虚拟环境配置、Python安装,以及环境变量设置。还涉及如何在Linux虚拟环境中进行系统升级、安装必要的软件并进行初步测试,以及注意事项如环境变量检查和加密狗使用。
windows安装和linux安装GAMMA的整个流程有极大出入。
个人系统:windows10
GAMMA版本:2023
1.安装加密狗驱动
直接双击文件夹中的HASPUserSetup,安装之后加密狗指示灯亮起
注意:需要先插上加密狗
2.解压安装包

进入解压后的文件家里,需要将gamma_local和gamma_software放入windows系统下的C盘的
3.安装windows系统上linux虚拟环境
gamma安装教程中知名MSYS2虚拟环境
3.1安装 MSYS2
下载软件安装包,双击运行按照指示安装即可
MSYS2 or MSYS2 download | SourceForge.net
3.2 设置环境变量
本人在安装MSYS2时未更改安装路径,安装之后C盘生成一个名称msys64的文件夹
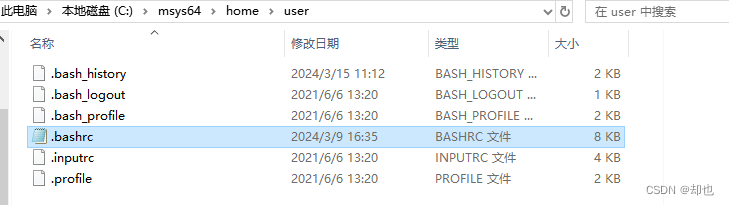
打开gamma_software文件夹找到bashrc_msys2_win64打开,在文件底部找到下方类似文本粘贴到.bashrc中
export DISPLAY=localhost:0

export GAMMA_LOCAL=/c/GAMMA_LOCAL_w64_20230619/local  # (replace by the correct path, /c/ corresponds to the c-drive: C:\)
export MINGW64=/c/msys64/mingw64                      # (replace by the correct path)
export MSYS64=/c/msys64                               # (replace by the correct path)
export GAMMA_HOME=/c/GAMMA_SOFTWARE         # (replace by the correct path to the top directory of the software distribution)
export MSP_HOME=$GAMMA_HOME/MSP
export ISP_HOME=$GAMMA_HOME/ISP
export DIFF_HOME=$GAMMA_HOME/DIFF
export DISP_HOME=$GAMMA_HOME/DISP
export LAT_HOME=$GAMMA_HOME/LAT
export IPTA_HOME=$GAMMA_HOME/IPTA
export GEO_HOME=$GAMMA_HOME/GEO
export PY3='/c/WPy64-31050'

#'/c/Program Files/...' has to be replaced by '/c/Program Files (x86)/...' for the 32-bit version of the programs
export PATH=$PY3:$PY3/python-3.10.5.amd64:$GAMMA_LOCAL/bin:$PATH:$MINGW64/bin:$MSYS64/usr/bin:$MSP_HOME/bin:\
$ISP_HOME/bin:$DIFF_HOME/bin:$LAT_HOME/bin:$IPTA_HOME/bin:$GEO_HOME/bin:$DISP_HOME/bin:$MSP_HOME/scripts:$ISP_HOME/scripts:\
$DIFF_HOME/scripts:$LAT_HOME/scripts:$IPTA_HOME/scripts:$GEO_HOME/scripts:$DISP_HOME/scripts:'/c/Program Files/gnuplot/bin':\
'/c/Program Files/Notepad++':'/c/Program Files/IrfanView':'/c/Users/cw/AppData/Local/Programs/Microsoft VS Code/bin/'

#This adds the Gamma Software main directory to the Python path
export PYTHONPATH=.:$GAMMA_HOME:$PYTHONPATH

#This command disables version checking for HDF5
export HDF5_DISABLE_VERSION_CHECK=1

#This sets the Gnuplot default terminal type to be WXT
export GNUTERM=wxt

#This sets the GDAL folder
export GDAL_DATA=$GAMMA_LOCAL/share/gdal

#This sets the PROJ4 folder
export PROJ_LIB=$GAMMA_LOCAL/share/proj

#This sets the default image format to BMP
export GAMMA_RASTER="BMP"

#The following aliases can be useful (uncomment to activate them)
alias ll='ls -alF'
#alias rm='rm -i'
#alias cp='cp -i'
#alias mv='mv -i'
alias cd..='cd ..'
alias ..='cd ..'
alias e='notepad++'
alias preview='start'
alias iv='i_view64'
alias xv='start'
alias eog='start'
(注:其中的路径和gamma版本、python版本等按照自己安装情况进行修改)
3.3 在线升级系统
msys2安装之后可以打开一个和linux命令终端类似的窗口,在其中输入
pacman -S make nano openssh git perl subversion tar tcsh unzip zip4.安装python
从下方链接下载winpython:
https://sourceforge.net/projects/winpython/files/
安装过程中切记修改安装目录,将其安装在C盘中
也不要在命令行窗口直接使用安装的命令,个人使用直接安装命令最好测试时出现部分模型无法使用
5.安装必要的软件
- Gnuplot
- Notepad++
- IrfanView等
6.软件测试
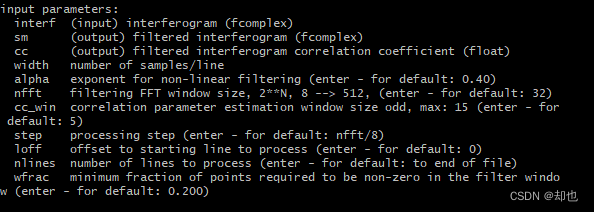
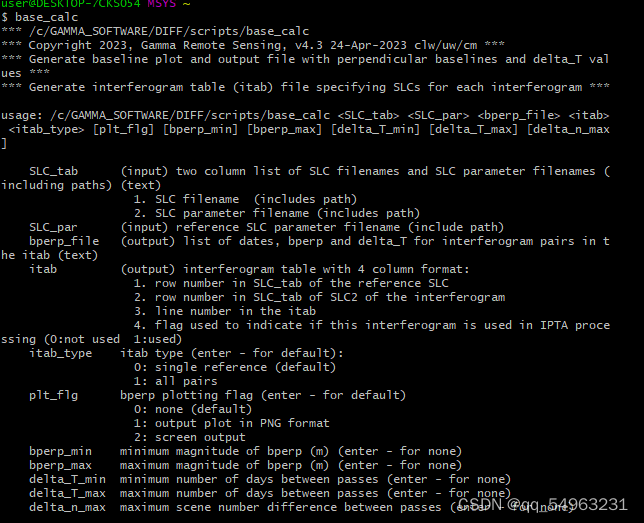
控制台分别输入adf、base_calc、visras.py
正确运行会弹出参数

7.其它
测试中,命令未找到说明环境变量设置出错,请检查环境变量
未插入加密狗会弹出提示框找不到加密狗
visras.py测试出错,检查python的安装位置与环境变量设置中的python路径和版本是否对应


 2581
2581


 被折叠的 条评论
为什么被折叠?
被折叠的 条评论
为什么被折叠?
 到【灌水乐园】发言


