


记录下labelImg标注数据到YOLOv8训练的过程,其中容易遇到labelImg的坑
数据集处理
首先在mydata下创建4个文件夹

images文件夹下存放着所有的图片,包括训练集和测试集等。后续会根据代码进行划分。
json文件夹里存放的是labelImg标注的所有数据。需要注意的是,json文件的命名应与images文件夹中的图片一一对应。labels文件夹是空的,后续会根据代码将json转化为YOLOv8支持的训练数据集。接下来需要创建一个 split_train_val.py 文件,放在mydata目录下,用于将images文件夹中的图片划分为训练集和测试集。代码如下:
import os
import json
import random
import argparse

class DatasetSplitter:
    def __init__(self, json_path, txt_path):
        self.json_path = json_path
        self.txt_path = txt_path
        self.trainval_percent = 1.0
        self.train_percent = 0.9

        self.total_json = os.listdir(json_path)
        self.num = len(self.total_json)
        self.list_index = list(range(self.num))

        if not os.path.exists(txt_path):
            os.makedirs(txt_path)

    def split_dataset(self):
        tv = int(self.num * self.trainval_percent)
        tr = int(tv * self.train_percent)
        trainval = random.sample(self.list_index, tv)
        train = random.sample(trainval, tr)

        file_trainval = open(os.path.join(self.txt_path, 'trainval.txt'), 'w')
        file_test = open(os.path.join(self.txt_path, 'test.txt'), 'w')
        file_train = open(os.path.join(self.txt_path, 'train.txt'), 'w')
        file_val = open(os.path.join(self.txt_path, 'val.txt'), 'w')

        for i in self.list_index:
            name = self.total_json[i][:-5] + '\n'  # Assuming filenames end with '.json'
            if i in trainval:
                file_trainval.write(name)
                if i in train:
                    file_train.write(name)
                else:
                    file_val.write(name)
            else:
                file_test.write(name)

        file_trainval.close()
        file_train.close()
        file_val.close()
        file_test.close()

if __name__ == "__main__":
    parser = argparse.ArgumentParser()
    parser.add_argument('--json_path', default='json', type=str, help='input json label path')
    parser.add_argument('--txt_path', default='dataSet', type=str, help='output txt label path')
    opt = parser.parse_args()

    dataset_splitter = DatasetSplitter(opt.json_path, opt.txt_path)
    dataset_splitter.split_dataset()
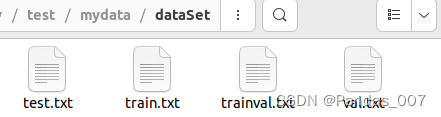
运行后会在dataSet生成四个文件.
然后前往mydata目录的上一级目录,例如我这里是test目录下,创建voc_label.py文件.用于将labelImg标注的json数据转化为txt文本数据.
请注意,YULO的标注框中的x和y表示矩形框的左上角,而labelImg中的(x,y,w,h)可能表示矩形框的中心点坐标。在使用时需要确认,以免训练出来的YOLO存在偏差。
可以通过以下代码draw_picture_by_json.py进行绘图测试,以下我是默认labelImg的格式是(x_center,y_center,w,h)的格式进行绘制.
from typing import Dict
from PIL import Image, ImageDraw
import json

def draw_pic_by_raw_data(image_path:str, output_path:str, json_data: Dict):
    data = json_data
    img = Image.open(image_path)
    draw = ImageDraw.Draw(img)
    # Load JSON file with bounding box information
    # Iterate through bounding boxes and draw them on the image
    annotations = data[0]["annotations"]
    for bbox in annotations:
        label = bbox["label"]
        x_center, y_center, width, height = (
            bbox["coordinates"]["x"],
            bbox["coordinates"]["y"],
            bbox["coordinates"]["width"],
            bbox["coordinates"]["height"]
        )
        #FIXME TODO 从中心坐标x,y LabelImg 计算左上角坐标
        x, y = x_center - width / 2, y_center - height / 2

        # Draw bounding box
        draw.rectangle([x, y, x+width, y+height], outline="red", width=2)


        # Draw label
        draw.text((x, y-15), label, fill="red")

    # Save the result
    img.save(output_path)
    img.show()

if __name__ == "__main__":
    test_img_path = "3157.jpg"
    test_json_path = "3157.json"
    output_path = "out.jpg"

    with open(test_json_path, 'r') as f:
        data = json.load(f)

    draw_pic_by_raw_data(test_img_path, output_path, data)
通过以上代码,如果矩形框正确,则验证了labelImg的x、y、w和h坐标应该是x_center、y_center、w和h的情况。需要在将json转换为txt文本时进行处理。这里给出voc_label.py的代码如下:请注意修改classes中的类别,修改为和mydata.yaml的顺序一致,否则会导致标签错误。
代码运行前请在
mydata目录的上一级,也就是我这里的test目录下创建一个paper_data文件夹,用于等会在mydata.yaml中指定路径.
import os
import json
from os import getcwd

sets = ['train', 'val', 'test']
classes = ["A", "B", "C", "D", "E"]  # 请根据您的实际类别进行修改 对齐yaml文件中的names
abs_path = os.getcwd()
print(abs_path)


def convert(size, box):
    dw = 1. / size[0]
    dh = 1. / size[1]
    x = (box[0] + box[1]) / 2.0 - 1
    y = (box[2] + box[3]) / 2.0 - 1
    w = box[1] - box[0]
    h = box[3] - box[2]
    x = x * dw
    w = w * dw
    y = y * dh
    h = h * dh
    return x, y, w, h


def convert_annotation(image_id):
    in_file = open('mydata/json/%s.json' % (image_id), 'r', encoding='UTF-8')
    out_file = open('mydata/labels/%s.txt' % (image_id), 'w')
    data = json.load(in_file)
    for obj in data[0]["annotations"]:
        w = obj["coordinates"]["width"]
        h = obj["coordinates"]["height"]
        difficult = 0  # JSON数据中没有difficult字段,设为0
        cls = obj["label"]
        if cls not in classes or difficult == 1:
            continue
        cls_id = classes.index(cls)
        ##注意:这里的box是左上角和右下角的坐标,而不是中心点坐标
        x_center = obj["coordinates"]["x"]
        y_center = obj["coordinates"]["y"]
        width = obj["coordinates"]["width"]
        height = obj["coordinates"]["height"]
        x, y = x_center - width / 2, y_center - height / 2
        b = x, x + width, y, y + height
        # b = obj["coordinates"]["x"], obj["coordinates"]["x"] + obj["coordinates"]["width"], \
        #     obj["coordinates"]["y"], obj["coordinates"]["y"] + obj["coordinates"]["height"]
        b1, b2, b3, b4 = b
        # 标注越界修正
        if b2 > w:
            b2 = w
        if b4 > h:
            b4 = h
        b = (b1, b2, b3, b4)
        bb = convert((w, h), b)
        out_file.write(str(cls_id) + " " + " ".join([str(a) for a in bb]) + '\n')


wd = getcwd()
for image_set in sets:
    if not os.path.exists('mydata/labels/'):
        os.makedirs('mydata/labels/')
    image_ids = open('mydata/dataSet/%s.txt' % (image_set)).read().strip().split()
    list_file = open('paper_data/%s.txt' % (image_set), 'w')
    for image_id in image_ids:
        list_file.write(abs_path + '/mydata/images/%s.jpg\n' % (image_id))
        convert_annotation(image_id)
    list_file.close()
yaml文件配置
截止到这里数据preprocess处理完毕.接下来进行训练前的yaml文件配置.
修改为刚才创建的paper_data的绝对路径

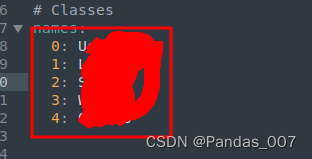
并进行names的配置,注意顺序和数量需要与
voc_label.py里面的列表顺序一致.
最后修改yolov8.yaml文件配置
yolov8.yaml的路径一般在ultralytics/ultralytics/cfg/models/v8目录下
修改nc为names中的类别数量

训练模型
yolo task=detect mode=train model=yolov8s.yaml data=mydata.yaml epochs=25 batch=16
这些模型可以支持多种尺寸,包括小(n)、中(s)、中大(m)、大(l)和超大(x)。模型的尺寸参数越大,所需的显存和训练时间也越多。要切换模型尺寸,只需在"model=yolov8"后面加上相应的尺寸参数(n、s、m、l、x),然后再加上.yaml即可。另外,epochs设置为25,batch大小为16。epochs表示训练的轮数, batch为每个批次的样本数量为16.
推理
训练结束后可以通过以下代码进行测试.
yolo predict model=xxxx/weights/best.pt source=xxxx/mydata/testvedio.mp4 imgsz=1280


 1459
1459


 被折叠的 条评论
为什么被折叠?
被折叠的 条评论
为什么被折叠?
 到【灌水乐园】发言


