


本项目主要是基于Opencv完成的人脸识别的考勤系统
人脸检测器的5种实现方法
方法一:haar方法进行实现(以下是基于notebook进行编码)
# 步骤
# 1、读取包含人脸的图片
# 2.使用haar模型识别人脸
# 3.将识别结果用矩形框画出来
# 导入相关包
import cv2
import numpy as np
import matplotlib.pyplot as plt
# %matplotlib inline
plt.rcParams['figure.dpi'] = 200
# 读取图片
img = cv2.imread('./images/faces1.jpg')
# 查看大小
img.shape

plt.imshow(cv2.cvtColor(img,cv2.COLOR_BGR2RGB))

# 构造haar检测器
face_detector = cv2.CascadeClassifier('./cascades/haarcascade_frontalface_default.xml')
# 转为灰度图
img_gray = cv2.cvtColor(img,cv2.COLOR_BGR2GRAY)
plt.imshow(img_gray)

# 检测结果
detections = face_detector.detectMultiScale(img_gray)
type(detections)

# 打印
detections

#查看detections的数据结构
detections.shape

#解析结果
for (x,y,w,h) in detections:
    cv2.rectangle(img,(x,y),(x+w,y+h),(0,255,0),5)
# 显示绘制结果
plt.imshow(cv2.cvtColor(img,cv2.COLOR_BGR2RGB))

# 调节参数
# scaleFactor:调整图片尺寸
# minNeighbors:候选人脸数量
# minSize:最小人脸尺寸
# maxSize:最大人脸尺寸
img = cv2.imread('./images/faces2.jpg')
img_gray = cv2.cvtColor(img,cv2.COLOR_BGR2GRAY)
detections = face_detector.detectMultiScale(img_gray,scaleFactor=1.2,minNeighbors=7,minSize=(10,10),maxSize=(100,100))
# 解析检测结果
for (x,y,w,h) in detections:
    print(w,h)
    cv2.rectangle(img,(x,y),(x+w,y+h),(0,255,0),5)
plt.imshow(cv2.cvtColor(img,cv2.COLOR_BGR2RGB))

方法二:hog方法进行实现(以下是基于notebook进行编码)
# 导入相关包
import cv2
import numpy as np
import matplotlib.pyplot as plt
# %matplotlib inline
plt.rcParams['figure.dpi'] = 200
# 读取照片
img = cv2.imread('./images/faces2.jpg')
# 显示照片
plt.imshow(cv2.cvtColor(img,cv2.COLOR_BGR2RGB))

# 安装DLIB
import dlib
# 构造HOG人脸检测器
hog_face_detetor = dlib.get_frontal_face_detector()
# 检测人脸
# scale 类似haar的scaleFactor
detections  = hog_face_detetor(img,1)
#查看一下detections的类型
type(detections)

# 打印一下
detections

len(detections)

# 解析矩形结果
for face in detections:
    x = face.left()
    y = face.top()
    r = face.right()
    b = face.bottom()
    cv2.rectangle(img,(x,y),(r,b),(0,255,0),5)
# 显示照片
plt.imshow(cv2.cvtColor(img,cv2.COLOR_BGR2RGB))

方法三:CNN方法进行实现(以下是基于notebook进行编码)
# 导入相关包
import cv2
import numpy as np
import matplotlib.pyplot as plt
# %matplotlib inline
plt.rcParams['figure.dpi'] = 200
# 读取照片
img = cv2.imread('./images/faces2.jpg')
# 显示照片
plt.imshow(cv2.cvtColor(img,cv2.COLOR_BGR2RGB))

# 安装DLIB
import dlib
# 构造CNN人脸检测器
cnn_face_detector = dlib.cnn_face_detection_model_v1('./weights/mmod_human_face_detector.dat')
# 检测人脸
detections = cnn_face_detector(img,1)
#查看detections的类型
type(detections)

# 解析矩形结果
for face in detections:
    x = face.rect.left()
    y = face.rect.top()
    r = face.rect.right()
    b = face.rect.bottom()
    #置信度
    c = face.confidence
    print(c)

    cv2.rectangle(img,(x,y),(r,b),(0,255,0),5)
# 显示照片
plt.imshow(cv2.cvtColor(img,cv2.COLOR_BGR2RGB))

方法四:SSD方法进行实现(以下是基于notebook进行编码)
# 导入包
import cv2
import numpy as np
import matplotlib.pyplot as plt
plt.rcParams['figure.dpi']=200
# 读取照片
img = cv2.imread('./images/faces2.jpg')
# 展示
plt.imshow(cv2.cvtColor(img,cv2.COLOR_BGR2RGB))

# deploy.prototxt.txt:https://github.com/opencv/opencv/tree/master/samples/dnn/face_detector
# res10_300x300_ssd_iter_140000.caffemodel:https://github.com/Shiva486/facial_recognition/blob/master/res10_300x300_ssd_iter_140000.caffemodel
# 加载模型
face_detector = cv2.dnn.readNetFromCaffe('./weights/deploy.prototxt.txt','./weights/res10_300x300_ssd_iter_140000.caffemodel')
# 原图尺寸
img_height = img.shape[0]
img_width = img.shape[1]
# 缩放至模型输入尺寸
img_resize = cv2.resize(img,(500,300))
# 图像转为blob(二进制)
img_blob = cv2.dnn.blobFromImage(img_resize,1.0,(500,300),(104.0, 177.0, 123.0))
# 输入
face_detector.setInput(img_blob)
# 推理
detections = face_detector.forward()
detections

# 查看大小
detections.shape

# 查看检测人脸数量
num_of_detections = detections.shape[2]
print(num_of_detections)
# 原图复制,一会绘制用
img_copy = img.copy()

for index in range(num_of_detections):
    # 置信度
    detection_confidence = detections[0,0,index,2]
    # 挑选置信度
    if detection_confidence>0.15:
        # 位置
        locations = detections[0,0,index,3:7] * np.array([img_width,img_height,img_width,img_height])
        # 打印
        print(detection_confidence * 100)

        lx,ly,rx,ry  = locations.astype('int')
        # 绘制
        cv2.rectangle(img_copy,(lx,ly),(rx,ry),(0,255,0),5)


# 展示
plt.imshow(cv2.cvtColor(img_copy,cv2.COLOR_BGR2RGB))

方法五:MTCNN方法进行实现(以下是基于notebook进行编码)
# 导入包
import cv2
import numpy as np
import matplotlib.pyplot as plt
plt.rcParams['figure.dpi']=200
# 读取照片
img = cv2.imread('./images/faces2.jpg')
# MTCNN需要RGB通道顺序
img_cvt = cv2.cvtColor(img,cv2.COLOR_BGR2RGB)
# 展示
plt.imshow(img_cvt)

# 导入MTCNN
from mtcnn.mtcnn import MTCNN
# 加载模型
face_detetor = MTCNN()
# 检测人脸
detections = face_detetor.detect_faces(img_cvt)
for face in detections:
    (x, y, w, h) = face['box']
    cv2.rectangle(img_cvt, (x, y), (x + w, y + h), (0,255,0), 5)
plt.imshow(img_cvt)

# 读取照片
img = cv2.imread('./images/test.jpg')
img_cvt = cv2.cvtColor(img,cv2.COLOR_BGR2RGB)
# 展示
plt.imshow(img_cvt)

# 检测人脸
detections = face_detetor.detect_faces(img_cvt)
for face in detections:
    (x, y, w, h) = face['box']
    cv2.rectangle(img_cvt, (x, y), (x + w, y + h), (0,255,0), 5)
plt.imshow(img_cvt)

人脸识别器的2种实现方法
方法一:Eigen_fisher_LBPH(基于notebook进行实现)
# 步骤
# 1、图片数据预处理
# 2、加载模型
# 3、训练模型
# 4、预测图片
# 5、评估测试数据集
# 6、保存模型
# 7、调用加载模型
# 导入包
import cv2
import numpy as np
import matplotlib.pyplot as plt
import dlib
%matplotlib inline
# 随机选一张图片
img_path = './yalefaces/train/subject01.glasses.gif'
# 读取GIF格式图片
cap = cv2.VideoCapture(img_path)
ret,img = cap.read()
img.shape

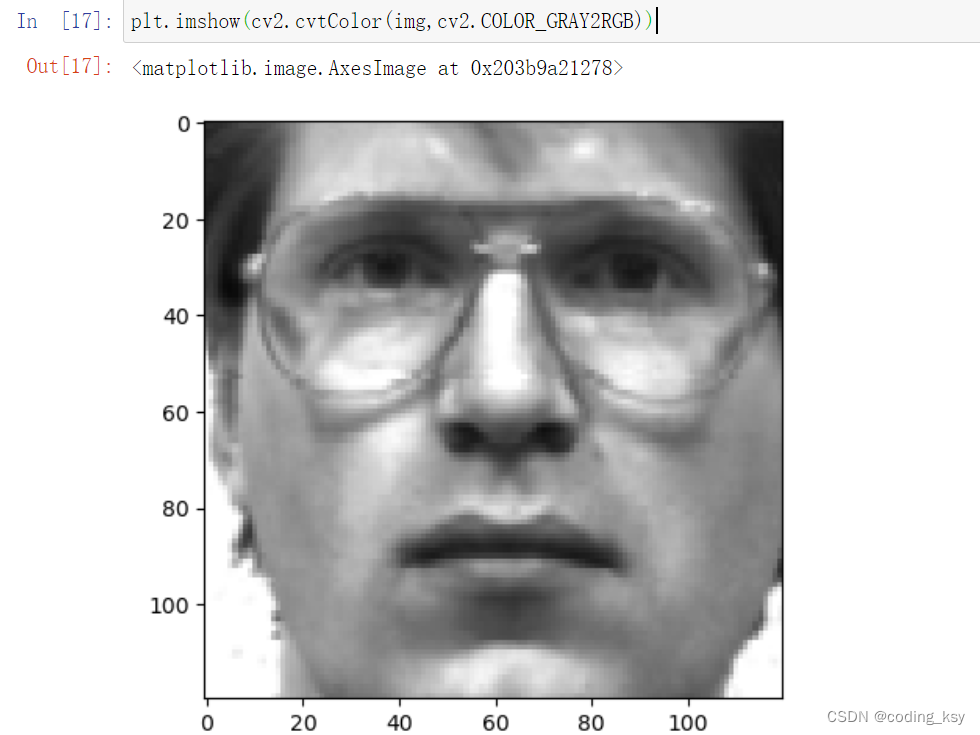
plt.imshow(cv2.cvtColor(img,cv2.COLOR_BGR2RGB))

# 图片预处理
# img_list:numpy格式图片
# label_list:numpy格式的label
# cls.train(img_list,np.array(label_list))
# 为了减少运算,提高速度,将人脸区域用人脸检测器提取出来
# 构造hog人脸检测器
hog_face_detector = dlib.get_frontal_face_detector()
def getFaceImgLabel(fileName):
    # 读取图片
    cap = cv2.VideoCapture(fileName)
    ret,img = cap.read()

    # 转为灰度图
    img = cv2.cvtColor(img,cv2.COLOR_BGR2GRAY)

    # 检测人脸
    detections = hog_face_detector(img,1)

    # 判断是否有人脸
    if len(detections) > 0:
        # 获取人脸区域坐标
        x = detections[0].left()
        y = detections[0].top()
        r = detections[0].right()
        b = detections[0].bottom()
        # 截取人脸
        img_crop = img[y:b,x:r]
        # 缩放解决冲突
        img_crop = cv2.resize(img_crop,(120,120))
        # 获取人脸labelid
        label_id = int(fileName.split('/')[-1].split('.')[0].split('subject')[-1])
        # 返回值
        return img_crop,label_id
    else:
        return None,-1
img_path = './yalefaces/train/subject01.glasses.gif'
# 测试一张图片
img,label = getFaceImgLabel(img_path)


plt.imshow(cv2.cvtColor(img,cv2.COLOR_GRAY2RGB))
# 遍历train文件夹,对所有图片同样处理
# 拼接成大的list
import glob
file_list =glob.glob('./yalefaces/train/*')
# 构造两个空列表
img_list = []
label_list = []

for train_file in file_list:
    # 获取每一张图片的对应信息
    img,label = getFaceImgLabel(train_file)

    #过滤数据
    if label != -1:
        img_list.append(img)
        label_list.append(label)
# 查看label_list大小
len(label_list)

# 查看img_list大小
len(img_list)

# 构造分类器
face_cls = cv2.face.LBPHFaceRecognizer_create()
# cv2.face.EigenFaceRecognizer_create()
# cv2.face.FisherFaceRecognizer_create()
# 训练
face_cls.train(img_list,np.array(label_list))
# 预测一张图片
test_file = './yalefaces/test/subject03.glasses.gif'

img,label = getFaceImgLabel(test_file)
#过滤数据
if label != -1:
    predict_id,distance = face_cls.predict(img)
    print(predict_id)
# 评估模型
file_list =glob.glob('./yalefaces/test/*')

true_list = []
predict_list = []

for test_file in file_list:
    # 获取每一张图片的对应信息
    img,label = getFaceImgLabel(test_file)
    #过滤数据
    if label != -1:
        predict_id,distance = face_cls.predict(img)
        predict_list.append(predict_id)
        true_list.append(label)
# 查看准确率
from sklearn.metrics import accuracy_score
accuracy_score(true_list,predict_list)

# 获取融合矩阵
from sklearn.metrics import confusion_matrix
cm = confusion_matrix(true_list,predict_list)

# 可视化
import seaborn
seaborn.heatmap(cm,annot=True)

# 保存模型
face_cls.save('./weights/LBPH.yml')
# 调用模型
new_cls = cv2.face.LBPHFaceRecognizer_create()
new_cls.read('./weights/LBPH.yml')
# 预测一张图片
test_file = './yalefaces/test/subject03.glasses.gif'

img,label = getFaceImgLabel(test_file)
#过滤数据
if label != -1:
    predict_id,distance = new_cls.predict(img)
    print(predict_id)
方法二:resnet(基于notebook进行实现)
# 步骤
# 1、图片数据预处理
# 2、加载模型
# 3、提取图片的特征描述符
# 4、预测图片:找到欧氏距离最近的特征描述符
# 5、评估测试数据集
# 导入包
import cv2
import numpy as np
import matplotlib.pyplot as plt
import dlib
# %matplotlib inline
plt.rcParams['figure.dpi'] = 200
# 获取人脸的68个关键点
# 人脸检测模型
hog_face_detector = dlib.get_frontal_face_detector()
# 关键点 检测模型
shape_detector = dlib.shape_predictor('./weights/shape_predictor_68_face_landmarks.dat')
# 读取一张测试图片
img = cv2.imread('./images/faces2.jpg')
# 检测人脸
detections = hog_face_detector(img,1)
for face in detections:
    # 人脸框坐标
    l,t,r,b = face.left(),face.top(),face.right(),face.bottom()
    # 获取68个关键点
    points = shape_detector(img,face)

    # 绘制关键点
    for point in points.parts():
        cv2.circle(img,(point.x,point.y),2,(0,255,0),1)

    # 绘制矩形框
    cv2.rectangle(img,(l,t),(r,b),(0,255,0),2)
plt.imshow(cv2.cvtColor(img,cv2.COLOR_BGR2RGB))

# 面部特征描述符
# 人脸检测模型
hog_face_detector = dlib.get_frontal_face_detector()
# 关键点 检测模型
shape_detector = dlib.shape_predictor('./weights/shape_predictor_68_face_landmarks.dat')
# resnet模型
face_descriptor_extractor = dlib.face_recognition_model_v1('./weights/dlib_face_recognition_resnet_model_v1.dat')
# 提取单张图片的特征描述符,label
def getFaceFeatLabel(fileName):
    # 获取人脸labelid
    label_id = int(fileName.split('/')[-1].split('.')[0].split('subject')[-1])
    # 读取图片

    cap = cv2.VideoCapture(fileName)
    ret,img = cap.read()

    # 转为RGB
    img = cv2.cvtColor(img,cv2.COLOR_BGR2RGB)
    #人脸检测
    detections = hog_face_detector(img,1)
    face_descriptor = None

    for face in detections:
        # 获取关键点
        points = shape_detector(img,face)
        # 获取特征描述符
        face_descriptor = face_descriptor_extractor.compute_face_descriptor(img,points)
        # 转为numpy 格式的数组
        face_descriptor = [f for f in face_descriptor]
        face_descriptor = np.asarray(face_descriptor,dtype=np.float64)
        face_descriptor = np.reshape(face_descriptor,(1,-1))

    return label_id,face_descriptor
# 测试一张图片
id1,fd1 = getFaceFeatLabel('./yalefaces/train/subject01.leftlight.gif')
fd1.shape

# 对train文件夹进行处理
import glob

file_list =glob.glob('./yalefaces/train/*')
# 构造两个空列表
label_list = []
feature_list = None

name_list = {}
index= 0
for train_file in file_list:
    # 获取每一张图片的对应信息
    label,feat = getFaceFeatLabel(train_file)

    #过滤数据
    if feat is not None:
        #文件名列表
        name_list[index] = train_file

        #label列表
        label_list.append(label)


        if feature_list is None:
            feature_list = feat
        else:
            # 特征列表
            feature_list = np.concatenate((feature_list,feat),axis=0)
        index +=1
len(label_list)

feature_list.shape

len(name_list)

name_list

feature_list[100]

# 计算距离
np.linalg.norm((feature_list[100]-feature_list[100]))

# 计算距离
np.linalg.norm((feature_list[100]-feature_list[101]))

# 计算距离
np.linalg.norm((feature_list[100]-feature_list[112]))

# 计算距离
np.linalg.norm((feature_list[100]-feature_list[96]))

# 计算一个特征描述符与所有特征的距离
np.linalg.norm((feature_list[0]-feature_list),axis=1)

# 计算一个特征描述符与所有特征的距离(排除自己)
np.linalg.norm((feature_list[0]-feature_list[1:]),axis=1)

# 寻找最小值索引
np.argmin(np.linalg.norm((feature_list[0]-feature_list[1:]),axis=1))

np.linalg.norm((feature_list[0]-feature_list[1:]),axis=1)[2]
name_list[1+2]
np.linalg.norm((feature_list[0]-feature_list[3]))
# 评估测试数据集


file_list =glob.glob('./yalefaces/test/*')
# 构造两个空列表
predict_list = []
label_list= []
# 距离阈值
threshold = 0.5

for test_file in file_list:
    # 获取每一张图片的对应信息
    label,feat = getFaceFeatLabel(test_file)

    # 读取图片
    cap = cv2.VideoCapture(test_file)
    ret,img = cap.read()

    img = cv2.cvtColor(img,cv2.COLOR_BGR2RGB)

    #过滤数据
    if feat is not None:
        # 计算距离
        distances = np.linalg.norm((feat-feature_list),axis=1)
        min_index = np.argmin(distances)
        min_distance = distances[min_index]

        if min_distance < threshold:
            # 同一人

            predict_id = int(name_list[min_index].split('/')[-1].split('.')[0].split('subject')[-1])
        else:
            predict_id =  -1


        predict_list.append(predict_id)
        label_list.append(label)

        cv2.putText(img,'True:'+str(label),(10,30),cv2.FONT_HERSHEY_COMPLEX_SMALL,1,(0,255,0))
        cv2.putText(img,'Pred:'+str(predict_id),(10,50),cv2.FONT_HERSHEY_COMPLEX_SMALL,1,(0,255,0))
        cv2.putText(img,'Dist:'+str(min_distance),(10,70),cv2.FONT_HERSHEY_COMPLEX_SMALL,1,(0,255,0))

        # 显示
        plt.figure()
        plt.imshow(img)

# 公式评估
from sklearn.metrics import accuracy_score
accuracy_score(label_list,predict_list)

人脸考勤机的整体项目(pycharm上运行)
项目整体架构

导入包
# 导入包
import cv2
import numpy as np
import dlib
import time
import csv
人脸注册方法
# 人脸注册方法
def faceRegister(label_id=1, name='enpei', count=3, interval=3):
    """
    label_id:人脸ID
    Name:人脸姓名
    count:采集数量
    interval:采集间隔时间
    """
    # 检测人脸
    # 获取68个关键点
    # 获取特征描述符

    cap = cv2.VideoCapture(0)

    # 获取长宽
    width = int(cap.get(cv2.CAP_PROP_FRAME_WIDTH))
    height = int(cap.get(cv2.CAP_PROP_FRAME_HEIGHT))

    # 构造人脸检测器
    hog_face_detector = dlib.get_frontal_face_detector()
    # 关键点检测器
    shape_detector = dlib.shape_predictor('./weights/shape_predictor_68_face_landmarks.dat')

    # 特征描述符
    face_descriptor_extractor = dlib.face_recognition_model_v1('./weights/dlib_face_recognition_resnet_model_v1.dat')

    # 开始时间
    start_time = time.time()

    # 执行次数
    collect_count = 0

    # CSV Writer
    f = open('./data/feature.csv', 'a', newline="")
    csv_writer = csv.writer(f)

    while True:
        ret, frame = cap.read()

        # 缩放
        frame = cv2.resize(frame, (width // 2, height // 2))

        # 镜像
        frame = cv2.flip(frame, 1)

        # 转为灰度图
        frame_gray = cv2.cvtColor(frame, cv2.COLOR_BGR2GRAY)

        # 检测人脸
        detections = hog_face_detector(frame, 1)

        # 遍历人脸
        for face in detections:

            # 人脸框坐标
            l, t, r, b = face.left(), face.top(), face.right(), face.bottom()

            # 获取人脸关键点
            points = shape_detector(frame, face)

            for point in points.parts():
                cv2.circle(frame, (point.x, point.y), 2, (0, 255, 0), -1)

            # 矩形人脸框
            cv2.rectangle(frame, (l, t), (r, b), (0, 255, 0), 2)

            # 采集:

            if collect_count < count:
                # 获取当前时间
                now = time.time()
                # 时间间隔
                if now - start_time > interval:

                    # 获取特征描述符
                    face_descriptor = face_descriptor_extractor.compute_face_descriptor(frame, points)

                    # 转为列表
                    face_descriptor = [f for f in face_descriptor]

                    # 写入CSV 文件
                    line = [label_id, name, face_descriptor]

                    csv_writer.writerow(line)

                    collect_count += 1

                    start_time = now

                    print("采集次数:{collect_count}".format(collect_count=collect_count))


                else:
                    pass

            else:
                # 采集完毕
                print('采集完毕')
                return

                # 显示画面

        cv2.imshow('Face attendance', frame)

        # 退出条件
        if cv2.waitKey(10) & 0xFF == ord('q'):
            break

    f.close()
    cap.release()
    cv2.destroyAllWindows()
获取csv中的特征
# 获取并组装CSV文件中特征
def getFeatureList():
    # 构造列表
    label_list = []
    name_list = []
    feature_list = None

    with open('./data/feature.csv', 'r') as f:
        csv_reader = csv.reader(f)

        for line in csv_reader:
            label_id = line[0]
            name = line[1]

            label_list.append(label_id)
            name_list.append(name)
            # string 转为list
            face_descriptor = eval(line[2])
            #
            face_descriptor = np.asarray(face_descriptor, dtype=np.float64)
            face_descriptor = np.reshape(face_descriptor, (1, -1))

            if feature_list is None:
                feature_list = face_descriptor
            else:
                feature_list = np.concatenate((feature_list, face_descriptor), axis=0)
    return label_list, name_list, feature_list
# 人脸识别
# 1、实时获取视频流中人脸的特征描述符
# 2、将它与库里特征做距离判断
# 3、找到预测的ID、NAME
# 4、考勤记录存进CSV文件:第一次识别到存入或者隔一段时间存

def faceRecognizer(threshold=0.5):
    cap = cv2.VideoCapture(0)

    # 获取长宽
    width = int(cap.get(cv2.CAP_PROP_FRAME_WIDTH))
    height = int(cap.get(cv2.CAP_PROP_FRAME_HEIGHT))

    # 构造人脸检测器
    hog_face_detector = dlib.get_frontal_face_detector()
    # 关键点检测器
    shape_detector = dlib.shape_predictor('./weights/shape_predictor_68_face_landmarks.dat')

    # 特征描述符
    face_descriptor_extractor = dlib.face_recognition_model_v1('./weights/dlib_face_recognition_resnet_model_v1.dat')

    # 读取特征
    label_list, name_list, feature_list = getFeatureList()

    # 字典记录人脸识别记录
    recog_record = {}

    # CSV写入
    f = open('./data/attendance.csv', 'a', newline="")
    csv_writer = csv.writer(f)

    # 帧率信息
    fps_time = time.time()

    while True:
        ret, frame = cap.read()

        # 缩放
        frame = cv2.resize(frame, (width // 2, height // 2))

        # 镜像
        frame = cv2.flip(frame, 1)

        # 检测人脸
        detections = hog_face_detector(frame, 1)

        # 遍历人脸
        for face in detections:

            # 人脸框坐标
            l, t, r, b = face.left(), face.top(), face.right(), face.bottom()

            # 获取人脸关键点
            points = shape_detector(frame, face)

            # 矩形人脸框
            cv2.rectangle(frame, (l, t), (r, b), (0, 255, 0), 2)

            # 获取特征描述符
            face_descriptor = face_descriptor_extractor.compute_face_descriptor(frame, points)

            # 转为列表
            face_descriptor = [f for f in face_descriptor]

            # 计算与库的距离
            face_descriptor = np.asarray(face_descriptor, dtype=np.float64)

            distances = np.linalg.norm((face_descriptor - feature_list), axis=1)
            # 最短距离索引
            min_index = np.argmin(distances)
            # 最短距离
            min_distance = distances[min_index]

            if min_distance < threshold:

                predict_id = label_list[min_index]
                predict_name = name_list[min_index]

                cv2.putText(frame, predict_name + str(round(min_distance, 2)), (l, b + 40),
                            cv2.FONT_HERSHEY_COMPLEX_SMALL, 1, (0, 255, 0), 1)

                now = time.time()
                need_insert = False
                # 判断是否识别过
                if predict_name in recog_record:
                    # 存过
                    # 隔一段时间再存
                    if now - recog_record[predict_name] > 3:
                        # 超过阈值时间,再存一次
                        need_insert = True
                        recog_record[predict_name] = now
                    else:
                        # 还没到时间
                        pass
                        need_insert = False
                else:
                    # 没有存过
                    recog_record[predict_name] = now
                    # 存入CSV文件
                    need_insert = True

                if need_insert:
                    time_local = time.localtime(recog_record[predict_name])
                    # 转换格式
                    time_str = time.strftime("%Y-%m-%d %H:%M:%S", time_local)
                    line = [predict_id, predict_name, min_distance, time_str]
                    csv_writer.writerow(line)

                    print('{time}: 写入成功:{name}'.format(name=predict_name, time=time_str))


            else:
                print('未识别')

        # 计算帧率
        now = time.time()
        fps = 1 / (now - fps_time)
        fps_time = now

        cv2.putText(frame, "FPS: " + str(round(fps, 2)), (20, 40), cv2.FONT_HERSHEY_COMPLEX_SMALL, 2, (0, 255, 0), 1)

        # 显示画面

        cv2.imshow('Face attendance', frame)

        # 退出条件
        if cv2.waitKey(10) & 0xFF == ord('q'):
            break

    f.close()
    cap.release()
    cv2.destroyAllWindows()
项目整体代码(attendance.py)
"""
人脸考勤
人脸注册:将人脸特征存进feature.csv
人脸识别:将检测的人脸特征与CSV中人脸特征作比较,如果比中的把考勤记录写入 attendance.csv
"""

# 导入包
import cv2
import numpy as np
import dlib
import time
import csv

# 人脸注册方法
def faceRegister(label_id=1,name='enpei',count=3,interval=3):
    """
    label_id:人脸ID
    Name:人脸姓名
    count:采集数量
    interval:采集间隔时间
    """
    # 检测人脸
    # 获取68个关键点
    # 获取特征描述符


    cap = cv2.VideoCapture(0)

    # 获取长宽
    width =  int(cap.get(cv2.CAP_PROP_FRAME_WIDTH))
    height =  int(cap.get(cv2.CAP_PROP_FRAME_HEIGHT))

    # 构造人脸检测器
    hog_face_detector = dlib.get_frontal_face_detector()
    # 关键点检测器
    shape_detector = dlib.shape_predictor('./weights/shape_predictor_68_face_landmarks.dat')

    # 特征描述符
    face_descriptor_extractor = dlib.face_recognition_model_v1('./weights/dlib_face_recognition_resnet_model_v1.dat')

    # 开始时间
    start_time = time.time()

    # 执行次数
    collect_count = 0

    # CSV Writer
    f = open('./data/feature.csv','a',newline="")
    csv_writer = csv.writer(f)

    while True:
        ret,frame = cap.read()

        # 缩放
        frame = cv2.resize(frame,(width//2,height//2))

        # 镜像
        frame =  cv2.flip(frame,1)

        # 转为灰度图
        frame_gray = cv2.cvtColor(frame,cv2.COLOR_BGR2GRAY)

        # 检测人脸
        detections = hog_face_detector(frame,1)

        # 遍历人脸
        for face in detections:

            # 人脸框坐标
            l,t,r,b =  face.left(),face.top(),face.right(),face.bottom()

            # 获取人脸关键点
            points = shape_detector(frame,face)

            for point in points.parts():
                cv2.circle(frame,(point.x,point.y),2,(0,255,0),-1)

            # 矩形人脸框
            cv2.rectangle(frame,(l,t),(r,b),(0,255,0),2)


            # 采集:

            if collect_count < count:
                # 获取当前时间
                now = time.time()
                # 时间间隔
                if now -start_time > interval:

                    # 获取特征描述符
                    face_descriptor = face_descriptor_extractor.compute_face_descriptor(frame,points)

                    # 转为列表
                    face_descriptor =  [f for f in face_descriptor]

                    # 写入CSV 文件
                    line = [label_id,name,face_descriptor]

                    csv_writer.writerow(line)


                    collect_count +=1

                    start_time = now

                    print("采集次数:{collect_count}".format(collect_count= collect_count))


                else:
                    pass

            else:
                # 采集完毕
                print('采集完毕')
                return


        # 显示画面

        cv2.imshow('Face attendance',frame)

        # 退出条件
        if cv2.waitKey(10) & 0xFF == ord('q'):
            break

    f.close()
    cap.release()
    cv2.destroyAllWindows()


# 获取并组装CSV文件中特征
def getFeatureList():
    # 构造列表
    label_list = []
    name_list = []
    feature_list = None

    with open('./data/feature.csv','r') as f:
        csv_reader = csv.reader(f)

        for line in csv_reader:
            label_id = line[0]
            name = line[1]

            label_list.append(label_id)
            name_list.append(name)
            # string 转为list
            face_descriptor = eval(line[2])
            #
            face_descriptor = np.asarray(face_descriptor,dtype=np.float64)
            face_descriptor = np.reshape(face_descriptor,(1,-1))

            if feature_list is None:
                feature_list =  face_descriptor
            else:
                feature_list = np.concatenate((feature_list,face_descriptor),axis=0)
    return label_list,name_list,feature_list

# 人脸识别
# 1、实时获取视频流中人脸的特征描述符
# 2、将它与库里特征做距离判断
# 3、找到预测的ID、NAME
# 4、考勤记录存进CSV文件:第一次识别到存入或者隔一段时间存

def faceRecognizer(threshold = 0.5):

    cap = cv2.VideoCapture(0)

    # 获取长宽
    width =  int(cap.get(cv2.CAP_PROP_FRAME_WIDTH))
    height =  int(cap.get(cv2.CAP_PROP_FRAME_HEIGHT))

    # 构造人脸检测器
    hog_face_detector = dlib.get_frontal_face_detector()
    # 关键点检测器
    shape_detector = dlib.shape_predictor('./weights/shape_predictor_68_face_landmarks.dat')

    # 特征描述符
    face_descriptor_extractor = dlib.face_recognition_model_v1('./weights/dlib_face_recognition_resnet_model_v1.dat')

    # 读取特征
    label_list,name_list,feature_list = getFeatureList()

    # 字典记录人脸识别记录
    recog_record = {}

    # CSV写入
    f = open('./data/attendance.csv','a',newline="")
    csv_writer = csv.writer(f)

    # 帧率信息
    fps_time = time.time()

    while True:
        ret,frame = cap.read()

        # 缩放
        frame = cv2.resize(frame,(width//2,height//2))

        # 镜像
        frame =  cv2.flip(frame,1)


        # 检测人脸
        detections = hog_face_detector(frame,1)

        # 遍历人脸
        for face in detections:

            # 人脸框坐标
            l,t,r,b =  face.left(),face.top(),face.right(),face.bottom()

            # 获取人脸关键点
            points = shape_detector(frame,face)


            # 矩形人脸框
            cv2.rectangle(frame,(l,t),(r,b),(0,255,0),2)

            # 获取特征描述符
            face_descriptor = face_descriptor_extractor.compute_face_descriptor(frame,points)

            # 转为列表
            face_descriptor =  [f for f in face_descriptor]

            # 计算与库的距离
            face_descriptor = np.asarray(face_descriptor,dtype=np.float64)


            distances = np.linalg.norm((face_descriptor-feature_list),axis=1)
            # 最短距离索引
            min_index = np.argmin(distances)
            # 最短距离
            min_distance = distances[min_index]

            if min_distance < threshold:


                predict_id = label_list[min_index]
                predict_name = name_list[min_index]


                cv2.putText(frame,predict_name + str(round(min_distance,2)),(l,b+40),cv2.FONT_HERSHEY_COMPLEX_SMALL,1,(0,255,0),1)

                now = time.time()
                need_insert =  False
                # 判断是否识别过
                if predict_name in recog_record:
                    # 存过
                    # 隔一段时间再存
                    if now - recog_record[predict_name] > 3:
                        # 超过阈值时间,再存一次
                        need_insert =True
                        recog_record[predict_name]  = now
                    else:
                        # 还没到时间
                        pass
                        need_insert =False
                else:
                    # 没有存过
                    recog_record[predict_name]  = now
                    # 存入CSV文件
                    need_insert =True

                if need_insert :
                    time_local =  time.localtime(recog_record[predict_name])
                    # 转换格式
                    time_str = time.strftime("%Y-%m-%d %H:%M:%S",time_local)
                    line = [predict_id,predict_name,min_distance,time_str]
                    csv_writer.writerow(line)

                    print('{time}: 写入成功:{name}'.format(name =predict_name,time = time_str ))


            else:
                print('未识别')


        # 计算帧率
        now = time.time()
        fps = 1/(now - fps_time)
        fps_time = now

        cv2.putText(frame,"FPS: "+str(round(fps,2)),(20,40),cv2.FONT_HERSHEY_COMPLEX_SMALL,2,(0,255,0),1)

        # 显示画面

        cv2.imshow('Face attendance',frame)

        # 退出条件
        if cv2.waitKey(10) & 0xFF == ord('q'):
            break

    f.close()
    cap.release()
    cv2.destroyAllWindows()


# faceRegister(label_id=1,name='enpei',count=3,interval=3)


# faceRecognizer(threshold = 0.5)


 2万+
2万+

 被折叠的 条评论
为什么被折叠?
被折叠的 条评论
为什么被折叠?
 到【灌水乐园】发言


