


Vue
一、Vue.js介绍
- Vue.js是目前最流行的、国产的前端MVVM框架
框架:封装与业务无关的重复代码,形成框架,参考jquery
框架的优势:提升开发效率,提高代码重用性,使前端开发变得简单 - 渐进式JavaScript框架:
可以由浅入深的,由简单到复杂的使用vue.js
渐进式意味着你可以将Vue作为你应用的一部分嵌入其中,带来更丰富的交互体验。 - 作者是尤雨溪 ( 华人 ) ,前Google员工
- GitHub账号:https://github.com/yyx990803
- 官方入门:https://cn.vuejs.org/
- vue 2.0API 文档:https://cn.vuejs.org/v2/guide/
- vue 3.0 API 文档:https://www.vue3js.cn/docs/zh/
- GitHub 库:https://github.com/vuejs/vue
- 体积小压缩后33K;
- 更高的运行效率
基于虚拟dom,一种可以预先通过JavaScript进行各种计算,把最终的DOM操作计算出来并优化的技术,由于这个DOM操作属于预处理操作,并没有真实的操作DOM,所以叫做虚拟DOM。- 双向数据绑定
让开发者不用再去操作dom对象,把更多的精力投入到业务逻辑上;- 生态丰富、学习成本低、被广泛的应用于web端、移动端、跨平台应用开发;
- weex
市场上拥有大量成熟、稳定的基于vue.js的ui框架、常用组件!拿来即用实现快速开发! 对初学者友好、入门容易、学习资料多;
二、MVVM模型
ViewModel 通过双向数据绑定把 View 层和 Model 层连接了起来,而View 和 Model 之间的同步工作完全是自动的,无需人为干涉,因此开发者只需关注业务逻辑,不需要手动操作DOM, 不需要关注数据状态的同步问题,复杂的数据状态维护完全由 MVVM 来统一管理。
回忆javascript对象
<script>
//原始创建一个js对象
var person = new Object();
person.id=1000;
person.name="chenjian";
person.age=38;
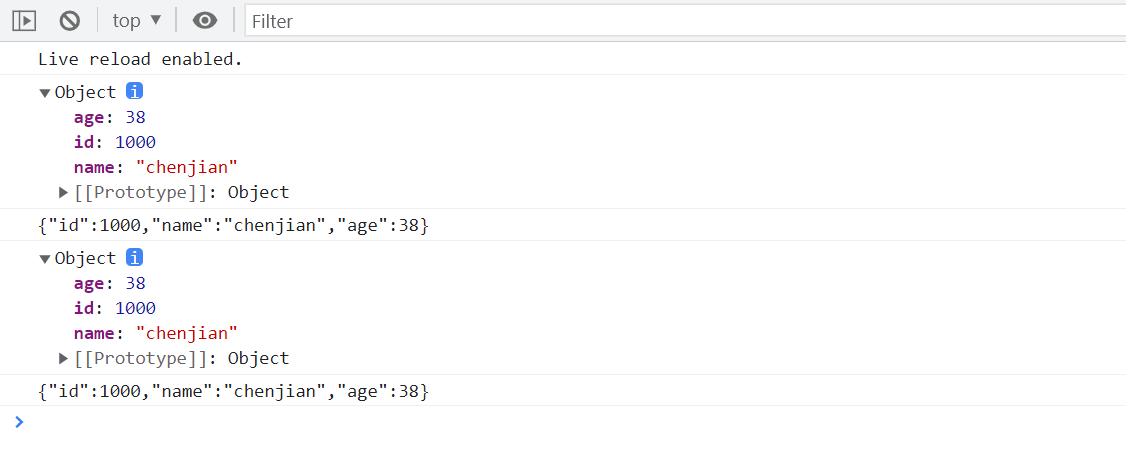
console.log(person)
//使用json字符串创建一个js对象
var personJsonStr='{"id":1000,"name":"chenjian","age":38}';
console.log(personJsonStr)
//将json字符串转换成js对象
var personJsonObj=JSON.parse(personJsonStr);
console.log(personJsonObj)
//将json对象转换成字符串
console.log(JSON.stringify(personJsonObj))
</script>
可以发现下面的打印第1,3行是js对象,2,4是字符串
三、Vue指令
1. 文本插值
最基本的数据绑定形式是文本插值,它使用的是“Mustache”语法 (即双大括号):
<span>Message: {{ msg }}</span>
双大括号标签会被替换为相应组件实例中 msg 属性的值。同时每次 msg 属性更改时它也会同步更新。

2. v-html
双大括号会将数据解释为纯文本,而不是 HTML。若想插入 HTML,你需要使用 v-html 指令:
<p>Using text interpolation: {{ rawHtml }}</p>
<p>Using v-html directive: <span v-html="rawHtml"></span></p>
图示:

3. v-bind
Attribute 绑定
双大括号不能在 HTML attributes 中使用。想要响应式地绑定一个 attribute,应该使用 v-bind 指令:
<input type="text" v-bind:value="username">
因为 v-bind 非常常用,提供了特定的简写语法:
<input type="text" :value="username">
这是在实际开发中更常见的用法。
布尔型 Attribute
布尔型 attribute 依据 true / false 值来决定 attribute 是否应该存在于该元素上。disabled 就是最常见的例子之一。
v-bind 在这种场景下的行为略有不同:
<button :disabled="isButtonDisabled">Button</button>
当 isButtonDisabled 为真值或一个空字符串 (即 <button disabled="">) 时,元素会包含这个 disabled attribute。而当其为其他假值时 attribute 将被忽略。
动态绑定多个值
如果你有像这样的一个包含多个 attribute 的 JavaScript 对象:
data() {
  return {
    objectOfAttrs: {
      id: 'container',
      class: 'wrapper'
    }
  }
}
通过不带参数的 v-bind,你可以将它们绑定到单个元素上:
<div v-bind="objectOfAttrs"></div>
4. v-if
条件渲染
v-if 指令用于条件性地渲染一块内容。这块内容只会在指令的表达式返回真值时才被渲染。
<h1 v-if="awesome">Vue is awesome!</h1>
v-else
你也可以使用 v-else 为 v-if 添加一个“else 区块”。
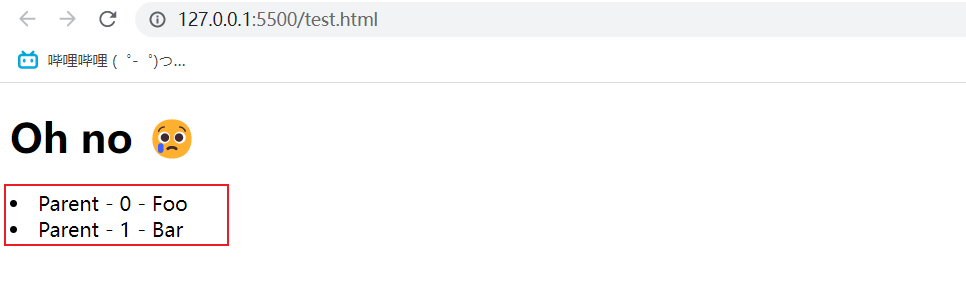
<button @click="awesome = !awesome">Toggle</button>
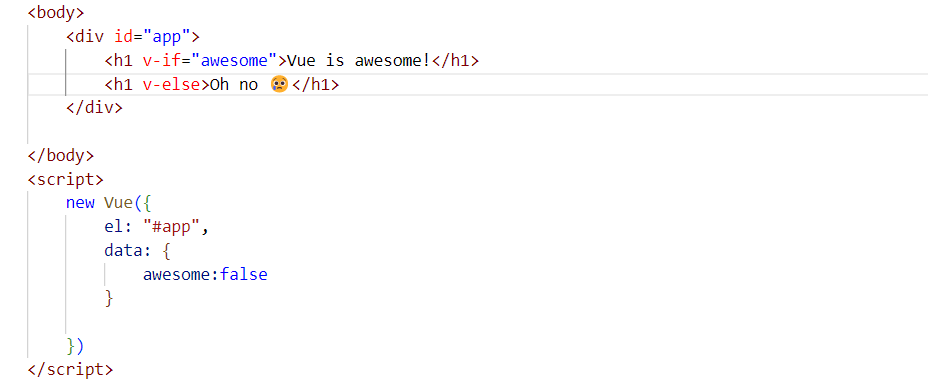
<h1 v-if="awesome">Vue is awesome!</h1>
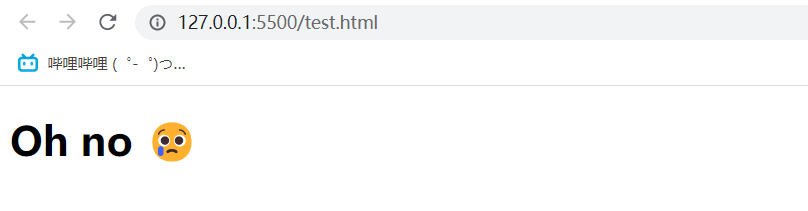
<h1 v-else>Oh no 😢</h1>
图示:
浏览器结果:
5. v-for
我们可以使用 v-for 指令基于一个数组来渲染一个列表。v-for 指令的值需要使用 item in items 形式的特殊语法,其中 items 是源数据的数组,而 item 是迭代项的别名:
data() {
  return {
    items: [{ message: 'Foo' }, { message: 'Bar' }]
  }
}
<li v-for="item in items">
  {{ item.message }}
</li>
在 v-for 块中可以完整地访问父作用域内的属性和变量。v-for 也支持使用可选的第二个参数表示当前项的位置索引。
data() {
  return {
    parentMessage: 'Parent',
    items: [{ message: 'Foo' }, { message: 'Bar' }]
  }
}
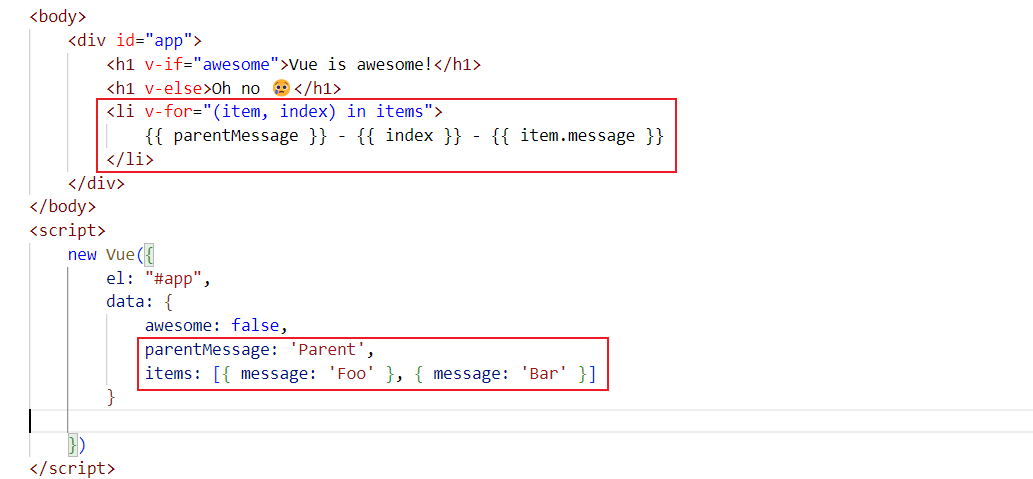
<li v-for="(item, index) in items">
  {{ parentMessage }} - {{ index }} - {{ item.message }}
</li>
结果如图所示:
浏览器结果:
v-for 与对象
     userList: [
          {
              "id": 18,
              "username": "admin",
              "password": "123456",
              "phone": "18538062907",
              "deptid": 1,
              "createtime": "2020-10-26T06:12:35.000+00:00"
          },
          {
              "id": 21,
              "username": "chenjian",
              "password": "123456",
              "phone": "18538062907",
              "deptid": 2,
              "createtime": "2020-10-26T06:12:35.000+00:00"
          },
          {
              "id": 24,
              "username": "陈建",
              "password": "123456",
              "phone": "18538062907",
              "deptid": 2,
              "createtime": "2020-10-26T06:12:35.000+00:00"
          },
          {
              "id": 28,
              "username": "张三1",
              "password": "123456",
              "phone": "18538062907",
              "deptid": 2,
              "createtime": "2020-10-26T06:29:42.000+00:00"
          }
      ]
     <table border="1px">
         <tr>
             <td>编号</td>
             <td>用户名</td>
             <td>密码</td>
             <td>手机号</td>
             <td>部门Id</td>
             <td>创建时间</td>
         </tr>
         <tr v-for="user in userList">
             <td>{{user.id}}</td>
             <td>{{user.username}}</td>
             <td>{{user.password}}</td>
             <td>{{user.phone}}</td>
             <td>{{user.deptid}}</td>
             <td>{{user.createtime}}</td>
         </tr>
     </table>
6. v-on
我们可以使用 v-on 指令 (简写为 @) 来监听 DOM 事件,并在事件触发时执行对应的 JavaScript。用法:v-on:click=“methodName” 或 @click=“handler”。
事件处理器的值可以是:
- 内联事件处理器:事件被触发时执行的内联 JavaScript 语句 (与 onclick 类似)。
- 方法事件处理器:一个指向组件上定义的方法的属性名或是路径。
内联事件处理器
内联事件处理器通常用于简单场景,例如:
  data() {
	return {
	    counter: 0
  	}
 }
	<button @click="counter++">Add 1</button>
	<p>The button above has been clicked {{ counter }} times.</p>

方法事件处理器
<input type="button" @click="showName" value="点我"></input>
    methods: {
        showName: function () {
            alert("shangtengfei")
        }
    }
7. v-model
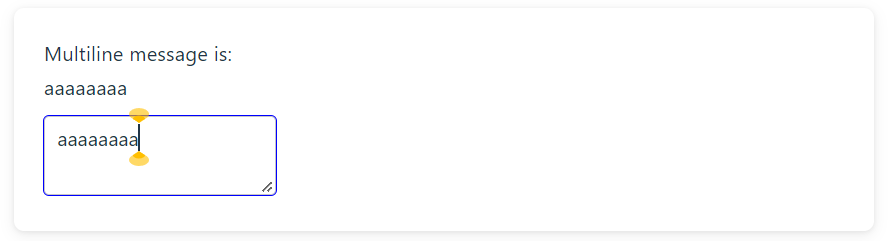
数据双向绑定
<span>Multiline message is:</span>
<p style="white-space: pre-line;">{{ message }}</p>
<textarea v-model="message" placeholder="add multiple lines"></textarea>
复选框
    data: {
        checked:false
    }
<input type="checkbox" id="checkbox" v-model="checked" />
<label for="checkbox">{{ checked }}</label>

我们也可以将多个复选框绑定到同一个数组或集合的值:
export default {
  data() {
    return {
      checkedNames: []
    }
  }
}
<div>Checked names: {{ checkedNames }}</div>

<input type="checkbox" id="jack" value="Jack" v-model="checkedNames">
<label for="jack">Jack</label>

<input type="checkbox" id="john" value="John" v-model="checkedNames">
<label for="john">John</label>

<input type="checkbox" id="mike" value="Mike" v-model="checkedNames">
<label for="mike">Mike</label>

单选按钮
<div>Picked: {{ picked }}</div>

<input type="radio" id="one" value="One" v-model="picked" />
<label for="one">One</label>

<input type="radio" id="two" value="Two" v-model="picked" />
<label for="two">Two</label>
  data: {
      picked:""
  }

选择器
单个选择器的示例如下:
<div>Selected: {{ selected }}</div>

<select v-model="selected">
  <option disabled value="">Please select one</option>
  <option>A</option>
  <option>B</option>
  <option>C</option>
</select>

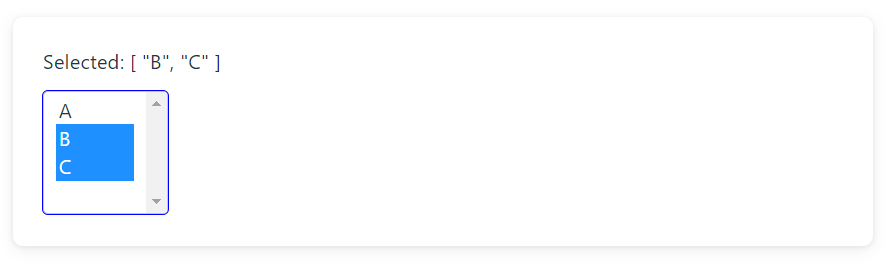
多选 (值绑定到一个数组):
<div>Selected: {{ selected }}</div>

<select v-model="selected" multiple>
  <option>A</option>
  <option>B</option>
  <option>C</option>
</select>
四、组件化应用构建
组件系统是 Vue 的另一个重要概念,因为它是一种抽象,允许我们使用小型、独立和通常可复用的组件构建大型应用
    <ol>
        <component-name></component-name>
        <component-name></component-name>
        <component-name></component-name>
        <component-name></component-name>
    </ol>
    //定义一个vue组件
    Vue.component(
        "component-name",//组件的名称
        //组件的值
        {
            template:"<li>组件测试</li>"

        }
    )

实战案例:
使用vue组件创建明星列表
1:刘德华 60
2:张学友 62
3:郭富城 60
4:黎明 59
    data: {
        kingList:[
            {"id":1,"name":"刘德华","age":60},
            {"id":2,"name":"张学友","age":61},
            {"id":3,"name":"郭富城","age":62},
            {"id":4,"name":"黎明","age":63}
        ]
    }
    //定义一个vue组件
    Vue.component(
        "component-king",//组件的名称
        //组件的值,通常是一段通用的代码
        {
            props:['xxx'],
            template:"<li>{{xxx.id}}||{{xxx.name}}||{{xxx.age}}</li>"
        }
    )
        <ul>
              <component-king v-for="kingTemp in kingList" :xxx="kingTemp" ></component-king>
        </ul>
结果

五、通过axios请求后端数据
简介
Axios,是一个基于promise网络请求库,作用于node.js和浏览器中,它是 isomorphic 的(即同一套代码可以运行在浏览器和node.js中)。在服务端它使用原生node.js http模块, 而在客户端 (浏览端) 则使用XMLHttpRequests。
安装
cnpm install axios -g
在main.js配置
import axios from 'axios'

//配置请求的主机和配置
axios.defaults.baseURL="http://localhost:80"
//把axios挂载到vue对象
Vue.prototype.axios=axios;
使用方法
https://github.com/axios/axios
axios.get('/user?ID=12345')
  .then(function (response) {
    // handle success
    console.log(response);
  })
  .catch(function (error) {
    // handle error
    console.log(error);
  })
  .finally(function () {
    // always executed
  });
axios.get('/user', {
    params: {
      ID: 12345
    }
  })
  .then(function (response) {
    console.log(response);
  })
  .catch(function (error) {
    console.log(error);
  });
上面是两种发送get请求的不同写法。
// Send a POST request
axios({
  method: 'post',
  url: '/user/12345',
  data: {
    firstName: 'Fred',
    lastName: 'Flintstone'
  }
});
  axios.post('/user', {
    firstName: 'Fred',
    lastName: 'Flintstone'
  })
  .then(function (response) {
    console.log(response);
  })
  .catch(function (error) {
    console.log(error);
  });
使用:
发送get请求
   	methods: {
        getUserInfo: function () {
            var _this = this;
            axios.get('http://localhost:9090/userinfo/queryAll')
                .then(function (response) {
                    // handle success
                    console.log(response);
                    _this.userList = response.data;
                })
        }
    }
发送post请求
        methods: {
            addGood() {
                var _this = this
                //添加商品,往数组goods加一条json数据
                var myGood = {
                    id: ++this.gid,
                    name: this.gname,
                    num: this.gnum,
                    status: this.gstatus,
                    ischecked: this.gischecked
                }
                axios.post('http://localhost:8080/goods/addGoods', myGood)
                .then(function (response) {
                    console.log(response);
                    if(response.data===true){
                        _this.getAll();
                    }
                })
            }
    	}
一定要注意发送Json数据,后台接收时要用@RequestBody注解接收!
六、常用的钩子函数created,mounted
常用的钩子函数:created 和 mounted
- created() 这是第二个命周期函数 在created 中, data和methods,都已经被初始好了,所以 如果要调用 methods 中的方法, 或者操作data中的数据, 最早只能在created 中操作
- mounted() 这是第四个生命周期函数,表示 内存中的模板,已经真实的挂载到了页面中, 用户已经可以看到渲染好的页面了
组件挂载后,此方法执行后,页面显示
mounted() {
    console.log('组件挂载后,此方法执行后,页面显示')
    //请求后端数据
    this.getAll()
}


 777
777


 被折叠的 条评论
为什么被折叠?
被折叠的 条评论
为什么被折叠?
 到【灌水乐园】发言


