


文章目录
一、项目介绍
1.1 项目背景
Boost搜索引擎是一个基于 Boost 文档的站内搜索引擎,用户可以根据浏览器访问该搜索引擎,当用户通过页面的搜索框输入查询关键字后,就能快速的快速的查询出相关的Boost在线文档,从而弥补了 Boost 库在线文档中没有搜索功能的缺陷。
1.2 模块划分
该项目的实现主要包含五个模块,即数据清洗模块、索引建立模块、搜索引擎模块、网络通信模块和前端界面模块:
- 数据清洗模块:该模块负责对 Boost 离线文档进行数据清洗,包括提取网页标题title、获取网页内容content、构建官方文档URL等,最后将清洗出来的数据保存到一个文件中。
- 索引建立模块:该模块主要功能是根据清洗出来的数据构建正排索引和倒排索引。
- 搜索引擎模块:该模块首先获取索引,任何根据用户提供的搜索关键字进行搜索,最后将搜索结果按照权值进行排序并返回。
- 网络通信模块:该模块作用是搭建 HTTP 网络通信服务器,实现与客户端的通信功能。
- 前端界面模块:该模块首先为用户提供搜索框的展示页面,然后将搜索结果展示给用户。

二、搜索引擎原理
2.1 基本原理
搜索引擎的基本原理是将用户输入的查询关键字转化为一组相关的文档,并按照相关度进行排序,最终展示给用户。具体来说,搜索引擎的工作过程包含以下几个步骤:
- 网络爬虫:搜索引擎首先通过网络爬虫程序抓取互联网上的网页,获取网页的内容和链接信息。
- 索引:搜索引擎将爬虫抓取到的网页内容进行分词和处理,将每个网页转化为一组关键词,并将这些关键词建立索引,以便后续查询时能够快速定位相关的文档。
- 查询处理:当用户输入查询词时,搜索引擎会对查询词进行分词和处理,将其转化为一组关键词,并在索引中查找包含这些关键词的文档列表。
- 相关度排序:根据一定的算法对查询词与文档的相关度进行计算,然后按照相关度排序,将最相关的文档展示给用户。
- 结果展示:最后,搜索引擎将排序后的文档结果展示给用户,包括文档的标题、摘要和链接等信息。

搜索引擎中的关键技术包括文本分词、索引构建、查询处理和相关度排序等。为了提高搜索引擎的效率和准确性,还可以使用一些技术和方法,例如压缩索引、倒排索引合并,查询缓存、搜索日志分析等。
2.2 正排索引和倒排索引
正排索引(Forward Index)和倒排索引(Inverted Index)都是文本检索中常用的索引结构。
-
正排索引:以文档为基本单位来组织数据的索引结构。对于每篇文档,正排索引会记录文档的一些属性,比如标题、作者、正文等,并将这些属性与文档ID一起存储在一个文档表中。同时,正排索引还会将每个文档中的每个单词及其出现的位置信息存储在一个单词表中,以方便进行搜索操作。正排索引的查询效率较高,但是由于需要存储大量的文档信息和单词信息,索引体积较大。
-
倒排索引:以单词为基本单位来组织数据的索引结构。倒排索引将每个单词及其出现的文档ID列表存储到一个倒排索引表中。当用户输入一个查询词时,倒排索引可以快速查找到包含该查询词的文档,并返回文档ID列表。相对于正排索引,倒排索引需要存储的信息量更小,因此索引体积相对较小,但是查询效率可能会受到一些限制,特别是在包含多个查询词的复杂查询中。
总的来说,正排索引适合于需要频繁访问文档内容的场景,比如文本编辑器或者其他需要高效访问文档内容的应用中;倒排索引则适用于信息检索和搜索引擎等需要根据关键词快速查找相关文档的场景。
三、环境搭建
3.1 升级GCC-G++
由于在该项目中会引入许多第三方库,比如httplib库,该库就会要求gcc编译器必须是较新的版本。如果使用老版本的编译器要么编译不通过,要么就会运行报错。因此我们需要对gcc进行升级,以下是升级至 gcc 7.3 的方法:
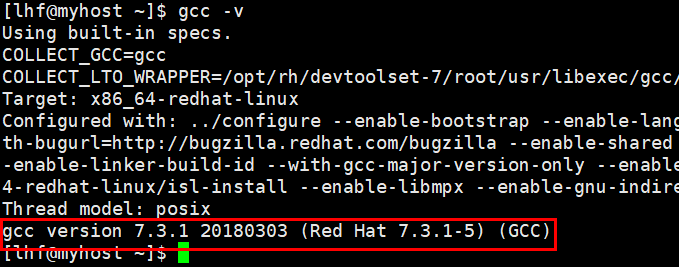
- 查看当前gcc版本
gcc --version
- 安装centos-release-scl
sudo yum install centos-release-scl-rh centos-release-scl
- 安装devtoolset
sudo yum install devtoolset-7-gcc devtoolset-7-gcc-c++
这里需要注意一下,如果想安装7.版本的,就改成devtoolset-7-gcc,以此类推。
- 激活对应的devtoolset
source /opt/rh/devtoolset-7/enable
此时GCC就成功升级到了 7.3 版本。
需要注意的是scl命令启用只是临时的,退出 shell 或重启就会恢复原系统gcc版本。如果想要一启动shell就立即生效可以进行以下配置:
echo "source /opt/rh/devtoolset-7/enable" >> ~/.bashrc
即把启动scl的命令添加到文件.bashrc中,每次启动shell就会执行该语句。
3.2 安装JsonCpp库
JSON 是一种轻量级的数据交换格式。它可以代表数字、字符串、值的有序序列和名称/值的集合对。
JsonCpp 是一个C++库,允许操作 JSON 值,包括字符串的序列化和反序列化。它还可以保存反序列化/序列化步骤中的现有注释,方便
用于存储用户输入文件的格式。
以下是安装JsonCpp的命令:
sudo yum install epel-release
sudo yum install jsoncpp-devel
安装好的JsonCpp存放在/usr/include/jsoncpp/json目录下:

3.3 引入httplib库
cpp-httplib 是个开源的库,是一个c++封装的http库,使用这个库可以在linux、windows平台下完成http客户端、http服务端的搭建,这是一个多线程“阻塞”HTTP 库。使用起来非常方便,只需要包含头文件httplib.h即可。源码地址
获取httplib库:
git clone https://github.com/yhirose/cpp-httplib.git
3.4 安装Boost库
由于C++本身的文件系统不够完善,因此可以使用Boost库在的filesystem来对文件进行操作,下面是安装Boost库的方法:
sudo yum install -y boost-devel
四、数据清洗模块
该模块负责对Boost离线文档进行去标签,清洗数据,然后将结果保存到文件中。在本项目中从Boost官网中下载的文档版本为boost_1_78_0,首先将boost_1_78_0/doc/html/目录下的全部文件赋值到项目下的目录data/input中,方便对其进行数据清洗。
首先在parser.cpp模块中定义源路径和存储结果的目的文件路径:
// 源目录
const std::string src_path = "../data/input";
// 目的路径
const std::string output = "../data/raw_html/raw.txt";
然后需要定义一个DocInfo结构体用来存储HTML文档的信息,包括title、content、url。其结构定义如下:
typedef struct DocInfo
{
	std::string title;	 // 文档标题
	std::string content; // 文档内容
	std::string url;	 // 官网文档的url
} DocInfo;
然后只需要在main函数中获取所有的HTML文档路径,然后根据文档路径解析出每个文档的title、content、url,并将其保存到DocInfo结构体中,最后写入到output 文件中即可。
4.1 获取HTML文档路径
实现EnumFile函数来递归式的获取src_path路径下的HTML文档路径。在该函数的实现中,由于C++本身的文件系统不够完善,因此使用boost库中的文件系统filesystem来对文件进行操作。
bool EnumFile(const std::string &src_path, std::vector<std::string> *files_list)
{
	namespace fs = boost::filesystem;
	fs::path root_path(src_path); // path 是filesystem中的路径对象

	// 判断src_path是否存在
	if (!fs::exists(root_path))
	{
		LOG(WARNING, src_path + "is not exists!");
		return false;
	}

	// 定义一个空的迭代器,用来进行递归结束的判断
	fs::recursive_directory_iterator end; // recursive_directory_iterator是filesystem中用来递归遍历文件的迭代器
	for (fs::recursive_directory_iterator iter(root_path); iter != end; ++iter)
	{
		// 1. 判断是否是普通文件,html是普通文件
		if (!fs::is_regular_file(*iter))
			continue;
		// 判断当前文件是否是 .html 为后缀的文件
		if (iter->path().extension() != ".html")
			continue;
		// 2. 此时一定是一个以html为后缀的普通文件
		files_list->push_back(iter->path().string());
	}
	return true;
}
最后将读取出来的HTML文档的路径保存到顺序表files_list中,方便后续根据文档路径对文档内容的读取。
4.2 解析HTML文档内容
该功能主要是有实现的ParseHTML函数来完成,该函数负责的功能有三个:解析出HTML文档的标题title、解析出HTML文档的内容、构建官方文档的URL。
ParseHTML函数的整体结构如下:
bool ParseHTML(const std::vector<std::string> &files_list, std::vector<DocInfo> *results)
{
	for (const std::string &file_path : files_list)
	{
		// 1. 读取文件
		std::string result;
		if (!ns_util::FileUtil::ReadFile(file_path, &result))
		{
			continue;
		}
		DocInfo doc;
		// 2. 解析当前文件内容,提取title
		if (!_ParseTitle(result, &doc.title))
		{
			continue;
		}
		// 3. 解析当前文件内容,提取content
		if (!_ParseContent(result, &doc.content))
		{
			continue;
		}
		// 4. 解析当前文件内容,构建文档官网url
		if (!_ParseURL(file_path, &doc.url))
		{
			continue;
		}
		results->push_back(std::move(doc)); // 将doc转化为右值,消除拷贝构造带来的性能低下
	}
	return true;
}
首先循环遍历files_list获取每个HTML文档的路径,然后通过ReadFile函数读取每个文档的内容,并将其保存到result字符串中,然后对result的内容进行解析,依次获取title、content、url,将其保存到DocInfo 结构体中,最后插入到results结果集中。
注意:最后将
doc插入到results结果集中使用了std::move将其转化为了右值,使其匹配vector的移动构造,消除了拷贝构造带来的性能低下问题。
_ParseTitle函数的实现:
bool _ParseTitle(const std::string &file, std::string *title)
{
	//<title>xxx</title>
	std::size_t begin = file.find("<title>");
	if (begin == std::string::npos)
		return false;
	std::size_t end = file.find("</title>");
	if (end == std::string::npos)
		return false;

	begin += std::string("<title>").size();
	if (begin > end)
		return false;

	*title = file.substr(begin, end - begin);
	return true;
}
在HTML文件中,标题包含在标签<title> </title>中,因此只需要找到<title>和</title>在文件中的位置,然后进行字符串截取就可以获得标题内容。
_ParseContent函数的实现:
bool _ParseContent(const std::string &file, std::string *content)
{
	// 基于一个简单的状态机进行去标签
	//  只有读取到了 '<' 就进入标签状态, 读取到 '>' ,则结束标志状态,进入内容的读取
	enum STATUS
	{
		LABEL,	// 标签状态
		CONTENT // 内容状态
	};

	enum STATUS status = LABEL; // html文件 的第一个字符就是 '<'
	for (auto ch : file)
	{
		switch (status)
		{
		case LABEL:
		{
			if (ch == '>')
				status = CONTENT;
		}
		break;
		case CONTENT:
		{
			if (ch == '<')
				status = LABEL;
			else
			{
				if (ch == '\n') // 去掉同一个文档内容中的 '\n',在保存解析结果到文件中时以 '\n' 作为文档与文档之间的分隔符
					ch = ' ';
				*content += ch;
			}
		}
		break;
		default:
			break;
		}
	}

	return true;
}
在HTML文件中,文档的内容包含在双标签<> </>中,但是HTML文件中除了双标签,还有很多单标签,因此就无法像解析标题那样来解析内容了。这里定义了一个简单的状态机,来解决判断标签和内容的问题:即遍历文档内容,如果遇到'<' 就进入LABEL状态,遇到'>'就进入CONTENT状态,然后进行内容的获取。
状态机的定义如下:
enum STATUS
{
	LABEL,	// 标签状态
	CONTENT // 内容状态
};
这里使用枚举的方式进行定义。
_ParseURL函数的实现:
bool _ParseURL(const std::string &file_path, std::string *url)
{
	std::string url_head = "https://www.boost.org/doc/libs/1_78_0/doc/html";
	std::string url_tail = file_path.substr(src_path.size()); // file_path: ../data/input/*.html    src_patc: ../data/input
	*url = url_head + url_tail;
	return true;
}
拼接出官网文档url非常简单,因为我们获取的离线文档是1_78_0/doc/html目录下的文件,因此只需要取官网文档的https://www.boost.org/doc/libs/1_78_0/doc/html作为url_head,然后再截取本地文件路径../data/input下的文档路径作为url_tail,最后将url_head和url_tail拼接再一起就构成了文档在官网中的url了。
4.3 保存解析后的结果
该功能由SaveResults函数来完成,代码实现如下:
bool SaveResults(const std::vector<DocInfo> &results, const std::string &output)
{
#define SEP '\3' // title、content、url之间的分隔符
	std::ofstream out(output, std::ios::out | std::ios::binary);
	if (!out.is_open())
	{
		LOG(WARNING, output + "open file.");
		return false;
	}

	// 开始写入文件
	// 写入格式 titile\3content\3url\ntitle\3content\3url\n...
	// 方便读取的时候使用getline读取的一行的一个文档的内容
	for (const auto &doc : results)
	{
		std::string out_string;
		out_string = doc.title;
		out_string += SEP;
		out_string += doc.content;
		out_string += SEP;
		out_string += doc.url;
		out_string += '\n';

		out.write(out_string.c_str(), out_string.size());
	}
	out.close();
	return true;
}
文件的写入操作借助于C++的文件流来实现。在保存每个文档的title、content、url时,使用了不可见字符'\3'来进行分隔,并且去除了每个文档中的'\n'换行字符,而使用'\n'换行字符进行文档与文档之间的隔离,方便后续使用getline函数每次读取的一行数据就是一个HTML文档的内容。
五、索引建立模块
该模块的主要功能是根据数据清洗后保存的结果,建立索引。而建立的索引中又分为正排索引和倒排索引,正排索引用于根据文档id,快速找到文档;倒排索引用于根据关键字查找到相关的文档。该模块主要实现了一个Index类。
5.1 Index类的基本结构
Index类的基本结构如下:
namespace ns_index
{
    // 设计为单例模式
    class Index
    {
    private:
        // 正排索引
        std::vector<DocInfo> forward_index;
        // 倒排索引
        // 倒排索引是一个关键字对应一组(一个)InvertedElem
        std::unordered_map<std::string, InvertedList> inverted_index;

    private:
        Index() {}
        Index(const Index &) = delete;
        Index &operator=(const Index &) = delete;

        static Index *instance; // 单例对象
        static std::mutex mtx;  // 互斥锁

    public:
        static Index *GetInstance();
        // 根据文档id找到文档
        DocInfo *GetForwardIndex(uint64_t id);

        // 根据关键字string,获取倒排拉链
        InvertedList *GetInvertedList(const std::string &word);

        // 根据"../data/raw_html/raw.txt"建立索引
        bool BuildIndex(const std::string &input);

    private:
        // 构建正排索引
        DocInfo *BuildForwardIndex(const std::string &line);
        // 构建倒排索引
        bool BuildInvertedIndex(const DocInfo &doc);
    };

    // 类外初始化类内静态成员变量
    Index *Index::instance = nullptr;
    std::mutex Index::mtx;

} // namespace ns_index
该类的成员变量分别是forward_index正排索引和inverted_index倒排索引,其定义分别如下:
// 正排索引
std::vector<DocInfo> forward_index;
// 倒排索引
std::unordered_map<std::string, InvertedList> inverted_index;
其中DocInfo是定义的文档信息结构体,其定义如下:
    // 文档信息
    struct DocInfo
    {
        std::string title;   // 文档标题
        std::string content; // 文档内容
        std::string url;     // 官网文档的url
        uint64_t doc_id;     // 文档id,即数组下标
    };
该结构体相比于之前增加了一个文档id的成员,其实就是文档存放在数组中的下标。
InvertedList是一个倒排拉链,其定义如下:
    // 倒排拉链
    typedef std::vector<InvertedElem> InvertedList;
其中InvertedElem也是定义的结构体,代表的是倒排元素,定义如下:
// 倒排元素
struct InvertedElem
{
    uint64_t doc_id;  // 文档id
    std::string word; // 关键字
    int weight;       // 权重
};
其中包含的文档id、关键字、权值这些成员变量。
该类中的GetForwardIndex函数用于根据文档找到对应的文档;GetInvertedList函数用于根据提供的关键字获取倒排拉链;BuildIndex函数用于建立索引,包括正排索引和倒排索引。并且将该类设计为了单例模式,只创建一个对象供全局使用。
5.2 建立正排索引
建立正排索引的代码如下:
DocInfo *BuildForwardIndex(const std::string &line)
{
    // 1. 解析line,字符串切分
    // line: title\3content\3url
    const std::string sep = "\3";
    std::vector<std::string> result;
    ns_util::StringUtil::Split(line, &result, sep);
    if (result.size() != 3)
    {
        LOG(WARNING, "split failed.");
        return nullptr;
    }

    // 2. 填充DocInfo
    DocInfo doc;
    doc.title = result[0];
    doc.content = result[1];
    doc.url = result[2];
    doc.doc_id = forward_index.size(); // 即从 0 下标开始

    // 3. 将doc插入到正排索引中
    forward_index.push_back(std::move(doc));
    // 返回当前doc,用于建立倒排索引
    return &forward_index.back();
}
通过getline读取文件raw.txt中的每一行数据,就得到了一个文档的全部信息,然后使用Boost库中的函数Split对其以\3为分隔符进行切分,最终构建出了DocInfo结构体对象,将其插入到正排使用forward_index,最后返回该DocInfo对象,用于建立倒排索引。
5.3 建立倒排索引
建立倒排索引的代码如下:
bool BuildInvertedIndex(const DocInfo &doc)
{
    // 1. 创建词频统计的结构体
    struct word_cnt
    {
        int title_cnt;   // 标题中出现次数
        int content_cnt; // 内容中出现次数
        word_cnt() : title_cnt(0), content_cnt(0) {}
    };

    // 用来暂存词频的映射表
    std::unordered_map<std::string, word_cnt> word_map;

    // 2. 利用jieba对title进行分词
    std::vector<std::string> title_words;
    ns_util::JiebaUtil::CutString(doc.title, &title_words);
    // 3. 对title进行词频统计
    for (auto &word : title_words)
    {
        boost::to_lower(word); // 统一转化为小写
        word_map[word].title_cnt++;
    }

    // 4. 利用jieba对content进行分词
    std::vector<std::string> content_words;
    ns_util::JiebaUtil::CutString(doc.content, &content_words);
    // 5. 对content进行词频统计
    for (auto &word : content_words)
    {
        boost::to_lower(word); // 统一转化为小写
        word_map[word].content_cnt++;
    }

    for (auto &word_pair : word_map)
    {
        // 创建并初始化倒排元素
        InvertedElem item;
        item.doc_id = doc.doc_id;
        item.word = word_pair.first;
        item.weight = 10 * word_pair.second.title_cnt + word_pair.second.content_cnt;

        // 插入倒排元素到倒排索引
        InvertedList &inverted_list = inverted_index[item.word]; // 获取倒排索引中word对应的倒排拉链,如果没有则会创建一个并引用返回
        inverted_list.push_back(std::move(item));
    }
    return true;
}
在构建倒排索引的函数中,引入了一个用于词频统计的结构体word_cnt,然后将其于与关键字建立一个映射关系word_map:
struct word_cnt
{
    int title_cnt;   // 标题中出现次数
    int content_cnt; // 内容中出现次数
    word_cnt() : title_cnt(0), content_cnt(0) {}
};
// 用来暂存词频的映射表
std::unordered_map<std::string, word_cnt> word_map;
这里使用jieba库对文档的标题和内容进行分词,然后分别统计其关键字的频率。统计完后遍历word_map集合,创建倒排元素,并将其插入到倒排索引以及相应的倒排拉链当中。
六、搜索引擎模块
该模块主要是对用户传入的关键字进行分词,然后对全部的分词通过索引进行搜索,最后将所有结果按照权重进行排序,构建Json串返回给用户。该模块主要实现了一个Searcher类。
6.1 搜索引擎类的基本结构
namespace ns_searcher
{
    // 定义一个用于去重的节点,即多个关键字可能会搜索到同一个文档
    struct InvertedElemPrint
    {
        uint64_t doc_id;
        int weight;
        std::vector<std::string> words;
        InvertedElemPrint() : doc_id(0), weight(0) {}
    };

    class Searcher
    {
    private:
        // 供查找的索引
        ns_index::Index *index;

    public:
        Searcher() {}
        ~Searcher() {}

    public:
        // 初始化搜索引擎
        void InitSearcher(const std::string &input)
        {
            // 1. 获取index对象
            index = ns_index::Index::GetInstance();
            LOG(NORMAL, "获取index单例对象成功.");

            // 2. 创建索引
            index->BuildIndex(input);
            LOG(NORMAL, "建立正排索引和倒排索引成功.");
        }
        // 搜索服务,将搜索结果以json串返回
        void Search(const std::string &query, std::string *json_strings);

    private:
        // 获取摘要
        std::string GetDesc(const std::string &content, const std::string &word);
    };
} // namespace ns_searcher
该类中的成员变量就是index对象的指针,后续将利用index对象实现搜索功能。包含的成员函数有:InitSearcher函数负责对搜索引擎进行初始化,主要是获取Index单例对象和建立索引;Search函数实现搜索功能,最终将搜索结果以Json串进行返回;GetDesc函数用于获取内容的摘要,以后在前端界面将其展示给用户。
此外,由于通过多个关键字搜索可能会搜索到同一个文档,因此该类中实现了去重功能。首先建立了一个InvertedElemPrint结构体对象,其定义如下:
 struct InvertedElemPrint
 {
     uint64_t doc_id;
     int weight;
     std::vector<std::string> words;
     InvertedElemPrint() : doc_id(0), weight(0) {}
 };
其中的words成员就用于存储哪些关键字可搜索到该文档。实现去重功能的主要是在Search函数中使用了unordered_map集合,详细情况可见后文搜索功能的实现。
6.2 搜索功能的实现
搜索功能的实现代码如下:
// 搜索服务,将搜索结果以json串返回
void Search(const std::string &query, std::string *json_strings)
{
    // 用于保存所有的搜索结果
    std::vector<InvertedElemPrint> inverted_list_all;
    // 用于去重
    std::unordered_map<uint64_t, InvertedElemPrint> inverted_elem_print_map;

    // 1. 对query进行分词
    std::vector<std::string> words;
    ns_util::JiebaUtil::CutString(query, &words);

    // 2. 通过index, 根据分词的各个词进行查找
    for (std::string word : words)
    {
        ns_index::InvertedList *inverted_list = index->GetInvertedList(word);
        if (nullptr == inverted_list)
            continue;

        for (const auto &elem : *inverted_list)
        {
            //[]: 如果存在则返回值,不存在则插入新的值
            auto &item = inverted_elem_print_map[elem.doc_id];
            // 此时,每次循环的item一定是doc_id相同的元素
            item.doc_id = elem.doc_id;
            item.weight += elem.weight;
            item.words.push_back(std::move(elem.word));
        }
    }

    // 3. 将结果插入到inverted_list_all中
    for (const auto &item : inverted_elem_print_map)
    {
        inverted_list_all.push_back(std::move(item.second));
    }

    // 4. 将结果按照权值进行排序
    std::sort(inverted_list_all.begin(), inverted_list_all.end(), [](const InvertedElemPrint &e1, const InvertedElemPrint &e2)
              { return e1.weight > e2.weight; });

    // 5. 构建Json串, Jsoncpp完成序列化和反序列化
    Json::Value roots;
    for (const auto &item : inverted_list_all)
    {
        // 根据正排索引,获取doc
        ns_index::DocInfo *doc = index->GetForwardIndex(item.doc_id);
        if (nullptr == doc)
            continue;

        Json::Value root;
        root["title"] = doc->title;
        root["desc"] = GetDesc(doc->content, item.words[0]);
        root["url"] = doc->url;

        roots.append(root);
    }

    Json::StyledWriter writer;
    *json_strings = writer.write(roots);
}
该函数中先定义了一个inverted_list_all用于保存搜索结果,然后定义了一个inverted_elem_print_map用于去重,即建立了文档id与InvertedElemPrint 结构体之间的映射关系。
在进行搜索前同样需要使用Jieba库对搜索关键字进行分词处理,然后根据每个分词获取对应的倒排拉链,遍历每个倒排拉链中的元素通过inverted_elem_print_map构建相应的InvertedElemPrint 对象。
完成上述工作之后,循环遍历inverted_elem_print_map集合,将其中的InvertedElemPrint 对象插入到结果集inverted_list_all中,此时其中的元素全是不重复的。然后将其中的每个元素按照权值进行排序,最后构建Json串返回给用户。
6.3 摘要功能的实现
获取摘要的基本思路是:找到word关键字在文档内容中首次出现的位置,然后向前找50字节(如果没有,则之间从文档内容开始进行截取),再向后面找100个字节(如果后面没有100字节,则将后面的内容全部截取),最后截取中间的内容作为摘要。GetDesc函数的实现代码如下:
std::string GetDesc(const std::string &content, const std::string &word)
{
    // 1. 找到word在content中首次出现的位置,然后往前找50字节(如果没有,则从begin开始),往后找100字节(然后没有,则到end)。
    const std::size_t prev_step = 50;
    const std::size_t next_step = 100;

    // 以忽略大小写的方式进行查找
    auto iter = std::search(content.begin(), content.end(), word.begin(), word.end(), [](char x, char y)
                            { return std::tolower(x) == std::tolower(y); });

    std::size_t pos = std::distance(content.begin(), iter);

    // 2. 获取start 和end,注意size_t
    std::size_t start = 0;
    std::size_t end = content.size() - 1;

    // 如果pos前面有50个字节
    if (pos > start + prev_step)
    {
        start = pos - prev_step;
    }
    // 如果pos后面有100字节
    if (pos + next_step < end)
        ;
    {
        end = pos + next_step;
    }

    std::string desc = "...";
    desc += content.substr(start, end - start);
    desc += "...";
    return desc;
}
七、网络通信模块
该模块作用是搭建 HTTP 网络通信服务器,实现与客户端的通信功能。这里借助了cpp-httplib库,大大减小了开发的难度,提高了开发效率,其代码实现如下:
#include "searcher.hpp"
#include "httplib.h"
#include "log.hpp"

const std::string root_path = "./wwwroot";
const std::string input = "../data/raw_html/raw.txt";

int main()
{
    httplib::Server server;
    ns_searcher::Searcher searcher;
    searcher.InitSearcher(input);

    // 设置资源根目录
    server.set_base_dir(root_path.c_str());

    server.Get("/s", [&searcher](const httplib::Request &req, httplib::Response &rsp)
    {
        if(!req.has_param("word"))
        {
            rsp.set_content("必须要有搜索关键字!", "text/plain; charset=utf-8");
            return;
        }

        std::string word = req.get_param_value("word");
        LOG(DEBUG, "用户正在搜索关键字:" + word);

        std::string json_strings;
        searcher.Search(word, &json_strings);

        rsp.set_content(json_strings, "application/json");
    });

    server.listen("0.0.0.0", 8080);
    return 0;
}
八、前端页面模块
前端代码如下:
<!DOCTYPE html>
<html lang="en">

<head>
    <meta charset="UTF-8">
    <meta http-equiv="X-UA-Compatible" content="IE=edge">
    <meta name="viewport" content="width=device-width, initial-scale=1.0">
    <script src="http://code.jquery.com/jquery-2.1.1.min.js"></script>

    <title>Boost库搜索引擎</title>
    <style>
        /* 去掉网页内容中的所有内外边距 */
        * {
            /* 设置外边距 */
            margin: 0;
            /* 设置内边距 */
            padding: 0;
        }

        /* 将body内容与html内容呈现吻合 */
        html,
        body {
            height: 100%;
        }

        /* 以"."开头:类选择器 */
        .container {
            /* 设置div的宽度 */
            width: 800px;
            /* 通过设置外边距达到居中对齐 */
            margin: 0px auto;
            /* 设置外边距的上边距,保持元素与上边界的距离 */
            margin-top: 15px;
        }

        /* 复合选择器:选中container下的search */
        .container .search {
            /* 宽度与父标签保持一致 */
            width: 100%;
            /* 高度 */
            height: 52px;
        }

        /* 先选中input标签,直接设置标签的属性,先要选中。input:标签选择器。*/
        .container .search input {
            /* 设置left左浮动 */
            float: left;
            width: 600px;
            height: 50px;
            /* 设置边框属性:宽度、样式、颜色 */
            border: 1px solid #4e6ef2;
            /* 去掉input的右边框 */
            border-right: none;
            /* 设置内边距 */
            padding-left: 12px;
            color: #ccc;
            font-size: 17px;
        }

        .container .search button {
            float: left;
            width: 150px;
            height: 52px;
            /* 设置button背景颜色:#4e6ef2 */
            background-color: #4e6ef2;
            /* 设置button中的字体颜色 */
            color: #fff;
            /* 设置字体大小 */
            font-size: 20px;
            font-family: 'Franklin Gothic Medium', 'Arial Narrow', Arial, sans-serif;

        }

        .container .result {
            width: 100%;
        }

        .container .result .item {
            margin-top: 15px;
        }

        .container .result .item a {
            /* 设置为块级元素,单独占一行 */
            display: block;
            /* 去掉a标签标题的下划线 */
            text-decoration: none;
            /* 设置标题的大小 */
            font-size: 18px;
            /* 设置标题的字体颜色 */
            color: #4e6ef2;
        }

        .container .result .item a:hover {
            /* 设置鼠标放在标题上的动态效果 */
            text-decoration: underline;
        }

        .container .result .item p {
            margin-top: 5px;
            font-size: 16px;
            font-family: 'Courier New', Courier, monospace;
        }

        .container .result .item i {
            display: block;
            /* 取消斜体风格 */
            font-style: normal;
            color: green;
        }
    </style>
</head>

<body>
    <div class="container">
        <div class="search">
            <input type="text" value="输入搜索关键字">
            <button onclick="Search()">搜索一下</button>
        </div>

        <div class="result">

            <!-- 动态生成网页内容 -->


            <!-- <div class="item">
                <a href="#">这是一个标题</a>
                <p>摘要内容..................................................</p>
                <i>https://gitee.com/LiHaiHei/boost-search-engine-project</i>
            </div>
            <div class="item">
                <a href="#">这是一个标题</a>
                <p>摘要内容..................................................</p>
                <i>https://gitee.com/LiHaiHei/boost-search-engine-project</i>
            </div>
            <div class="item">
                <a href="#">这是一个标题</a>
                <p>摘要内容..................................................</p>
                <i>https://gitee.com/LiHaiHei/boost-search-engine-project</i>
            </div>
            <div class="item">
                <a href="#">这是一个标题</a>
                <p>摘要内容..................................................</p>
                <i>https://gitee.com/LiHaiHei/boost-search-engine-project</i>
            </div> -->
        </div>
    </div>

    <script>
        function Search() {
            // 浏览器的一个弹窗
            // alert("Hello JS!");

            // 1. 利用jQuery提取数据,$可以理解为jQuery的别称
            let query = $(".container .search input").val();
            if (query == '' || query == null) {
                return;
            }
            console.log("query = " + query); // console:是浏览器的对话框,可以用来查看js数据

            // 2. 发起HTTP请求,ajax:是jQuery中一个和后端进行数据交互的函数
            $.ajax({
                type: "GET",
                url: "/s?word=" + query,
                success: function (data) {
                    console.log(data);
                    BuildHtml(data);
                }
            });
        }

        function BuildHtml(data) {
            if (data == '' || data == null) {
                document.write("无搜索结果...");
                return;
            }

            // 获取HTML中的result标签
            let result_lable = $(".container .result");
            // 清空历史搜索结果
            result_lable.empty();

            for (let elem of data) {
                // console.log(elem.title);
                // console.log(elem.url);

                // 构建a标签
                let a_lable = $("<a>", {
                    text: elem.title,
                    href: elem.url,
                    // 跳转到新的页面
                    target: "_blank"
                });

                // 构建p标签
                let p_lable = $("<p>", {
                    text: elem.desc
                });

                // 构建i标签
                let i_lable = $("<i>", {
                    text: elem.url
                });

                let div_lable = $("<div>", {
                    class: "item"
                });

                // 添加a、p、i 三个标签到div item标签中
                a_lable.appendTo(div_lable);
                p_lable.appendTo(div_lable);
                i_lable.appendTo(div_lable);

                // 添加item到result中
                div_lable.appendTo(result_lable);
            }
        }

    </script>
</body>

</html>
九、项目总结
添加日志功能:
#pragma once
#include <iostream>
#include <string>
#include <ctime>

#define NORMAL 1
#define WARNING 2
#define DEBUG 3
#define FATAL 4

#define LOG(LEVEL, MESSAGE) log(#LEVEL, MESSAGE, __FILE__, __LINE__)

void log(std::string level, std::string message, std::string file, int line)
{
    std::cout << "[" << level << "]"
              << "[" << time(nullptr) << "]"
              << "[" << message << "]"
              << "[" << file << ":" << line << "]" << std::endl;
}
服务部署:
nohup ./server > log/log.txt 2>&1 &
nohup 英文全称 no hang up(不挂起),用于在系统后台不挂断地运行命令,退出终端不会影响程序的运行。
nohup 命令,在默认情况下(非重定向时),会输出一个名叫 nohup.out 的文件到当前目录下,如果当前目录的 nohup.out 文件不可写,输出重定向到 $HOME/nohup.out 文件中。


 610
610


 被折叠的 条评论
为什么被折叠?
被折叠的 条评论
为什么被折叠?
 到【灌水乐园】发言


