


前言
这篇就来看看http这个插件,这个插件的用处也是显而易见的,发送请求。
简单使用一下
HTTP 客户端 | Tauri![]() https://v2.tauri.app/zh-cn/plugin/http-client/
https://v2.tauri.app/zh-cn/plugin/http-client/
正文
安装依赖
在Cargo.toml文件中
tauri-plugin-http ={version = "2"}注册插件
.plugin(tauri_plugin_http::init())后端使用
发送请求,这其实很简单
reqwest - Rust![]() https://docs.rs/reqwest/latest/reqwest/使用reqwest这个crate。
https://docs.rs/reqwest/latest/reqwest/使用reqwest这个crate。
说白了,这个插件就是对这个crate的封装。
因此,代码如下
use tauri_plugin_http::reqwest;
use std::fs;
use tauri::command;

#[command]
async fn fetch(){
    let client = reqwest::Client::new();
    let res = client.get("https://geo.datav.aliyun.com/areas_v3/bound/510100_full.json")
        .send()
        .await
        .unwrap();
    println!("{:?}", res);
    if res.status().is_success() {
        println!("请求成功");
        let text=res.text().await.unwrap();
        fs::write("output.json", text).unwrap();
    }
}
注册通信函数,并使用。
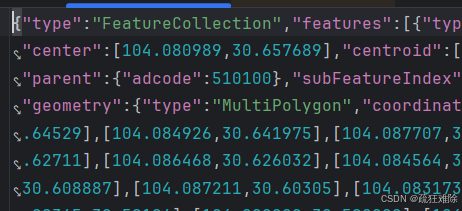
笔者如下网址发送请求,获取一些地理数据
总之,成功了

在后端的使用就没了。
可以发送get、post等,基本操作,不必细说。
看看插件中注册的通信函数
  .invoke_handler(tauri::generate_handler![
            commands::fetch,
            commands::fetch_cancel,
            commands::fetch_send,
            commands::fetch_read_body
        ])
注册了四个,很显然,最重要的方法就是fetch,
前端也有fetch,
当前的 fetch 方法是一个 Rust 后端 API。 它试图与 fetch Web API 尽可能接近和兼容。
——tauri的官方文档
看来跟前端差不多
在前端使用
安装依赖
pnpm tauri add http这个命令,前后端都会安装。
代码如下
 async function clicked() {
        let response=await fetch("https://geo.datav.aliyun.com/areas_v3/bound/510100_full.json",{
            method:"GET",
        })
        let res=await response.json();
        console.log(res)
    }
这段代码要能成功,必然要配置权限,大部分前端的东西都需要配置权限
即
{
      "identifier": "http:default",
      "allow": [
        { "url": "http://*/*" },
        { "url": "https://*/*" }
      ]
}
配置运行所有的http和https
结果如下
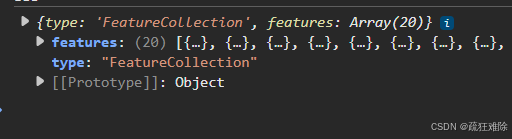
如果输出不出来,可能是版本依赖的问题,笔者在这里遇到了这个问题
解决了。
如何发送请求
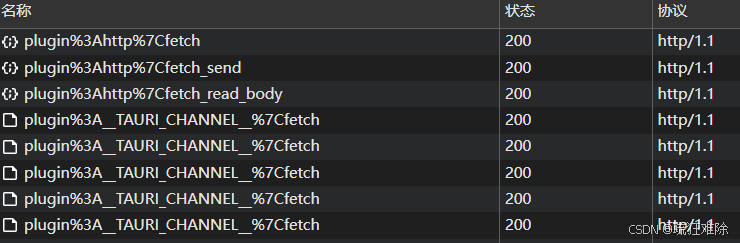
在开发者工具中,可以找到如下请求
首先使用fetch、然后使用fetch_send,然后使用fetch_read_body
最后使用plugin:__TAURI_CHANNEL__|Cfetch
从名字中,就可以看出fetch_send,这里发送了请求。
看看fetch_send
关键代码如下
#[command]
pub async fn fetch_send<R: Runtime>(
    webview: Webview<R>,
    rid: ResourceId,
) -> crate::Result<FetchResponse> {
    let (req, abort_rx) = {
           ...
    };
    let mut fut = req.fut.lock().await;
    let res = tokio::select! {
        res = fut.as_mut() => res?,
        _ = abort_rx.0 => {
            let mut resources_table = webview.resources_table();
            resources_table.close(rid)?;
            return Err(Error::RequestCanceled);
        }
    };


    ...

}
先获取到请求,使用tokio发送请求,里面实际上使用互斥锁,总之,各种封装。
看看fetch_read_body
关键代码如下
#[command]
pub async fn fetch_read_body<R: Runtime>(
    webview: Webview<R>,
    rid: ResourceId,
    stream_channel: Channel<tauri::ipc::InvokeResponseBody>,
) -> crate::Result<()> {
    let res = {
       ...
    };

    let mut res = Arc::into_inner(res).unwrap().0;

    // send response through IPC channel
    while let Some(chunk) = res.chunk().await? {
        let mut chunk = chunk.to_vec();
        // append 0 to indicate we are not done yet
        chunk.push(0);
        stream_channel.send(tauri::ipc::InvokeResponseBody::Raw(chunk))?;
    }
   ...
}
传入一个通道,把请求的结果传到通道里面。
原来这个是用来处理结果的,plugin:__TAURI_CHANNEL__|fetch
看看前端的处理
关键代码
在node_modules\.pnpm\@tauri-apps+plugin-http@2.4.3\node_modules\@tauri-apps\plugin-http\dist-js\index.js文件中,如下代码
    const readableStreamBody = new ReadableStream({
        start: (controller) => {
            const streamChannel = new Channel();
            streamChannel.onmessage = (res) => {

              ....
            }
            invoke('plugin:http|fetch_read_body', {
                rid: responseRid,
                streamChannel
            }).catch((e) => {
                controller.error(e);
            });
        }
    });
    const res = new Response(readableStreamBody, {
        status,
        statusText
});当await response.json()时,就会触发start,
在里面初始化了一个管道Channel,定义了管道的onmessage
然后使用fetch_read_body,把Channel传进去
原来可以这样使用
这个Channel是core里面的
import { invoke, Channel } from '@tauri-apps/api/core';使用channel
参考
不妨来使用这个channel
就以前面自定义的通信函数fetch中使用
代码如下
前端
import {invoke,Channel} from "@tauri-apps/api/core";
    async function clicked() {
        const channel = new Channel();
        channel.onmessage=(res)=>{
            console.log(res);
        }
        await invoke("fetch",{"channel":channel})
    }
初始化通道,作为参数传递进去
后端
use tauri::ipc::Channel;
use tauri::ipc::InvokeResponseBody;
#[command]
async fn fetch(channel: Channel) {
    let client = reqwest::Client::new();
    let res = client
        .get("https://geo.datav.aliyun.com/areas_v3/bound/510100_full.json")
        .send()
        .await
        .unwrap();
    if res.status().is_success() {
        let result=res.text().await.unwrap();
        channel.send(InvokeResponseBody::Json(result)).unwrap();
    }
}
前端传入通道,使用send方法、返回json数据
结果如下

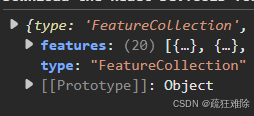
没问题
Channel
这个Channel是在通信函数中,实现了CommandArg 这个trait
实现了from_command这个方法
fn from_command(command: CommandItem<'de, R>) -> Result<Self, InvokeError> {
    let name = command.name;
    let arg = command.key;
    let webview = command.message.webview();
    let value: String =
      Deserialize::deserialize(command).map_err(|e| crate::Error::InvalidArgs(name, arg, e))?;
    JavaScriptChannelId::from_str(&value)
      .map(|id| id.channel_on(webview))
      .map_err(|_| {
        InvokeError::from(format!(
	        "invalid channel value `{value}`, expected a string in the `{IPC_PAYLOAD_PREFIX}ID` format"
	      ))
      })
}从代码里面可以看出,需要获得value,因此需要将Channel作为参数传入。
然后,使用from_str这个方法获取Channel
因此,传一个字符串也可以,也不能乱传,需要有这个channel
比如使用前端的Channel对象的toJson方法,即
 await invoke("fetch",{"channel":channel.toJSON()});
// 或者使用
await invoke("fetch",{"channel":"__CHANNEL__:"+channel.id});
看请求
http://ipc.localhost/plugin:__TAURI_CHANNEL__|Cfetch
可以发现__TAURI_CHANNEL__是一个插件,通信函数是fetch
简单看看是什么发出的请求参数

下面这段代码
window.__TAURI_INTERNALS__.invoke('plugin:__TAURI_CHANNEL__|fetch', null, {
    headers: {
        'Tauri-Channel-Id': '2'
    }
}).then( (response) => window['_2166646617']({
    message: response,
    index: 0
})).catch(console.error)
这个Channel挺有趣的,以后还会使用的。


 1147
1147

 被折叠的 条评论
为什么被折叠?
被折叠的 条评论
为什么被折叠?
 到【灌水乐园】发言


