[实验目的]
1、掌握java 继承中父类及其子类的定义方法。
2、掌握子类重写父类同名方法的方法。
3、掌握接口的用法。
(1) 学习如何定义接口 ;
(2) 掌握接口的实现方式 ;
(3) 使用实现了接口的类 ;
(4) 理解接口与抽象类的区别。
[实验要求]
-
复习理论教学中所学的内容。
-
认真进行实验预习,查阅参考书,书写源程序,书写实验预习报告。
-
认真总结实验并书写实验报告。
[实验内容]
-
类的继承性练习
(1) 程序源代码如下。
public class Student
{
protected String xm; //姓名,具有保护修饰符的成员变量
protected int xh;//学号
void setdata(String xm,int xh) //设置数据的方法
{
this.xm=xm;
this.xh=xh;
}
public void print() //输出数据的方法
{
System.out.println(xm+", "+xh);
}
}
(2) 编译源并运行程序。贴图如下

(二)创建将被继承的类
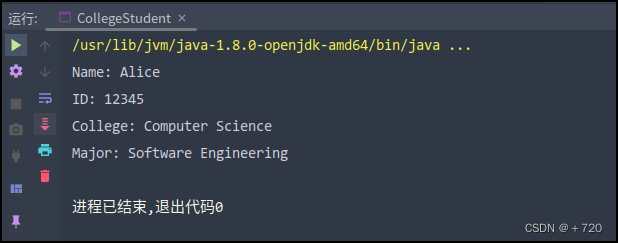
(1) 程序功能:通过Student类产生子类CollegeStudent,其不仅具有父类的成员变量xm(姓名)、xh(学号),还定义了新成员变量xy(学院)、bj(bj)。在程序中调用了父类的print 方法,同时可以看出子类也具有该方法。
程序代码:
public class CollegeStudent extends Student {
private String college;
private String major;

public CollegeStudent(String name, int id, String college, String major) {
super(name, id);
this.college = college;
this.major = major;
}

@Override
public void print() {
super.print();
System.out.println("College: " + college);
System.out.println("Major: " + major);
}

public static void main(String[] args) {
CollegeStudent student = new CollegeStudent("Alice", 12345, "Computer Science", "Software Engineering");
student.print();
}

}运行结果贴图:
(三)了解成员方法的覆盖方式
-
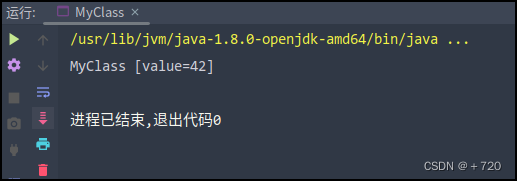
编写覆盖了Object 类toString方法的一个类,并用System.out.println()输出该类的一个对象。
程序代码:
public class MyClass {
private int value;

public MyClass(int value) {
this.value = value;
}

@Override
public String toString() {
return "MyClass [value=" + value + "]";
}

public static void main(String[] args) {
MyClass obj = new MyClass(42);
System.out.println(obj); // 输出: MyClass [value=42]
}
}运行结果贴图:
-
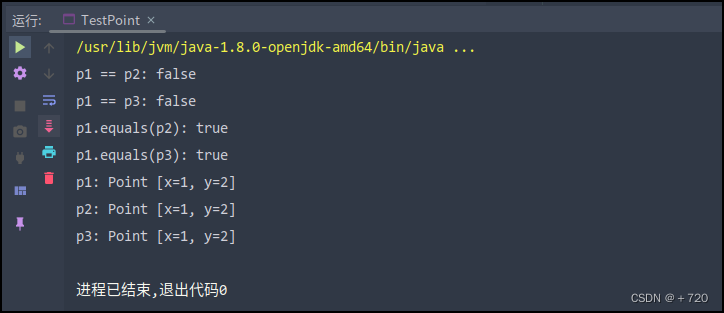
试着以Point类为例,尝试为Object类的clone()和equals()方法进行覆盖,Point类包含私有成员x,y,构造方法1(包含两个参数a,b),构造方法2(参数为Point p),clone方法,equals方法,toString方法。用TestPoint类进行测试。
程序代码:
public class Point implements Cloneable {
private int x;
private int y;

public Point(int x, int y) {
this.x = x;
this.y = y;
}

public Point(Point p) {
this(p.x, p.y);
}

@Override
public Point clone() throws CloneNotSupportedException {
return (Point) super.clone();
}

@Override
public boolean equals(Object o) {
if (o == this) {
return true;
}
if (!(o instanceof Point)) {
return false;
}
Point p = (Point) o;
return p.x == x && p.y == y;
}

@Override
public String toString() {
return "Point [x=" + x + ", y=" + y + "]";
}
}


public class TestPoint {
public static void main(String[] args) throws CloneNotSupportedException {
Point p1 = new Point(1, 2);
Point p2 = new Point(p1);
Point p3 = p1.clone();

System.out.println("p1 == p2: " + (p1 == p2)); // 输出: p1 == p2: false
System.out.println("p1 == p3: " + (p1 == p3)); // 输出: p1 == p3: false
System.out.println("p1.equals(p2): " + p1.equals(p2)); // 输出: p1.equals(p2): true
System.out.println("p1.equals(p3): " + p1.equals(p3)); // 输出: p1.equals(p3): true
System.out.println("p1: " + p1); // 输出: p1: Point [x=1, y=2]
System.out.println("p2: " + p2); // 输出: p2: Point [x=1, y=2]
System.out.println("p3: " + p3); // 输出: p3: Point [x=1, y=2]
}
}
运行结果贴图:
(四)this、super和super()的使用
-
程序功能:程序功能:说明this、super 和super()的用法。程序首先定义Point(点)类,然后创建点的子类Line(线),父类Point的成员可以作为Line起点,可以在子类Line中再定义两个坐标,作为Line终点的横纵坐标。最后通过TestLine类输出线段的长度。程序中通过super(a,b)调用父类Point 的构造方法为父类的x 和y 赋值。在子类Line 的setLine方法中,因为参数名和成员变量名相同,为给成员变量赋值,使用this 引用,告诉编译器是为当前类的成员变量赋值。在length 和toString 方法中使用父类成员变量时,使用super 引用,告诉编译器使用的是父类的成员变量。
程序代码:
package line;

class Point {
protected int x;
protected int y;

public Point(int x, int y) {
this.x = x;
this.y = y;
}

@Override
public String toString() {
return "Point [x=" + x + ", y=" + y + "]";
}
}

public class Line extends Point {
private int x1;
private int y1;

public Line(int a, int b, int x1, int y1) {
super(a, b);
this.x1 = x1;
this.y1 = y1;
}

public void setLine(int a, int b, int x1, int y1) {
this.x = a;
this.y = b;
this.x1 = x1;
this.y1 = y1;
}

public double length() {
return Math.sqrt((x1 - super.x) * (x1 - super.x) + (y1 - super.y) * (y1 - super.y));
}

@Override
public String toString() {
return "Line [x=" + super.x + ", y=" + super.y + ", x1=" + x1 + ", y1=" + y1 +", length=" + length() + "]";
}
public static void main(String[] args) {
Line line = new Line(1, 2, 3, 4);
System.out.println(line);
}
}
运行结果贴图:

(五) 接口的实现与运用
实验任务 :
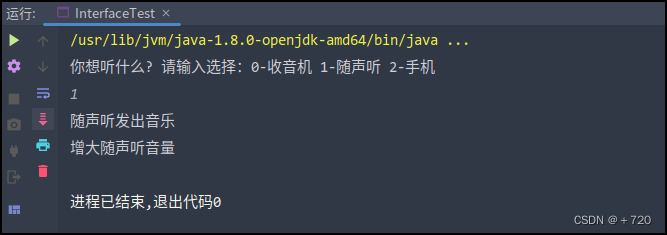
本实验的任务是设计和实现一个 Soundable 接口 , 该接口具有发声功能 , 同时还能够调节声音大小。 Soundable 接口的这些功能将会由 3 种声音设备来具体实现 , 它们分别是收音机 Radio 、随身昕 Walkman 和手机 Mobilephone 。最后还要设计一个应用程序类来使用这些实现了 Soundable 接口的声音设备类。程序运行时 , 先询问用户想听哪种设备 , 然后程序就会按照该设备的工作方式来发出声音。
实验步骤 :
(1) 仔细阅读程序, 并完成其中的代码1~代码3。
// InterfaceTest.java
import java.util.Scanner;
interface Soundable {
public void increaseVolume( );
public void decreaseVolume( );
public void stopSound( );
public void playSound( );
}
class Radio implements Soundable {
public void increaseVolume( ) {
System.out.println("增大收音机音量");
}
public void decreaseVolume( ) {
System.out.println("减小收音机音量");
}
public void stopSound( ) {
System.out.println("关闭收音机");
}
public void playSound( ) {
System.out.println("收音机播放广播");
}
}
class Walkman implements Soundable {
public void increaseVolume( ) {
System.out.println("增大随声听音量");
}
public void decreaseVolume( ) {
代码1 // 输出减小随声听音量
}
public void stopSound( ) {
System.out.println("关闭随声听");
}
public void playSound( ) {
System.out.println("随声听发出音乐");
}
}
class Mobilephone implements Soundable {
public void increaseVolume( ) {
System.out.println("增大手机音量");
}
public void decreaseVolume( ) {
System.out.println("减小手机音量");
}
public void stopSound( ) {
System.out.println("关闭手机");
}
public void playSound( ) {
System.out.println("手机发出来电铃声");
}
}
class People {
private String name;
private int age;
public void listen(Soundable s) {
s.playSound( );
}
}
public class InterfaceTest {
public static void main(String[] args) {
int i;
People sportsman = new People( );
Scanner scanner = new Scanner(System.in);
Soundable[] soundDevice = new Soundable[3];
//往声音设备数组中放入能发声的设备
soundDevice[0] = new Radio( );
soundDevice[1] = new Walkman( );
代码2 //创建手机对象并赋值给soundDevice[2]
System.out.println("你想听什么? 请输入选择:0-收音机 1-随声听 2-手机");
i = scanner.nextInt( );
//开始听声音
sportsman.listen(soundDevice[i]);
soundDevice[i].increaseVolume( );
代码3 //调用stopSound( )方法
}
}
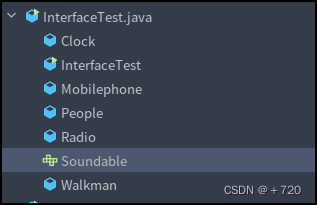
(2) 打开文本编辑器编辑 InterfaceTest.java 并保存 , 然后在Eclipse 环境中进行编译 , 编译的结果将会产生 6 个 class 文件 , 其中包括 Soundable.class, 虽然 Soundable 本身是一个接口 , 但编译之后也会产生 class 文件。
(3) 编译之后运行这个程序 , 观察所得结果。
思考
(1) 请问在 InterfaceTest 类中 ,SoundDevice[] 数组是什么类型的 , 该数组为什么能存放 3 种不同的对象 Radio、Walkman 和 Mobilephone 呢 ?
答 这个数组的类型是Soundable,它能存储任何实现了Soundable接口的类的对象。因此,这个数组能存储Radio、Walkman和Mobilephone这三个类的对象,因为这三个类都实现了Soundable接口。该数组能存储三个对象,因为在它的声明中使用了new Soundable[3],这表示该数组可以存储三个对象。
(2) 在程序中 ,Soundable 是一个接口 , 那么该接口是否可以被实例化呢 ? 请在InterfaceTest 类的 main() 方法中加入以下语句试验一下 , 并分析结果。
Soundable Sound=new Soundable(),
答
接口是不能被实例化的。
在Java中,接口是一种特殊的类型,它不能被实例化。它只能用来声明一组方法,提供一个规范,让其他类去实现这些方法。因此,如果想要使用一个接口的方法,需要实例化一个实现了该接口的类,并通过实例调用方法。
(3) 现在假定要为程序增加一个闹钟类 Clock, 该类也实现 Soundable 接口 , 能够发出滴答声 , 请将以下的 Clock 类加入到 InterfaceTest.java 程序中 , 并在 InterfaceTest 类的 main() 方法中加入 SoundDevice[3] new Clock(); 语句。
class Clock implements Soundable{
public void Stopsound(){
System.out.println(" 关闭闹钟 ");
}
public void Playsound(){
system.out.println(" 闹钟发出滴答声 ");
}
}
修改之后 , 重新编译 InterfaceTest.java 并运行它 , 观察结果。
由于新加入的 Clock 类仅仅实现了 Soundable 接口的stopsound() 和 playsound() 方法 , 而 increaseVolume() 和 decreaseVolume() 方法没有实现 , 因此它实质上是一个抽象类 , 而抽象类是不能实例化的 , 所以导致编译错误。
(4) 在第 (3) 小题中由于新加入的 Clock 类仅仅实现了 Soundable 接口的stopsound() 和 playsound() 方法 , 而 increaseVolume() 和 decreaseVolume() 方法没有实现 , 因此它实质上是一个抽象类 , 而抽象类是不能实例化的 , 所以导致编译错误。但是按照常理 , 闹钟的滴答声确实是不可以增大或减小的 , 那么如何解决这个问题呢 ? 现在请在 Clock 类中加入下面两个含 {} 空方法体的方法实现 , 再编译运行程序 , 看看会有什么变化。
public void increaseVolume(){}
public void decreaseVolume(){}
答

(5) 现在请模仿本实验的程序设计出一个自己的接口程序 , 要求先设计一个 moveable 可移动接口 , 然后分别设计 3 个类 , 即汽车 Car 、轮船 Ship 、飞机 Aircraft 来实现该接口 , 最后设计一个应用程序来使用它们。
程序代码:
import java.util.Scanner;

interface Moveable {
// 开始移动
void startMove();
// 停止移动
void stopMove();
}

// 汽车类,实现可移动接口
class Car implements Moveable {
@Override
public void startMove() {
// 启动汽车
System.out.println("启动汽车");
}
@Override
public void stopMove() {
// 停止汽车
System.out.println("停止汽车");
}
}

// 轮船类,实现可移动接口
class Ship implements Moveable {
@Override
public void startMove() {
// 启动轮船
System.out.println("启动轮船");
}
@Override
public void stopMove() {
// 停止轮船
System.out.println("停止轮船");
}
}

// 飞机类,实现可移动接口
class Aircraft implements Moveable {
@Override
public void startMove() {
// 启动飞机
System.out.println("启动飞机");
}
@Override
public void stopMove() {
//停止飞机
System.out.println("停止飞机");
}
}

// 应用程序
public class Main {
public static void main(String[] args) {
// 定义可移动的设备数组
Moveable[] devices = new Moveable[3];
// 初始化设备数组
devices[0] = new Car();
devices[1] = new Ship();
devices[2] = new Aircraft();


// 使用设备数组中的设备
Scanner scanner = new Scanner(System.in);
System.out.println("你想使用什么设备?请输入选择:0-汽车 1-轮船 2-飞机");
int i = scanner.nextInt();
devices[i].startMove();
devices[i].stopMove();
}
}运行结果贴图:

实验分析:接口的特点在于只定义能做什么 , 而不定义怎么去做。在本实验中 , 收音机 Radio, 随身听 Walkman 和手机 Mobilephone 分别以自己的方式实现了 Soundable 接口 , 当接口成为 Listen(Soundable s) 方法的形参时 , 任何实现了 Soundable 接口的对象都能成为它的实参 , 如果不用接口作形参 , 那就必须写 3 个不同的方法 , 即
listenRadio(Radio r),
listenWalkman(Walkman w) ,
listenMobilephone(Mobilephone m)。
(六)深复制(掌握Clonable接口的使用)
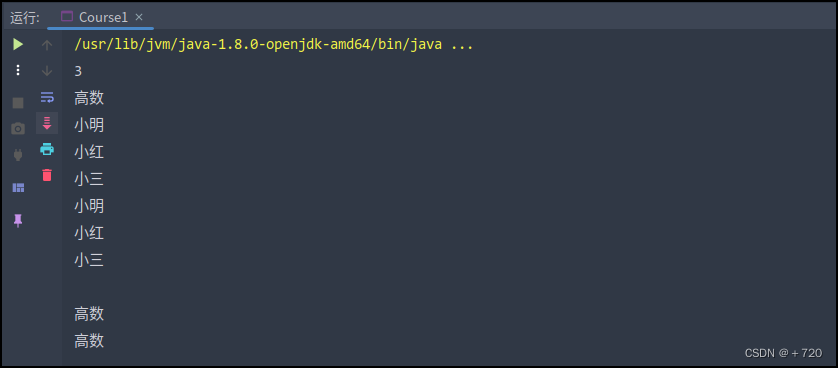
重写书中的程序清单10-6的Course类,增加一个clone方法,执行students域的深度复制。
程序代码:
package javaxqg0_practice;

import java.util.ArrayList;

public class Course1 {
private String courseName;
ArrayList<String> students = new ArrayList<>();

public Course1(String courseName) {
this.courseName = courseName;
}

public void addStudents(String student) {
students.add(student);
}

public void getStudents() {
for(int i=0;i<getSize();i++)
System.out.println(students.get(i));
}

public String getCourseName() {
return courseName;
}

public int getSize() {
return students.size();
}

public void dropStudent(String student) {
students.remove(student);
}
public static void main(String[] args) {
// TODO Auto-generated method stub

Course1 course = new Course1("高数");
course.addStudents("小明");
course.addStudents("小红");
course.addStudents("小三");
System.out.println(course.getSize());
System.out.println(course.getCourseName());
course.getStudents();
//System.out.println(course.toString());

course.dropStudent("小庄");
course.getStudents();
System.out.println();
System.out.println(course.getCourseName());
System.out.println(course.getCourseName());
}
}运行结果贴图:


 915
915


 被折叠的 条评论
为什么被折叠?


