


1、SpringWebFlux执行流程和核心 API
SpringWebFlux 基于 Reactor,默认容器是 Netty,Netty 是高性能的 NIO 框架,异步非阻塞(AIO,是 NIO 的升级)的框架
1.1、执行流程
Netty
-
BIO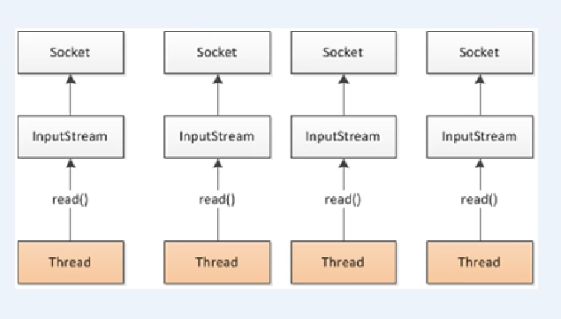
-
NIO(非阻塞)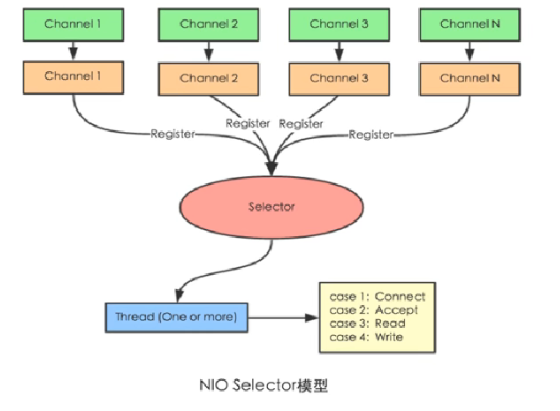
- 数据读取到
channel,channel注册到selector,selector监听channel变化,channel发生读取或写操作,该线程就执行相应的操作
- 数据读取到
SpringWebFlux 执行过程和 SpringMVC 基本上是一样的
SpringWebFLux 核心控制器 DispatchHandler,实现接口 WebHandler
HandlerMapping:请求查询到处理的方法HandlerAdapter:真正负责请求HandlerResultHandler:响应结果处理
- 将依赖改为
spring-boot-starter-webflux
        <dependency>
            <groupId>org.springframework.boot</groupId>
            <!--<artifactId>spring-boot-starter</artifactId>-->
            <artifactId>spring-boot-starter-webflux</artifactId>
        </dependency>
-
接口
WebHandler有一个方法public interface WebHandler { Mono<Void> handle(ServerWebExchange var1); } -
进入实现类
DispatchHandler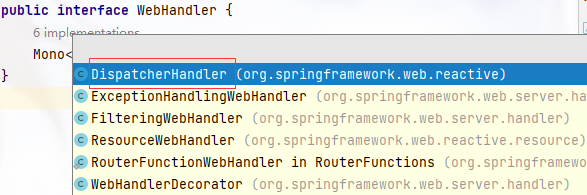
-
public Mono<Void> handle(ServerWebExchange exchange) {// 放 http 请求响应信息
    return this.handlerMappings == null ?
        // 若 handlerMappings 为空则直接抛异常
        this.createNotFoundError() : Flux.fromIterable(this.handlerMappings).concatMap((mapping) -> {
        //根据请求地址获取 handler对象(处理器对象)
        return mapping.getHandler(exchange);
    }).next().switchIfEmpty(this.createNotFoundError()).flatMap((handler) -> {
        //调用相应的处理业务方法(更 SpringMVC 的调用处理器的方法是一样的,都用到了适配器模式)
        return this.invokeHandler(exchange, handler);
    }).flatMap((result) -> {
        //返回处理的结果
        return this.handleResult(exchange, result);
    });
}
this.invokeHandler(exchange, handler);
-
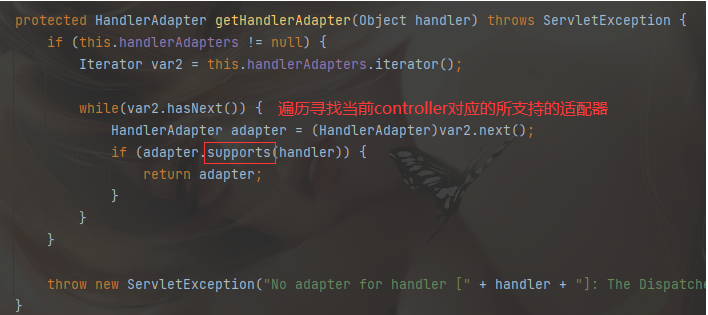
private Mono<HandlerResult> invokeHandler(ServerWebExchange exchange, Object handler) {
    if (this.handlerAdapters != null) {
        Iterator var3 = this.handlerAdapters.iterator();

        while(var3.hasNext()) {
            HandlerAdapter handlerAdapter = (HandlerAdapter)var3.next();
            //遍历寻找当前处理器对应的所支持的适配器,然后执行相应的方法返回
            if (handlerAdapter.supports(handler)) {
                return handlerAdapter.handle(exchange, handler);
            }
        }
    }

    return Mono.error(new IllegalStateException("No HandlerAdapter: " + handler));
}
SpringMVC 中的适配器(controller)。与上述的差别是:SpringMVC 只是返回了相应的适配器对象,然后在 doDispatch 方法中进行处理:mv = ha.handle(...),返回的是 modelAndView。
实际上就是:根据映射规则查找响应的控制器,在执行对应的控制器方法,最后返回渲染后的结果
1.1、核心API
SpringWebFlux 实现函数式编程,两个接口:RouterFunction(路由处理)、HandlerFunction(处理具体的函数)
HandlerFunction*
@FunctionalInterface
public interface HandlerFunction<T extends ServerResponse> {
    //请求的处理方法在里面执行
    Mono<T> handle(ServerRequest var1);
}
RouterFunction 一般都用其工具类 RouterFunctions来进行路由
@FunctionalInterface
public interface RouterFunction<T extends ServerResponse> {
    Mono<HandlerFunction<T>> route(ServerRequest var1);

    default RouterFunction<T> and(RouterFunction<T> other) {
        return new RouterFunctions.SameComposedRouterFunction(this, other);
    }

    default RouterFunction<?> andOther(RouterFunction<?> other) {
        return new RouterFunctions.DifferentComposedRouterFunction(this, other);
    }

    default RouterFunction<T> andRoute(RequestPredicate predicate, HandlerFunction<T> handlerFunction) {
        return this.and(RouterFunctions.route(predicate, handlerFunction));
    }

    default RouterFunction<T> andNest(RequestPredicate predicate, RouterFunction<T> routerFunction) {
        return this.and(RouterFunctions.nest(predicate, routerFunction));
    }

    default <S extends ServerResponse> RouterFunction<S> filter(HandlerFilterFunction<T, S> filterFunction) {
        return new RouterFunctions.FilteredRouterFunction(this, filterFunction);
    }

    default void accept(RouterFunctions.Visitor visitor) {
        visitor.unknown(this);
    }
}
2、SpringWebFlux(基于注解编程模型)
SpringWebFlux 实现方式有
2
2
2 种,注解编程模型和函数式编程模型
使用注解编程模型方式,和之前 SpringMVC 使用相似的,只需要把相关依赖配置到项目中,SpringBoot 自动配置相关运行容器,默认情况下使用 Netty 服务器
-
创建
SpringBoot工程,引入相关依赖<dependency> <groupId>org.springframework.boot</groupId> <artifactId>spring-boot-starter-webflux</artifactId> </dependency> -
配置启动的端口号
application.propertiesserver.port=8081 -
创建相应的
service,entity,controller-
entity(User)@Data @AllArgsConstructor @NoArgsConstructor public class User { private String name; private String gender; private Integer age; } -
ServiceUservicepublic interface UserService { /** * 根据 id 查询用户 * * @param id 用户id * @return 返回发布者 */ Mono<User> getUserById(Integer id); /** * 查询所有用户 * * @return 返回所有的发布者 */ Flux<User> getAllUser(); /** * 添加用户 * * @param user 用户发布者 * @return 返回空的发布者 */ Mono<Void> saveUserInfo(Mono<User> user); }UserServiceImpl@Service public class UserServiceImpl implements UserService { /** * 创建 map 集合存储数据,模拟从数据库中获取数据 */ private final Map<Integer, User> users = new HashMap<>(); public UserServiceImpl() { this.users.put(1, new User("lucy", "nan", 20)); this.users.put(2, new User("mary", "nv", 18)); this.users.put(3, new User("tom", "nan", 21)); } @Override public Mono<User> getUserById(Integer id) { //放入数据 return Mono.justOrEmpty(this.users.get(id)); } @Override public Flux<User> getAllUser() { //放入集合数据 return Flux.fromIterable(users.values()); } @Override public Mono<Void> saveUserInfo(Mono<User> userMono) { return userMono.doOnNext(user -> { //向 map 集合里面放值 int id = users.size() + 1; users.put(id, user); }).thenEmpty(Mono.empty());//清空,终止信号 } } -
controllerUserController@Controller public class UserController { //注入service @Autowired private UserService userService; /** * id查询 */ @GetMapping("/user/{id}") @ResponseBody public Mono<User> getUserId(@PathVariable int id) { return userService.getUserById(id); } /** * 查询所有 */ @GetMapping("/users") @ResponseBody public Flux<User> getUsers() { return userService.getAllUser(); } /** * 添加 */ @PostMapping("/saveUser") public Mono<Void> saveUser(@RequestBody User user) { Mono<User> userMono = Mono.just(user); return userService.saveUserInfo(userMono); } }
-
-
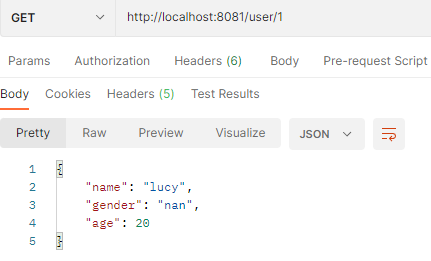
启动项目,
postMan测试http://localhost:8081/user/1
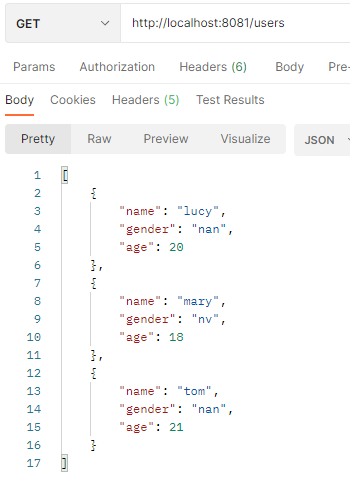
http://localhost:8081/users
说明:
SpringMVC方式实现,同步阻塞的方式,基于 SpringMVC + Servlet + TomcatSpringWebFlux方式实现,异步非阻塞方式,基于 SpringWebFlux + Reactor + Netty
3、SpringWebFlux(基于函数式编程模型)
- 在使用函数式编程模型操作时候,需要自己初始化服务器
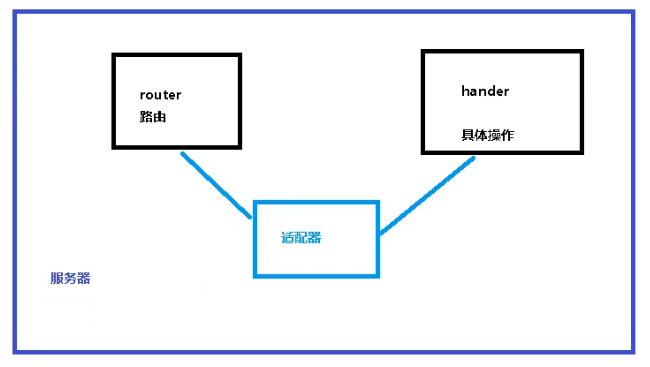
- 基于函数式编程模型时候,有两个核心接口:
RouterFuction(实现路由功能,请求转发给对应的handler)HandlerFunction(处理请求生成响应的函数)
- 核心任务定义两个函数式接口的实现并且启动需要的服务器
SpringWebFlux请求和响应不再是ServletRequst和ServletResonse。而是ServerRequst和ServerResonse
-
把注解编程模型工程复制,删除
controller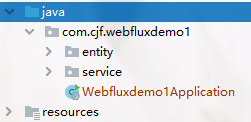
-
创建
handler.UserHandlerpublic class UserHandler { private final UserService userService; public UserHandler(UserService userService) { this.userService = userService; } //根据 id 查询 public Mono<ServerResponse> getUserById(ServerRequest request) { //获取 id 值 int userId = Integer.parseInt(request.pathVariable("id")); //空置处理 Mono<ServerResponse> notFound = ServerResponse.notFound().build(); //调用 service 方法得到数据 Mono<User> userMono = this.userService.getUserById(userId); //把 userMono 进行转换为 ServerResponse 返回 return userMono.flatMap((user -> ServerResponse.ok() .contentType(MediaType.APPLICATION_JSON) .bodyValue(user))) //如果为空抛异常 .switchIfEmpty(notFound); //以下方式,更上面的一样 /* return ServerResponse.ok() .contentType(MediaType.APPLICATION_JSON) .body(userMono, User.class); */ } //查询所有,一个 http 请求只有 1 个响应,不可能发一个 http 请求给 n 个响应 public Mono<ServerResponse> getAllUsers() { //调用 service 得到结果 Flux<User> users = this.userService.getAllUser(); //Flux<Users> 被封装到 serverResponse 的 body 中 return ServerResponse.ok().contentType(MediaType.APPLICATION_JSON).body(users, User.class); } //添加 public Mono<ServerResponse> saveUser(ServerRequest request) { //得到 user 对象 Mono<User> userMono = request.bodyToMono(User.class); this.userService.saveUserInfo(userMono); //buid 表示有订阅,有变化通知我,来执行上面的具体操作 return ServerResponse.ok().build(this.userService.saveUserInfo(userMono)); } } -
初始化服务器,编写 Router
-
Server(进行路由和服务适配)package com.cjf.webfluxdemo1; import com.cjf.webfluxdemo1.handler.UserHandler; import com.cjf.webfluxdemo1.service.UserService; import com.cjf.webfluxdemo1.service.impl.UserServiceImpl; import org.springframework.http.MediaType; import org.springframework.http.server.reactive.HttpHandler; import org.springframework.http.server.reactive.ReactorHttpHandlerAdapter; import org.springframework.web.reactive.function.server.RequestPredicates; import org.springframework.web.reactive.function.server.RouterFunction; import org.springframework.web.reactive.function.server.RouterFunctions; import org.springframework.web.reactive.function.server.ServerResponse; import reactor.netty.http.server.HttpServer; import java.util.ArrayDeque; public class Server { //1.创建 Router 路由 public RouterFunction<ServerResponse> routingFunction() { UserService userService = new UserServiceImpl(); //创建 handler 对象 UserHandler userHandler = new UserHandler(userService); //设置路由,路径设置,接受的格式为 JSON ,具体调用的方法去处理请求 return RouterFunctions .route(RequestPredicates.GET("/users/{id}").and(RequestPredicates.accept(MediaType.APPLICATION_JSON)) , (request -> userHandler.getUserById(request))) .andRoute(RequestPredicates.GET("/users").and(RequestPredicates.accept(MediaType.APPLICATION_JSON)) , (request) -> userHandler.getAllUsers()); } //2 创建服务器完成适配 public void createReactorServer() { //路由和 handler 适配 RouterFunction<ServerResponse> route = routingFunction(); HttpHandler httpHandler = RouterFunctions.toHttpHandler(route); ReactorHttpHandlerAdapter adapter = new ReactorHttpHandlerAdapter(httpHandler); //创建服务器 HttpServer httpServer = HttpServer.create(); //现在进行构建。 httpServer.handle(adapter).bindNow(); } }-
组织路由
nest例如:定义
url公共前缀//1.创建 Router 路由 public RouterFunction<ServerResponse> routingFunction() { UserService userService = new UserServiceImpl(); //创建 handler 对象 UserHandler userHandler = new UserHandler(userService); //设置路由,路径设置,接受的格式为 JSON ,具体调用的方法去处理请求 RouterFunction<ServerResponse> f = RouterFunctions.route(RequestPredicates.GET("/users/{id}").and(RequestPredicates.accept(MediaType.APPLICATION_JSON)) , (request -> userHandler.getUserById(request))) .andRoute(RequestPredicates.GET("/users").and(RequestPredicates.accept(MediaType.APPLICATION_JSON)) , (request) -> userHandler.getAllUsers()); //nest,组织定义 url 公共前缀 此时为:/here/users/{id} return RouterFunctions.nest(RequestPredicates.path("/here"),f); }
-
-
RouterFunction.route(...)public static <T extends ServerResponse> RouterFunction<T> //RequestPredicate predicate 传入一个请求断言,类似于 gateway 中设置路由地址等信息, //HandlerFunction<T> handlerFunction 具体的处理该请求的信息,以上我们使用 lambda创建 route(RequestPredicate predicate, HandlerFunction<T> handlerFunction) { return new DefaultRouterFunction(predicate, handlerFunction); }
-
HandlerFunction@FunctionalInterface public interface HandlerFunction<T extends ServerResponse> { Mono<T> handle(ServerRequest var1); }
-
进行测试
public class Server { public static void main(String[] args) throws IOException { Server server = new Server(); server.createReactorServer(); System.out.println("enter to exit"); System.in.read(); } //.... }- 启动,并访问端口
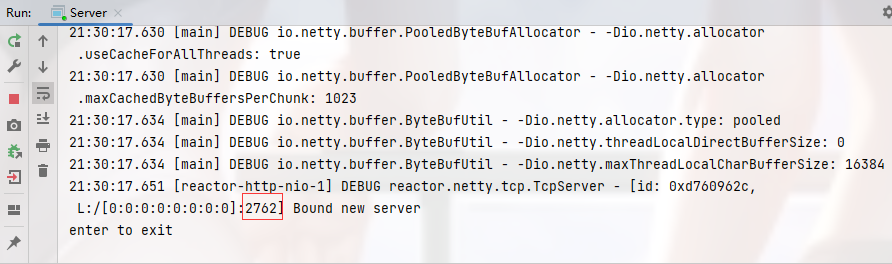
- http://localhost:2762/users

-
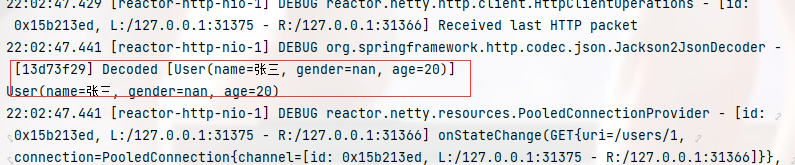
使用 具体的内容:WebClient 测试调用
Clientpublic class Client { public static void main(String[] args) { //调用服务器地址 WebClient webClient = WebClient.create("http://127.0.0.1:31366"); //根据 id 查询 String id = "1"; User user = webClient.get().uri("/users/{id}", id).accept(MediaType.APPLICATION_JSON) //检索数据获取响应体 .retrieve() //从中得到数据 .bodyToMono(User.class) //执行,订阅 .block(); System.out.println(user); //查询所用 Flux<User> res = webClient.get().uri("/users").accept(MediaType.APPLICATION_JSON) .retrieve() .bodyToFlux(User.class); res.map((user1->user1.getName())).buffer().doOnNext(System.out::println).blockFirst(); } }启动服务器,然后执行调用


 634
634


 被折叠的 条评论
为什么被折叠?
被折叠的 条评论
为什么被折叠?
 到【灌水乐园】发言


